Unlock the full potential of your Instant Pot by mastering its steam rack. This simple, often overlooked accessory elevates food above liquid, enabling true steaming, keeping items crisp, and preventing burning. Using it correctly ensures even cooking, preserves texture and nutrients, and expands your recipe horizons far beyond just stews and chili. This guide provides everything from basic setup to advanced techniques for vegetables, proteins, grains, and even baking.
Key Takeaways
- The steam rack is your key to “dry” pressure cooking: It lifts food above the cooking liquid, allowing steam to circulate evenly for tender-crisp results and preventing soggy or boiled textures.
- Always add sufficient liquid to the inner pot: The Instant Pot needs at least 1 cup of liquid (water, broth, etc.) to generate steam and build pressure, regardless of the rack.
- Layer strategically for multi-level steaming: You can stack items like artichokes or multiple potato halves on the rack, but ensure steam can circulate and items aren’t packed too tightly.
- Natural Release (NR) is crucial for delicate foods: For items like fish, asparagus, or custards, allowing pressure to release naturally prevents overcooking and maintains texture.
- It’s not just for veggies: Use the rack for hard-boiled eggs (to prevent cracking), baking potatoes, cooking dumplings, steaming tamales, and even as a trivet for pot-in-pot (PIP) cooking.
- Cleanliness is non-negotiable: Always wash the rack and the condensation collection cup after each use to prevent odors, mold, and mineral buildup from affecting future dishes.
[FEATURED_IMAGE_PLACEHOLDER]
📑 Table of Contents
- Introduction: Why Your Steam Rack is a Secret Weapon
- Getting Started: Setup, Safety, and the Golden Rule
- Steaming Perfection: Vegetables and Delicate Foods
- Beyond Veggies: Hearty Meals and Protein Power
- Pot-in-Pot (PIP) and Multi-Layer Magic
- Specialty Uses: Tamales, Dumplings, and More
- Troubleshooting and Pro Tips
- Conclusion: Embrace the Steam
Introduction: Why Your Steam Rack is a Secret Weapon
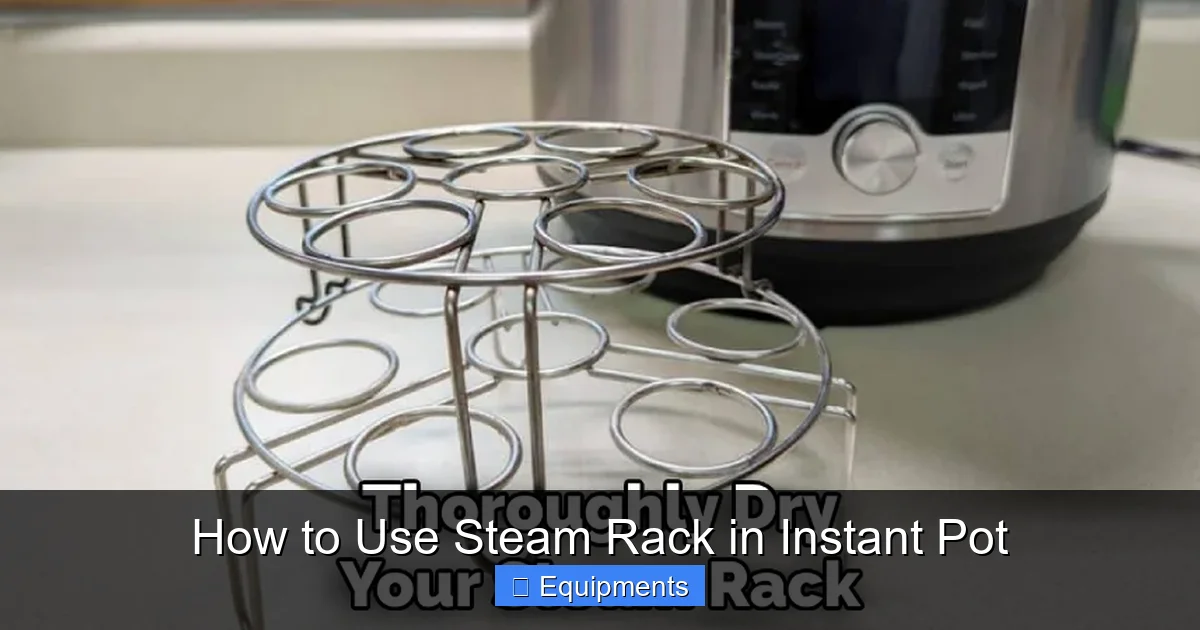
So, you unboxed your Instant Pot, marveled at its sleek design, and maybe cooked a fantastic soup or pulled pork. But tucked away in that box of accessories is a simple, metal rack—the steam rack or steaming rack. If it’s still in the drawer, you’re missing one of the most versatile tools in your electric pressure cooker arsenal. This isn’t just another piece of hardware; it’s the gateway to a whole new world of textures and flavors. Think of it as a tiny, sturdy platform that transforms your Instant Pot from a powerful pot into a sophisticated steamer, a crisper, and a preventer-of-soggy-bottom.
Using the steam rack in your Instant Pot fundamentally changes the cooking environment. Instead of food sitting in simmering liquid, it sits *above* it, bathed in superheated, pressurized steam. This method is faster than traditional steaming, locks in nutrients better than boiling, and delivers a perfect “tender-crisp” bite that’s hard to achieve any other way. Whether you’re a busy parent wanting to quickly steam broccoli for dinner, a meal prep enthusiast cooking a batch of perfect hard-boiled eggs, or an adventurous home cook trying your hand at homemade tamales, understanding this rack is essential. Let’s dive in, step by step, and turn that overlooked accessory into your new favorite kitchen companion.
Getting Started: Setup, Safety, and the Golden Rule
The Absolute Basics: Where It Goes and How Much Liquid
This is the non-negotiable foundation. The steam rack always goes inside the Instant Pot’s stainless steel inner pot. Place it at the bottom, right on the pot’s floor. The feet or legs of the rack are designed to keep it elevated just enough to allow liquid to pool underneath. This pool of liquid is critical—it’s what creates the steam.
Visual guide about How to Use Steam Rack in Instant Pot
Image source: thekitchenix.com
The Golden Rule: You must add at least 1 cup (250ml) of liquid to the inner pot under the steam rack. This liquid can be water, broth, juice, or a combination. Without this minimum, your Instant Pot will not come to pressure and will display a “burn” or “not enough liquid” error message. The food you place on the rack does not count toward this liquid requirement. For longer cook times (over 20 minutes), you may need to add more liquid to prevent it from evaporating completely.
Safety First: The Condensation Cup
Notice the small, plastic cup that often clips onto the lid’s steam release handle? That’s the condensation collection cup. When you use the steam rack, more condensation can form and drip back down. Always ensure this cup is properly attached and empty before starting. If you’re doing a long cook, check it halfway through and empty it if full. This prevents excess liquid from dripping onto your food, which could make it soggy.
Cleaning: A Non-Negotiable Step
After every single use, take the rack out and wash it thoroughly with warm, soapy water. Pay special attention to the grates and legs where food particles and mineral deposits can hide. A dirty rack can harbor odors, affect the taste of future foods, and even impede steam flow. If you have hard water, you might notice white, chalky buildup. Soak the rack in a vinegar-water solution (1:1) for 30 minutes and scrub with a soft brush to remove scale.
Steaming Perfection: Vegetables and Delicate Foods
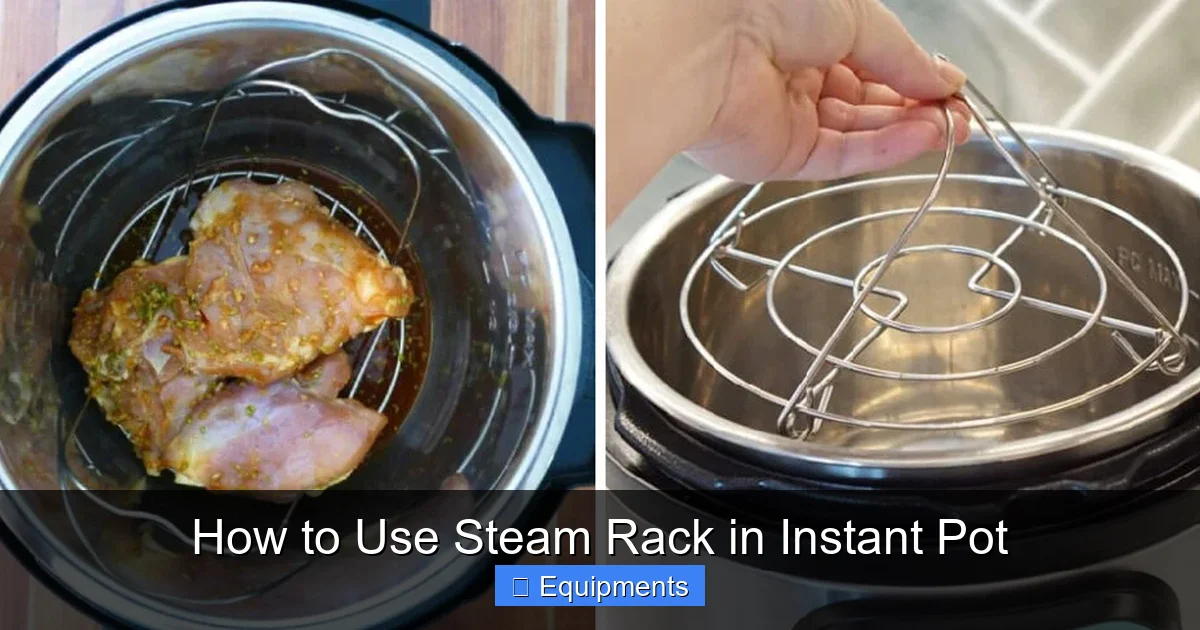
This is where the steam rack truly shines. Steaming vegetables in the Instant Pot is a game-changer—it’s incredibly fast, preserves vibrant color and nutrients better than boiling, and gives you that ideal crisp-tender texture. The same principles apply to other delicate foods like fish fillets or shrimp.
Visual guide about How to Use Steam Rack in Instant Pot
Image source: thekitchenix.com
Mastering Veggie Times and Techniques
The key is cutting uniformly. A 1-inch cube of potato will cook much faster than a whole, large potato. Here’s a quick reference guide for 1 cup of prepared vegetables placed on the steam rack with 1 cup of water underneath. Always use Manual/High Pressure.
- Broccoli or Cauliflower Florets: 0 minutes (yes, zero!) with Quick Release (QR). The pot takes 5-10 minutes to come to pressure, which cooks them perfectly.
- Green Beans (fresh): 1-2 minutes, QR.
- Asparagus (spears): 1 minute, QR.
- Carrots (sliced or diced): 2-3 minutes, QR or NR for 5 minutes.
- Potatoes (cubed): 3-5 minutes, Natural Release for 5-10 minutes for creaminess.
- Artichokes (whole, medium): 5-7 minutes, NR for 5 minutes.
Pro Tip: For extra flavor, substitute some of the cooking water with broth, or place a few lemon slices or a sprig of herbs (thyme, rosemary) in the liquid underneath. The steam will infuse the food with subtle aromatics. Season your veggies after cooking with salt, pepper, and a drizzle of good olive oil or melted butter.
Cooking Fish and Seafood Without Fall-Apart
Fish is notoriously easy to overcook. The Instant Pot’s steam rack is your best friend here. Place a piece of parchment paper or a small, heat-proof plate on the rack, then set your seasoned fish fillet (salmon, cod, tilapia) on top. This prevents it from steaming directly on the metal and getting a weird pattern, and it makes for easier removal.
- Salmon Fillet (6-8 oz): 3-4 minutes on High, with 5-minute Natural Release. The residual heat finishes the cooking. It will be moist and flaky.
- Shrimp (large, peeled): 1-2 minutes, Quick Release immediately. They turn pink and opaque in seconds.
Critical Tip: Never use the Quick Release for fish or shrimp. The sudden rush of steam and moisture will blast the delicate meat, making it tough and rubbery. Always let the pressure release naturally for at least 5 minutes for fillets.
Beyond Veggies: Hearty Meals and Protein Power
The steam rack’s utility extends far beyond light fare. It’s a workhorse for preparing components of hearty meals or cooking entire dishes that need to stay out of liquid.
The Perfect Hard-Boiled Egg, Every Time
This is a legendary Instant Pot hack. Place the steam rack in the pot. Add 1 cup of cold water. Place your eggs (room temperature is best) directly on the rack. Seal and cook on Manual/High Pressure for 5 minutes. When the cook time ends, perform a Quick Release. Immediately transfer the eggs to an ice bath for at least 5 minutes. The shells will slip off effortlessly because the pressure cooks them evenly and the rapid pressure release prevents the green sulfur ring. No more guessing, no over-cooked yolks.
Baking Potatoes and Sweet Potatoes
Forget waiting an hour in the oven. Wash and pierce your potatoes (Russet or sweet). Place them directly on the steam rack. Add 1 cup of water to the pot. Cook on High Pressure: 12-15 minutes for medium potatoes, 15-20 for large. Let pressure release naturally for 10 minutes, then quick release any remaining. The potatoes will be fluffy, cooked through, and skin-on ready for toppings. The skin stays intact and slightly crisp.
Cooking Sausages, Chicken Breasts, and More
You can steam sausages (like bratwurst or Italian) directly on the rack for a juicy, pre-cooked result in about 8-10 minutes on High. For boneless, skinless chicken breasts, place them on the rack. Add 1 cup of broth or water. Cook for 6-8 minutes (for a 6-8 oz breast), followed by a 5-minute Natural Release. The result is incredibly moist chicken that shreds easily for tacos or salads. The key is the short cook time and NR to retain juices.
Pot-in-Pot (PIP) and Multi-Layer Magic
This is where your culinary creativity can really take off. The steam rack acts as a trivet, creating a raised platform for a second, smaller container (a baking dish, a ramekin, a stainless steel bowl) to sit above the main cooking liquid.
Visual guide about How to Use Steam Rack in Instant Pot
Image source: images.nexusapp.co
The Pot-in-Pot Technique Explained
Place the steam rack in the inner pot. Add your 1+ cups of liquid to the bottom pot. Place your second, heat-proof container with its own ingredients (e.g., a cake batter, a rice and water mixture, a cheesecake) on top of the rack. Seal the lid. The heat and steam from the bottom pot cook the food in the top pot simultaneously. This is perfect for:
- Rice or Quinoa: Cook a protein and a grain together. Put seasoned chicken thighs on the rack, and a bowl with 1 cup rice + 1 cup water on the rack beside them. Cook for 8-10 minutes (for chicken) and the rice will cook perfectly in the same cycle.
- Desserts: Make a simple cheesecake or custard in a springform pan or ramekins placed on the rack. The gentle, even steam is ideal for setting them without a water bath.
- Reheating: Place leftovers in a container on the rack with a splash of water in the bottom. A quick 2-3 minute steam cycle revives food without drying it out.
Multi-Level Steaming: Stacking Foods
You can place items directly on the rack in a single layer. But can you stack? Yes, but with caution. You can layer sturdy items like artichoke halves, large potato wedges, or multiple heads of broccoli if you arrange them so steam can still circulate. Don’t pile them high like a mountain. A loose, single layer on top of another single layer is the max. For delicate greens like spinach, a single layer is best—they cook in seconds and wilt into a dense pile if stacked, steaming unevenly.
Specialty Uses: Tamales, Dumplings, and More
Once you grasp the core concept, you’ll see opportunities everywhere. The steam rack is your ticket to cooking foods that traditionally require a bulky steamer basket.
Steaming Tamales and Dumplings
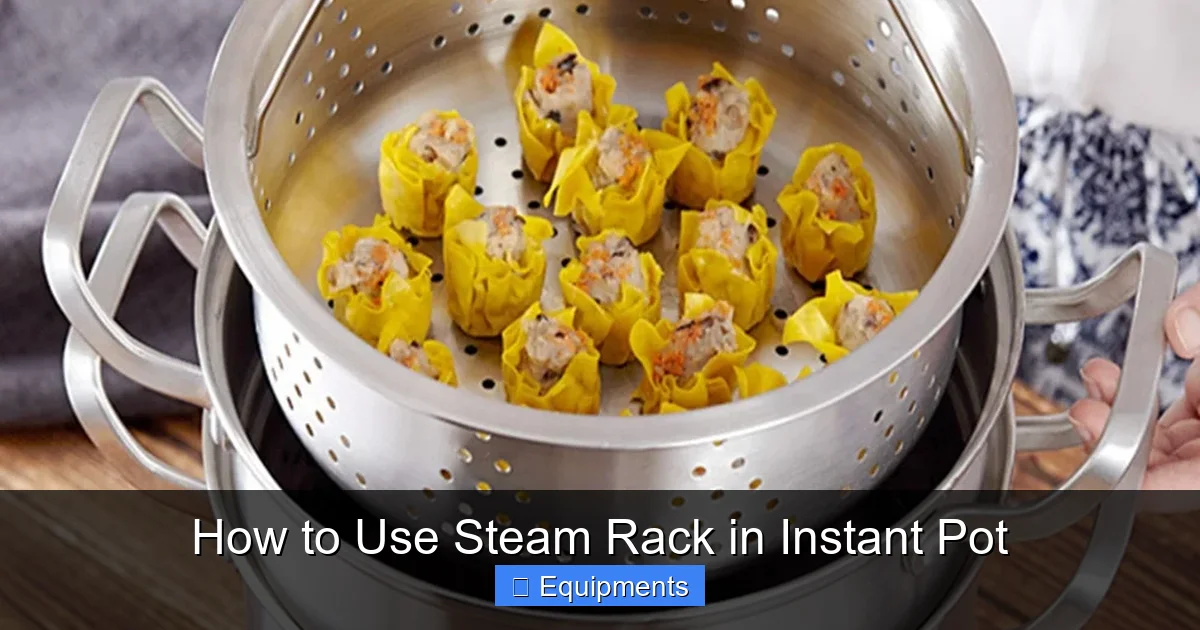
Arrange your husk-wrapped tamales or dumplings on the steam rack, standing upright if possible. Add 1-2 cups of water or a mixture of water and beer to the bottom for extra flavor. Cook on High Pressure for 15-20 minutes, followed by a 10-minute Natural Release. They’ll be hot, steamed, and ready to serve. No giant pot of boiling water needed.
Making Perfect “Steamed” Buns and Breads
For bao buns or similar steamed breads, you can use the rack. Place a piece of parchment paper with a slight rim (to catch condensation) on the rack, then set your buns on the paper. The parchment prevents sticking and keeps the bottoms from getting wet from drips. Cook with 1 cup of water for 5-8 minutes, NR for 5. They’ll come out soft and fluffy.
Infusing Flavors: The Aromatic Steam Base
Don’t waste the liquid at the bottom! Before adding your 1 cup of base liquid (water/broth), toss in aromatics: a sliced lemon, a few garlic cloves, a cinnamon stick, fresh herb sprigs, or a splash of wine or juice. As this liquid heats and turns to steam, it carries those flavors up and into the food on the rack. It’s a simple way to add a layer of complexity to even the simplest steamed vegetable or protein.
Troubleshooting and Pro Tips
Even with the best setup, things can go awry. Here’s how to diagnose and fix common steam rack issues.
“Burn” Alert: Why It Happens and How to Prevent It
The dreaded “BURN” message usually means food or liquid has stuck to the bottom of the inner pot and is scorching. With the steam rack, this almost never happens to the food on the rack—it happens to the liquid underneath if it evaporates completely or has too many sugars/proteins. Prevention:
- Always use the minimum 1 cup of liquid. For long cooks (45+ mins), use 1.5 cups.
- Use “plain” liquid for the bottom: If your food on the rack is very sugary (like glazed salmon) or starchy (like potato cubes), the drippings can fall and caramelize. Use plain water or a mild broth in the bottom pot.
- Deglaze if needed: If you sautéed something first, always add a splash of liquid and scrape the pot bottom before adding the rack.
Soggy or Unevenly Cooked Food
If your food is wet or cooking unevenly:
- Check your cut size: Ensure pieces are uniform.
- Don’t overcrowd the rack. Steam needs to circulate. Leave space between items.
- Use Natural Release for delicate foods. QR can make things rubbery.
- Check your seal: A worn sealing ring can leak steam, increasing cook time and moisture. Ensure the ring is seated properly and in good condition.
No Steam Coming Out? Check the Basics.
If the valve isn’t releasing steam during the build-up phase:
- Is the steam release handle set to “Sealing”? This is the most common oversight.
- Is the sealing ring properly installed? Remove it and re-seat it.
- Is the liquid level below the minimum line? Add more liquid.
Conclusion: Embrace the Steam
The humble steam rack is your Instant Pot’s portal to healthier, faster, and more versatile cooking. It empowers you to move beyond the one-pot stew and explore the vibrant world of steamed, crisp-tender vegetables; flawlessly cooked seafood; effortless hard-boiled eggs; and creative pot-in-pot meals. By remembering the golden rule—always 1 cup of liquid underneath—and pairing it with proper timing and release methods, you unlock a new dimension of pressure cooking. Clean it religiously, experiment with aromatic bases, and don’t be afraid to layer or stack intelligently. This simple piece of metal, when used with intention, transforms your Instant Pot from a mere appliance into a true kitchen workhorse. So pull that rack out of the drawer, give it a wash, and steam something wonderful tonight.
Frequently Asked Questions
Can I use the steam rack if I’m not steaming? For example, for a pot roast?
Yes, but with a purpose. For a pot roast, you typically want the meat to sit in the liquid to braise and become tender. Using the rack would lift it out of the juices, resulting in a dry, roasted texture rather than a braised one. Use the rack when you specifically want to keep food *out* of the liquid to achieve steaming or to prevent burning on the bottom.
What’s the difference between the steam rack and the trivet that came with my Instant Pot?
>They are often the same physical item! Instant Pot uses the terms “steam rack” and “trivet” interchangeably for the metal rack with legs. Its primary function is to elevate food. Whether you call it a steam rack (when steaming veggies) or a trivet (when using the pot-in-pot method), it’s the same tool serving the same purpose of creating space above the cooking liquid.
Can I stack two steam racks on top of each other for multiple layers?
While you might find third-party stacking racks, the official Instant Pot steam rack is not designed to be stacked on itself. Attempting to do so can be unstable, block steam flow, and is not recommended by the manufacturer. For multiple layers, use one rack and place items on it in a single, loose layer, or use the pot-in-pot method for true separate cooking compartments.
My vegetables came out wet on the bottom. What did I do wrong?
This usually happens when condensation from the lid drips down onto the food. First, ensure the condensation collection cup on the lid was empty and properly attached before starting. For very delicate or long-cook items, you can tent a piece of foil loosely over the food on the rack to catch drips, but be careful it doesn’t block steam flow. Also, using a Natural Release for the last 5 minutes can reduce the amount of condensation that forms.
Is it safe to put the steam rack in the dishwasher?
The stainless steel Instant Pot steam rack is generally dishwasher safe on the top rack. However, for best results and to prevent potential mineral buildup from hard water, hand washing with warm, soapy water and a non-abrasive sponge is recommended. The legs and grates can trap particles that a dishwasher might not fully clear. Always ensure it is completely dry before storing.
Can I use the steam rack for deep frying or sautéing in the Instant Pot?
No. The steam rack is designed for steaming and elevating food above liquid. It is not a frying basket. The Instant Pot’s “Sauté” function is for direct heat at the bottom of the inner pot. You would sauté food directly in the pot with oil, not on the rack. Using the rack for sautéing would be inefficient and potentially unsafe as oil could pool under it.
Pingback: How to Steam Dumplings - kitchenandhouseware.com