The Hamilton Beach Flexbrew is a versatile single-serve coffee maker designed for flexibility. This guide demystifies its dual brewing system, showing you exactly how to switch between coffee pods and ground coffee for a customized cup. You’ll learn essential setup steps, the precise cleaning routine to maintain flavor, and how to troubleshoot common 2026 model issues. Follow these actionable tips to maximize your machine’s performance and enjoy barista-quality coffee at home with minimal fuss.
So, you’ve unboxed your shiny new Hamilton Beach Flexbrew. It sits on your counter, a promise of convenient, customizable coffee. But maybe you’re looking at the two separate bins and the buttons, feeling a tiny bit unsure. Don’t worry! That feeling is completely normal. This machine is brilliantly designed for flexibility, but that flexibility means there’s a right way to do everything to get that perfect, flavorful cup. In this complete guide for 2026, we’re going to walk through every single step, from that very first setup to advanced troubleshooting. Think of this as your friendly, detailed instruction manual that actually makes sense. We’ll cover the subtle differences between brewing with a pod versus with ground coffee, the non-negotiable cleaning habits that will keep your coffee tasting fresh for years, and all the little tips and tricks that turn a good brewer into a great one. By the end, you’ll be using your Flexbrew with total confidence.
Key Takeaways
- Understand the Dual System: The Flexbrew uses a distinct pod chamber and a separate ground coffee basket; never interchange parts or try to use both at once.
- Water is Key: Always use fresh, cold water and measure precisely using the included cup markers on the reservoir to avoid under or over-extraction.
- Clean After Every Use: A quick rinse of the brew basket and pod holder prevents oil buildup. Perform a full descaling cycle monthly with vinegar or a descaling solution.
- Pod Compatibility: While designed for standard K-Cup® pods, the 2026 models work best with specific Hamilton Beach or certified third-party pods to ensure proper puncture and flow.
- Ground Coffee Matters: Use a medium grind for optimal extraction. Spoon grounds into the filter basket without tamping, and level it off for consistent brews.
- Listen for the “Click”: When securing the brew basket or pod holder, ensure it clicks firmly into place to prevent leaks and ensure proper piercing of pods.
- Customize Your Brew: Experiment with the “Strong” button and water reservoir levels to control brew strength and size, tailoring each cup to your exact preference.
📑 Table of Contents
- Unpacking and Initial Setup: Getting Started Right
- Mastering the Two Brewing Systems: Pods vs. Ground Coffee
- Essential Daily and Weekly Maintenance: The Cleaning Ritual
- Troubleshooting Common 2026 Issues: Quick Fixes
- Pro Tips and Best Practices for 2026 and Beyond
- Conclusion: Your Journey to Perfect Coffee
Unpacking and Initial Setup: Getting Started Right
Before you even think about brewing, a proper setup ensures everything functions correctly and safely. Rushing this step can lead to poor performance or even a mess. Let’s get your machine ready for its first cup.
Removing Packaging and Understanding Parts
First, take everything out of the box. You’ll find the main unit, the water reservoir (often a separate piece), the pod holder assembly, the ground coffee filter basket, a reusable coffee filter (for ground coffee), and the drip tray. There might also be a small cleaning tool or pod adapter. Most importantly, locate the quick start guide. While we’ll cover everything here, having it handy for part diagrams is useful. Carefully remove all protective stickers from the heating plate and any plastic films on the reservoir. Wash the reservoir, drip tray, and both the pod holder and ground coffee basket with warm, soapy water. Rinse thoroughly. This removes any manufacturing residues. Never submerge the main unit in water.
Priming the Machine: The First Water-Only Cycle
This is a critical step many people skip. Priming clears any air locks in the internal tubing and heats the system. Fill the clean reservoir with fresh, cold water up to the “Min” or “1 Cup” line. Place an empty cup on the drip tray. Ensure the pod holder is not inserted—the machine needs an empty brew path. Press the brew button. You’ll hear the pump engage and hot water will cycle through and into your cup. It might not be a full cup’s worth; that’s okay. Discard this water. This single cycle primes the heating element and water lines. If your 2026 model has a “Prime” or “Clean” button, consult the manual for its specific use, but the water-only cycle is universally effective.
Mastering the Two Brewing Systems: Pods vs. Ground Coffee
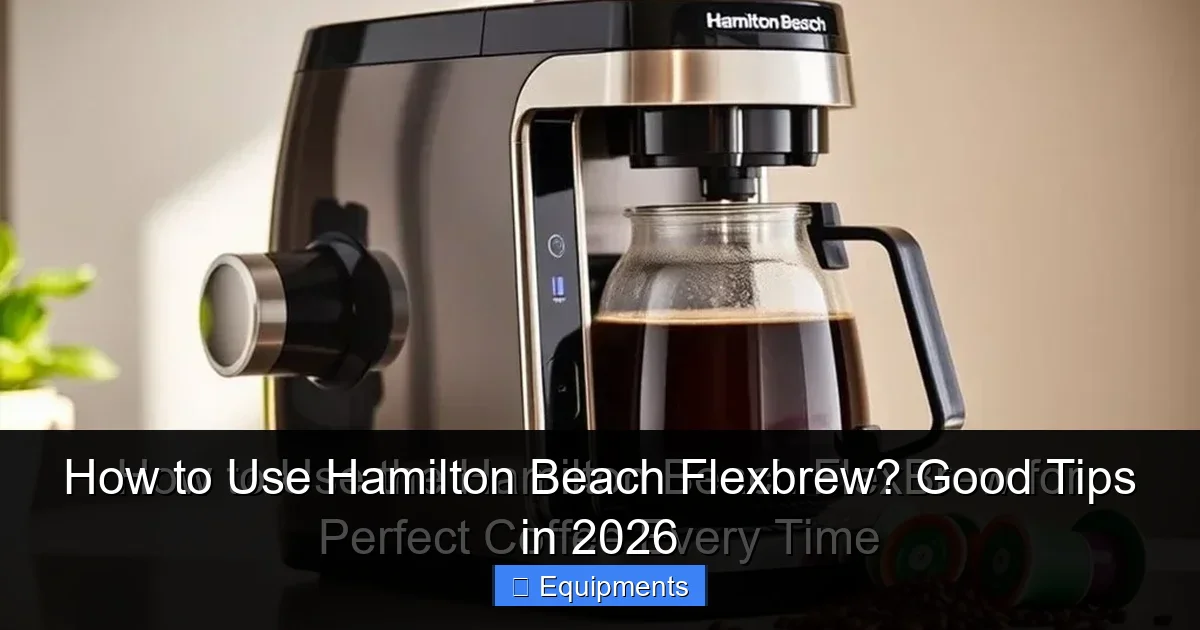
This is the heart of the Flexbrew’s flexibility. Understanding the distinct processes for each method is key to avoiding frustration. They are separate, self-contained systems. You do not combine them.
Visual guide about How to Use Hamilton Beach Flexbrew? Good Tips in 2026
Image source: lunaskitchentips.com
Brewing with Single-Serve Pods (The K-Cup® System)
This is the fastest method, perfect for a quick, single cup. Here is the precise sequence:
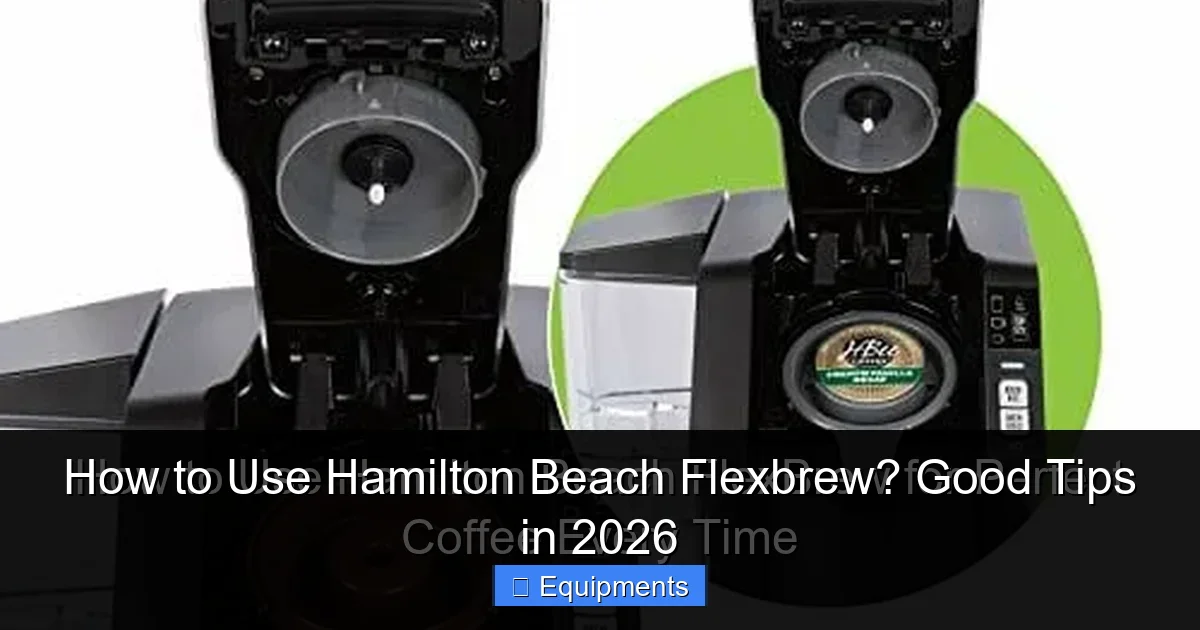
- Lift the Pod Holder Lever: Grasp the lever on the front (or top, depending on your model’s design) and lift it fully up. This opens the pod chamber.
- Insert the Pod: Take a standard K-Cup® pod. Peel off the foil lid completely. Place the pod into the holder’s circular opening, foil side up. The holder has sharp pins; ensure the pod sits flat and centered over them.
- Lower the Lever Firmly: Push the lever down until you hear a distinct, solid CLICK. This click indicates the pins have pierced both the foil and the plastic pod seal, and the chamber is securely sealed. If you don’t hear the click, the machine will not brew and may leak.
- Place Your Cup: Position your cup (8oz to 14oz, depending on your model’s max) directly under the dispenser nozzle.
- Select Size and Strength: Use the buttons to choose your cup size (e.g., “8 oz” or “10 oz”). For a bolder cup, press the “Strong” button before brewing. The “Strong” button typically extends the brew time slightly for more extraction.
- Press Brew: Hit the main brew button. The machine will heat water, pump it through the pod, and dispense into your cup. The process takes 30-90 seconds.
Pro Tip for 2026: If you use third-party or compostable pods, they can sometimes be thicker or have different seal materials. If you experience slow brewing or partial extraction, try a different brand. Hamilton Beach’s own pods are engineered for optimal flow in their machines.
Brewing with Ground Coffee (The Carafe-Style System)
This method gives you more control over the coffee itself and is ideal if you have a favorite ground blend or want to brew a stronger, larger cup. It uses a separate filter basket.
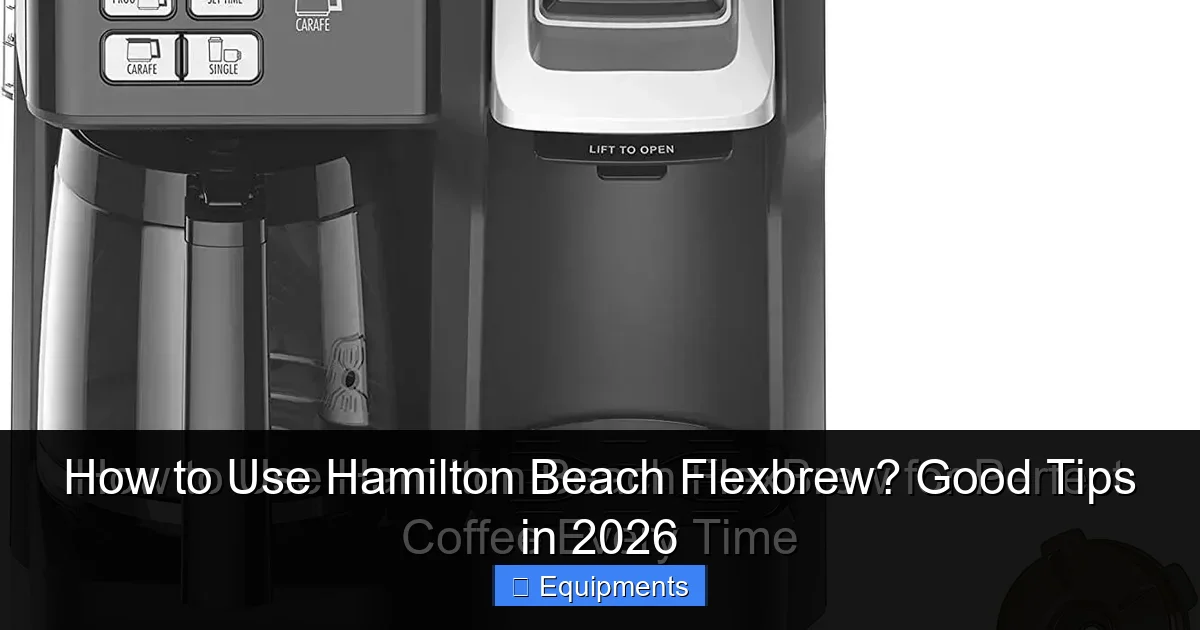
- Open the Lid: Lift the main lid of the machine. This exposes the brew head where the ground coffee basket goes.
- Prepare the Filter: Take the reusable mesh filter basket (it’s the one with a handle, different from the pod holder). Place a paper filter (size #4 is standard) inside it, or use the mesh filter alone if you prefer (but paper filters catch more oils for a cleaner cup).
- Add Ground Coffee: Spoon your medium-ground coffee into the filter. A good starting ratio is 1 tablespoon per 5-6 oz cup. Do not tamp or press the grounds down. Simply fill the basket and then use a spoon or your finger to level it off. Tamping can restrict water flow and cause overflows.
- Insert the Basket: Place the filled filter basket into the brew head. You’ll feel it slide into grooves. Push it down gently until it sits flush and secure.
- Close the Lid: Lower the machine’s main lid. This is important; it helps contain steam and heat.
- Select Cup Size: The ground coffee basket is designed for larger brews. You’ll typically select “8 oz,” “10 oz,” or “12 oz” (check your model’s max). The “Strong” button also works here.
- Brew: Place your cup under the nozzle and press brew. The machine will heat and pump a larger volume of water through the coffee bed.
Important: After brewing ground coffee, the machine will often continue to drip for a few seconds. This is normal as residual water drains from the heating chamber. Keep your cup in place for an extra 10 seconds after the main stream stops.
Essential Daily and Weekly Maintenance: The Cleaning Ritual
Neglecting cleaning is the number one cause of bad-tasting coffee and machine errors. Coffee oils and mineral scale build up quickly. A clean machine is a happy, long-lasting machine that makes delicious coffee.
Visual guide about How to Use Hamilton Beach Flexbrew? Good Tips in 2026
Image source: lunaskitchentips.com
The 30-Second Post-Brew Clean (Do This Every Time)
This takes less time than washing a single mug and makes a world of difference.
- Immediately after brewing, lift the lever (for pods) or open the lid (for ground coffee).
- Remove the used pod or the filter basket with its paper filter and grounds.
- Discard the pod or compost the grounds and paper filter.
- Rinse the pod holder and the ground coffee basket under warm running water. Use the small brush (often included) to gently scrub the mesh screen and puncture pins in the pod holder. Coffee grounds love to hide in those crevices.
- Empty the drip tray and rinse it.
- Wipe the exterior with a damp cloth.
Doing this every single day prevents stale coffee oils from rancidifying and clogging the tiny water pathways.
Deep Cleaning and Descaling (Weekly to Monthly)
Even with daily rinsing, mineral deposits from water (scale) build up inside the heating element and water lines. This slows brewing, causes odd noises, and eventually leads to failure. Descaling removes this.
- For Daily/Weekly Deep Clean: Once a week, wash the reservoir, drip tray, and baskets with warm, soapy water. Use a cotton swab to clean around the dispenser nozzle where coffee splatter can accumulate.
- For Monthly Descaling: You must do this at least once a month, more often if you have hard water. Fill the reservoir with a 1:1 mixture of white vinegar and cold water. (Alternatively, use a commercial descaler like Dezcal, following its dilution instructions).
- Place a large mug or bowl on the drip tray to catch the liquid.
- Run a full brew cycle with the vinegar solution. Do not add a pod or coffee grounds. Let the machine run through the entire cycle. The vinegar will steam and smell strong; open a window.
- Once finished, discard the liquid in the mug. Refill the reservoir with fresh, cold water. Run 2-3 full brew cycles with just water to completely flush out any vinegar taste. Smell the steam from the nozzle after the final cycle; it should smell like nothing.
2026 Note: Some newer Flexbrew models may have a dedicated “Descale” indicator light that reminds you when it’s time. Heed this warning. Ignoring it will shorten your machine’s life significantly.
Troubleshooting Common 2026 Issues: Quick Fixes
Even with perfect care, you might encounter a hiccup. Most issues are simple to fix.
Visual guide about How to Use Hamilton Beach Flexbrew? Good Tips in 2026
Image source: lunaskitchentips.com
Problem: Machine Won’t Turn On or Brew
First, check the basics. Is the machine plugged into a working outlet? Is the reservoir properly seated? Many models have a safety interlock that prevents brewing if the reservoir is not clicked into place. Ensure the lid is fully closed if using the ground coffee basket. If using pods, verify the lever is fully down and clicked. If it still won’t work, there may be an issue with the internal thermal fuse, which requires contacting Hamilton Beach customer support.
Problem: Coffee is Weak or Watery
This is almost always an issue with coffee-to-water ratio or grind size.
- For Pods: Ensure you selected the correct cup size. Brewing a “10 oz” cup with a pod designed for 8 oz will yield weaker coffee. Try the “Strong” button. Also, a pod may be old or low-quality. Pods lose freshness quickly once the foil is punctured during packaging.
- For Ground Coffee: You likely need more coffee. Increase to 2 tablespoons per cup. Also, check your grind. If it’s too coarse (like for French press), water flows through too fast. You need a medium grind, similar to what’s used for automatic drip coffee makers. If your grind is fine (like for espresso), it will clump and cause overflows or under-extraction.
Problem: Leaking from the Bottom or Top
Leaks are usually a seal or assembly issue.
- Leaking from Bottom: This is often scale buildup preventing a proper seal in the internal water tank. Perform a full descaling cycle immediately.
- Leaking from Top/Pod Area: The pod is not seated correctly, or the lever isn’t fully clicked. Lift the lever, remove the pod, reinsert it ensuring it’s flat, and push the lever down firmly until you hear the click. Also, check that the pod isn’t damaged or swollen.
- Leaking Around Filter Basket: The basket isn’t fully inserted or the paper filter is folded incorrectly. Remove the basket, check the paper filter for folds against the rim, and re-seat the basket firmly.
Problem: Machine is Clogged or Brewing Very Slowly
This is a classic sign of scale or coffee ground blockage.
- First, descale immediately using the vinegar method.
- If using ground coffee, you may have used a grind that is too fine, or you may have tamped the grounds. Disassemble and clean the mesh filter basket thoroughly with the brush.
- For pod users, a low-quality or clogged pod (some with extra-fine mesh filters) can restrict flow. Try a different brand.
Pro Tips and Best Practices for 2026 and Beyond
Now that you have the basics down, let’s elevate your coffee game. These tips will help you extract the absolute best flavor and ensure your machine lasts for years.
Water Quality is Everything
The #1 ingredient in coffee is water. If your tap water tastes like chlorine or is very hard (leaves scale), it will ruin your coffee and your machine. Always use filtered or bottled spring water in the reservoir. This improves taste dramatically and drastically reduces the frequency of descaling. Investing in a simple water filter pitcher is one of the best things you can do for your coffee.
Pre-Infusion for Ground Coffee (The “Bloom”)
For the ultimate cup from your ground coffee brews, mimic a high-end coffee barista. After adding your grounds and starting the brew, pause the machine after the first 2-3 seconds of water dispense. Let the grounds “bloom” and saturate for 30 seconds. This allows carbon dioxide to escape, leading to a more even extraction and a sweeter, less bitter cup. Then press brew again to continue the cycle. Not all models have a pause function, but you can quickly open and close the lid to momentarily stop the brew on some.
Temperature Matters: Pre-Heating Your Cup
The Flexbrew heats water to a standard temperature (usually around 190°F). Pouring this into a cold ceramic mug can drop the temperature by 10-15 degrees, affecting extraction and making your coffee cool too fast. Rinse your mug with hot tap water or from the machine’s first water-only cycle before brewing. This small step keeps your coffee hotter longer and preserves flavor.
Experiment with Ratios and the “Strong” Button
The “Strong” button isn’t magic; it simply extends the brew time by cycling the water through the coffee/pod in shorter bursts. This increases contact time and extraction. Use it for a bolder flavor, but don’t overuse it with already dark roasts, or it can become bitter. For ground coffee, the ultimate customization is your own ratio. Start with 1 tablespoon per 5 oz cup. For a 10 oz cup, try 2.5 tablespoons. Keep a small notebook to record your favorite combinations for different beans.
Storage and Long-Term Care
If you won’t be using the machine for a week or more (like while traveling), empty the reservoir and let it air dry completely with the lid open. This prevents stagnant water and mold. Store the machine with the brew head empty (no basket or pod holder inserted). Always store pods and coffee in airtight containers away from heat, light, and moisture.
Conclusion: Your Journey to Perfect Coffee
Using your Hamilton Beach Flexbrew to its fullest potential isn’t about complicated rituals; it’s about understanding two simple, separate systems and committing to a few easy habits. You now know that the pod path and the ground coffee path are distinct. You know that a 30-second rinse after each use is non-negotiable for flavor, and a monthly vinegar bath is essential for the machine’s health. You can troubleshoot leaks, weak coffee, and clogs like a pro. Most importantly, you have the tools to experiment—tweaking coffee amounts, using the strong button, and pre-heating your cup—to brew coffee that’s perfectly tailored to your taste. This machine was built for flexibility and convenience. By following these 2026 tips, you honor that design. You move from just making coffee to crafting it. So go ahead, fill that reservoir, hear that satisfying click of the pod holder, and enjoy the perfectly brewed cup you’ve earned. Here’s to many great mornings ahead!
Frequently Asked Questions
Can I use any brand of K-Cup® pod in my Hamilton Beach Flexbrew?
Yes, the Flexbrew is compatible with all standard K-Cup® pods. However, for the most consistent puncture and flow, especially in 2026 models, Hamilton Beach recommends using their own brand or other major brands like Keurig®, Starbucks®, or Dunkin’. Some very thin or compostable pods from smaller brands may occasionally puncture imperfectly or restrict flow.
How often should I descale my Flexbrew?
Descaling frequency depends entirely on your water hardness and usage. As a rule, descale monthly if you use the machine daily with hard water. With filtered water and lighter use, every 2-3 months may suffice. Many 2025/2026 models have a “Descale” indicator light that will illuminate when it’s time. Never ignore this signal.
My coffee tastes bitter or burnt. What am I doing wrong?
Bitter coffee usually means over-extraction. For pods, this is rare but can happen with the “Strong” button on a dark roast—try a regular brew. For ground coffee, the most common cause is a grind that is too fine or, surprisingly, using too much coffee. An overly packed basket restricts water flow, causing it to over-extract the fines. Ensure you are using a medium grind and leveling the coffee without tamping. Old, stale coffee beans will also taste bitter and flat.
The machine leaks water from the bottom during brewing. Is it broken?
Probably not. This is the most common sign of internal scale buildup, which prevents the internal tank from sealing properly. A full descaling cycle with white vinegar or a commercial descaler will almost always fix this. After descaling, run several water-only cycles to flush. If leaking persists, the internal tank seal may be worn and require professional service.
Can I make a 14oz or larger cup of coffee?
Your machine’s maximum cup size is determined by its reservoir capacity and heating element cycle. Most Flexbrew models are designed for single servings up to 10oz or 14oz (check your manual). You cannot brew a full 16oz travel mug in one cycle without risking overflow or weak coffee. To make a larger volume, brew a second cup immediately after the first, using a fresh pod or fresh grounds.
Where can I buy replacement parts like the reusable filter basket?
Genuine Hamilton Beach replacement parts are available directly from the Hamilton Beach website in their “Parts & Accessories” section. You can also find them on major retailers like Amazon, Walmart, and Target by searching for your specific model number (e.g., “Flexbrew 49980A parts”). For common items like the mesh filter basket, many third-party sellers offer compatible versions, but genuine parts ensure perfect fit and function.