Storing beans after soaking is a critical step often overlooked, leading to spoilage or wasted effort. The key is understanding that soaked beans are perishable and must be refrigerated for short-term use (3-5 days) or frozen for long-term storage (2-3 months). Always use airtight containers, label them with dates, and trust your senses—any sour smell or slimy texture means discard. Proper storage preserves flavor, texture, and safety, making your meal prep efficient and reliable.
Key Takeaways
- Soaked beans are highly perishable and must be stored in the refrigerator or freezer immediately after soaking. Leaving them at room temperature creates a dangerous environment for bacteria like Clostridium botulinum.
- For short-term storage, refrigerate soaked beans in an airtight container submerged in their soaking water for 3-5 days. The water helps maintain moisture and prevents the beans from drying out.
- For long-term storage, freezing is the best method. Blanch boiled beans for 1-2 minutes before freezing to preserve texture and color. Properly frozen beans last 2-3 months.
- Always use clean, airtight containers or freezer bags, removing as much air as possible. Oxygen exposure leads to freezer burn and off-flavors.
- Label every container with the bean type and date of soaking/boiling. This prevents mystery containers and ensures you use the oldest beans first.
- Trust your senses: discard any beans with a sour, fermented, or unpleasant odor, or a slimy, sticky coating. When in doubt, throw it out—the risk of food poisoning is not worth it.
- You can store beans in their soaking water, but for some recipes, draining and rinsing before storage can help reduce oligosaccharides (the compounds that cause gas).
📑 Table of Contents
- Why Proper Storage After Soaking Isn’t Optional
- The Golden Rules: Safety First, Always
- Short-Term Hero: Refrigerator Storage (3-5 Days)
- Long-Term Champion: Freezer Storage (2-3 Months)
- Container Choices: Your Storage Vessels Decoded
- Safety First: Recognizing Spoilage and Best-By Dates
- From Storage to Table: Using Your Stored Beans
- Conclusion: Making Bean Storage a Habit
Why Proper Storage After Soaking Isn’t Optional
You’ve done the work. You sorted through your dried beans, picked out any stones or debris, and gave them a long, thorough soak. Maybe you did a quick soak, boiling them for two minutes and letting them sit for an hour. Or maybe you planned ahead and let them lounge in a bowl of cold water overnight. Either way, your beans are plump, hydrated, and ready for the pot. But what happens next? If your answer is “I’ll just leave them in the soaking water on the counter until I’m ready to cook them later today,” you’re setting yourself up for a problem. Knowing how to store beans after soaking is one of the most important, and often skipped, steps in bean cookery.
Spoiled beans aren’t just unpleasant—they can be dangerous. Soaking creates a warm, moist, nutrient-rich environment that is practically a five-star hotel for bacteria and mold. The moment your beans finish soaking, the clock starts ticking. Leaving them at room temperature, even in a cool kitchen, allows harmful bacteria to multiply rapidly. The goal of proper storage is to halt that bacterial growth, preserve the texture you worked for, and lock in the nutritional benefits. It’s the bridge between preparation and cooking, and crossing it correctly saves you from wasted food, a funky smell in your kitchen, and potential stomach troubles. This guide will walk you through every safe and effective method, from “I’ll cook these in a few hours” to “I’m batch-prepping for the freezer.”
The Golden Rules: Safety First, Always
Before we dive into methods, there are non-negotiable safety principles. These are the bedrock of everything we’ll discuss.
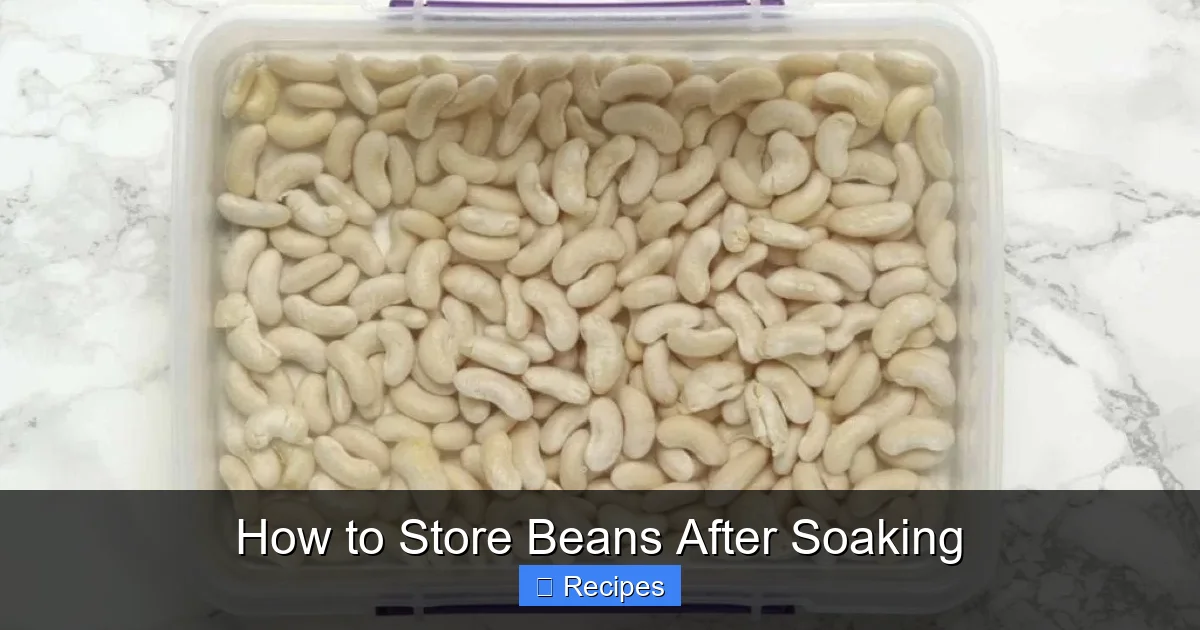
Visual guide about How to Store Beans After Soaking
Image source: storables.com
The Danger Zone is Real
Food safety science gives us the “Danger Zone”: temperatures between 40°F (4°C) and 140°F (60°C). This is where bacteria grow most quickly. A bowl of soaked beans sitting on your counter is sitting squarely in that zone. Rule number one: never store soaked beans at room temperature. The maximum safe time is two hours, but even that is pushing it for something as porous as a bean. As soon as the soak is complete, get those beans into the fridge or freezer.
The Smell Test is Your Best Friend
Soaked beans have a clean, earthy, slightly beany smell. If that smell turns sour, tangy, yeasty, or just generally “off,” the beans have begun to ferment or spoil. You might also notice a sticky, slimy film on the surface of the water or the beans themselves. This is a biofilm of bacteria. Any sour or unpleasant odor means the entire batch must be discarded immediately. Do not try to rinse it away. Do not think cooking will kill everything. The toxins produced by some bacteria are heat-stable. Trust your nose.
Cleanliness is Next to Bean-ness
Always start with clean equipment. The bowl you soaked your beans in should be washed with hot, soapy water before use. The containers you transfer them to for storage must be pristine. Cross-contamination from dirty surfaces or utensils is a fast track to spoilage.
Short-Term Hero: Refrigerator Storage (3-5 Days)
This is your go-to method if you plan to cook your beans within the next few days. It’s simple, but the details matter for maximizing freshness and minimizing that gassy effect.

Visual guide about How to Store Beans After Soaking
Image source: storables.com
The “Submerged in Water” Method (Most Common)
This is the classic approach. After soaking, simply drain the beans (if you prefer—more on that in a moment) and transfer them to a clean, airtight container—glass jars, BPA-free plastic containers, or a lidded bowl work well. Pour the clean soaking water back over the beans until they are fully submerged. Why keep the water? It maintains the hydration level you achieved during the soak, preventing the beans from drying out and developing a tough skin. The water also helps dilute any remaining oligosaccharides (the sugar compounds that cause digestive gas for many people).
- Container: Use a container that fits the amount of beans closely to minimize air exposure.
- Temperature: Your refrigerator should be at or below 40°F (4°C).
- Duration: Use within 3 to 5 days. The 5-day mark is the absolute maximum; aim for 3-4 days for peak quality.
- Tip: If the soaking water looks cloudy or has sediment, you can rinse the beans and use fresh, cold water in the storage container. It’s a personal preference.
The “Drained and Rinsed” Method (For Less Gas)
Many bean-soakers know that the soaking water contains a lot of the compounds responsible for intestinal gas. If you are particularly sensitive, or if you’re storing beans for a recipe where the soaking liquid might interfere (like a bean salad), you can drain and rinse the beans thoroughly after soaking. Place the rinsed beans in an airtight container and add fresh, cold water just to cover them. This method may slightly reduce the storage time by a day, as the fresh water provides no preservative effect from the initial soak, but the difference is minimal. The primary benefit is a potential reduction in digestive discomfort.
What About Soaking Water Alone?
Never store just the soaking water without beans. The liquid is nutrient-rich and will spoil incredibly quickly on its own, becoming a breeding ground for bacteria. Always store the beans with their liquid.
Long-Term Champion: Freezer Storage (2-3 Months)
Freezing is the ultimate way to capture the benefits of your soaking (and subsequent cooking) session for future use. It stops all enzymatic and bacterial activity. However, you cannot freeze raw soaked beans with great results. The high water content inside the bean expands when frozen, which can rupture the cell walls, leading to a mushy, disintegrated texture upon thawing and cooking. The secret to successful frozen beans is to cook them first, or at least partially cook them.
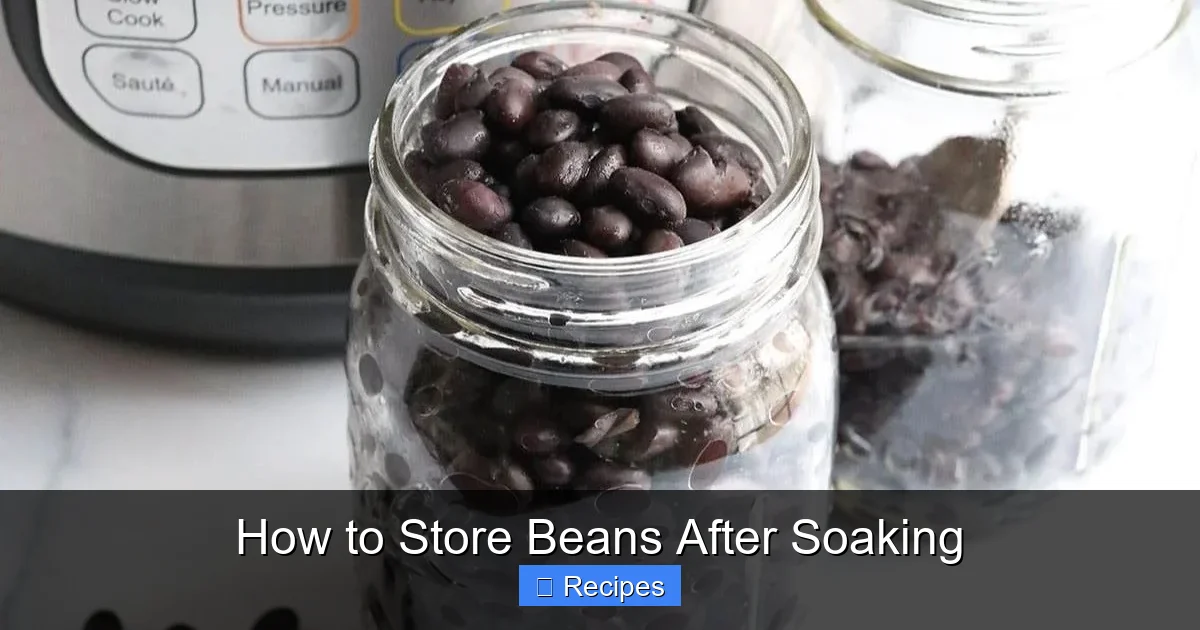
Visual guide about How to Store Beans After Soaking
Image source: storables.com
The Blanch-and-Freeze Protocol (For Best Texture)
This method gives you the closest texture to freshly cooked beans.
- Soak and Boil: Soak your beans as usual. Then, boil them in fresh water for just 1-2 minutes. You are not cooking them to tenderness; you are “blanching” them. This brief heat treatment deactivates enzymes that can cause texture and flavor degradation during frozen storage.
- Cool Rapidly: Immediately drain the beans and plunge them into a bowl of ice water to stop the cooking process. Let them chill for 5-10 minutes.
- Dry: Drain the beans thoroughly and pat them gently with a clean kitchen towel or paper towels. Removing surface moisture prevents ice crystals from forming large clumps.
- Portion and Pack: Divide the cooled, dried beans into meal-sized portions (e.g., 1.5-2 cups, which is equivalent to one 15-oz can). Place each portion in a freezer-safe zip-top bag or a small, airtight freezer container. If using bags, press out as much air as possible before sealing. Consider laying the bags flat on a baking sheet to freeze first; once solid, you can stack them, saving freezer space.
- Label and Date: Use a permanent marker to note the bean type and the date. Frozen beans are best used within 2-3 months for optimal flavor and texture, though they remain safe indefinitely if kept frozen.
The “Cooked Bean” Freeze (Simpler, Slightly Softer)
If you plan to use the beans in soups, stews, or refried beans where ultimate texture isn’t critical, you can skip the blanch step. Simply soak the beans, then cook them until fully tender. Drain, cool, and pack them as described above. They will be softer when thawed but perfectly delicious in slow-cooked dishes.
Thawing and Using Frozen Beans
You can often add frozen beans directly to soups and stews without thawing. For salads or other dishes, thaw them overnight in the refrigerator or place the sealed bag in a bowl of cold water for a few hours. Do not thaw at room temperature. Gently rinse before use to remove any ice crystals.
Container Choices: Your Storage Vessels Decoded
The right container is 50% of the storage battle. It must create an effective seal against air and moisture (in the fridge) and against freezer burn (in the freezer).
For the Refrigerator (3-5 Days)
- Glass Jars with Lids: The gold standard. Mason jars or any glass container with a tight-sealing lid are non-porous, won’t stain, and you can see the contents. Leave about 1/2 inch of headspace at the top to allow for slight expansion if you’re covering with liquid.
- BPA-Free Plastic Containers: Look for containers specifically labeled as airtight and fridge-safe. Ensure they are clean and free of scratches, which can harbor bacteria.
- Stainless Steel Bowls with Lids: Excellent non-reactive option, though you can’t see inside without opening.
- Avoid: Open bowls covered with plastic wrap (poor seal), containers that previously held strong-smelling foods (odor transfer).
For the Freezer (2-3 Months)
- Heavy-Duty Freezer Zip-Top Bags: Highly recommended. They are space-efficient and you can remove nearly all air by using the water displacement method: seal the bag almost all the way, submerge it in water up to the seal, and the water pressure pushes out the air. Then finish sealing.
- Freezer-Safe Plastic Containers: Must be labeled “freezer-safe” as regular fridge containers can become brittle and crack. Choose shallow, rectangular shapes for easy stacking and faster freezing/thawing.
- Vacuum Sealers: The ultimate in freezer storage if you have one. It removes virtually all air, preventing freezer burn almost entirely and extending quality.
- Avoid: Glass jars unless they are specifically labeled freezer-safe (like some mason jars). Regular glass can shatter from the expansion of the liquid inside as it freezes. If using glass, leave a full inch of headspace and do not seal until the beans are completely frozen.
Safety First: Recognizing Spoilage and Best-By Dates
You have your beans in the fridge, looking calm and collected. How do you know when they’ve turned? Vigilance is key.
The sensory exam is mandatory before every use.
Look at the beans and the liquid. They should look plump and firm. The liquid should be relatively clear or slightly cloudy from bean starch. Now, smell them. Bring the container to your nose and take a good whiff. It should smell earthy and beany. If you detect any sourness, fermentation notes (like beer or yeast), or a generally unpleasant aroma, discard the entire batch immediately. Do not taste a bean to check. Next, feel a bean between your fingers (with clean hands, or after rinsing one). It should feel firm and smooth. If it feels sticky, slimy, or tacky, that’s a biofilm—a sign of bacterial growth. Throw it out.
Understanding the Timeline
The 3-5 day fridge rule and 2-3 month freezer rule are for quality and safety. These are not arbitrary. They are based on the rate at which spoilage organisms can grow in cold conditions and the rate at which texture and flavor degrade in the freezer. Setting a calendar reminder when you store your beans is a great habit. Labeling is not optional; it’s essential.
From Storage to Table: Using Your Stored Beans
Storing beans properly is only half the battle. Using them correctly completes the cycle.
Using Refrigerated Soaked Beans
You can cook them directly from the fridge. Simply drain the soaking water (or use it, if you kept it and it smells fine) and add fresh, cold water to a pot. Bring to a boil, then reduce to a simmer. Cooking time will be slightly longer than if you started with dry beans, as the beans have been hydrated but not cooked. Taste for tenderness. Note: Beans stored in the refrigerator may take a minute or two longer to cook than beans that went straight from dry to pot, as the cold beans lower the cooking water temperature.
Using Frozen Cooked/Blanched Beans
For soups, stews, and chili, you can often toss the frozen beans right into the pot in the last 10-15 minutes of cooking. For salads, dips, or as a side dish, thaw them in the fridge overnight. Once thawed, drain and rinse. They are already cooked, so they just need to be heated through or used cold. They will be softer than freshly cooked beans, so account for that in your dish. They are perfect for mashing into refried beans, blending into hummus, or adding to a pasta salad.
Pro-Tip: The “Soak Once, Cook Twice” Philosophy
The most efficient use of your time and energy is to soak a large batch of beans, cook them all to tenderness, and then freeze them in portion-sized bags. You get the digestive benefits of soaking and the convenience of a “canned bean” that you prepared yourself, with no BPA, less sodium, and superior flavor. This is the ultimate expression of knowing how to store beans after soaking—you’re not just storing a step, you’re storing a finished, versatile ingredient.
Conclusion: Making Bean Storage a Habit
Soaking beans is a fantastic habit that improves cook time, texture, and digestibility. But that habit is only as good as the next step. Treating soaked beans as the perishable food they are—by refrigerating them promptly for short-term use or, even better, cooking and freezing them for long-term convenience—is what turns a good cook into a great one. It eliminates waste, guarantees you have a healthy, plant-based protein on hand at all times, and ensures that every pot of beans you make is safe and delicious. So next time you soak a bag of black beans or chickpeas, make the storage plan before you even fill the bowl. Your future self, pulling a perfectly portioned bag of ready-to-use beans from the freezer on a busy weeknight, will thank you.
Frequently Asked Questions
Can I store beans in the soaking water at room temperature?
No. Soaked beans at room temperature are in the “danger zone” for bacterial growth and can become unsafe within a few hours. Always refrigerate or freeze them immediately after soaking.
How long can I keep soaked beans in the fridge?
Soaked beans stored submerged in water in an airtight container in the refrigerator are safe for 3 to 5 days. Always perform a smell and texture test before using them.
Can I freeze beans right after soaking without cooking them first?
You can, but the texture will be very poor—mushy and mealy—after thawing. For best results, cook the beans to tenderness first, then cool and freeze them. Blanching boiled beans for 1-2 minutes before freezing helps preserve texture even more.
Is it better to store beans in their soaking water or fresh water?
Storing in the original soaking water is fine for 3-5 days and helps maintain moisture. If you are sensitive to the gas-causing compounds in soaking water, draining and rinsing the beans, then covering with fresh cold water is a good alternative.
What’s the best container for freezing beans?
Heavy-duty freezer zip-top bags are excellent because you can remove almost all air, preventing freezer burn. Freezer-safe plastic containers or vacuum-sealed bags are also great options. If using glass, ensure it’s labeled freezer-safe and leave ample headspace.
How can I tell if my stored beans have gone bad?
Trust your senses. Discard beans if they have any sour, fermented, or unpleasant odor, or if they feel sticky, slimy, or tacky. A change in color or a visible mold are also clear signs of spoilage. When in doubt, throw them out.
Pingback: Are Brown Beans Commonly Used When Making Classic Chili? - kitchenandhouseware.com
Pingback: Which Beans Are Commonly Used When Making Classic Chili? - kitchenandhouseware.com
Pingback: Broad Beans - kitchenandhouseware.com
Pingback: Bean Soup Recipes Using Dry Beans - kitchenandhouseware.com