Staining and sealing your cutting board protects it from moisture, bacteria, and knife marks while allowing for custom color. Always use food-safe products, prepare the surface meticulously, and apply thin, even coats. Allow proper curing time and maintain regularly with reapplication to ensure your board remains a functional, beautiful centerpiece in your kitchen for years.
So, you have that beautiful, solid wood cutting board. It’s been a workhorse in your kitchen, chopping vegetables, carving meat, and maybe even serving as a makeshift cheese platter. Over time, you’ve noticed it starting to look a little tired. The wood might be drying out, showing fine scratches, or perhaps you’re just dreaming of giving it a new, custom hue that matches your kitchen decor. This is where the transformative process of learning how to stain and seal a cutting board comes in. It’s not just about aesthetics—though that’s a huge bonus—it’s a critical act of preservation. A properly stained and sealed board is protected from the relentless assault of moisture, bacteria, and knife blades. It becomes more hygienic, more durable, and more beautiful. But it’s a process that demands respect for the materials and the right techniques. Using the wrong products can turn your kitchen workhorse into a health hazard. Let’s walk through this together, step by step, to ensure you end up with a stunning, safe, and long-lasting finished piece.
The journey to a flawless finished cutting board begins long before you open a can of stain. It’s rooted in understanding what you’re working with. Cutting boards are typically made from hardwoods like maple, walnut, cherry, or oak. These are dense, closed-grain woods ideal for food use because they don’t harbor bacteria as easily as softer, open-grain woods. However, each wood species absorbs stain differently. Maple, for instance, is very dense and can be resistant to stain, often requiring a pre-conditioner or a gel stain. Walnut is naturally dark and may only need a sealant to enhance its rich color. Knowing your wood’s personality is the first secret to success. The goal of staining is to add color, but the goal of sealing is to create an impermeable barrier. A sealant locks in the stain (if used), fills the wood’s pores, and creates a slick surface that is easy to clean and prevents juices and food particles from penetrating. Without a good seal, even the most beautiful stain is useless, as water and germs will seep in, causing warping, staining, and potential contamination.
Key Takeaways
- Preparation is Foundational: Thorough sanding and cleaning create a perfectly smooth surface for even stain absorption and sealant adhesion, preventing future issues.
- Food-Safe is Non-Negotiable: Only use stains and sealants explicitly labeled as safe for food contact to prevent chemical contamination from everyday use.
- Test Before You Commit: Always test your chosen stain on a hidden area of the board to preview the final color and absorption rate on your specific wood type.
- Thin Coats Win: Apply multiple thin, even coats of both stain and sealant rather than one thick layer to avoid drips, tackiness, and ensure a smooth, durable finish.
- Curing is Part of the Process: Respect full cure times (often 72+ hours) before using the board to allow finishes to harden completely and become food-safe.
- Maintenance is Key: Regular cleaning with mild soap, immediate drying, and periodic reapplication of sealant (every 1-3 months) dramatically extend the board’s life.
- Safety First: Work in a well-ventilated area, wear gloves and a mask during sanding and application, and always follow product instructions and our terms and conditions for safe handling.
📑 Table of Contents
- Gathering Your Arsenal: Tools and Materials for Success
- The Sacred First Step: Surface Preparation
- The Art of Staining: Adding Color and Character
- Sealing the Deal: Protecting Your Investment
- Curing, Care, and Long-Term Maintenance
- Troubleshooting: Fixing Common Mistakes
- Final Thoughts: A Labor of Love
Gathering Your Arsenal: Tools and Materials for Success
Having everything you need at your fingertips makes the job smoother and prevents midway trips to the store that can lead to mistakes or ruined finishes. This isn’t a project for improvisation. Let’s build your checklist.
Essential Tools
- Sanding Supplies: You’ll need a range of sandpaper grits. Start with 80 or 100-grit to remove old finishes or major imperfections, then move to 150-grit for smoothing, and finish with 220-grit for a glass-smooth surface. A sanding block or an orbital sander (used very carefully) works well. Don’t forget a tack cloth or vacuum to remove all dust.
- Application Tools: For stain, you can use lint-free cloths, foam brushes, or natural bristle brushes. Cloths give you the most control for wiping on and wiping off. For sealants, foam brushes or clean, lint-free cloths are ideal. Avoid synthetic brushes that can leave streaks.
- Protective Gear: A high-quality dust mask (N95 or better) is essential during sanding. Nitrile gloves protect your hands from chemicals. Safety glasses are a good idea. Ensure excellent ventilation by opening windows and using fans.
- Work Area Setup: A large, flat, well-protected surface (drop cloth or cardboard). Painter’s tape can help mask off areas if you’re only staining part of a board. Have plenty of rags on hand.
Choosing the Right Products: The Food-Safe Imperative
This is the most critical section. You cannot compromise here. Only use products explicitly labeled as food-safe or food-grade. This means they have been tested and certified to be non-toxic once fully cured. Never use standard furniture stains or polyurethanes from the hardware store unless they specifically state they are safe for cutting boards and food contact. These products can leach harmful chemicals into your food.
- Stains: Look for “food-safe wood stain,” “butcher block conditioner with stain,” or “gel stain for cutting boards.” Brands like Howard Products, General Finishes, and Rust-Oleum offer food-safe lines. These are typically water-based or oil-based with non-toxic pigments. They come in a variety of colors from natural honey to deep walnut.
- Sealants/Finishes: This is your board’s shield. The most common and beloved options are penetrating oils and waxes.
- Mineral Oil (Odorless, Food-Grade): The gold standard. It’s inert, won’t go rancid like vegetable oils, and penetrates deeply to protect from within. It doesn’t form a surface film, so it needs frequent reapplication but is extremely safe.
- Beeswax/Mineral Oil Blends: Products like Howard Products’ Cutting Board Wax or beeswax mixed with mineral oil. The wax sits on top, creating a slightly more water-resistant surface and a beautiful satin sheen. Excellent for maintenance between deep oilings.
- Tung Oil or Linseed Oil (Food-Grade, Polymerized): These drying oils cure to a harder, more water-resistant finish. “Pure” or “raw” tung/linseed oil can take weeks to cure and may still be slightly tacky. “Polymerized” or “cooked” versions are pre-treated to cure faster and harder. Ensure they are 100% pure and food-grade.
- Food-Safe Polyurethane: A true film-forming finish. It creates a hard, glass-like, waterproof barrier. It’s very durable but can be prone to scratching, and once scratched, moisture can get underneath. It also changes the feel of the wood significantly. Use only if you want a completely non-porous surface and are willing to maintain it meticulously. Brands like General Finishes’ “Food-Safe” finish are designed for this.
When selecting products, always read the label. Look for phrases like “safe for food contact after full cure,” “non-toxic,” and “conforms to FDA regulations.” If in doubt, contact the manufacturer. For your peace of mind, you might also review our terms and conditions regarding product recommendations and safe usage, as we only endorse products meeting strict safety standards.
The Sacred First Step: Surface Preparation
You’ve probably heard this before: “90% of a good paint job is preparation.” It’s 100% true for staining and sealing wood. Rushing or skimping here guarantees a subpar result. The goal is to start with a perfectly clean, smooth, and dust-free surface. Any old finish, grease, or scratch will show through your new stain and sealant.
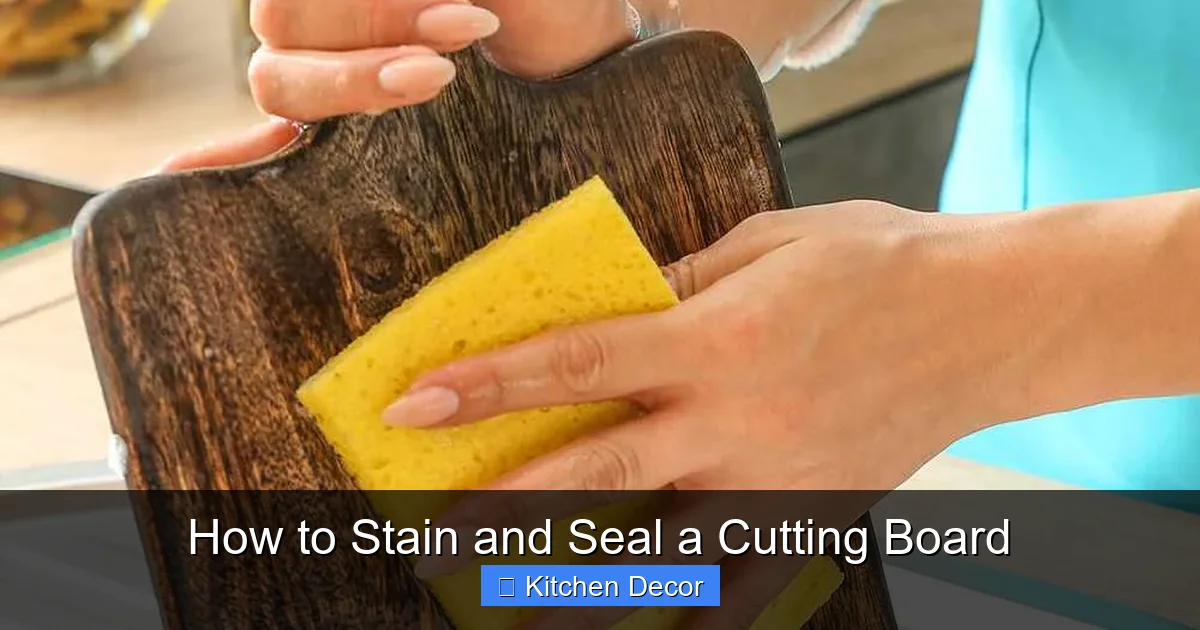
Visual guide about How to Stain and Seal a Cutting Board
Image source: allrecipes.com
Stripping and Sanding: From Rough to Smooth
If your board has an old, flaking finish, you must remove it completely. Use a chemical stripper labeled safe for the project (follow its instructions meticulously) or sand it off. Begin with your coarsest sandpaper (80-grit) to aggressively remove the old finish. Sand with the grain of the wood, not against it. This is crucial to avoid creating deep scratches that will be impossible to remove later. Once the old finish is gone, wipe the board down with a damp cloth and let it dry completely.
Now, the smoothing process. Move to 150-grit sandpaper. Sand the entire surface thoroughly, again with the grain. You’re removing the scratches from the coarse grit and evening out the surface. Wipe clean. Finally, the magic happens with 220-grit sandpaper. Sand until the surface feels uniformly smooth to the touch, like fine silk. Run your hand over it; you should feel no snags. This ultra-smooth surface is what allows stain to go on evenly and sealant to form a flawless film. Pay special attention to the edges and ends, which are more prone to splintering. Sand them lightly to round over any sharp corners.
The Final Clean: Banishing Dust Forever
After your final sanding, the board is covered in a fine layer of dust. This is your enemy. Use a vacuum with a brush attachment to suction off all loose dust. Then, use a tack cloth (a sticky cheesecloth) to wipe down every surface, corner, and edge. The tack cloth will pick up the finest particles. Follow with a wipe-down using a cloth dampened with mineral spirits (ensure ventilation) to remove any residual oils or contaminants. Let the board air dry completely for at least 30 minutes. Your board should now be impeccably clean and smooth. Any dust left will be sealed into your finish, creating a gritty texture.
The Art of Staining: Adding Color and Character
With your canvas ready, it’s time for color. Staining is optional—you might love the natural wood color and just want to seal it. But if you desire a warmer tone, a deep espresso, or something in between, staining is your tool. Remember, stain adds color but does not provide significant protection. That’s the sealant’s job.

Visual guide about How to Stain and Seal a Cutting Board
Image source: stainandsealexperts.com
Choosing and Testing Your Stain
Select your food-safe stain. For a subtle change, consider a “natural” or “honey” tone. For dramatic effect, “walnut” or “espresso” are popular. Always, without exception, perform a test. Find an inconspicuous area, like the bottom or a cut end. Apply a small amount of stain with a cloth, let it sit for the time recommended on the can (usually 5-15 minutes), then wipe off the excess with a clean cloth. Observe the color after it dries completely (24 hours). Wood is unpredictable; a stain that looks light wet can deepen significantly. This test tells you if you need to adjust your choice or application time.
Application Technique: The Wipe-On, Wipe-Off Method
The most controllable method for a beginner is the wipe-on, wipe-off technique. Stir the stain thoroughly (don’t shake, as it can create bubbles). Using a lint-free cloth or a foam brush, apply a generous, even coat of stain to a 1×1 foot section of the board, working with the grain. Don’t let it pool. Let the stain sit on the wood for the time specified on the label—this is where the pigment penetrates. Then, using a clean, dry cloth, wipe firmly in the direction of the grain to remove all excess stain. The color you see after wiping is your final color. If you want a deeper tone, you can apply a second coat after the first is dry (follow product dry times). However, it’s easier to build color with multiple thin coats than to try to remove a too-dark stain. Work systematically across the entire board, maintaining a wet edge to avoid lap marks. Pay attention to the ends of the board; they absorb stain faster and can become darker. You may need to wipe them more quickly or apply less stain.
Let It Dry Completely
Once stained, place the board in a dust-free, well-ventilated area. Let it dry completely according to the stain manufacturer’s instructions, typically at least 24 hours. Do not rush to the next step. Any residual moisture in the stain will trap solvents and ruin your sealant application.
Sealing the Deal: Protecting Your Investment
This is the final, protective layer. Sealing locks in the stain (if used), fills the wood’s cellular structure, and creates a barrier against liquids, food particles, and bacteria. The sealant you choose depends on your desired look and maintenance tolerance.

Visual guide about How to Stain and Seal a Cutting Board
Image source: cdn.apartmenttherapy.info
Understanding Your Sealant Options
- Mineral Oil: The simplest and most forgiving. It penetrates deeply, doesn’t go rancid, and is 100% food-safe. It leaves a slightly wet look but no surface film. It requires frequent reapplication (monthly for heavy use) as it washes off with soap and water. Perfect for beginners and those who want zero risk.
- Beeswax/Mineral Oil Blend: Apply over mineral oil or on its own. The wax forms a microscopic top layer that adds a bit of water resistance and a soft sheen. It’s great for a final touch and helps repel water momentarily. Reapply every few weeks.
- Food-Safe Tung Oil: Provides a harder, more water-resistant finish than oil alone. It cures to a satin sheen and is very durable. Application is similar to oil: flood the surface, let it penetrate for 10-15 minutes, then wipe off all excess. Apply 2-3 coats, sanding lightly with 320-grit between coats for a supremely smooth feel. Curing time is longer (up to 30 days for full hardness, though it’s food-safe sooner).
- Food-Safe Polyurethane: Creates a hard, plastic-like film. It’s the most water-resistant and durable against scratches and cuts. Apply in 2-3 very thin coats with a foam brush, sanding lightly between coats. It changes the tactile feel of the wood significantly and can chip if deeply scored. Once the surface is damaged, the barrier is compromised, and moisture can get underneath.
Application Process: Thin and Patient
Regardless of your chosen sealant, the rule is the same: thin coats, patience, and full curing. Ensure your stained board is completely dry.
- First Coat: Pour a small amount of sealant onto the board. Using a clean, lint-free cloth or foam brush, spread a thin, even layer over the entire surface, edges, and ends. Work with the grain. Don’t flood it; you want a saturated but not puddled surface.
- Let it Sit, Then Wipe: For oils and waxes, let it sit for 10-20 minutes to allow penetration. Then, using a clean, dry cloth, buff the surface firmly to remove all excess. This is critical. Any excess left on the surface will remain sticky and never cure properly. For polyurethane, follow the can’s instructions regarding dry time between coats, usually 2-4 hours.
- Dry/Cure: Place the board in a clean, dust-free, well-ventilated area. Let it cure completely. Mineral oil may feel dry to the touch in a few hours, but wait 24 hours before light use. Tung oil and polyurethane require much longer—often 72 hours or more—before being considered food-safe and ready for regular use. Check the product label.
- Light Sanding (for film-forming finishes): For tung oil or polyurethane, once the first coat is dry (tack-free), lightly sand the surface with 320-grit sandpaper or a synthetic abrasive pad (like a Scotch-Brite pad). This isn’t to remove finish, but to create a “tooth” for the next coat to adhere to. Wipe away all dust with a tack cloth.
- Repeat: Apply a second, and possibly third, thin coat using the same method. For oils, 2-3 coats are typical. For polyurethane, 2-3 coats provide excellent protection. The final coat should be allowed to cure for the full recommended time before any use.
Curing, Care, and Long-Term Maintenance
Your board is finished and looks gorgeous. But the journey isn’t over. How you treat it in the first week and for the rest of its life will determine its longevity.
The Critical Curing Period
Even after a finish feels dry to the touch, it is still curing—hardening and becoming fully inert. During this time (which can be up to 30 days for some oils), the finish is vulnerable. Avoid using the board for food preparation. Keep it in a clean, dust-free environment. Don’t stack other items on it. For oil-based finishes, the curing process is an oxidation process, and air exposure is good. For polyurethane, it’s a chemical cure, and avoiding abrasion is key. Patience here is a virtue that pays off with a flawless, durable surface.
Daily and Weekly Care
- Cleaning: After each use, scrape off large food debris with a bench scraper. Wash with warm water and a mild dish soap. Avoid soaking the board. Never put it in the dishwasher—the heat, water, and detergent will destroy the wood and the finish.
- Drying: Immediately after washing, wipe it down and stand it upright on its edge or prop it up to allow air circulation on all sides. Let it air dry completely before storing. This prevents warping and mildew.
- Disinfecting: For sanitizing, you can use a solution of 1 tablespoon of unscented household bleach per gallon of water. Wipe the surface, let it sit for a few minutes, then rinse thoroughly with water and dry immediately. White vinegar is also a good, food-safe disinfectant.
- Storage: Store boards upright or flat in a cool, dry place away from direct sunlight and heat sources (like above the stove). Avoid storing a damp board.
The Maintenance Cycle: When and How to Reapply
Even the best finish will wear. You’ll know it’s time to refresh when the wood looks dry, feels rough, or begins to absorb water (you’ll see dark spots where liquid soaks in). For mineral oil finishes, this could be every month with heavy use. For tung oil or wax, every 3-6 months. For polyurethane, it might be years, but once it’s scratched deeply, it’s hard to repair locally.
To Reapply: You usually don’t need to strip the old finish unless it’s flaking or damaged. Simply clean the board thoroughly, let it dry, and sand it lightly with 220-grit sandpaper to scuff the surface and remove any film. Wipe clean with a tack cloth. Then, apply a fresh coat of your chosen sealant exactly as you did originally. This simple maintenance routine is the key to a cutting board that lasts decades.
Remember, proper care extends beyond just the finish. Avoid using the board for extremely acidic foods (like citrus or tomatoes) for prolonged periods, as acid can degrade finishes faster. Use separate boards for raw meat and produce to maintain hygiene. Following these practices, alongside our terms and conditions for safe product use, will keep your board in pristine condition.
Troubleshooting: Fixing Common Mistakes
Even with the best plan, things can go awry. Here’s how to fix the most common issues.
- Sticky or Tacky Finish: This is almost always from applying a coat that was too thick or not wiping off enough excess. The solvent can’t evaporate properly. Solution: If it’s recent (within a few days), wipe the surface down with a cloth dampened with the appropriate solvent (mineral spirits for oil-based, water for water-based) to remove the uncured finish. Let it dry completely, then sand lightly and reapply a thin coat. If it’s been weeks and still tacky, it may be a formulation issue; you may need to strip and start over.
- Uneven or Blotchy Stain: Caused by uneven sanding, not wiping off stain evenly, or the wood’s natural density variations. Prevention is key: sand perfectly and test. To fix a finished board, you must strip the stain and sealant, sand again, and try again. For a minor blotch on an unstained board, you can try applying a second coat to the lighter areas, but it’s tricky.
- Raising the Grain: When water-based products contact wood, the fibers can swell, creating a rough, fuzzy surface. Solution: After your first coat of water-based stain or sealant, let it dry, then sand lightly with 320-grit sandpaper. This knocks down the raised grain. Wipe clean and apply your next coat. The final finish will be smooth.
- White Rings or Haze from Moisture: This is a common issue with film-forming finishes like polyurethane. A hot pan or a wet glass left on the board can cause moisture to get trapped, creating a white, cloudy area. Often, this will disappear as it dries. If persistent, you can try applying a small amount of mineral oil to the area, letting it sit, and buffing. For severe cases, the area may need to be sanded and refinished.
- Peeling or Flaking Finish: This indicates a failure of adhesion, often because the surface wasn’t properly prepared (dusty, greasy) or the previous finish wasn’t fully cured before a new coat. To repair, you must completely strip the peeling areas, sand to bare wood, and reapply the finish system from the beginning. Ensure each layer is fully cured.
Final Thoughts: A Labor of Love
Learning how to stain and seal a cutting board is a deeply satisfying DIY project. It connects you to the craftsmanship of the wood and transforms a utilitarian tool into a personalized kitchen heirloom. The process teaches patience—the patience of sanding, the patience of waiting for coats to dry, the patience of curing. There’s a profound pride in using a board you’ve finished with your own hands, knowing it’s both beautiful and built to last. Remember the core principles: prepare relentlessly, choose only food-safe products, apply thin coats, and commit to regular maintenance. Don’t be discouraged by a first attempt that isn’t perfect; every board teaches you something. With these guidelines, you’re equipped to take that raw piece of wood and turn it into a functional work of art that will serve your kitchen for generations. Now, go forth and create!
Frequently Asked Questions
Can I use regular wood stain or polyurethane from the hardware store on my cutting board?
No. Standard wood stains and polyurethanes are not formulated for food contact and can contain harmful chemicals that may leach into your food. Always use products specifically labeled as “food-safe” or “for cutting boards” and follow the manufacturer’s full cure instructions before using the board for food preparation.
How often do I need to reapply sealant to my cutting board?
The frequency depends on use and the type of sealant. With mineral oil, reapply whenever the wood looks dry or starts absorbing water—often monthly for daily-use boards. With tung oil or wax blends, every 3-6 months is typical. Film-forming finishes like food-safe polyurethane may last years but can be difficult to repair locally if deeply scratched.
What’s the difference between mineral oil and beeswax for sealing?
Mineral oil is a penetrating oil that soaks into the wood fibers from within, providing internal protection and preventing drying. It leaves a slightly wet look but no surface film. Beeswax sits on top of the wood, creating a slight barrier that enhances water resistance and adds a soft sheen. Many people use a combination: apply mineral oil first to condition, then use a beeswax blend for a top-layer boost. Beeswax alone doesn’t penetrate deeply enough for long-term protection.
Can I stain a bamboo cutting board?
Yes, but with caution. Bamboo is a grass, not a true wood, and is extremely dense with a high silica content. It often resists stain absorption, leading to a very light, uneven color. You must sand it thoroughly (up to 220-grit) and use a gel stain or a stain specifically formulated for bamboo. Always test extensively on a hidden area first. The sealing process is the same as for hardwoods, but bamboo can be more prone to splintering on the ends, so seal those areas well.
How do I know when my cutting board needs to be refinished?
Look for these signs: the wood looks dull, dry, or gray; it feels rough to the touch; liquids (like water or oil) are absorbed into the wood instead of beading up on the surface; there are deep knife scars or gouges that are difficult to clean; or the finish is flaking or peeling in areas. If you catch it early (just dryness), a deep cleaning and reapplication of sealant may suffice. For severe damage, a full refinishing (stripping, sanding, and re-staining/sealing) is necessary.
Is it safe to use a cutting board that has a film-forming finish like polyurethane?
Yes, but only if the polyurethane is specifically labeled as “food-safe” and has been allowed to cure completely according to the manufacturer’s instructions (often 7-30 days). Once fully cured, it forms an inert, non-toxic barrier. However, be aware that any scratches or cuts in the film can trap moisture and bacteria underneath, making the board harder to sanitize. For this reason, many woodworkers prefer penetrating oils for cutting boards, as they can be re-oiled to maintain protection even if the surface is scored.