How To Sharpen A Damascus Knife is an essential topic that provides valuable insights and practical knowledge for anyone interested in learning more about this subject.
Key Takeaways
- Select a fine-grit whetstone: Use a 1000+ grit stone to protect the Damascus pattern from coarse abrasion.
- Maintain a consistent angle: Hold a stable 15-20 degree angle throughout the sharpening process for an even edge.
- Apply gentle, even pressure: Let the stone do the work to avoid chipping the delicate, layered steel.
- Hone regularly with a leather strop: Use a strop between sharpenings to realign the edge and maintain sharpness.
- Avoid electric sharpeners: Machine sharpeners remove too much metal and can destroy the knife’s unique finish.
- Dry thoroughly after sharpening: Immediate drying prevents rust on the high-carbon steel layers.
- Test sharpness carefully: Slice through paper or a tomato to confirm a clean, burr-free edge.
📑 Table of Contents
- Your Beautiful, Frustrating Damascus Knife: A Love Letter and a How-To Guide
- Understanding the Beast: What Makes Damascus Steel Special (and Finicky)
- Choosing Your Tools: The Gentle Art of the Right Abrasive
- The Method: A Step-by-Step Guide to the Perfect Edge
- Common Mistakes & How to Avoid Them: The “Oops” Guide
- Beyond the Stone: Long-Term Care for Your Damascus Investment
- The Final Edge: It’s a Practice, Not a Perfection
Your Beautiful, Frustrating Damascus Knife: A Love Letter and a How-To Guide
There’s a moment every owner of a Damascus knife knows well. You’re in the kitchen, the light catches the blade just right, and those mesmerizing, watery patterns—the telltale signature of folded steel—seem to ripple. It feels less like a tool and more like a piece of functional art. Then, you go to slice a tomato. The blade, once a laser, now pushes the skin aside. The romance fades, replaced by a familiar frustration. How do I bring back this edge without ruining that beautiful pattern?
I’ve been there. I’ve cradled a beloved Damascus chef’s knife, staring at its dull reflection, terrified that a wrong move would erase centuries of smithing artistry. Sharpening a Damascus knife isn’t just about restoring sharpness; it’s about respecting the material’s unique dual nature—its incredible potential for a keen edge and its relative delicacy. This guide is everything I’ve learned, from my first clumsy attempts to the confident, gentle routine I use now. Let’s turn that frustration back into admiration.
Understanding the Beast: What Makes Damascus Steel Special (and Finicky)
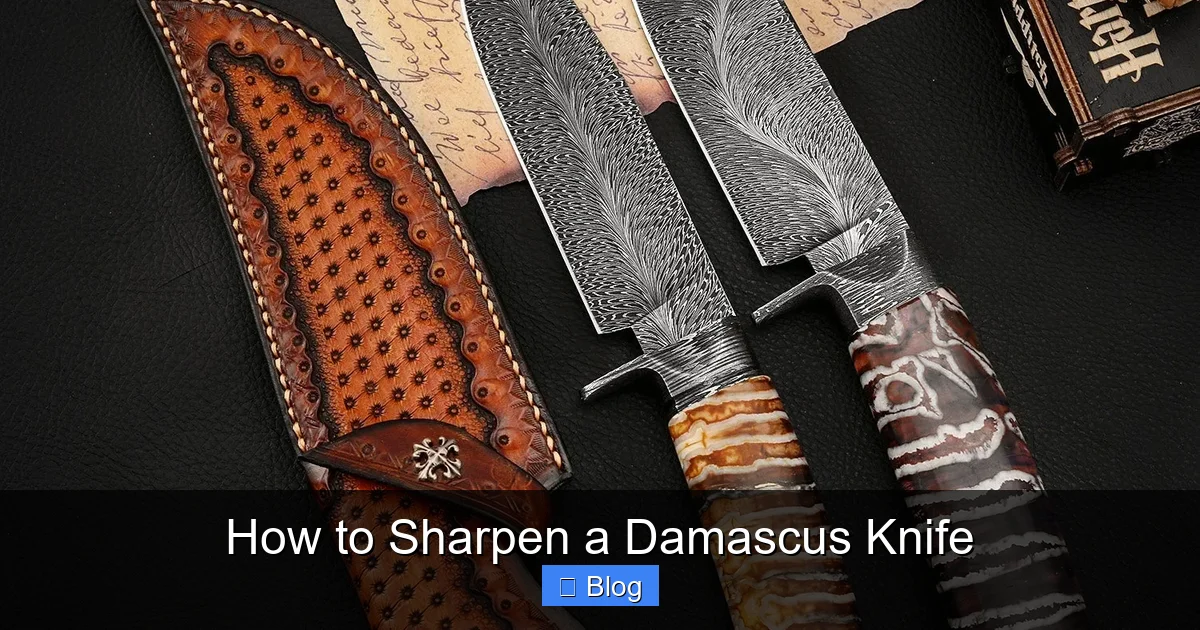
Before we touch a stone, we need to understand what we’re dealing with. “Damascus” is a bit of a catch-all term today, but it generally refers to steel made by forge-welding and folding different steel alloys together, then etching to reveal the patterns. This isn’t just for show.
Visual guide about How to Sharpen a Damascus Knife
Image source: biliknife.com
The Good: Layered Strength and a Razor’s Potential
The folding process creates hundreds of microscopic layers of hard and slightly softer steel. This can yield a blade that is both incredibly tough (resistant to chipping) and capable of taking a phenomenally sharp edge—often sharper than a solid mono-steel blade. The high-carbon steel layers (often 1095 or 15N20) are responsible for that keenness.
The Challenge: The Etched Surface and Layer Boundaries
Here’s the crucial part: that stunning pattern is an etch. Acid eats away at the softer steel layers slightly more than the harder ones, creating depth and contrast. This means the surface of a Damascus blade is not uniform. Furthermore, where those layers meet can be a microscopic weak point if abused. Aggressive, incorrect sharpening can:
- Grind away the beautiful pattern by over-polishing the etched surfaces.
- Cause delamination (layers splitting) if excessive force or heat is applied at the wrong angle.
- Round the edge instead of sharpening it if you use the wrong technique.
The goal, therefore, is to sharpen the edge without disturbing the character of the blade. It’s a more mindful process than sharpening a stainless steel workhorse.
Choosing Your Tools: The Gentle Art of the Right Abrasive
Using a power grinder or a cheap, gritty pull-through sharpener is the fastest way to destroy a Damascus blade’s character. You need tools that allow for control, finesse, and a progressive polish. Think “sculptor,” not “construction worker.”
Visual guide about How to Sharpen a Damascus Knife
Image source: cdn.shopify.com
Whetstones (Water Stones): The Gold Standard
For total control and preserving the finish, nothing beats a good set of whetstones. They offer a gradual, tactile sharpening process.
- Grit Progression: Start with a medium grit (800-1000) to reshape the edge if it’s truly dull. Move to a fine grit (3000-5000) for sharpening and refinement. For a mirror polish that really makes the pattern pop, finish with a very fine grit (8000-10000) or a leather strop with compound.
- Material: Synthetic stones (like those from Naniwa, Shapton, or Suehiro) are consistent and reliable. Natural stones (like Belgian Coticules or Japanese Tomoegawa) are legendary but pricier and require more care. For Damascus, a reliable synthetic is perfect.
- Soaking vs. Splash-and-Go: Soaking stones need to sit in water for 10-15 minutes before use. Splash-and-go stones (like Shapton Pros) just need a quick splash. Both work; choose based on convenience.
Honing Rods (Steels): For Realignment, Not Sharpening
A traditional steel (the round, grooved rod) is for honing—realigning the microscopic edge between sharpenings. It does not remove metal. For Damascus, a fine ceramic honing rod is a better daily companion. It’s smoother and less aggressive than steel, perfect for a quick touch-up without risking damage. Use it lightly, at the same angle as your edge, 5-10 times per side.
Pull-Through and Electric Sharpeners: Generally a Hard “No”
Most guided pull-through systems (the ones with slots) use preset, often too-aggressive angles and coarse abrasives. They will rapidly round off your precision edge and can easily grind through the etched layers. Electric sharpeners are even worse, generating heat and removing far too much metal. Save these for your cheap stainless utility knives.
Data Table: Comparing Common Sharpening Tools for Damascus
| Tool Type | Best For | Pros | Cons / Risks for Damascus |
|---|---|---|---|
| Whetstone Set (800-10k grit) | Full sharpening & polish | Maximum control, preserves pattern, creates ultimate edge, affordable long-term | Learning curve, requires time and practice |
| Fine Ceramic Honing Rod | Weekly edge maintenance | Quick, easy, safe for touch-ups, minimal metal removal | Does not sharpen a truly dull edge, only realigns |
| Diamond Plate (Fine Grit) | Quick repair, fixing chips | Very aggressive, flattens quickly, good for hard steels | High risk of scratching/gouging the blade surface if not careful |
| Guided Pull-Through System | Not recommended | Convenient, foolproof angle | Removes too much metal, rounds edge, destroys etched finish |
| Electric Sharpener | Never use | Fast | Generates damaging heat, removes excessive metal, guarantees pattern loss |
The Method: A Step-by-Step Guide to the Perfect Edge
Now, let’s get our hands wet. The mantra for sharpening Damascus is: slow, light, and consistent angle. Rushing or applying bodyweight is your enemy.

Visual guide about How to Sharpen a Damascus Knife
Image source: getyourknives.com
Step 1: Preparation is Everything
Place your whetstone on a non-slip surface (a damp towel or a stone holder works). Soak it if required, then sprinkle a few drops of water on the surface. This slurry (water mixed with metal particles) actually aids the polishing process. Have a cup of water nearby to rinse the stone and blade periodically.
Step 2: Finding and Maintaining Your Angle
This is the most critical skill. For most Damascus chef’s knives, a 15-degree angle per side (30-degree total included angle) is a great starting point—sharp yet durable. Paring knives might go to 12-15°. Here’s a foolproof way to find it:
The Quarter Method: Imagine the blade is a book, and the spine is the back cover. To get a 15° angle, you’d raise the “cover” (the blade face) until it’s about the thickness of a quarter off the table. For a 20° angle, it’s about the thickness of two quarters. Practice this motion in the air first. Once you find it, that’s your angle. Your goal is to maintain that exact angle throughout every stroke.
Step 3: The Sharpening Stroke (The “Push-Pull” or “X-Pattern”)
- Start at the Heel: Place the blade’s heel (the part closest to the handle) on the stone, edge-first, at your chosen angle. The entire edge should contact the stone.
- The Push: Using your arm and shoulder (not your wrist), push the blade forward and across the stone, maintaining the angle. Apply light, even pressure—just enough to keep the blade flat against the stone. Imagine you’re trying to move a very thin slice of the stone itself.
- The Pull: At the end of the push, lift the blade slightly, return it to the starting position, and repeat. Some prefer a continuous arc; both work. The key is consistency.
- Cover the Entire Edge: Work from heel to tip. You’ll need to slightly raise your elbow to follow the blade’s curve and ensure the tip gets attention. A common mistake is only sharpening the middle third.
- Count Your Strokes: Do 5-10 smooth, even strokes on one side. Then, flip the knife and repeat on the other side. Always do an equal number of strokes on each side to keep the bevel symmetrical.
Pro Tip: Watch the secondary bevel (the tiny, shiny edge you’re creating). On a well-sharpened knife, you’ll see a consistent, thin line of light reflecting off it along the entire edge. That’s your visual cue that you’re maintaining the angle.
Step 4: The Progressive Polish
Once you’ve established a burr (a tiny flap of metal on the opposite side) with your medium grit, it’s time to move up.
- Fine Grit (3000-5000): Switch stones. Use the same number of strokes, same angle, but with even lighter pressure. Your goal now is to refine the edge and remove the burr. You can feel a sharp edge by carefully running your thumb perpendicular to the edge (from spine to edge) – it should feel “grippy” or “sticky.”
- Ultra-Fine Grit (8000+) or Strop: For that professional, hair-popping sharpness and to maximize the Damascus contrast, finish here. On the stone, use almost no pressure—just the weight of the blade. Or, use a leather strap (a strop) charged with a fine polishing compound (like green chromium oxide). Pull the blade edge-first away from you along the leather, maintaining the angle. This hones and polishes without removing significant metal.
Step 5: The Test and Cleanup
Test your knife on something forgiving like a piece of paper or a ripe tomato. It should slice cleanly without tearing. Rinse the knife and stones thoroughly, dry completely, and store your knife properly (on a magnetic strip, in a block, or with a blade protector—never loose in a drawer).
Common Mistakes & How to Avoid Them: The “Oops” Guide
Even with the best intentions, it’s easy to slip up. Here are the most common pitfalls and how to sidestep them.
Mistake 1: The Wrong Angle (Too High or Too Low)
What happens: Too steep an angle (e.g., 25°+) makes the knife feel dull and requires more force. Too shallow an angle (e.g., <10°) is fragile and can chip easily. Both feel wrong.
The Fix: Use the quarter method religiously. Practice on an old, cheap knife first. Remember, consistency is more important than hitting a “perfect” degree. A consistent 18° is better than an inconsistent 15°.
Mistake 2: Using Excessive Pressure
What happens: You’re grinding, not sharpening. This removes metal too fast, can overheat the edge (ruining its temper), and is the #1 cause of grinding away the Damascus pattern. You’ll end up with a rounded, useless edge and a visibly worn blade.
The Fix: Light pressure. Let the abrasive do the work. Think of it as guiding the blade, not forcing it. If your arm is sore after 10 strokes, you’re pressing too hard.
Mistake 3: Neglecting the Tip
What happens: The tip remains dull, making detailed work impossible. It also creates an uneven edge.
The Fix: As you push the blade forward, slightly raise your elbow to follow the sweep of the blade’s tip, ensuring it makes contact with the stone. You can also do dedicated, short “tip strokes” where you only move the last 1-2 inches of the blade.
Mistake 4: Skipping Grits or Over-Polishing
What happens: Jumping from a 200-grit diamond plate to a 8000-grit stone won’t remove the deep scratches from the coarse grit, leaving a jagged edge. Conversely, spending 30 minutes on a 10000-grit stone on a knife that only needs a 3000-grit touch-up is wasteful and will eventually grind the pattern away.
The Fix: Use a logical progression. For routine touch-ups, you may only need your fine (3000-5000) stone. Reserve the ultra-fines for when you want to restore maximum performance and luster. Match your effort to the knife’s need.
Beyond the Stone: Long-Term Care for Your Damascus Investment
Sharpening is periodic maintenance. Daily care is what keeps you from needing to sharpen so often.
Honing is Your Best Friend
Use that fine ceramic honing rod before or after every few uses. It takes 10 seconds and realigns the edge, dramatically extending the time between true sharpenings. It’s like brushing your teeth versus getting a filling.
Storage and Cleaning: The Simple Rules
- Clean and Dry Immediately: Hand wash with mild soap, dry thoroughly immediately. Carbon steel layers in Damascus can rust if left wet. Even “stainless” Damascus (with high stainless steel content) benefits from this habit.
- No Dishwasher: Ever. The heat, detergent, and banging will destroy the handle and edge.
- Store Properly: Use a magnetic strip, a wooden block with slots, or individual blade guards. Avoid sheaths that trap moisture. Never throw it in a drawer with other utensils.
When to Seek a Professional
There’s no shame in calling a professional sharpener, especially if:
- The blade is chipped or severely damaged.
- You are completely uncomfortable with the process.
- The knife has significant value (sentimental or monetary).
How to find a good one: Look for someone who uses wet stones, not machines. Ask if they have experience with Japanese or carbon steel knives. A true professional will understand the delicacy of Damascus and will often hand-sharpen it. They are artisans, not just technicians.
The Final Edge: It’s a Practice, Not a Perfection
Sharpening your Damascus knife is a skill that connects you to the tool in a unique way. That first perfectly sharpened edge, where the blade whispers through a tomato skin and the patterns seem to shine brighter, is an incredible feeling. You’ve not just maintained a tool; you’ve participated in its ongoing story.
Remember the core principles: gentle abrasives, a consistent light touch, a proper angle, and patient progression. Your Damascus knife is a marriage of art and engineering. Treat it with that respect, and it will reward you with decades of beautiful, razor-sharp performance. Now, go find that tomato. You’ve earned it.
Frequently Asked Questions
What is How To Sharpen A Damascus Knife?
How To Sharpen A Damascus Knife is an important topic with many practical applications and benefits.
How can How To Sharpen A Damascus Knife help me?
Understanding How To Sharpen A Damascus Knife can improve your knowledge and provide practical solutions.
