Setting the clock on your GE double oven is a simple yet essential task that unlocks the full functionality of your appliance, including timed baking, roasting, and delayed start features. This guide provides a clear, model-agnostic process to accurately set the time, troubleshoot common problems like power loss resets, and understand your oven’s control panel. Mastering this basic function ensures your cooking is precisely timed and your kitchen runs smoothly.
Key Takeaways
- Locate Your Control Panel: The clock setting buttons are always on the main electronic control panel, typically above or between the oven doors.
- Use the CLOCK/CLOCK SET Button: This dedicated button initiates the time-setting sequence on virtually all GE double oven models.
- AM/PM vs. 24-Hour Format: Be aware of your selected time format; many GE ovens default to 12-hour (AM/PM), which you must toggle correctly.
- Always Save Your Setting: After adjusting the time, you must press the START or ENTER button to save and exit the setting mode.
- Power Loss Resets the Clock: A common issue; after a power outage, the clock will flash and require resetting, which is normal behavior.
- Unplug for Persistent Issues: If the clock or controls are unresponsive, a full power reset by unplugging the oven for 5 minutes often resolves glitches.
- Consult Your Specific Model’s Manual: While this guide is universal, your model’s manual provides the exact button layout and any unique quirks.
📑 Table of Contents
- Introduction: Why Your Oven’s Clock Matters
- Understanding Your GE Double Oven Control Panel
- The Step-by-Step Process to Set the Clock
- Troubleshooting: What to Do When It Goes Wrong
- The Benefits of a Correctly Set Clock: Beyond Telling Time
- Maintenance and Best Practices for Your Oven’s Clock
- Advanced Features and Clock Integration
- Conclusion: Your Mastery Begins Here
Introduction: Why Your Oven’s Clock Matters
You’ve just installed your magnificent GE double oven, a powerhouse of culinary potential with two separate cooking chambers. You’re eager to bake cookies in one and roast a chicken in the other simultaneously. But wait—the clock on the sleek digital display is blinking 12:00 or 0:00. It’s a small detail, but it’s the gateway to your oven’s smartest features. That clock isn’t just for telling time; it’s the brain for your Delay Start function, the coordinator for Timed Bake and Timed Roast modes, and even a component in some self-cleaning cycles. An incorrect clock can lead to undercooked meals or, worse, food that sits in a turned-off oven for hours. Setting it correctly is the first and most crucial step in mastering your appliance. This comprehensive guide will walk you through the process, demystify the control panel, and equip you to handle any clock-related hiccup, ensuring your GE double oven works for you, not against you.
Understanding Your GE Double Oven Control Panel
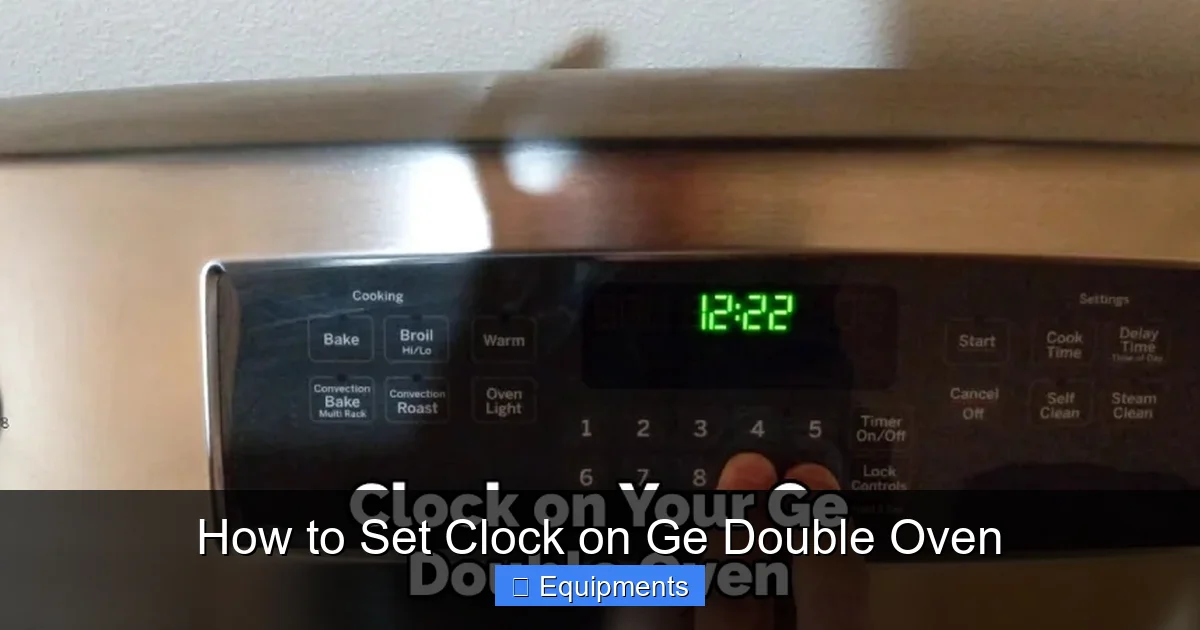
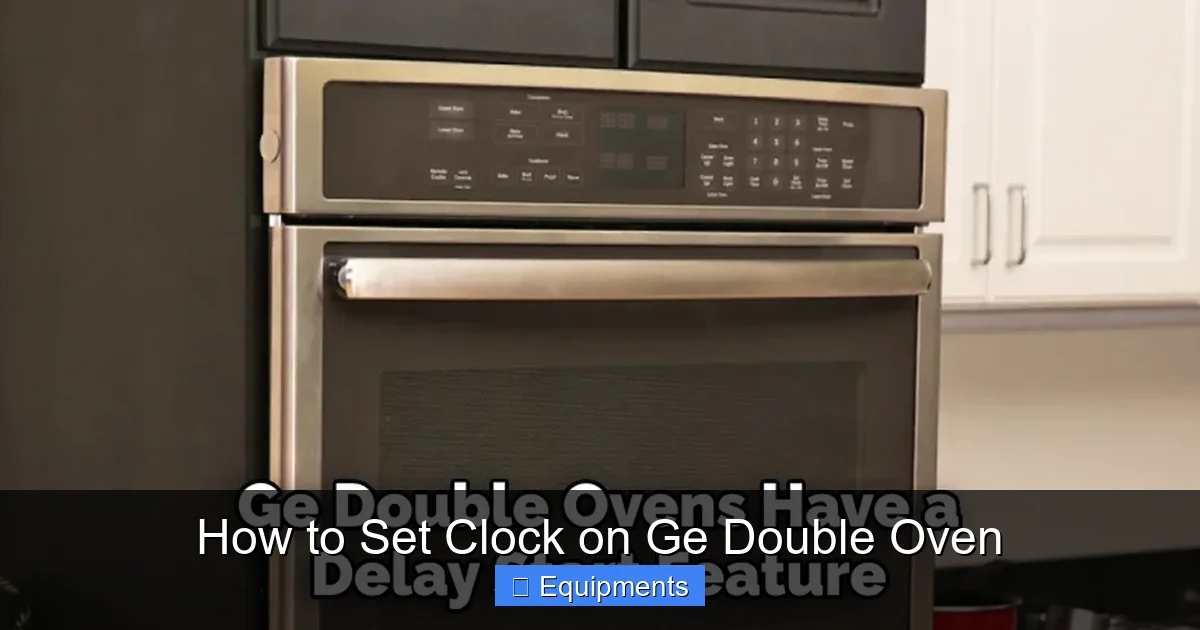
Before you touch a button, take a moment to look. GE double ovens, whether they are the Profile™ series, Cafe™ series, or standard GE models, share a common control logic, even if the button labels and layout vary slightly. The control panel is your command center, usually a sleek glass touchpad or a panel with physical buttons located above the oven doors.
Visual guide about How to Set Clock on Ge Double Oven
Image source: thekitchenix.com
Identifying the Key Buttons
You need to find three critical buttons. First, locate the CLOCK or CLOCK SET button. This is your primary key. It might be labeled simply “Clock” or have a clock icon. Second, find the + (or “Up”/”Increase”) and – (or “Down”/”Decrease”) buttons. These are often used in conjunction with the Clock button to scroll through hours and minutes. Finally, know the location of your START/ENTER button. This is the “save” command that finalizes your setting. On some models, the BAKE or ROAST button might also serve as an “Enter” key during setup. Familiarize yourself with these on your specific unit.
12-Hour vs. 24-Hour Display Formats
This is a classic point of confusion. Many GE ovens are set from the factory to display time in a 12-hour format with AM/PM indicators (like 3:45 PM). Some models, particularly those designed for international markets or professional use, may default to a 24-hour “military” format (like 15:45). Before you start, see if there is a small “AM” or “PM” dot or icon on your display. If you see it, you’re in 12-hour mode. If the time simply counts from 00:00 to 23:59, you’re in 24-hour mode. The method to toggle between them is usually the same: you press the CLOCK button, then use the +/- buttons to adjust the hours past 12 or 24 until the format switches. This guide assumes a 12-hour format, but the logic for 24-hour is identical—just scroll the hours accordingly.
The Step-by-Step Process to Set the Clock
Now, let’s get that time set. The process is designed to be intuitive and follows a consistent pattern across most GE double oven models. Follow these steps precisely.
Visual guide about How to Set Clock on Ge Double Oven
Image source: thekitchenix.com
Step 1: Initiate the Setting Mode
Press the CLOCK or CLOCK SET button once. You should see the current time on the display begin to flash, or the first digit (the hour) may start blinking. This blinking indicates the oven is in “setting” mode and is waiting for your input. If nothing happens, ensure the oven is not actively running a cook cycle or a self-clean. Some models require you to press and hold the CLOCK button for 3-5 seconds. Try a firm, short press first, then a press-and-hold if needed.
Step 2: Set the Hour
With the hour digit flashing, press the + (Up) or – (Down) button. Each press increments or decrements the hour by one. Continue pressing until the correct hour is displayed. If you are in 12-hour mode, you will cycle from 1 to 12. Critical Tip: Pay close attention to the AM/PM indicator. If it’s 3:00 PM, you must set the hour to 3 and ensure the “PM” dot or icon is illuminated. If you set it to 3 but the AM dot is on, your oven will think it’s 3:00 AM. Often, the AM/PM indicator will also flash when you are in the hour-setting phase, allowing you to toggle it with the +/- buttons.
Step 3: Set the Minutes
After setting the correct hour, press the CLOCK button again. The hour should stop flashing, and the minute digits (the two numbers after the colon) will begin to flash. Now, use the + and – buttons to adjust the minutes to the correct time. Press and hold the buttons for faster scrolling if needed.
Step 4: Confirm AM/PM (If Applicable)
In many models, after setting the minutes, you press CLOCK once more, and the AM/PM indicator will flash. Use the +/- buttons to toggle between AM and PM. Ensure it matches your intended time. On some models, the AM/PM toggles automatically when you scroll past 12 in the hour setting, so this step may be integrated into Step 2.
Step 5: Save and Exit
This is the most important step. Once the correct time and period (AM/PM) are displayed, you must press the START or ENTER button. This command tells the oven’s computer to accept the new time and exit the setup mode. The display will stop flashing and show the steady, correct time. If you walk away without pressing START/ENTER, your changes will not be saved, and the clock will revert or remain in setting mode.
Troubleshooting: What to Do When It Goes Wrong
Even with a simple process, things can go awry. Here’s how to diagnose and fix the most common clock-related problems on your GE double oven.
Visual guide about How to Set Clock on Ge Double Oven
Image source: thekitchenix.com
Problem: The Clock Keeps Flashing After a Power Outage
This is normal and by design. GE ovens are engineered to alert you to a power interruption. The flashing clock is a reminder that the timed functions (Delay Start, Timed Cook) cannot be used until the correct time is reset. Simply follow the step-by-step process above to restore the time. The oven will not retain any cook settings during a power loss, so you must reprogram any active cooking cycle.
Problem: The Control Panel is Unresponsive or “Frozen”
If buttons do nothing, or the display is frozen on an error code or the flashing clock won’t stop, the oven’s main control board may have experienced a software glitch. The universal fix is a hard reset. Do not just turn off the breaker for a few seconds; the capacitor may retain power. Instead, unplug the oven from the wall outlet (or turn off the dedicated circuit breaker and verify power is off). Leave it unplugged for a full 5 minutes. This ensures all residual power drains from the control board. Plug it back in. The display may flash again, prompting you to set the clock. This resolves most temporary electronic errors.
Problem: The Clock Won’t Set or Skips Numbers Erratically
This is less common but can happen. First, ensure you are pressing the buttons firmly and deliberately. A weak press may not register. Second, check for moisture or residue on the control panel. Wipe it gently with a soft, dry cloth. Third, if the problem persists after a reset, a button may be physically stuck or the control board itself may be faulty. At this point, consulting the troubleshooting section of your owner’s manual or contacting GE Customer Care is the next step.
Problem: Incorrect Time Persists After Setting
If you set the time, press START, and it reverts or changes on its own, there is a deeper issue. First, confirm you actually pressed START/ENTER and saw the display stop flashing. Second, check if the oven is in a special mode like Sabbath Mode (often a Menorah or Star of David icon). In Sabbath Mode, the clock display may be disabled or behave differently to comply with religious observances. Exiting Sabbath Mode will restore normal clock function. If no special mode is active, a failed control board memory is the likely culprit, requiring professional service.
The Benefits of a Correctly Set Clock: Beyond Telling Time
Setting the clock accurately is not a bureaucratic chore; it directly enables the sophisticated, convenient features that make a double oven invaluable.
Precision with Timed Cooking Modes
The Timed Bake and Timed Roast functions are game-changers. You set a start time and an end time. The oven will turn on at your specified start time, cook for the duration you set, and then automatically turn off. This is perfect for coming home to a freshly baked casserole or ensuring a roast doesn’t overcook while you tend to other tasks. For example: “I want my ham to finish roasting exactly when our guests arrive at 6:00 PM.” You calculate the cooking time (e.g., 2 hours), set the end time to 6:00 PM, and the oven calculates the start time (4:00 PM) automatically. This all depends on an accurate clock.
Convenience of Delay Start
This is the flip side of Timed Cook. With Delay Start, you program the oven to turn on at a future time. Imagine preparing your Thanksgiving turkey, placing it in the cold oven, and setting it to start roasting at 4:00 AM so it’s perfectly done by noon. The delay is based on the clock’s time. An incorrect clock means your “delay” could be 12 hours off, with disastrous results.
Coordination of Dual Oven Functions
On a double oven, you can run two different timed cycles simultaneously. Oven A might be on a Timed Bake for cookies ending at 3:30 PM, while Oven B is on a Delay Start for a casserole beginning at 3:00 PM. The single, synchronized clock ensures these two independent chambers work in harmony, preventing conflicts and maximizing your kitchen’s output during busy cooking sessions.
Self-Cleaning Cycle Timing
Many GE self-cleaning cycles are time-based and require you to set a start time (often a 2-3 hour high-heat cycle). The oven will not begin the cleaning process until the clock reaches the time you set. A wrong clock means the cycle could start in the middle of the night or when you’re not home.
Maintenance and Best Practices for Your Oven’s Clock
Treating your oven’s control system with care ensures years of reliable service.
Protecting Against Power Surges and Outages
Since the clock resets on power loss, consider plugging your oven into a surge protector if your home experiences frequent electrical fluctuations. For areas with unstable power, a small uninterruptible power supply (UPS) designed for major appliances can provide enough backup power to allow the oven to ride out brief outages without resetting the clock or interrupting a cook cycle. Always use a UPS rated for the oven’s high amperage draw.
Cleaning Around the Control Panel
Spills, grease, and grime can seep into the cracks around the buttons and touchpad, causing them to stick or become unresponsive. Regularly wipe the control panel with a soft, damp cloth. For stuck-on residue, use a mild soap solution, then dry thoroughly. Never spray cleaner directly onto the panel; spray it onto the cloth first. Avoid abrasive scrubbers that can damage the printed labels.
Software and Model-Specific Updates
Some newer GE models with Wi-Fi connectivity (like those in the Profile line) can receive firmware updates from GE. These updates can sometimes improve clock functionality, add new features, or fix bugs. Check the GE Appliances app or website for your specific model number to see if updates are available. This is a more advanced step but can be beneficial for connected ovens.
Advanced Features and Clock Integration
Once your clock is set, a world of advanced scheduling opens up, especially on modern GE double ovens.
Using the Sabbath Mode with the Clock
Sabbath Mode is a special setting for observant Jews that disables the oven’s automatic shut-off and allows for cooking on the Sabbath and certain holidays. In this mode, the oven’s display may be dimmed or show a special icon, and the clock is typically not visible or used for timed functions. To use it, you generally must first have the clock set correctly, then follow a specific button sequence (often involving the CLOCK and TIMER buttons for several seconds) to engage and disengage the mode. The manual is essential here. Remember: Sabbath Mode overrides the clock-based timed shut-off for safety during religious observance.
Connecting to Wi-Fi and the GE App
On Wi-Fi-enabled models, setting the clock is the first step in connecting your oven to your home network. Through the GE Appliances app, you can remotely monitor cooking, receive notifications when a timer ends, and even start or stop the oven. The app relies on the oven’s internal clock being accurate to provide correct notifications and scheduling. After setting the clock manually, you’ll usually navigate the oven’s settings menu to connect to Wi-Fi, then pair it with the app on your phone. This connectivity turns your double oven into a truly smart kitchen appliance.
Programming Multiple Timers
Your GE double oven likely has a separate TIMER function (not to be confused with the cook timers). This is a simple countdown kitchen timer, independent of the clock and cooking functions. You can set multiple timers—one for the cookies in the upper oven, another for the sauce simmering on the cooktop, all managed from the same control panel. The process is similar to setting the clock: press TIMER, use +/- to set minutes/seconds, and press START. This utilizes the same user interface muscle memory you built for setting the clock.
Conclusion: Your Mastery Begins Here
Setting the clock on your GE double oven is more than a setup step; it’s the foundational act that activates the brain of your appliance. From this simple, steady time display flows the power to schedule your cooking with precision, to run two ovens in perfect sync, and to integrate your kitchen into the modern smart home ecosystem. While the process is straightforward—find the CLOCK button, adjust hours and minutes, toggle AM/PM, and hit START—the knowledge of why and how empowers you. You are no longer a passive user but an informed operator, ready to troubleshoot a post-power-outage blink, to differentiate between a simple reset and a deeper issue, and to fully leverage features like Delay Start and Wi-Fi connectivity. So take a moment, locate those buttons on your panel, and set that time. Your perfectly timed, dual-chamber culinary adventures await. You’ve got this.
Frequently Asked Questions
Why does my GE double oven clock keep flashing after a power outage?
The flashing clock is a normal alert indicating a power loss has occurred. The oven’s timed functions are disabled until you manually reset the correct time. Simply follow the standard clock-setting procedure to stop the flashing and restore full functionality.
Can I set my GE double oven clock to a 24-hour format instead of AM/PM?
Yes, most GE double ovens can toggle between 12-hour (AM/PM) and 24-hour formats. The method varies slightly by model, but typically involves pressing the CLOCK button, then scrolling the hour setting past 12 or 24 until the format indicator changes. Consult your specific model’s manual for the exact steps.
Is the process for setting the clock different on a GE Profile double oven versus a standard GE model?
>The core process is virtually identical across all GE double oven lines, including Profile, Cafe, and standard GE. The button labels (CLOCK vs. CLOCK SET) and layout may differ aesthetically, but the sequence of pressing CLOCK, adjusting with +/- buttons, and pressing START/ENTER remains the universal standard.
My oven’s clock is correct, but the Timed Bake function still won’t start at the set time. Why?
First, ensure the oven door is fully closed; a slightly ajar door will prevent a timed start. Second, double-check that you did not accidentally set the cook mode to “Bake” without a time, instead of “Timed Bake.” The oven must be in a timed cook mode (Timed Bake, Timed Roast) for the start delay to engage. Finally, confirm the clock itself is accurately set.
What’s the difference between the oven’s CLOCK and the separate TIMER function?
The CLOCK is a permanent time-of-day display that must be set and is used as the reference for all timed cooking features (Delay Start, Timed Bake/Roast). The TIMER is a simple, independent countdown kitchen timer (like a kitchen egg timer) that you can set for any duration for general reminders; it does not control the oven’s heating elements.
I set the clock and pressed START, but the time is still wrong or the display is blank. What now?
Perform a full power reset. Unplug the oven from the wall outlet (or turn off its dedicated circuit breaker) and leave it disconnected for at least 5 minutes. This clears the control board’s memory. Plug it back in, and the clock will likely be flashing again, allowing you to set it fresh. If the display remains blank or unresponsive after this, there may be a hardware fault requiring service.