Seasoning cast iron with grapeseed oil is a superior method for building a strong, slick, and durable cooking surface. Its high smoke point and neutral flavor make it ideal for creating a polymerized layer without imparting taste. This guide provides a detailed, foolproof process from initial cleaning to long-term maintenance, ensuring your skillet becomes a cherished heirloom.
Key Takeaways
- Grapeseed oil is exceptionally effective due to its high smoke point (~420°F/216°C) and low viscosity, allowing it to polymerize cleanly into a thin, hard, and glossy layer without gumminess.
- Thin layers are critical. More oil is not better; it leads to a sticky, uneven surface. Wipe the pan until it looks and feels completely dry before heating.
- Proper heating is non-negotiable. The oil must reach its smoke point and be held there to complete polymerization. An oven provides the most even heat; stovetop works with careful control.
- Seasoning is a cumulative process. One perfect layer is good, but 3-5 layers create a robust, resilient foundation. Build it over multiple cooking sessions or dedicated seasoning cycles.
- Maintenance is simpler than re-seasoning. After the initial cure, maintaining the seasoning is about gentle cleaning (no soap needed for most), immediate drying, and a light wipe of oil after use.
- Rust is a surface issue, not a failure. It’s easily removed with steel wool or vinegar and indicates exposure to moisture without drying. Re-seasoning restores the pan fully.
- Avoid common pitfalls: Using too much oil, not heating long enough, or using oils with low smoke points (like flaxseed, which can flake) will sabotage your results.
📑 Table of Contents
- The Allure of Cast Iron: Why the Seasoning Journey Matters
- Why Grapeseed Oil? The Science Behind a Superior Season
- The Step-by-Step Seasoning Guide: From Bare to Brilliant
- Troubleshooting Common Issues: Sticky, Rusty, and Uneven
- Maintaining Your Cast Iron for Generations: Beyond the First Season
- Conclusion: Your Cast Iron Legacy Starts Now
The Allure of Cast Iron: Why the Seasoning Journey Matters
There’s a certain magic to a well-seasoned cast iron skillet. It’s the sizzle of a perfect steak, the golden crust on cornbread, the way it moves from stovetop to oven to campfire without a second thought. This magic isn’t inherent in the iron itself; it’s a man-made layer, a protective shield of polymerized oil we call seasoning. Getting that layer right is the difference between a frustrating, sticky pan and a kitchen workhorse that gets better with every use.
For years, the debate raged: what is the best oil for seasoning? Vegetable shortening, flaxseed, peanut oil—all have their champions. But for a combination of performance, availability, and neutrality, grapeseed oil emerges as a top-tier, often underrated, choice. It’s not just about tradition; it’s about chemistry and practicality. This guide will walk you through every step, from a bare or rusty pan to a gleaming, non-stick surface, using grapeseed oil as your trusted partner. We’ll demystify the process, so you approach it with confidence, not guesswork.
Why Grapeseed Oil? The Science Behind a Superior Season
The Polymerization Powerhouse
Seasoning, at its core, is a chemical process called polymerization. When you heat an oil past its smoke point, the fatty acid chains break down and cross-link, bonding to the iron and to each other, forming a hard, plastic-like layer. The quality of this layer depends entirely on the oil’s properties. Grapeseed oil shines here for two primary reasons:
Visual guide about How to Season Cast Iron with Grapeseed Oil
Image source: goshindig.com
- High Smoke Point: At approximately 420°F (216°C), grapeseed oil has one of the highest smoke points among common cooking oils. This means you can heat your pan to the necessary temperature for polymerization without the oil breaking down into acrid smoke and bitter compounds prematurely. It gives you a wider, more forgiving temperature window to achieve that perfect cure.
- Low Viscosity & Neutral Profile: Grapeseed oil is very thin and has almost no flavor or color. This thinness allows it to spread into an incredibly fine, even layer when wiped thoroughly. A neutral profile means it won’t transfer any taste to your food, which is crucial for a versatile skillet used for everything from acidic tomato sauces to delicate fish.
What Makes Other Oils Less Ideal?
Understanding why grapeseed works well means knowing what to avoid.
- Flaxseed Oil: Once popularized by online articles, its very low smoke point (~225°F/107°C) means it polymerizes at a lower temperature but can remain soft and prone to flaking over time, especially with thermal cycling. It’s also expensive and rancid-prone.
- Olive Oil (Extra Virgin): Has a lower smoke point and contains particulates and flavors that can burn, creating a sticky or gummy residue. Refined olive oil is better but still not ideal.
- Vegetable/Soybean Oil: Often recommended, it works but has a lower smoke point than grapeseed and a higher viscosity, making it slightly harder to apply in a truly thin layer. It can also develop a sticky feel if applied too thickly.
- Butter or Bacon Fat: These are cooking fats, not seasoning oils. They contain milk solids or impurities that will burn and create a gummy, uneven surface. Use them in your seasoned pan, not on it for seasoning.
Grapeseed oil’s combination of high heat tolerance and purity makes it a consistent, reliable performer that builds a smooth, glossy, and durable seasoning layer layer after layer.
The Step-by-Step Seasoning Guide: From Bare to Brilliant
Patience and precision are your tools. Rushing this process is the most common reason for failure. Follow these steps exactly, and you will succeed.
Visual guide about How to Season Cast Iron with Grapeseed Oil
Image source: chefspick.co.uk
Step 1: The Critical Clean (For New, Rusty, or Stripped Pans)
Your pan must start completely free of any factory coating, rust, or old, flaking seasoning. This is the most important prep step.
- For New Pans: Many come with a protective wax or oil coating from the factory. Scrub it off entirely using hot soapy water and a stiff brush or steel wool (a copper scrubber is gentler). Rinse and dry immediately.
- For Rusty Pans: Use steel wool (grade #0000 is fine) or a dedicated rust remover like Bar Keepers Friend (non-abrasive version) and elbow grease. Scrub until all reddish rust is gone and you see bare, gray metal. For heavy rust, an vinegar soak (1:1 vinegar/water) for a few hours can help, but you must still scrub afterwards. Rinse extremely well to remove all acid traces, then dry thoroughly over low heat.
- For Pans with Old, Flaky Seasoning: You must strip it back to bare metal. Use a chain mail scrubber (like a Ruster’s helper) or steel wool with soap. This is hard work but necessary. A self-cleaning oven cycle can also burn off old seasoning, but it creates a lot of smoke and mess.
Pro Tip: After any cleaning, place the pan on a stovetop burner or in a 200°F oven for 10 minutes to evaporate all residual moisture. Any water left will cause instant flash rusting during the next step.
Step 2: The Art of the Oil Application – “Less is Everything”
This is where most people fail. You want a layer so thin it’s invisible to the eye and barely perceptible to the touch.
- Apply Oil: Pour about 1 teaspoon of grapeseed oil onto the warm (not hot), dry pan. Using a clean, lint-free cloth or paper towel, rub it over the entire surface—inside, outside, and handle. The bottom too, to prevent rust.
- Wipe It All Off: Now, using a fresh section of the cloth or a new paper towel, vigorously wipe the pan again. You are trying to remove every last trace of oil. The pan should look dry. If you can see a sheen or feel any greasiness, you have too much. Wipe more. The goal is a microscopic film, not a coating.
Why This Matters: Excess oil that doesn’t fully polymerize will heat up, pool, and become a sticky, brittle, or flaky mess. A true seasoning layer is a monomolecular film that bonds seamlessly with the iron. You cannot apply it with a brush; you must massages it in and then remove it.
Step 3: The Heating – Where Polymerization Happens
Now you apply heat to trigger the chemical reaction.
- Oven Method (Most Reliable): Preheat your oven to 450-500°F (232-260°C). Place the oiled pan upside down on the middle rack. Put a foil-lined sheet on the rack below to catch any drips. Bake for 1 hour. Turn the oven off and let the pan cool completely inside. This upside-down position ensures any tiny drips fall away, not pool on the cooking surface.
- Stovetop Method (For Quick Fixes): Heat the pan on medium-high until very hot (a few drops of water should sizzle and evaporate instantly). Reduce heat to medium and watch the oil. It will begin to smoke lightly—this is the polymerization. Let it smoke for 5-10 minutes, moving the pan to ensure even heating. Turn off the heat and let it cool. This method is less even and harder to control but useful for a quick touch-up.
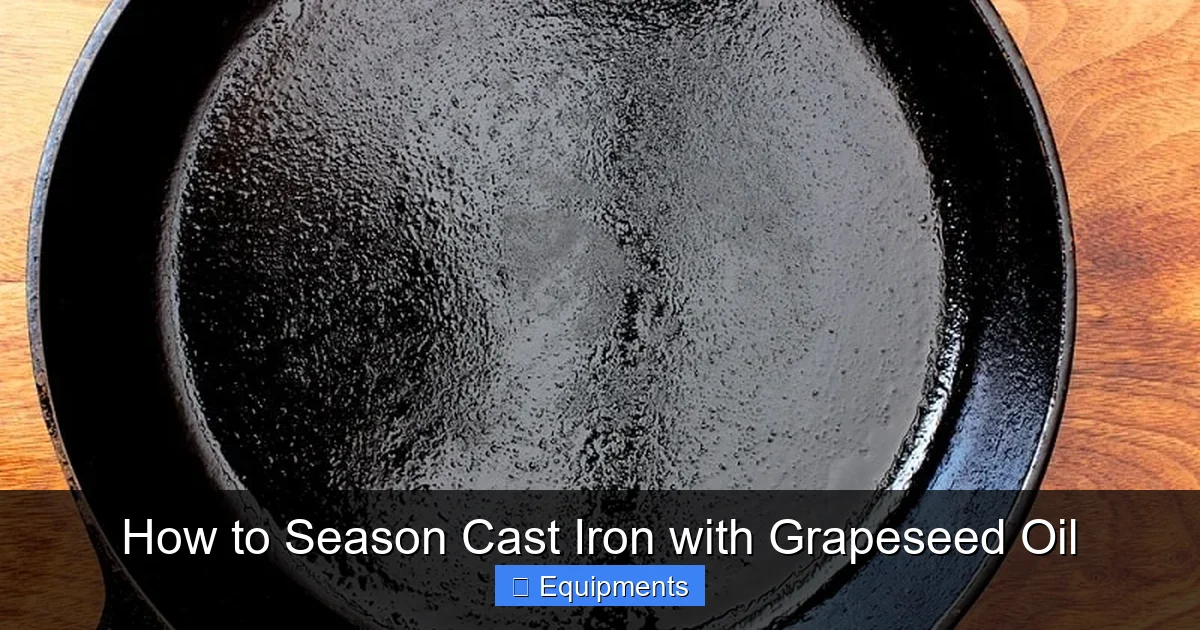
Visual Cue: After cooling, the pan should have a uniform, matte-to-slightly-glossy, dark brown or black appearance. No sticky spots, no pools, no uneven coloration.
Step 4: Repeat and Build
One layer is a start, not a finish. For a truly robust, non-stick surface, repeat Steps 2 and 3 (wipe thin, heat for 1 hour) 3-5 more times. You can do this in one afternoon, or better yet, build it naturally over your next 5-10 cooking sessions. Each time you cook with a decent amount of fat (like searing meat or frying), you are adding a micro-layer of seasoning. This cumulative approach often yields the best, most integrated seasoning.
Troubleshooting Common Issues: Sticky, Rusty, and Uneven
Even with the best intentions, things can go awry. Here’s how to diagnose and fix the most common problems.
Visual guide about How to Season Cast Iron with Grapeseed Oil
Image source: chefspick.co.uk
The Sticky or Gummy Surface
Cause: Almost always, too much oil was applied, or the pan wasn’t heated hot enough or long enough for the oil to fully polymerize. The oil has partially cooked but not fully transformed.
Solution: This is a fixable setback. Place the pan back in a 450°F oven for a full hour. The sticky layer will often harden and become part of the seasoning. If it remains sticky after this, you need to strip it back. Scrub vigorously with steel wool and soap (yes, soap is okay here on a non-seasoned surface), rinse, dry, and start the seasoning process over from Step 1. This time, wipe more aggressively.
Rust Spots Appearing
Cause: Exposure to moisture without drying. This can happen if you hand-washed and didn’t dry it thoroughly, or if you left it to air-dry. A humid environment can also cause flash rust on bare iron.
Solution: Light rust is easy. Scrub the spot with steel wool until the rust is gone and you feel bare metal. Dry the pan immediately and thoroughly. Apply a microscopic layer of grapeseed oil to the spot and heat it (in the oven or on the stove) to re-season that area. For widespread rust, you likely need a full strip-and-reseason. Prevention is key: always dry your pan on a warm burner for 5 minutes after washing, then apply a tiny wipe of oil while it’s still warm and store it in a dry place.
Uneven or Patchy Seasoning
Cause: Uneven oil application or uneven heating. If you seasoned on the stovetop, the center may be hotter than the edges. If you didn’t wipe enough, oil pools in low spots.
Solution: The best fix is often to just use the pan. Cook with it regularly. The heat and fat from cooking will help even out the seasoning over time. For severe patchiness, you may need to strip and re-season, being extra meticulous with the wipe-down step and using the oven method for even heat distribution.
Maintaining Your Cast Iron for Generations: Beyond the First Season
The initial seasoning is the foundation, but daily habits determine whether your pan becomes a treasure or a burden. The goal is to protect and build that polymerized layer with every use.
The Golden Rules of Cleaning
Forget everything you’ve heard about never using soap. Once a layer of seasoning is established, a little mild soap is fine and often necessary to remove stuck-on food without excessive scrubbing that damages the seasoning.
- Wash While Warm: After cooking, let the pan cool slightly (but not completely), then add hot water. Use a non-metal scrubber (nylon brush, stiff plastic scraper, or chain mail scrubber for tough bits). A little dish soap is okay.
- For Stubborn Bits: Boil a cup of water in the pan to loosen food. Use a wooden or silicone spatula to scrape. Never use a metal utensil on a seasoned surface.
- Dry Immediately and Thoroughly: This is the #1 rule. Rinse, then place on a burner over medium heat for 3-5 minutes until all water beads and evaporates. You should see the pan return to its dry, dark state.
- The Light Oil Wipe (Optional but Helpful): While the pan is still warm (not hot), pour a few drops of grapeseed oil onto a paper towel and rub a microscopic layer over the entire cooking surface and interior. Wipe off any excess until it feels dry. This replenishes the surface and protects against humidity. For most users in a dry climate, this step is only needed occasionally. If you live in a humid area, do it after every wash.
What to Cook (and What to Avoid)
Build your seasoning with fats. Initially, cook foods with high fat content: bacon, sausage, fried chicken, seared steaks. The fat bastes the surface and integrates into the seasoning.
Be cautious with:
- Acidic Foods (Tomatoes, Wine, Citrus): These can strip a new, fragile seasoning. Once your pan has a strong, well-built base (dark, smooth, non-stick), you can use it for these occasionally, but don’t simmer tomato sauce for hours in a new skillet.
- Delicate Fish or Eggs: Wait until your seasoning is robust. A sticky or thin layer will cause sticking.
- Strong Flavors: Cast iron is porous. Very pungent foods like garlic or fish can leave residual tastes. It’s best to have a dedicated pan for strong flavors or ensure your seasoning is very mature.
Storage: Keeping the Rust at Bay
Store your pan in a dry cabinet. Some people line it with a paper towel to absorb ambient moisture. Do not store it with food in it. If you store it for a long time (months), give it a light coat of oil as described above. The key is preventing any moisture contact with the iron.
Conclusion: Your Cast Iron Legacy Starts Now
Seasoning cast iron with grapeseed oil isn’t a one-time chore; it’s the beginning of a rewarding relationship with a piece of cookware that can last centuries. By understanding the why—the science of polymerization and the properties of grapeseed oil—you move from following instructions to mastering the craft. Remember the mantra: thin layers, high heat, repeat.
Your first few seasons might not be perfect, and that’s okay. Each cycle builds the foundation. The moment you cook an egg without it sticking, or achieve a perfect sear without hot spots, you’ll understand the value of the patience you invested. This pan will outlive trends and fads. It will be passed down. And every meal cooked in it will be infused with the story of your care—a story written in a durable, black, non-stick layer built one thin coat of grapeseed oil at a time. Now, go heat up that pan. Your first legendary meal awaits.
Frequently Asked Questions
Can I use other oils if I don’t have grapeseed oil?
Yes, refined avocado oil (high smoke point) or refined canola oil are good substitutes. Avoid extra virgin olive oil, butter, or bacon fat for seasoning due to low smoke points or impurities. Stick to oils with neutral flavor and high smoke points for best results.
How many layers of seasoning do I really need?
Aim for at least 3-5 initial layers applied in dedicated cycles. However, true durability comes from cumulative use. After the base is built, every time you cook with fat, you add a microscopic layer. Your pan’s seasoning will deepen and improve over years of use, not just from initial applications.
My pan is sticky after seasoning. Is it ruined?
No, it’s a common fixable issue. Stickiness means the oil didn’t fully polymerize (usually from being too thick). Place the pan in a 450°F oven for a full hour. This often hardens the layer. If it remains sticky, scrub it off with steel wool and soap, dry, and re-season, being meticulous about wiping the oil until the pan looks completely dry before heating.
Is rust on a cast iron pan normal?
Rust is a sign of iron exposure to moisture, not a failed seasoning. It’s easily removed. Scrub the rust off with steel wool until you reach bare metal, wash, dry thoroughly on a warm burner, and apply a fresh, thin layer of grapeseed oil and heat it. Prevention through immediate and thorough drying is the best strategy.
Can I season my cast iron on the stovetop instead of the oven?
You can, but the oven is far more reliable. Stovetop heating is uneven, making it hard to achieve consistent polymerization across the whole surface. If you use the stovetop, heat the pan until very hot, apply a thin layer of oil, and let it smoke for 5-10 minutes on medium heat, moving the pan constantly. The oven method is strongly recommended for initial seasoning or major re-seasoning.
Do I need to season a new pre-seasoned cast iron pan?
Factory seasoning is often a thin, functional coat. For optimal performance, it’s highly beneficial to add 2-3 layers of your own grapeseed oil seasoning. This builds a stronger, more personalized layer tailored to your cooking. Treat the factory seasoning as a base, not a finished product.
Pingback: How to Remove Rust from Cast Iron - kitchenandhouseware.com