Resetting the filter light on your GE microwave is a simple process that usually involves pressing and holding the “Filter Reset” button or cycling the power. However, it’s critical to understand that a reset only turns off the warning light; it does not clean the filter itself. You must physically remove, clean, or replace the charcoal filter before resetting the indicator. This guide provides detailed, model-specific instructions to safely complete this essential maintenance task and keep your microwave running efficiently.
Key Takeaways
- Reset vs. Clean: Resetting the filter light only turns off the warning; it does not clean the filter. You must clean or replace the filter first.
- Primary Methods: The two main reset methods are using the dedicated “Filter Reset” button (common on newer models) or a full power cycle (unplugging the microwave).
- Model Variations: The location of the reset button and filter access varies significantly between over-the-range and countertop models. Always consult your owner’s manual first.
- Safety First: Always disconnect the microwave from power (unplug or turn off breaker) before attempting to access or clean any internal components.
- Filter Types: GE microwaves use either a washable metal mesh grease filter or a non-washable charcoal filter for odors. Know which type you have.
- Persistent Light: If the filter light reappears quickly after a reset, it means the filter is still clogged and needs a more thorough cleaning or replacement.
- Professional Help: If you are uncomfortable accessing internal parts or the reset fails, contact GE customer support or a qualified appliance technician.
📑 Table of Contents
- Why Your GE Microwave Filter Light is On & What “Reset” Really Means
- Method 1: The Standard Reset Button (The Easiest Way)
- Method 2: The Power Cycle Reset (The Universal Fallback)
- Finding Your Model Number & Accessing the Filter
- Step-by-Step: Cleaning vs. Replacing Your Filter
- Troubleshooting: What to Do When the Filter Light Won’t Stay Off
- Preventative Maintenance: Keeping Your Filter (and Microwave) Happy
- Conclusion: A Simple Reset for a Healthy Home Appliance
Why Your GE Microwave Filter Light is On & What “Reset” Really Means
That little “Filter” or “Replace Filter” indicator light on your GE microwave control panel isn’t just being annoying for no reason. It’s your appliance’s way of sending a crucial maintenance alert. But before we dive into the “how,” we need to be crystal clear on the “what.” Understanding this distinction is the most important part of this entire process.
Resetting the filter light is not a magical fix. It is simply you, the user, telling the microwave’s computer, “Hey, I’ve taken care of the filter issue you warned me about.” The microwave has no way of knowing if you actually cleaned the filter or just hit a button. Therefore, the mandatory first step is to perform the physical maintenance on the filter itself. Ignoring this and just resetting the light is like turning off a smoke detector battery without checking for a fire—it leaves your appliance at risk.
GE microwaves, especially over-the-range (OTR) models, work hard. They suck in greasy, smoky air from your stove and push it through filters. The metal mesh grease filter (usually in the bottom of the microwave cavity) catches grease particles and is typically dishwasher-safe. The charcoal filter (often located behind a cover on the top or back) absorbs odors and cooking fumes; this one is not washable and must be replaced every 6-12 months, depending on use. The filter light is triggered by a timer or, on some smarter models, by a sensor detecting reduced airflow. Resetting it tells the timer to start counting down again from zero, or clears the sensor alert after you’ve restored proper airflow by cleaning.
Method 1: The Standard Reset Button (The Easiest Way)
This is the method you’ll use for the vast majority of modern GE microwave models, particularly those manufactured in the last 10-15 years. GE designed this feature for convenience. The dedicated button is usually clearly labeled.
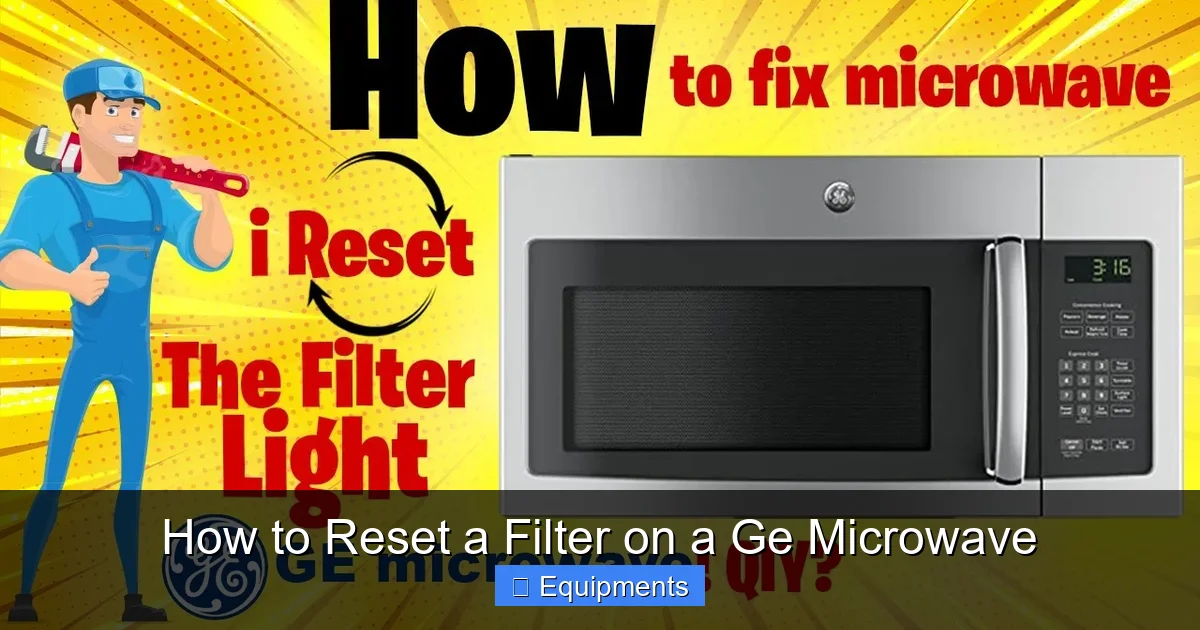
Visual guide about How to Reset a Filter on a Ge Microwave
Image source: i.ytimg.com
Locating the “Filter Reset” Button
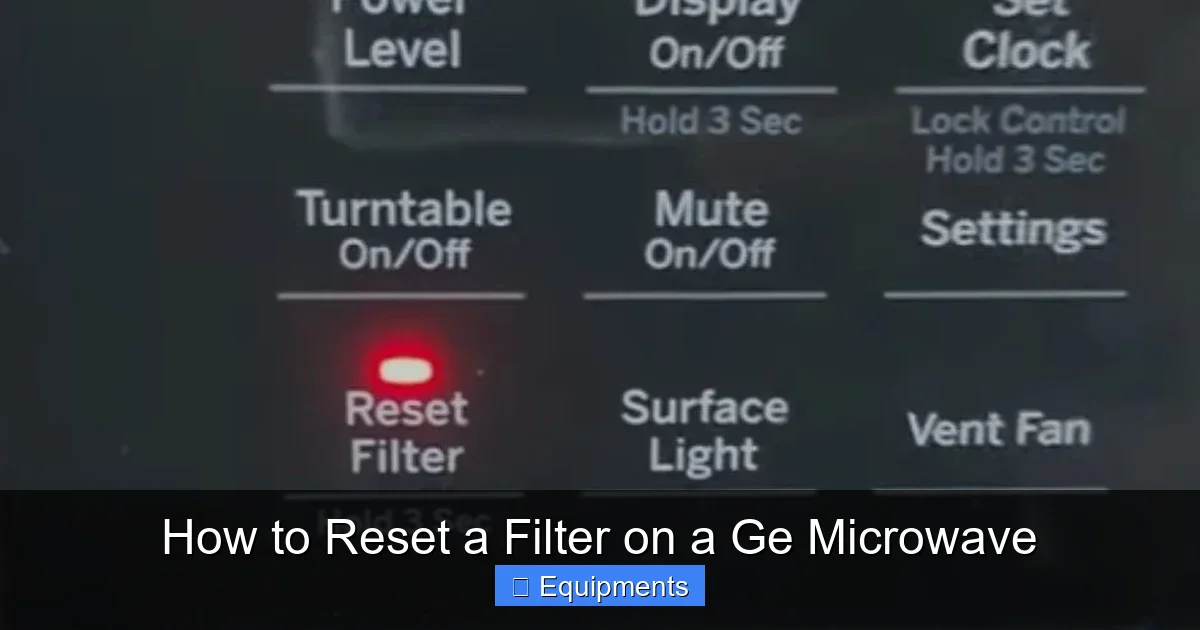
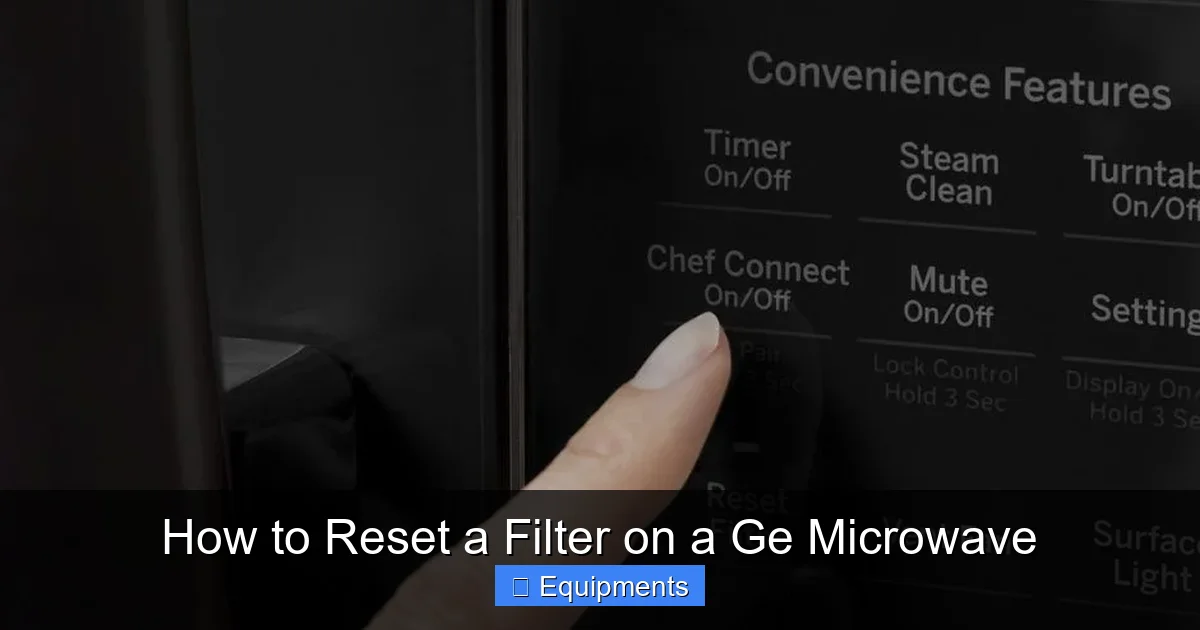
Head to your microwave’s control panel. Look for a button that says one of the following: “Filter Reset,” “Reset Filter,” “Filter,” or sometimes just an icon of a filter. It’s often located near the other feature buttons like “Vent,” “Light,” or “Timer.” On some models, it might be a secondary function accessed by pressing a “Options” or “Settings” button first. The best place to find the exact location is, you guessed it, your owner’s manual. If you don’t have it, you can usually find a free PDF download by searching for your exact model number (found on a sticker inside the door frame or on the back).
Step-by-Step Button Reset Procedure
- Perform the Maintenance First: Remove, clean (or replace) the appropriate filter as described in your manual. Let it dry completely if washed.
- Reinstall the Filter: Make sure it is seated correctly in its housing. An improperly seated filter can cause the light to come back on immediately.
- Press and Hold: Press and hold the “Filter Reset” button for approximately 3 to 5 seconds. You should see the filter light blink or hear a beep, and then it should go out. On some models, you may need to press it twice quickly.
- Confirm: The light should remain off. If it comes back on within a few minutes or after the next cooking cycle, the filter may not be clean enough or isn’t installed properly.
Pro Tip: If you can’t find a dedicated button, look for a sequence. Some GE models require you to press “Vent” then “Start” or another combination. The manual is your ultimate guide here.
Method 2: The Power Cycle Reset (The Universal Fallback)
What if you have an older GE microwave with no obvious reset button? Or what if the button method didn’t work? This is the tried-and-true method that works on virtually any electronic device, including your microwave. It’s called a “hard reset” or power cycle. It forces the appliance’s main control board (the computer) to fully reboot and clear its temporary memory, including the filter timer.
Visual guide about How to Reset a Filter on a Ge Microwave
Image source: quiethome.life
Why Unplugging is the Correct Method
Simply turning the microwave off via the control panel does not cut all power. The microwave is still plugged in and has a small amount of standby power running to the clock and control panel. To perform a true reset, you must remove all power from the unit. This allows the capacitors on the control board to fully discharge, wiping the slate clean.
Step-by-Step Power Cycle Procedure
- Perform the Maintenance First: Again, clean or replace the filter and reinstall it properly.
- Unplug the Microwave: Carefully pull the microwave’s power cord from the wall outlet. If it’s a built-in OTR model and the cord is hard to reach, turn off the dedicated circuit breaker in your home’s electrical panel that supplies power to the microwave. This is the safer, more recommended method for OTR units.
- Wait Patiently: Leave the microwave unplugged (or the breaker off) for a full 5 minutes. This is not an exaggeration. It ensures all residual power is drained.
- Restore Power: Plug the microwave back into the wall, or flip the breaker back on.
- Check the Light: The clock will likely be flashing “12:00” or “0:00.” Set the time if desired. The filter reset light should now be off. If it comes back on after the next use, double-check your filter installation and cleanliness.
Critical Safety Note for Over-the-Range Models: If your GE microwave is mounted over your stove, **do not attempt to unplug it from an outlet behind the range** unless you can safely reach it without stretching over hot burners or pulling the unit. The risk of burns or damaging the microwave’s mounting is high. **Always use the circuit breaker method for OTR installations.**
Finding Your Model Number & Accessing the Filter
All this talk about buttons and power cycles is useless if you can’t find the filter to clean it in the first place! The filter’s location and type are entirely dependent on your specific GE microwave model.
Visual guide about How to Reset a Filter on a Ge Microwave
Image source: quiethome.life
How to Find Your Model Number
This is your golden ticket to the correct instructions. Look for a white or silver sticker on:
- The interior of the door frame (most common).
- The back of the microwave cabinet.
- The bottom of the microwave (if you can access it).
The model number is a string of letters and numbers (e.g., JE1540GW001, JVM3160RFSS, Profile PEM31). Write it down or take a photo.
Typical Filter Locations by Model Type
- Over-the-Range (OTR) Microwaves: The grease filter is almost always a rectangular, mesh-like piece that slides out from the bottom front of the microwave cavity. There is usually a tab or latch to release it. The charcoal filter is typically behind a removable cover on the top or back of the unit (inside the vent hood area). You’ll need to remove a few screws to access it.
- Countertop Microwaves: Grease filters are less common. If present, they are usually a small, circular mesh screen that twists or slides out from the bottom interior. Many countertop models rely solely on a charcoal filter located behind the rear vent grille or inside a top compartment. Some may not have a user-serviceable filter at all, using a permanent, non-replaceable charcoal coating.
Action Step: With your model number in hand, search “[Your GE Model Number] filter location” or download the manual from GE Appliances’ website. This will give you a definitive diagram.
Step-by-Step: Cleaning vs. Replacing Your Filter
Now for the physical work. Remember, the reset is pointless without this.
Cleaning the Metal Mesh Grease Filter
This filter is designed to be cleaned.
- Remove: Slide or lift it out of its housing.
- Soak: Fill your sink with hot water and a generous amount of dish soap or a degreaser (like Simple Green). Soak the filter for 10-15 minutes to loosen caked-on grease.
- Scrub: Use a non-abrasive sponge or soft brush. For stubborn grease, use a paste of baking soda and water or a dedicated oven cleaner (check it’s safe for your filter’s coating).
- Rinse Thoroughly: Ensure all soap and degreaser residue is gone. Any leftover cleaning agent will vaporize in your microwave.
- Dry Completely: Shake off excess water and let it air-dry on a towel for at least 2 hours. Never reinstall a damp filter. You can speed this up with a hairdryer on cool setting.
- Reinstall: Slide it back into its guides until it clicks or seats firmly.
Replacing the Charcoal Filter
This filter cannot be cleaned. It is a consumable item.
- Identify: It’s usually a rectangular, black, fibrous pad enclosed in a plastic or metal frame.
- Access: Remove the vent cover screws as per your manual. The filter will be sitting inside a slot.
- Remove: Gently pull it out. Note its orientation.
- Replace: Buy the exact replacement filter specified for your model (use your model number). GE part numbers often start with “AM” or “WB.” Third-party universal charcoal filters are also available but ensure correct dimensions.
- Install: Slide the new filter into the slot in the same direction the old one came out. Ensure a snug fit.
- Reassemble: Replace the vent cover and screws.
Important: After replacing a charcoal filter, you must perform the reset procedure (button or power cycle) to turn off the filter light.
Troubleshooting: What to Do When the Filter Light Won’t Stay Off
You’ve cleaned or replaced the filter. You’ve followed the reset steps perfectly. But that pesky light is back on after one cooking session. Don’t panic; this is a diagnostic clue.
Common Reasons for a Persistent Filter Light
- Improper Filter Installation: This is the #1 culprit. The filter isn’t seated all the way. Grease filters can be slightly bent; charcoal filters can be inserted backward. Remove it and reinstall, ensuring it fits flush with no gaps.
- Filter Not Clean/Clogged: A grease filter soaked in greasy water may look clean but still have a film that restricts airflow. Soak it longer, use a stronger degreaser, or consider replacing it if it’s old and degraded.
- Wrong Filter Type: You might have accidentally installed a charcoal filter where a grease filter goes, or vice versa. Double-check your manual for the correct part.
- Faulty Reset Button or Control Board: Rare, but possible. If the button feels sticky or unresponsive, or if the light comes back on instantly after a perfect reset, the button itself or the control board’s memory might be failing.
- Vent Duct Blockage: The filter light can also indicate a problem with the entire exhaust system. If the duct that vents the microwave to the outside is clogged with lint, debris, or a bird’s nest, airflow is restricted. The microwave senses this and triggers the filter warning.
Advanced Troubleshooting Steps
- Double-Check Everything: Go through the entire process again: clean/replace, reinstall perfectly, power cycle for 5 minutes.
- Inspect the Vent Path: If accessible, look at the external vent cap on your roof or sidewall. Is it clear of obstructions? You may need a professional duct cleaning.
- Test Vent Function: Hold a thin piece of tissue paper near the vent hood while the microwave’s vent fan is on. Does the paper get sucked up and held firmly? Weak suction indicates a blockage.
- Consult a Pro: If all else fails, the issue may be electrical. A faulty airflow sensor or control board malfunction requires a qualified appliance repair technician. At this point, the cost of a service call might be comparable to the cost of a new microwave, especially on an older unit.
Preventative Maintenance: Keeping Your Filter (and Microwave) Happy
An ounce of prevention is worth a pound of cure (or a costly repair bill).
Establish a Cleaning/Replacement Schedule
Don’t wait for the light! Based on your cooking habits:
- Heavy Cooks (daily frying, greasy foods): Check/clean the grease filter monthly. Replace the charcoal filter every 6 months.
- Moderate Cooks (boiling, steaming, light reheating): Check/clean grease filter every 3 months. Replace charcoal filter yearly.
- Light Cooks (mostly reheating coffee, popcorn): Check/clean grease filter twice a year. Replace charcoal filter every 1-2 years.
Best Practices for Longevity
- Use the Vent Fan: Always turn on the microwave’s vent fan when cooking on the stove below it. This captures grease at the source before it coats the microwave’s interior and filter.
- Use Lids: Cover pots and pans while cooking on the stove to minimize grease-laden steam.
- Wipe Spills Immediately: Clean any food splatters inside the microwave cavity promptly. Burnt-on food can produce smoke, which overloads the filter system.
- Don’t Block Vents: Ensure nothing is stored on top of the microwave (for OTR models) that blocks the intake vents. Keep the area around the external vent cap clear of leaves, snow, or debris.
By incorporating these habits, you’ll extend the life of your microwave, maintain its cooking efficiency, prevent greasy buildup inside the cabinet (which is a fire hazard), and keep that filter light from becoming a nagging nuisance.
Conclusion: A Simple Reset for a Healthy Home Appliance
Resetting the filter light on your GE microwave is the final, official step in a crucial maintenance routine. It’s a simple process—usually a 5-second button press or a 5-minute power cycle—but its importance cannot be overstated. This guide has walked you through the philosophy: reset only comes after maintenance. We’ve covered the two primary reset methods, emphasized the critical need to first identify your model and physically service the correct filter (cleaning the metal mesh, replacing the charcoal), and provided a roadmap for troubleshooting when things don’t go as planned.
Think of your microwave’s filter system as its lungs. A clogged filter makes the appliance work harder, runs less efficiently, heats food more slowly, and creates a fire risk from accumulated grease. That filter light is your appliance’s cough—a signal that it’s struggling to breathe. By responding promptly with the proper cleaning or replacement, followed by the correct reset procedure, you’re not just silencing a beep; you’re performing essential healthcare for a major appliance in your kitchen. You’re ensuring it will be there, reliable and efficient, for all your future popcorn nights and leftover reheatings. Bookmark this guide, find your model number, and make filter maintenance a regular part of your home care routine. Your microwave—and your cooking—will thank you for it.
Frequently Asked Questions
Can I reset the filter light without cleaning the filter first?
Technically, yes, you can press the reset button or unplug the microwave to turn off the light. However, this is strongly discouraged. The light will return very quickly because the underlying issue (a clogged filter) remains. More importantly, operating your microwave with a dirty filter reduces efficiency, increases cooking times, and poses a serious fire hazard due to grease buildup.
My GE microwave has no visible “Filter Reset” button. What do I do?
This is common on older or basic models. Your primary method is the power cycle. Turn off the circuit breaker that powers the microwave (or unplug it if accessible) and leave it off for a full 5 minutes. This hard reset clears the control board’s memory and should extinguish the filter light, provided the filter has already been cleaned or replaced.
I cleaned the filter, but the light came back on after one use. Why?
> This usually indicates one of three issues: 1) The filter was not cleaned thoroughly enough and still restricts airflow. 2) The filter is not seated correctly in its housing. Remove it and reinstall, ensuring it fits perfectly. 3) You have a charcoal filter that needs replacing, not cleaning. Remember, charcoal filters are not washable.
Where is the charcoal filter located in my GE over-the-range microwave?
In most GE OTR models, the charcoal filter is located behind the vent hood grille at the top of the microwave. You’ll need to remove the decorative vent cover (usually held by 2-4 screws) to access it. The filter is a rectangular black pad sitting in a slot. Always refer to your specific model’s manual for the exact location and removal instructions.
How often should I actually replace the charcoal filter?
GE recommends replacing the charcoal filter every 6 to 12 months for optimal performance. The exact timing depends on your cooking frequency and the types of food prepared. Heavy cooking with lots of frying, grilling, or strong-smelling foods (fish, spices) will require more frequent replacement (closer to 6 months). Light use may stretch to a year.
Is it safe to use my microwave while the filter light is on?
While it may still function, you should avoid regular use with the filter light illuminated. A clogged filter severely restricts the vent fan’s ability to remove heat, steam, and grease-laden air from the cooking cavity. This leads to longer cook times, uneven heating, moisture buildup inside the microwave, and significantly increases the risk of a grease fire inside the appliance’s cabinet. Address the filter issue promptly.