Peeling veneer on particle board cabinets is a common issue caused by moisture, age, or poor adhesion. This guide provides a complete, step-by-step process to re-adhere loose veneer, from diagnosing the problem to a flawless finish. You’ll learn the essential tools, the best adhesives for porous particle board, and pro tips for clamping and sanding to achieve professional results. Proper preparation and patience are the keys to a durable, invisible repair that saves you the cost of replacement.
Key Takeaways
- Identify the Root Cause: Always diagnose why the veneer peeled (moisture, heat, original glue failure) before repairing to prevent recurrence.
- Surface Prep is Non-Negotiable: Thoroughly clean and lightly sand both the cabinet base and veneer back to ensure a strong bond; any dust or old glue will cause failure.
- Choose the Right Adhesive: Use a high-quality, water-resistant PVA glue like Titebond III or a construction adhesive for particle board; avoid simple school glue.
- Clamp Strategically: Use caul clamps or weighted boards with protective pads to apply even pressure across the entire repaired area without damaging the veneer.
- Sand Between Coats: Lightly sand with fine-grit sandpaper (220+) after each finish coat to achieve a perfectly smooth, seamless surface ready for paint or stain.
- Finish to Match: Repair the finish with careful painting, staining, or applying a new veneer edge band to blend the repair seamlessly with the surrounding cabinet.
- Prevent Future Damage: Control kitchen humidity, avoid direct water spray on cabinets, and use trivets and mats to protect surfaces from heat and moisture.
📑 Table of Contents
- Understanding the Enemy: Veneer, Particle Board, and Why They Separate
- Gathering Your Arsenal: Tools and Materials for a Professional Repair
- The Step-by-Step Repair Process: From Bubble to Beautiful
- Prevention Strategies: Keeping Your Cabinets Looking New
- When Repair Isn’t Enough: Signs It’s Time for Replacement
- Conclusion: Confidence in Your Craft
Understanding the Enemy: Veneer, Particle Board, and Why They Separate
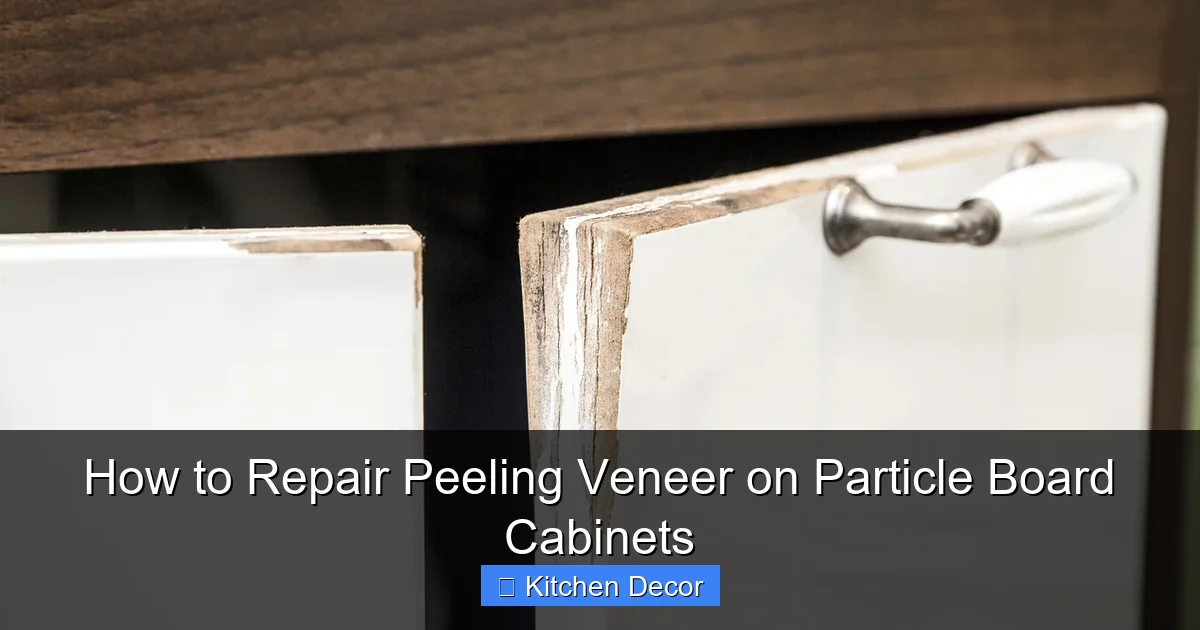
Let’s start with the basics. Veneer is a super-thin layer of real wood, often just 1/50th of an inch thick, that’s glued onto a substrate. In your cabinets, that substrate is almost certainly particle board. Particle board is made from wood chips, shavings, and resin pressed into sheets. It’s cheap, stable when dry, and provides a flat surface for veneer. But it has a critical weakness: it hates water. When particle board gets wet, the resin bonds weaken, and the board swells. This swelling puts immense stress on the brittle veneer layer glued to its surface.
The original glue bond between the veneer and the particle board fails for a few main reasons. The most common culprit is moisture—from steam, leaks, or even excessive cleaning with a wet cloth. Heat from a dishwasher or oven can also dry out and brittle the glue over time. Sometimes, the original manufacturing glue was just poor quality or didn’t get enough pressure during application. You’ll know you’re dealing with a veneer issue when you see a lift or bubble in the surface. It might feel like a small blister or a large section that’s completely detached. The edges are especially vulnerable. Your mission is to re-establish that bond without creating a lump or a visible seam.
Diagnosing the Damage: How Bad Is It Really?
Before you buy a single tube of glue, you need to play detective. Gently probe the lifted area with your fingernail or a plastic putty knife. Is the veneer completely detached, with a clear gap underneath? Or is it partially adhered, with a soft, hollow sound when you tap it? A partial failure is easier to fix. You also need to check the particle board underneath. If it’s swollen, soft, or crumbly, the substrate itself is damaged. You can glue veneer to sound particle board, but you cannot glue it to a mushy, degraded core. In that case, you might need to build up the area with a wood filler or consider replacing that cabinet side entirely. Also, assess the size. A small 2-inch bubble is a simple fix. A 12-inch peel along a cabinet side requires more clamping strategy and patience.
Gathering Your Arsenal: Tools and Materials for a Professional Repair
Having the right tools makes this job 10 times easier and yields a 10 times better result. Don’t try to do this with Elmer’s glue and your hands. Here’s your essential checklist, broken down by function.
Visual guide about How to Repair Peeling Veneer on Particle Board Cabinets
Image source: handhillscabinets.com
Adhesives: The Heart of the Bond
This is the most important decision. For particle board, you need a glue that can penetrate the porous surface and create a flexible, water-resistant bond.
- Waterproof PVA Glue (Titebond III or Gorilla Wood Glue): My top recommendation. It cleans up with water, has good initial tack, and is waterproof when dry. Titebond III is specifically rated for exterior use, making it ideal for kitchen environments.
- Construction Adhesive (Liquid Nails or PL Premium): Excellent for large areas or very porous, damaged particle board. It’s thicker, has incredible gap-filling ability, and a very strong bond. It’s harder to clean up and requires mineral spirits, so use it sparingly and precisely.
- Contact Cement: The classic veneer glue. You apply it to both surfaces, let it get tacky (usually 15-20 minutes), then press together. It creates an instant, permanent bond with no clamping needed. The downside? It’s messy, fumes are strong, and you get one shot to position the veneer perfectly. Best for experienced DIYers or very small, precise repairs.
Pro Tip: Avoid basic carpenter’s glue (like Titebond Original) for this job in a kitchen. While strong, it’s not fully waterproof and can fail with repeated steam and humidity cycles.
Clamping and Pressure Tools
You cannot skip pressure. The glue needs to be squeezed into the pores of the particle board and the veneer back.
- Caul Clamps (or F-Clamps): These are ideal. The wide, flat bar distributes pressure evenly over a large area without denting the delicate veneer. You’ll need at least two, spaced every 6-8 inches along the repair.
- Weight and Flat Boards: For large, flat areas like cabinet sides, you can use heavy books, bags of rice, or flat pieces of wood (like a 1×4) as weights. Place a protective layer of wax paper or plastic between the weight and the veneer to prevent sticking.
- Painter’s Tape: The unsung hero. Use it to temporarily hold the veneer in place while you position your clamps, and to protect adjacent cabinet surfaces from glue squeeze-out.
Finishing and Prep Supplies
- Fine-Grit Sandpaper (220+ grit): For smoothing glue lines and prepping for finish. A sanding block is essential for flat surfaces.
- Tack Cloths or Microfiber Rags: To remove every speck of dust after sanding.
- Utility Knife or Razor Blade: For scoring and trimming excess veneer.
- Wood Putty or filler: To repair any damaged particle board substrate or small gaps before gluing.
- Your Cabinet’s Finish: Matching paint, stain, or polyurethane is crucial for a seamless blend.
The Step-by-Step Repair Process: From Bubble to Beautiful
Now, let’s get our hands dirty. This process is methodical. Rushing any step will lead to a visible lump or a future failure. Work in a well-ventilated area and protect your countertops.
Visual guide about How to Repair Peeling Veneer on Particle Board Cabinets
Image source: handhillscabinets.com
Step 1: Preparation and Removal
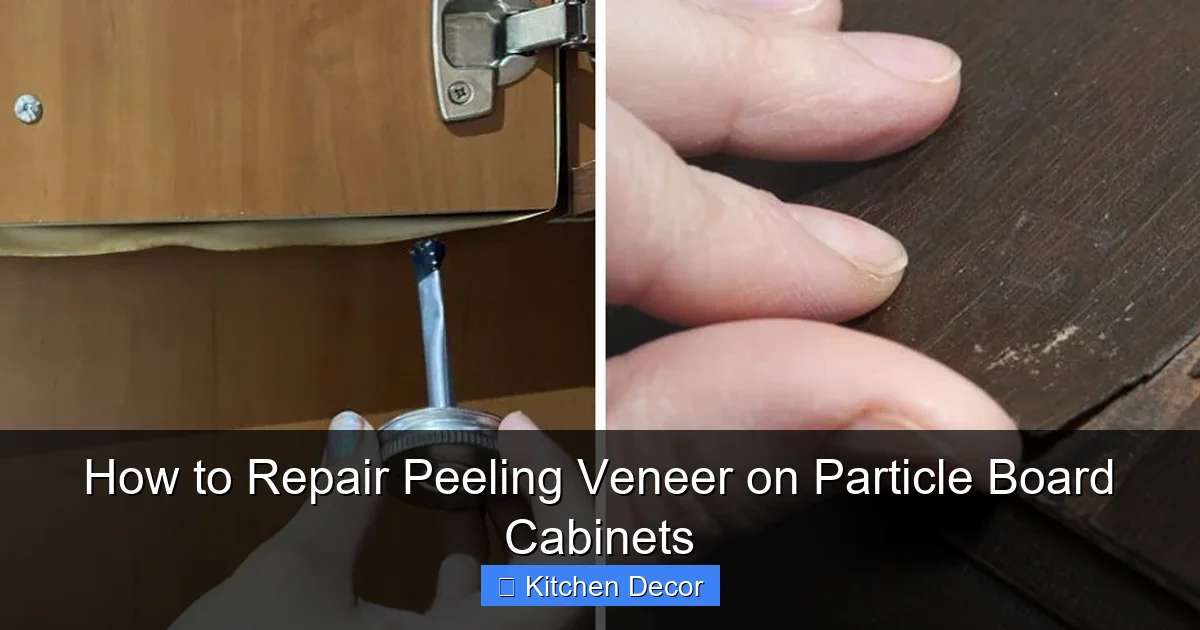
First, you must access the problem area. If the veneer is only partially lifted, carefully work a thin, flexible putty knife or a credit card under the edge to gently separate the veneer from the substrate. Go slowly. Your goal is to create enough of a gap to apply glue, not to rip the veneer off completely. If it’s fully detached, simply lift it. Once the area is accessible, scrape away ALL old, hardened glue from both the back of the veneer and the particle board surface. This is critical. New glue will not bond to old glue. Use a plastic scraper to avoid gouging. Next, lightly sand both surfaces with 120-grit sandpaper. You’re not removing material, just deglazing the surfaces to give the new glue something to grip. Wipe everything down with a tack cloth until it’s perfectly clean and dust-free.
Step 2: Repairing the Substrate (If Needed)
Inspect the exposed particle board. If it’s pitted, swollen, or has chunks missing, you must fill it. Use a water-based wood filler that is sandable and paintable. Apply it with a putty knife, overfilling the damaged area slightly. Let it cure completely per the manufacturer’s instructions, then sand it perfectly smooth and flush with the surrounding surface. This ensures your clamped veneer won’t have a hollow spot underneath.
Step 3: Glue Application
This is the core of the repair. Apply a thin, even layer of your chosen adhesive to the particle board surface. For PVA glue, a roller or a glue spreader works best to get a consistent, film-like coat. Don’t glob it on. Excess glue will squeeze out and create a mess. If you’re using contact cement, apply it to both the board and the veneer back, wait for it to become tacky (touch test with a knuckle—it should feel dry but not stick to your finger), then proceed. For our PVA method, immediately after applying glue to the board, apply a very light second coat to the back of the veneer. This double-glue technique prevents the veneer from sucking all the moisture from the glue too quickly, which can weaken the bond.
Step 4: Positioning and Clamping
This step requires a steady hand and a plan. Do not apply glue until you are 100% ready to clamp.
- Test-fit the veneer piece without glue to ensure it aligns perfectly with the edges and grain pattern. Use painter’s tape as a hinge to hold it in place while you test.
- Once aligned, apply the glue as described.
- Carefully lower the veneer into position. Use a soft rubber mallet or a block of wood to gently tap it down from the center outward, pushing out any air bubbles.
- Immediately begin clamping. Place a protective wax paper square over the veneer where the clamp pad will sit. Position your caul clamps along the length of the repair, alternating sides if possible. Tighten them firmly and evenly, but not so hard that you crush the veneer or cause it to buckle. You should see a small, even bead of glue squeeze out all around the edges—this indicates good contact. If you’re using weights, ensure the flat board covers the entire repair and the weight is distributed evenly.
- Wipe away any excess glue that squeeeps out with a damp cloth before it dries. Dried glue is a nightmare to remove from veneer.
- Let the glue cure completely. Check the manufacturer’s time, but for PVA, this is usually 30-60 minutes under clamp, with full strength in 24 hours. Do not rush this.
Step 5: Trimming, Filling, and Sanding
After the glue is fully cured, remove the clamps. You may have a slight overlap or a rough edge where the veneer meets the cabinet face. Use a sharp utility knife and a straight edge to carefully score and trim any overhanging veneer. The goal is a perfectly flush seam. Next, inspect the seam. If there’s a tiny gap or line, use a wood putty that matches your cabinet color to fill it. Apply it sparingly with a putty knife, let it dry, then sand it smooth with 220-grit sandpaper. Now, sand the entire repaired area and a slight border into the surrounding cabinet surface. This “feathering” removes the slight ridge from the new veneer and creates a uniform texture for finishing. Sand with the grain. Wipe clean with a tack cloth.
Step 6: Finishing to Perfection
This is where the magic happens. Your repair is structurally sound but visible. Now you make it invisible.
- For Painted Cabinets: Prime the repaired area with a stain-blocking primer (like an oil-based or shellac-based primer) to prevent any tannins from the wood veneer from bleeding through. Then, carefully apply your cabinet paint in thin, even coats. You will likely need 2-3 coats. Sand lightly with 320-grit sandpaper between coats for a glass-smooth finish. The final coat should be feathered into the existing paint.
- For Stained Cabinets: This is trickier. You must match the existing stain color exactly. Test on a scrap piece of similar wood first. Apply the stain with a brush or cloth, let it sit for a few minutes, then wipe off excess. It may take multiple thin coats to build color to match. Once the stain is dry, apply a clear finish (like a water-based polyurethane) in thin coats, sanding lightly between each. The final coat should be applied to the entire cabinet door or face panel if possible to ensure a uniform sheen.
Pro Finishing Tip: If the cabinet has a complex grain pattern or a glazed finish, you may need to replicate that effect on the new veneer. Practice on a hidden area or a scrap. Sometimes, the best approach for a highly visible area is to refinish the entire cabinet door for a truly seamless look.
Prevention Strategies: Keeping Your Cabinets Looking New
A repair is a fix, but prevention is the real victory. Once you’ve restored your cabinets, implement these habits to ensure the peeling doesn’t return.
Moisture is Public Enemy #1
Particle board’s kryptonite is water. Never wipe down cabinets with a soaking wet cloth. Use a damp cloth, wrung out thoroughly, followed immediately by a dry microfiber towel. Install and use a range hood vent that exhausts outside to remove cooking steam. Wipe up any water spills or condensation on the countertop immediately, especially around the sink. Consider placing a mat or tray under the dish rack to catch drips.
Visual guide about How to Repair Peeling Veneer on Particle Board Cabinets
Image source: thehomenix.com
Heat Management
Don’t place hot pots, pans, or baking sheets directly on the countertop edge or cabinet face. Always use trivets and hot pads. The heat can dry out and embrittle the glue over time, and the thermal expansion can stress the veneer bond.
Gentle Cleaning
Avoid harsh, ammonia-based cleaners or abrasive scrubbers. They can strip the finish and damage the veneer’s surface, creating pathways for moisture. Use a mild dish soap diluted in water or a cleaner specifically designed for wood cabinets.
Hardware Check
Loose cabinet hinges and drawer slides can cause doors and drawers to sit crookedly, putting uneven stress on the cabinet frame and its veneer. Periodically tighten all screws. If a screw hole in particle board is stripped, use a toothpick and wood glue to fill it before re-driving the screw.
When Repair Isn’t Enough: Signs It’s Time for Replacement
Not all damage is salvageable. There comes a point where a repair is more work than it’s worth or simply won’t hold. Here are the red flags:
- Extensive Water Damage: If the particle board core is swollen, soft, or crumbling over a large area, no glue will adhere to it. The structural integrity is compromised.
- Multiple Layers of Peeling: If you have a large area where the top veneer is gone and the layer beneath is also delaminating, you’re looking at a full re-veneering job, which is complex and often not cost-effective for particle board.
- Severe Warping: If the entire cabinet side or door has warped due to moisture, clamping it flat for a veneer repair will be nearly impossible and unlikely to last.
- Cost vs. Value: If your cabinets are very old, low-quality, or you’re planning a full kitchen remodel soon, investing hours in a meticulous repair may not be the best use of your time. Sometimes, replacing a single damaged cabinet door or side panel is the most practical solution.
For a single, sound panel with isolated peeling, however, the repair method detailed above will give you many more years of service and save significant money.
Conclusion: Confidence in Your Craft
Repairing peeling veneer on particle board cabinets isn’t magic—it’s meticulous, patient work. It combines the right materials with a disciplined process: diagnose, prepare, glue with the right adhesive, clamp with even pressure, sand meticulously, and finish with care. You are not just gluing wood; you are restoring the structural and aesthetic integrity of your kitchen. The satisfaction of fixing what seems broken, of seeing that seamless line where the bubble once was, is immense. You’ve conquered a common household problem with skill and saved your hard-earned money. Now, step back, admire your handiwork, and enjoy cabinets that look as good as they function. Remember, the key to longevity is in the prevention—treat those particle board cores with respect, keep the moisture at bay, and your repair will last for years to come.
Frequently Asked Questions
Can I use regular wood glue (like Titebond Original) for this repair?
You can, but it’s not recommended for kitchen cabinets. Regular PVA glue is not fully waterproof. The high humidity and steam in a kitchen can eventually cause the bond to fail. For a durable repair in a moist environment, always choose a waterproof PVA (like Titebond III) or a construction adhesive.
How long do I need to clamp the veneer?
Clamp time depends on the adhesive. For waterproof PVA glues, clamp for at least 30-60 minutes to achieve initial tack. However, do not stress or handle the repair for 24 hours to allow the glue to reach full strength. Contact cement bonds instantly and requires no clamping once the surfaces are pressed together.
What if the veneer cracks when I’m trying to lift it?
Small, hairline cracks are common and can be filled during the finishing process. If a large section cracks or breaks, you have two options: 1) Carefully glue the crack back together as part of the overall repair, using a fine-tip glue bottle to get adhesive into the seam, or 2) If the piece is lost, you may need to source a matching veneer patch, which is a more advanced technique involving steaming and careful trimming.
My cabinet has a raised panel design. Can I still repair the veneer on the raised part?
Yes, but it’s more challenging due to the curves. You’ll need to use smaller, more numerous clamps or a creative weighting system (like a bag of rice conforming to the shape). The key is consistent pressure across the entire curved surface. Take your time with positioning and clamping to avoid creating new creases in the veneer.
Is there a way to repair the veneer without removing the old, failed glue?
No. For a successful, long-lasting bond, you must have two clean, sound surfaces. Any old, hardened glue acts as a barrier and will prevent the new adhesive from bonding directly to the particle board and veneer. Skipping the scraping and sanding step is the number one reason for repair failure.
Can I just paint over the peeling veneer instead of repairing it?
Painting over a lifted veneer is a temporary cosmetic fix that will fail. The paint will crack and peel along with the veneer underneath. The only proper way to paint over a veneer problem is to first re-adhere or remove the loose veneer, repair the substrate, and then prime and paint the entire, stable surface. Otherwise, you’re just painting a problem that will soon reappear.