Putting up shelves without brackets is easier than you think and creates a stunning, minimalist look perfect for kitchens. We explore five reliable bracketless methods, from hidden floating shelves to strong adhesive strips and clever tension systems. Each technique has specific weight limits and wall-type requirements, so you can choose the perfect solution for your space and storage needs.
Let’s be honest: those clunky, L-shaped brackets under every shelf can kind of ruin the aesthetic. They interrupt clean lines, collect dust, and shout “temporary fix!” But what if you could have beautiful, sturdy shelving that looks like it’s magically floating on your wall? The secret is learning how to put shelves up without brackets. This isn’t a one-trick pony; it’s a whole philosophy of storage that prioritizes sleek design and smart engineering. In the kitchen—a room full of gadgets, dishes, and decorative pieces—bracketless shelves can transform your space from cluttered to curated. Whether you’re a renter forbidden from drilling or a homeowner craving a high-end look, this guide will walk you through every method, tool, and safety tip you need to know.
We’re going to demystify the process. You’ll learn about the hardware hidden inside the wall, the science of industrial-strength adhesives, and the clever use of tension and gravity. Forget the visual noise of brackets. It’s time to embrace storage that disappears, leaving only your beautiful kitchenware and decor on full display. Let’s get started.
Key Takeaways
- Floating shelves use internal supports for a seamless look: They require precise installation into wall studs or with heavy-duty anchors for maximum strength, ideal for displaying dishes and decor.
- Adhesive systems are renter-friendly for light loads: Heavy-duty strips like 3M Command provide a drill-free option for spices, small plants, and utensils on smooth, non-porous surfaces.
- Tension rods and ceiling hooks create storage without wall attachment: Perfect for renters or tile walls, using pressure between walls or hanging from the ceiling for pots, pans, and herbs.
- Wall type dictates your method and hardware: Drywall, plaster, tile, and concrete all require different anchors and techniques; always verify your wall material before starting.
- Weight capacity is the non-negotiable rule: Never exceed the manufacturer’s rated weight for your chosen system, and distribute weight evenly to prevent failure.
- Proper surface preparation ensures adhesion and longevity: Clean walls with isopropyl alcohol, ensure they are completely dry, and avoid porous or textured surfaces for adhesive solutions.
- Safety and precision trump speed: Use a level, measure twice, and test with minimal weight first. When in doubt, consult a professional for heavy or valuable items.
📑 Table of Contents
- Method 1: The Classic Floating Shelf with Hidden Supports
- Method 2: Heavy-Duty Adhesive Strips & Tracks
- Method 3: Tension Rods and Ceiling Hooks (No-Wall-Attachment)
- Method 4: Decorative L-Brackets and Corbels That Disappear
- Method 5: Creative and Unconventional Bracketless Ideas
- Safety, Weight, and Wall-Type Master Guide
- Conclusion: A Clean Look is Within Your Reach
Method 1: The Classic Floating Shelf with Hidden Supports
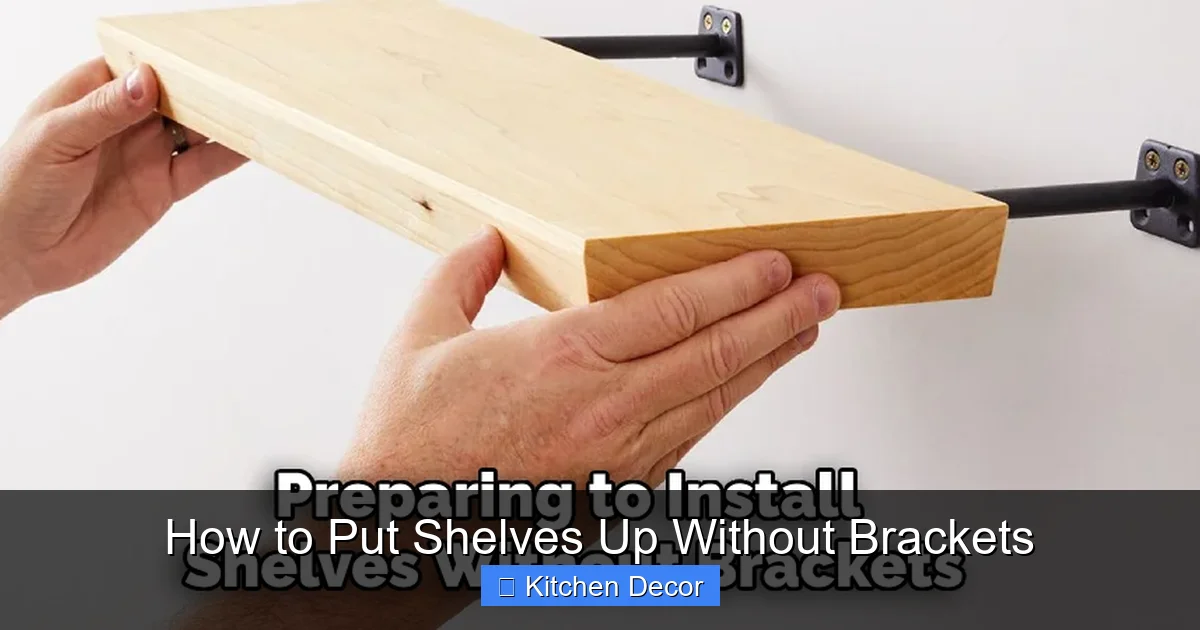
When people think of “shelves without brackets,” this is the image that comes to mind: a sleek plank of wood, stone, or metal seemingly defying gravity. The magic happens inside the wall. This method offers the highest weight capacity and most permanent, professional-looking result, making it perfect for kitchen essentials like heavy plates, cookbooks, or stoneware.
How It Works: The Internal Support System
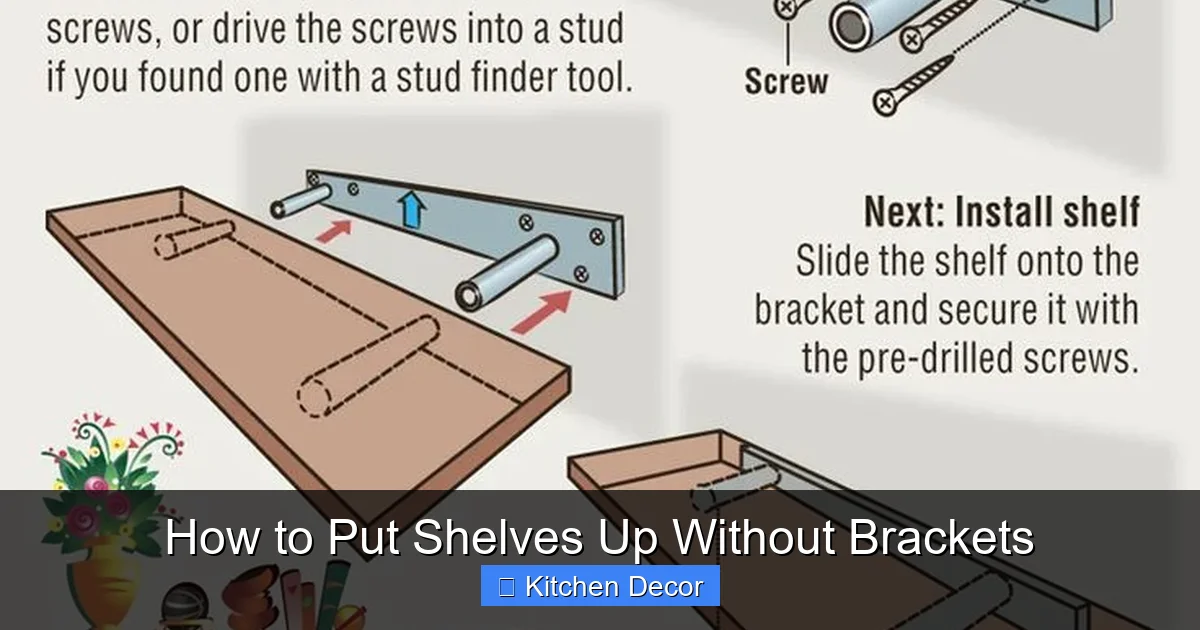
True floating shelves rely on a support system mounted *inside* the shelf and anchored deep into the wall. The most common system is a metal rod or cleat. One half of the bracket is secured to the wall’s structural members (studs), and the other half is recessed into a channel carved into the back of the shelf. The shelf slides onto the wall-mounted cleat, hiding all hardware. Another popular method uses solid steel supports that are inserted into holes drilled through the shelf from underneath, then secured into the wall.
Step-by-Step Installation Process
1. Locate Your Studs: This is the most critical step. Use a reliable stud finder to mark the center of each stud where you want your shelf. For a 24-inch deep shelf, you’ll typically need supports at both ends and possibly in the middle for longer spans. Mark these points carefully.
2. Prepare the Shelf: If using a cleat system, route a straight, clean channel along the entire back of your shelf. The channel must perfectly match the width and depth of your wall cleat. If using individual supports, drill the corresponding holes from the bottom of the shelf up, ensuring they are perfectly plumb.
3. Mount the Wall Hardware: Secure the wall-mounted half of your bracket system (the cleat or individual support sockets) to the studs using long, sturdy wood screws (e.g., 2.5-3 inch). For heavy loads, use lag bolts. Ensure it is perfectly level using a long spirit level.
4. Install the Shelf: Carefully lift the shelf and slide it onto the mounted cleat or insert the supports into the sockets. It should fit snugly and securely. You may need to use a mallet for a tight fit, but never force it.
5. Secure (Optional but Recommended): For absolute security, especially in a high-traffic kitchen, you can drill a small pilot hole through the side of the shelf into the wall cleat and insert a small set screw. This prevents any potential lifting off.
Kitchen-Specific Tips & Material Choices
- Wood: A classic choice. Hardwoods like oak, maple, or walnut handle weight best. Seal the wood thoroughly with a food-safe oil or polyurethane to protect against moisture and spills common in kitchens.
- Butcher Block: Excellent for a rustic, functional kitchen look. It’s sturdy and can be easily sanded and re-oiled.
- Metal: Steel or powder-coated aluminum shelves offer a modern, industrial vibe and are incredibly strong. They are also moisture-resistant.
- Reclaimed Wood: Adds character. Ensure it is properly cleaned, de-barked, and kiln-dried to prevent warping or pests. Test its weight capacity—old, dry wood can be brittle.
Pro Tip: For a kitchen island or a very long, continuous shelf run, use multiple cleat sections joined end-to-end. The seam will be hidden under the shelf.
Method 2: Heavy-Duty Adhesive Strips & Tracks
This is the holy grail for renters and anyone who absolutely cannot put holes in their walls. Modern adhesive technology has come a long way. Systems like 3M Command and FIXALL use powerful, removable strips that bond to both the wall and the shelf, creating a strong mechanical hold. This method is best for light to medium kitchen items.
Visual guide about How to Put Shelves Up Without Brackets
Image source: thekitchenix.com
Understanding Weight Limits and Surface Requirements
This is non-negotiable. Every adhesive package lists a maximum weight limit per strip and per total shelf. Never exceed it. A typical large Command strip might hold 4-7 pounds individually. A small shelf with four strips might safely hold 16-28 pounds total—think spices, a few small mugs, a tiny plant, or utensils. These strips require a smooth, non-porous, clean surface. They work brilliantly on painted drywall (without texture), glass, tile, and metal. They will fail on popcorn ceilings, heavily textured walls, unfinished wood, or any surface that isn’t perfectly smooth.
Installation: The Critical Steps for Success
1. Surface Prep is Everything: Clean the wall and the shelf contact points with isopropyl (rubbing) alcohol. Use a lint-free cloth. Any grease, dust, or soap residue will compromise the bond. Let it dry completely.
2. Apply Strips Correctly: Press the adhesive strips firmly onto the *back of the shelf* for the recommended time (usually 30 seconds). Then, press the shelf onto the wall with firm, even pressure for another 30+ seconds. Do not slide the shelf once it touches the wall.
3. Wait the Full Cure Time: This is where most people fail. The instructions will say “wait 1 hour” before applying light weight, but for maximum strength, especially in a kitchen where you’ll be adding and removing items, wait the full 24-72 hours before loading the shelf. Patience is key.
4. Removal: To remove, gently pull straight down on the tab. It should release cleanly. If any adhesive residue remains, use a hairdryer to warm it and rub gently with a finger. Never use sharp tools.
Best Kitchen Applications for Adhesive
- Inside cabinet doors for spice racks.
- A small shelf on the side of a fridge for olive oil and vinegar.
- A narrow “ladder” shelf in a tight space for tea towels and small tools.
- On the smooth tile backsplash behind the sink for dish soap and sponges.
- On the inside of a pantry door for snacks or packets.
Warning: Do not use adhesive strips for anything heavy, sharp, or breakable in a high-use area. A falling glass bowl is a safety hazard. Stick to the weight limit religiously.
Method 3: Tension Rods and Ceiling Hooks (No-Wall-Attachment)
Why attach to the wall at all? This clever method uses pressure or ceiling suspension to create storage. It’s 100% renter-safe and works on any wall type, including delicate tile or glass.
Visual guide about How to Put Shelves Up Without Brackets
Image source: i.pinimg.com
The Tension Rod Shelf System
This is brilliantly simple. You use two or more sturdy tension rods (the kind for shower curtains or closet organizers) and a flat shelf board. The rods are extended between two opposing walls or between a wall and a cabinet side. The shelf board rests on top of the rods. The friction and downward pressure hold everything in place.
- Ideal For: Narrow spaces between appliances, inside a deep cabinet, or across a window nook.
- Weight Capacity: Depends entirely on the tension rod’s rating and the friction of your walls. Expect 10-20 lbs total if installed securely. Don’t overload.
- Installation: Measure precisely. Extend the rods until they are very snug against the walls. For extra security on smooth surfaces, add a little non-slip shelf liner or rubber pad between the rod ends and the wall.
Ceiling-Suspended Pot Racks & Shelves
This is a stunning, professional-kitchen look. You hang a shelf or a grid from the ceiling using heavy-duty ceiling hooks and chains or wrought-iron rods. The weight is transferred to the ceiling joists, not the walls.
- You Must Find Ceiling Joists: Use a stud finder on the ceiling. You cannot anchor these into drywall alone. The hooks must screw directly into solid wood joists.
- Hardware: Use lag screws and heavy-duty eye hooks rated for at least 50 lbs each. For a long shelf, use multiple hooks.
- Perfect For: Displaying beautiful copper pots, hanging herb baskets, or storing bulky items like stockpots and colanders, freeing up cabinet space.
- Considerations: Ensure you have enough headroom. This method is not suitable for very low ceilings. Also, consider the visual impact—it’s a bold statement.
Creative Tension-Based Alternatives
Think beyond rods. You can use a long, sturdy wooden dowel with end caps that press against walls. Or, for a corner, use a corner tension shelf that pushes against two perpendicular walls. These are widely available and create instant, drill-free storage.
Method 4: Decorative L-Brackets and Corbels That Disappear
Okay, we said “without brackets,” but hear us out. Sometimes the solution is to use brackets that are so small, so decorative, or so cleverly hidden that they become part of the design rather than an eyesore. This is a compromise that offers great strength with minimal visual impact.
Visual guide about How to Put Shelves Up Without Brackets
Image source: wikihow.com
The “Invisible” Metal Angle
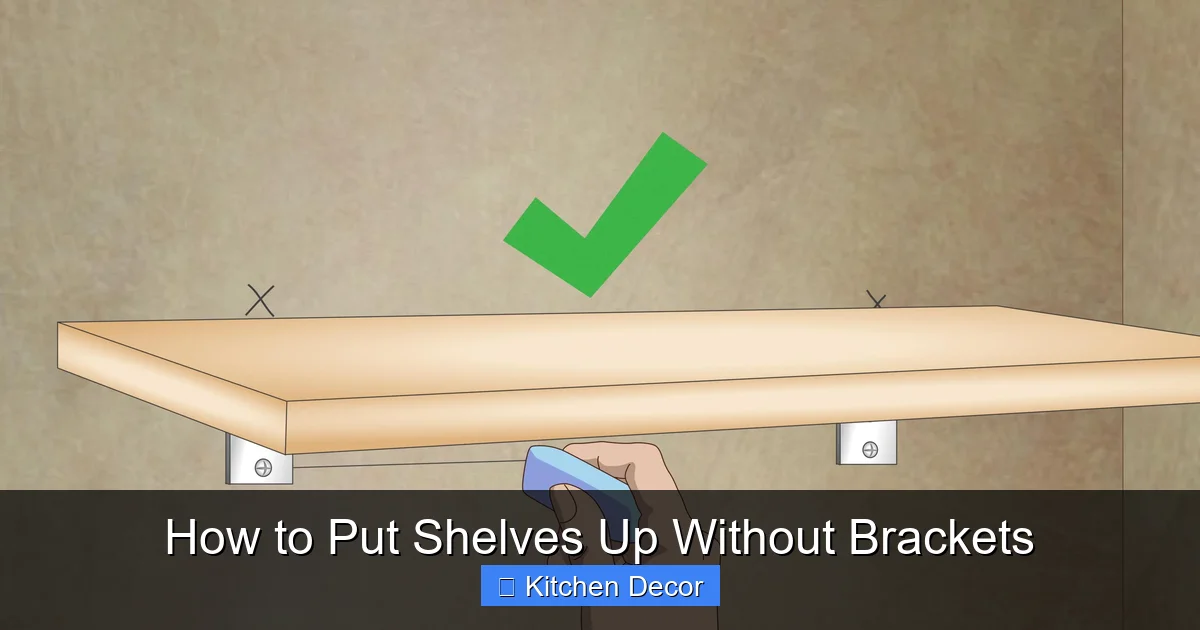
Instead of bulky decorative brackets, use small, matte-black or brushed nickel steel angle irons (1”x1” or 2”x2”). Paint them the same color as your wall or shelf. Install them so the shelf sits *on top* of them, with the front edge of the bracket set back several inches from the shelf’s front. From the front, you see only the shelf. This works great with floating-style shelves where you want the illusion but need the security of a mechanical attachment, especially on plaster walls where stud finding is tricky.
Using Corbels as Decorative Supports
A corbel is a decorative bracket, often ornate and made of wood or stone. Instead of hiding it, make it a feature. Choose a corbel style that matches your kitchen’s theme (e.g., a craftsman-style corbel for a rustic kitchen). Secure it to the wall with screws into studs, then place the shelf on top. The corbel becomes a beautiful architectural element, not an eyesore. For a truly hidden look, use a “kneehole” corbel that is designed to be mostly concealed under the shelf overhang.
Method 5: Creative and Unconventional Bracketless Ideas
Let’s get inventive. Sometimes the best solution isn’t in the hardware aisle but in the furniture or garage section.
The Ledge and Lip Method
Install a simple, narrow wooden ledge (a “display ledge”) directly onto the wall with small screws or adhesive. Then, place your actual shelf—a beautiful slab of marble or thick wood—on top of this ledge. The ledge acts as a hidden support. You could even use a ceramic tile or a metal angle as the hidden ledge. This is excellent for a narrow, continuous shelf above a countertop.
Using Existing Architecture
Look for opportunities in your kitchen’s existing structure. Can you place a shelf on top of a sturdy window sill? Between two cabinets? On top of a deep base cabinet? Sometimes the “wall” is already there, you just need to add the horizontal surface. A simple board laid across two sturdy surfaces (with non-slip pads underneath) can be a perfect, zero-installation shelf.
The Magnetic Shelf for Metal Surfaces
If you have a stainless steel refrigerator or a metal backsplash, you can use strong neodymium magnets embedded in the corners of a lightweight shelf (like a thin acrylic or balsa wood shelf). This is for ultra-light loads only—a few spice jars, a small notepad. It’s the ultimate temporary, no-mark solution.
Safety, Weight, and Wall-Type Master Guide
Before you buy a single shelf, you must master this section. All the methods above will fail if you ignore these fundamentals.
Identifying Your Wall Material
This dictates everything. Tap the wall. A hollow sound is drywall. A solid, dense sound could be plaster, concrete, or masonry. Drywall: Must anchor into studs for heavy loads. Use plastic anchors for light loads in the drywall between studs, but know their limits. Plaster: Older, harder. Often requires special plaster anchors or finding the wood lath behind. Tile: Requires a masonry drill bit and tile anchors (like toggle bolts that expand behind the tile). Risk of cracking tile is high—proceed with caution or use adhesive/tension methods. Concrete/Brick: Requires a hammer drill and concrete anchors ( sleeve anchors or wedge anchors).
The Golden Rules of Weight Distribution
- Heavy items go on the ends or over supports. The center of a long span is the weakest point. Place heavier items like stand mixers or stoneware near the shelf’s ends, directly over a support cleat or anchor point.
- Distribute weight evenly. Don’t put all the weight on one side. This creates torque that can pry the shelf off its supports.
- Factor in dynamic weight. Are you pulling items off the shelf? Will children bump into it? Add a 25-50% safety margin to the static weight capacity.
When to Call a Professional
If you are installing a massive floating shelf to hold dozens of heavy items, if your ceiling is low and you’re hanging something substantial, or if you’re unsure about your wall’s structure, consult a professional handyman or contractor. The cost of a consultation is less than the cost of repairing a collapsed shelf and damaged kitchenware. For renters, always get written permission from your landlord before making any modifications, even minor ones.
Conclusion: A Clean Look is Within Your Reach
Putting up shelves without brackets isn’t a magic trick—it’s a deliberate choice that combines design savvy with practical know-how. You now have a toolkit of solutions, from the rock-solid permanence of hidden floating cleats to the renter-friendly magic of adhesive strips and tension rods. The key is matching the method to your specific kitchen context: your wall material, your weight requirements, your rental status, and your design vision.
Start by assessing your wall and what you want to store. Need a showcase for your favorite ceramic collection? Invest in a properly installed floating shelf. Just need a spot for olive oils in a rental? Heavy-duty adhesive strips on the tile backsplash are perfect. Dreaming of a pot rack? Look to the ceiling joists. By embracing these bracketless techniques, you move beyond the limitations of visible hardware. You create a kitchen that feels open, intentional, and beautifully modern. The clean lines you’ve always wanted are not only possible—they’re surprisingly achievable. Now, measure your wall, choose your method, and get building. Your perfectly curated kitchen awaits.
Frequently Asked Questions
Can floating shelves without brackets hold heavy items like dishes and appliances?
Yes, but only if they are properly installed into wall studs or with heavy-duty anchors rated for the weight. The support system (cleat or steel rods) must be robust, and weight should be distributed evenly, with heaviest items placed over the supports. Always check the manufacturer’s weight rating for your specific shelf and hardware.
Are adhesive strip shelves safe to use in a kitchen near the stove or sink?
They can be, with caution. Adhesive bonds can be weakened by heat, steam, and grease. Avoid placing them directly next to the stove or in the splash zone of the sink. Use them on walls away from major moisture and heat sources for items like spices or decorative pieces. Ensure the wall surface is clean and dry at installation.
What is the best bracketless shelf method for a renter?
The best options are those causing zero damage: heavy-duty adhesive strips (on approved surfaces), tension rod systems between walls or cabinets, and ceiling-suspended racks anchored into ceiling joists (get landlord approval). Always review your lease agreement before installing anything.
How do I know if my wall can support a floating shelf?
You must locate the wall studs using a stud finder. For drywall, the strongest support comes from screwing directly into these studs. If you cannot hit studs, you must use appropriate anchors for your wall type (plastic for drywall, toggle bolts for plaster, masonry anchors for concrete) and strictly adhere to their weight limits. When in doubt, consult a professional.
Can I put a floating shelf over tile without drilling into the tile?
Not reliably for any significant weight. The only safe way to mount a load-bearing shelf into a tiled wall is to drill through the tile with a diamond-tipped masonry bit and use anchors that expand behind the tile. This is a precise job with a risk of cracking the tile. For light items, consider a tension system or adhesive method on the tile surface instead.
How long do adhesive shelf strips last before they fail?
In ideal conditions (clean, smooth wall, correct weight, stable temperature), they can last for years. However, factors like humidity, temperature fluctuations, and wall movement can degrade the bond over time. For a kitchen, expect a good 1-3 years of reliable service for light loads. Always periodically check for any loosening by gently wiggling the shelf.