Organizing your pull-out pantry drawers is a game-changer for kitchen efficiency. By decluttering, grouping like items, and using the right tools, you can create a system where everything has a place and is instantly accessible. This guide provides a practical, step-by-step method to turn frustrating, messy drawers into streamlined storage hubs that save you time and reduce stress every single day.
Key Takeaways
- Declutter Ruthlessly First: You cannot organize what you don’t need. Empty every drawer and be honest about what you actually use and what is expired or unwanted.
- Group by Category & Frequency: Store items you use daily at the front, and group baking supplies, snacks, or canned goods together in their own dedicated zones.
- Use Adjustable Dividers and Bins: Invest in customizable drawer organizers to create stable compartments that prevent items from sliding around and becoming a jumbled mess again.
- Label Everything Clearly: Labels on bins or directly on shelves (if possible) are the #1 tool for maintaining your system. Everyone in the household can then find and return items correctly.
- Prioritize Accessibility and Visibility: The goal is to see and reach everything without pulling the entire drawer out. Use tiered organizers or front-facing bins for deep drawers.
- Maintenance is Part of the Plan: Schedule a 10-minute weekly reset to ensure items are returned to their proper spots. A little maintenance prevents the system from breaking down.
- Customize for Your Space: Measure your drawers accurately and choose organizers that fit your specific depth, width, and height. One-size-fits-all rarely fits perfectly.
📑 Table of Contents
- Why Organizing Pull-Out Pantry Drawers Is a Kitchen Game-Changer
- Phase 1: The Great Purge – Decluttering Your Drawers
- Phase 2: Smart Grouping Strategies – Finding Your Categories
- Phase 3: Essential Tools of the Trade – Gear for Your Drawers
- Phase 4: The Step-by-Step Implementation Plan
- Phase 5: Special Considerations for Different Drawer Types
- Phase 6: Maintaining Your Organized Pantry System
- Conclusion: Your Invitation to Order
Why Organizing Pull-Out Pantry Drawers Is a Kitchen Game-Changer
Let’s be honest. That deep, cavernous pull-out pantry drawer often becomes a black hole for kitchen staples. One minute you’re searching for a specific spice, and the next, you’ve unearthed a can of soup from 2018 and three mismatched lids. It’s frustrating, time-consuming, and can lead to wasted food and money. But what if that same drawer could become your kitchen’s secret weapon? A place where every item is visible, reachable, and perfectly ordered? That’s the power of truly organized pull-out pantry drawers.
Unlike traditional shelves where items get pushed to the back and forgotten, a well-organized pull-out drawer brings everything to you. It maximizes every inch of often-wasted vertical space and transforms chaotic clutter into a serene, functional storage area. This isn’t about achieving a magazine-worthy look for a photo shoot; it’s about creating a sustainable system that makes your daily cooking and meal prep smoother, faster, and more enjoyable. When you know exactly where everything is, you save precious minutes and mental energy. This guide will walk you through the complete process, from the initial purge to the final label, ensuring your pantry drawers work for you, not against you.
Phase 1: The Great Purge – Decluttering Your Drawers
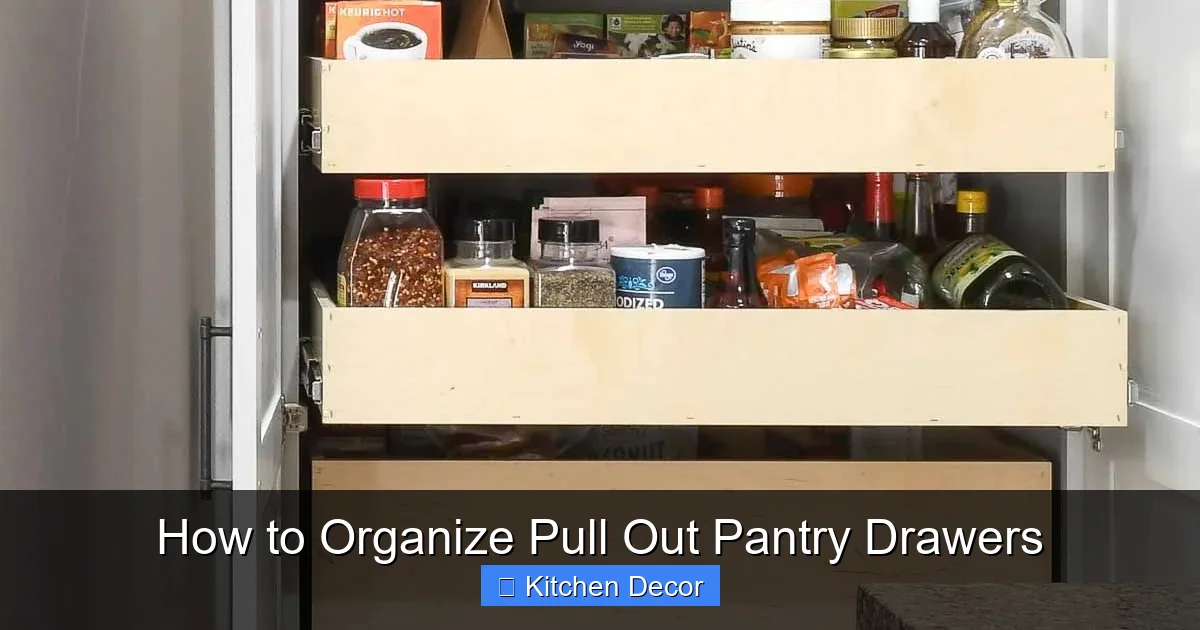
Before you buy a single bin or divider, you must face the contents head-on. This is the most critical and transformative step. You cannot organize a drawer full of expired goods, items you never use, and broken packaging. The goal here is to create a clean slate filled only with things you need, want, and will actually use.
Visual guide about How to Organize Pull Out Pantry Drawers
Image source: i.pinimg.com
Step 1: Empty Everything Out
Pull that drawer completely out and set it on your kitchen counter or table. Yes, it will look like a disaster. That’s okay! This visual of the total volume of your pantry items is a powerful motivator. As you unload, wipe down the empty drawer interior with a damp cloth to remove any dust or crumbs.
Step 2: Sort into Four Piles
Create designated zones on your counter: Keep, Donate/Sell, Trash/Recycle, and Relocate. Go through every single item, one by one.
- Keep: Items you use regularly (at least once a month), are not expired, and fit your current cooking/eating habits.
- Donate/Sell: Unopened, non-expired food you know you won’t eat (maybe a fancy ingredient for a recipe you’ll never try). Also, duplicate kitchen gadgets or tools stored in the pantry.
- Trash/Recycle: Expired food, damaged packaging, or items you’re unsure about. When in doubt, throw it out. Check “best by” dates—many foods are safe past this date but use your senses (smell, look) for canned goods.
- Relocate: Items that don’t belong in the pantry at all. This might be cleaning supplies (yikes!), pet food that belongs in a utility closet, or tools that should be in a garage drawer. Move these to their proper homes immediately.
Step 3: Be Brutally Honest
Ask yourself tough questions: “Have I used this in the last 6 months?” “Did I buy this for one specific recipe and never again?” “Is this a ‘just in case’ item that I’ll realistically never need?” Sentimental items (like that souvenir mug from vacation) do not belong in a functional pantry. Be kind to your future self by letting go of the dead weight now. The less you keep, the easier every subsequent step becomes.
Phase 2: Smart Grouping Strategies – Finding Your Categories
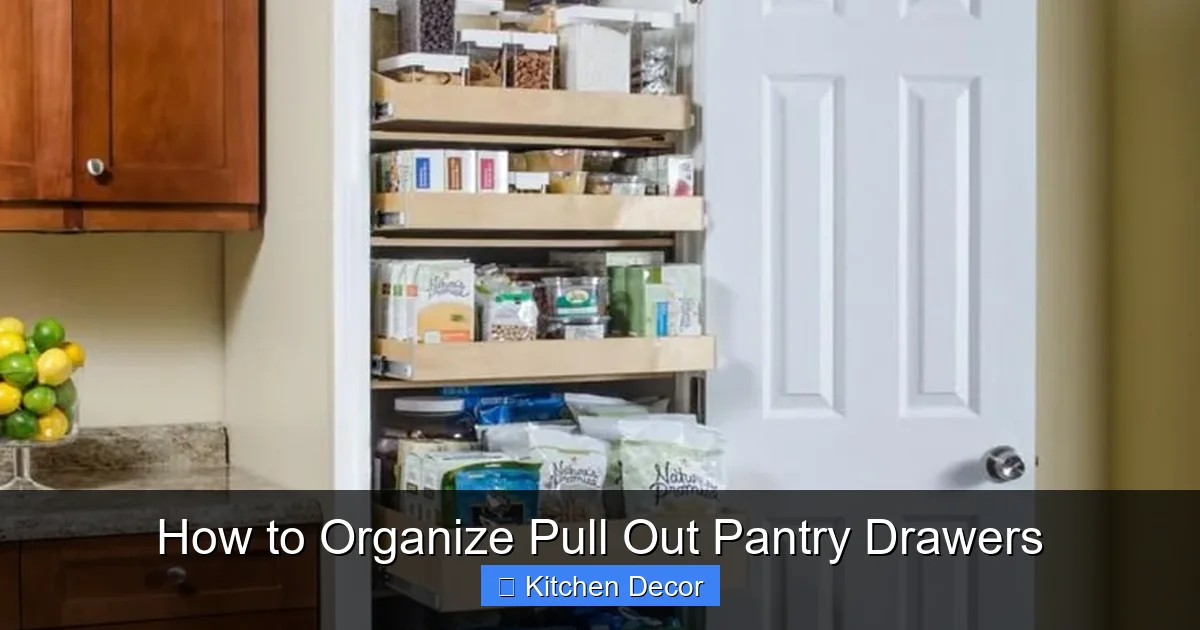
With your “Keep” pile, you now have a manageable collection of useful items. The next step is to group them into logical categories. This is the brain of your organization system. How you group depends entirely on your family’s habits and the types of food you cook.
Visual guide about How to Organize Pull Out Pantry Drawers
Image source: i.pinimg.com
Common Pantry Grouping Categories:
- Breakfast: Oatmeal, cereal, pancake mix, syrup, coffee/tea.
- Baking: Flour, sugar, baking powder, chocolate chips, sprinkles.
- Canned Goods: Vegetables, beans, tomatoes, tuna, broth.
- Snacks: Chips, crackers, granola bars, nuts, popcorn.
- Pasta & Grains: Pasta, rice, quinoa, couscous, lentils.
- Sauces & Condiments: Soy sauce, ketchup, pasta sauce, oils, vinegars.
- Spices: (Often better in a separate, smaller drawer or rack due to quantity).
Pro Tip: Group by how you shop or how you cook. If you make a lot of Mexican food, group taco seasoning, tortillas, and canned tomatoes together. If you have kids, create a dedicated “Kid Snacks” zone at a height they can reach. Think in terms of meal assembly. When you want to make spaghetti, you should be able to grab pasta, sauce, and a can of tomatoes from the same general area.
Phase 3: Essential Tools of the Trade – Gear for Your Drawers
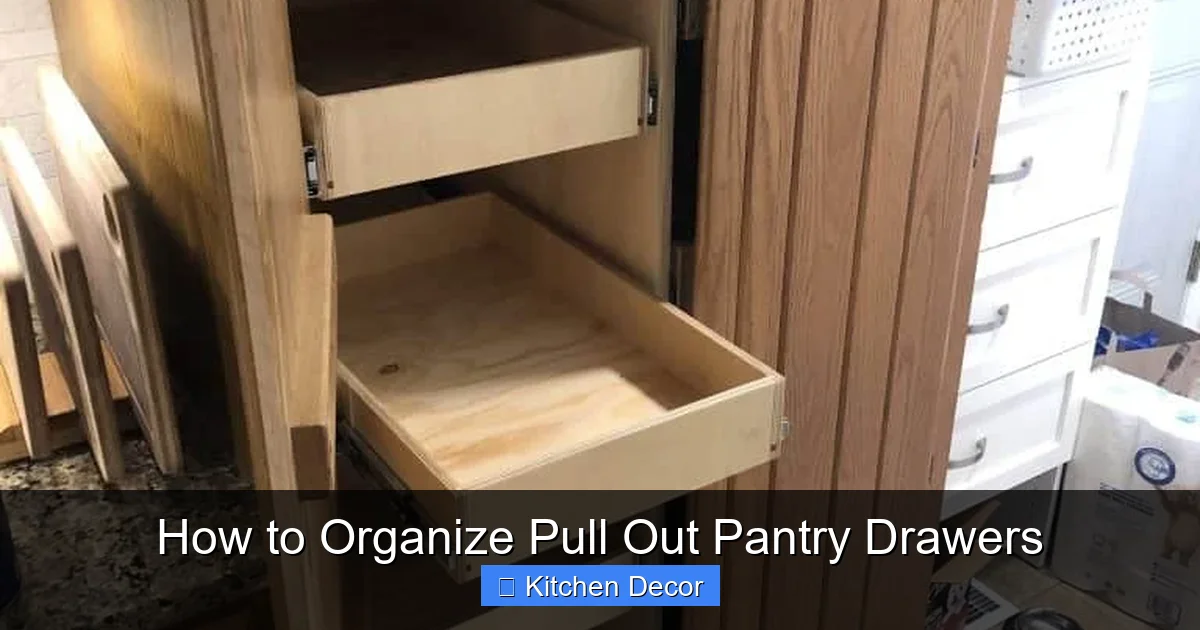
Now that you know what you have and how it groups, it’s time to select the tools that will contain and control these groups. The right tools prevent the “drawer avalanche” and keep your system intact. The best organizers are adjustable, sturdy, and fit your specific drawer dimensions.
Visual guide about How to Organize Pull Out Pantry Drawers
Image source: weekenddiyprojects.com
Drawer Dividers and Inserts
These are the workhorses. They create fixed or adjustable compartments.
- Adjustable Bamboo/Plastic Grids: These are fantastic because you can configure the dividers to create compartments of different sizes for cans, boxes, and bags. Look for ones with non-slip feet.
- Fixed Compartment Trays: Pre-sized for common items like spice jars or canisters. Great if your grouping needs are static and predictable.
- Custom Cut-to-Size Dividers: For a perfect, seamless fit, you can purchase acrylic or wood strips and cut them to your exact drawer width and depth.
Bins and Baskets
Bins are perfect for corralling loose items like snack bags, pouches, or small boxes. They create a “container within a container” and can be pulled out as a single unit.
- Fabric Bins: Lightweight, often with handles. Good for soft items like bags of chips or fruit pouches. Ensure they have a rigid bottom.
- Plastic/Woven Baskets: More structured, easy to wipe clean. Ideal for heavier items like canned goods or large pasta boxes. Look for ones with a front handle or cut-out for easy pulling.
- Clear vs. Opaque: Clear bins let you see contents instantly. Opaque bins create a uniform, clean look but require labeling. A mix of both is often effective.
Can Risers and Tiered Organizers
These are non-negotiable for deep drawers. A simple plastic or metal riser creates two levels of storage, instantly doubling your visibility and access. You can see and reach the items in the back row without having to unload the front. For very deep drawers, consider a three-tiered organizer.
Spice and Small Item Solutions
Spices are a common pantry headache. If they live in a drawer, use a dedicated spice tray with angled slots or a spinning lazy Susan (if the drawer is wide enough). For small packets (sauce, gravy, drink mix), use a small divided container or a simple letter tray to keep them upright and sorted.
Phase 4: The Step-by-Step Implementation Plan
Time to put it all together. Follow this sequence for a flawless setup.
Step 1: Measure Twice, Buy Once
With your empty drawer, measure its exact interior width, depth, and height. Take these measurements with you when shopping for organizers (online or in-store). Pay attention to the drawer’s glide mechanism—ensure any organizer you choose does not interfere with the drawer’s ability to open and close fully.
Step 2: Place Your Deepest/Heaviest Items First
Start with the largest, heaviest groups, typically canned goods or large bottles (oil, vinegar). If using a tiered riser, place these on the back tier. If using bins, designate a sturdy bin for cans. Position this group toward the back of the drawer if it’s a frequently used item, or to the side if it’s less frequent.
Step 3: Build Out with Medium and Small Groups
Next, place your medium-sized items: boxes of pasta, cereal boxes (consider decanting into airtight containers for freshness and uniformity), and baking supplies. Use dividers to create a dedicated slot for standing boxes. Then, fill in the nooks and crannies with your smallest categories: spice packets, tea bags, individual snack packs. Use small bins or divider sections for these to prevent them from scattering.
Step 4: The Front-Facing Principle
The most frequently accessed items—daily snacks, go-to condiments, your morning coffee supplies—should live at the very front of the drawer. If using bins, pull the entire bin forward. If using a tiered system, the front tier is for daily drivers. This eliminates the need to move multiple items to get to what you need.
Step 5: Label with Abandon
This is the step that guarantees long-term success. Label every single bin, basket, and divider section. Use a label maker for crisp, professional labels, or chalkboard labels for flexibility. Write clearly: “SNACKS,” “PASTA & RICE,” “BAKING – SUGAR & FLOUR.” If you decant items into clear containers, label the container lids. This creates a self-correcting system. Anyone (including future you at 6 PM) can see where something belongs and put it back.
Phase 5: Special Considerations for Different Drawer Types
Not all pull-out pantry drawers are created equal. Here’s how to adapt your strategy.
For Very Deep Drawers (Over 12 inches)
Depth is your enemy if unaddressed. You must use a tiered organizer or can riser. Without it, the back half of your drawer becomes a black hole. Consider a two-tier system where the back tier holds less-frequently used items (like holiday cookie supplies or backup canned goods) and the front tier holds everyday items.
For Shallow Drawers (Under 6 inches)
Shallow drawers are perfect for flat items. Think spices in a row, tea bags, or packets. Use a long, shallow tray with multiple dividers. You can also use these drawers for lids, baking sheets, or cutting boards stored on their sides. The key is to avoid stacking, as that defeats the purpose of visibility.
For Drawers with High Sides
If the drawer is deep front-to-back but not very tall, stacking is risky. Stick to a single layer of items using dividers to keep them upright. For items like baking pans or trays, store them on their sides, using a vertical divider to keep them from sliding.
For Drawers with Odd Shapes or Obstructions
If your drawer has a lip, a plumbing pipe, or a strange angle, you need custom solutions. Measure the usable space precisely. You may need to use smaller, individual bins that fit around the obstruction rather than one large organizer. Sometimes, the best solution is to use that awkward drawer for a single, specific category that fits its shape, like a collection of tall oil/vinegar bottles.
Phase 6: Maintaining Your Organized Pantry System
The work isn’t done once the drawer is full. A system is only as good as its maintenance. The goal is to make resetting effortless.
The 5-Minute Weekly Reset
Pick a low-traffic time, like Sunday evening while dinner is cooking. Open each pantry drawer. Do a quick scan. Are any items out of place? Did a bag of chips sneak into the baking bin? Did a spice packet fall behind the cereal? Simply return items to their labeled homes. This tiny habit prevents the slow creep of chaos.
Conduct a Quarterly Audit
Every 3-4 months, do a lighter version of your initial purge. Check expiration dates on the front items. Toss anything that’s stale or past its prime. As you use items, note what’s running low. This is your shopping list inspiration. Also, reassess your groupings. Did you start a new diet or cooking hobby that requires a new category? Adjust your bins and labels accordingly.
Involve the Whole Household
Show your family, partners, or roommates the system. Explain the labeling. Make it clear that the goal is to make everyone’s life easier. A quick, “Hey, the snacks are in the bin labeled ‘SNACKS’ at the front,” can save hours of collective frustration over time.
Conclusion: Your Invitation to Order
Organizing your pull-out pantry drawers is more than a weekend chore; it’s an investment in the daily rhythm of your home. It transforms a source of daily friction into a point of quiet efficiency. You deserve to open a drawer and find exactly what you need, when you need it, without a frustrating search. Start with the purge—it’s the hardest but most rewarding part. Then, build your system with intention, using the tools and strategies that fit your unique space and habits. Remember, perfection is not the goal; consistent functionality is. A drawer that is 80% organized and actually used is infinitely better than a 100% perfect system that collapses after a week. So grab a trash bag, measure your drawer, and take the first step. Your future, less-stressed self will thank you every single time you reach for a spice and find it on the first try.
Frequently Asked Questions
What are the absolute essential tools I need to start organizing?
At minimum, you need a tape measure, a few clear bins (for grouping), and a label maker or labels. Start with these basics and add dividers or tiered organizers as you learn your specific needs.
How often should I completely reorganize my pantry drawers?
A full purge and reorganization is only needed once or twice a year, typically aligned with seasonal changes or major shopping habit shifts. However, a quick 5-minute weekly reset to return items to their labeled spots is crucial for maintaining the system.
My drawer is extremely deep. How do I prevent losing items in the back?
A tiered organizer or can riser is mandatory for deep drawers. It creates a front and back level, ensuring everything is visible and accessible without unloading the entire drawer.
What should I do with items I don’t use but are still good?
Donate unopened, non-expired food to a local food bank or pantry. For kitchen tools you don’t use, consider selling them online or gifting them to someone who would. The goal is to clear your space of all non-essential items.
Is organizing pull-out pantry drawers an expensive project?
Not at all. You can start very inexpensively with repurposed shoeboxes or sturdy cardboard for dividers and simple plastic bins. The most cost-effective investment is a good label maker. As your budget allows, you can upgrade to custom bamboo or acrylic organizers.
What’s the best way to handle awkward spaces, like drawers with a pipe running through them?
Measure the usable space around the obstruction. Use smaller, individual bins that fit within the available area rather than trying to force one large organizer. Sometimes, the best solution is to dedicate that specific awkward drawer to a single category of tall, thin items that fit its unique shape.