Hiding outlets in your kitchen island is essential for achieving a clean, uncluttered look while maintaining functionality and safety. You can choose from several effective methods like pop-up outlets, drawer-integrated units, or false panel covers, each offering a unique blend of aesthetics and convenience. The key is selecting a solution that matches your island’s design, complies with electrical codes, and is professionally installed to ensure long-term reliability and a beautiful, seamless kitchen space.
Let’s be honest. That lonely, sometimes grimy, power outlet on the side of your beautiful kitchen island is a bit of an eyesore. It’s a necessary evil, a little rectangle of white plastic that breaks the flow of your carefully chosen marble or butcher block. But what if I told you that outlet doesn’t have to be seen at all? Welcome to the world of clever concealment, where how to hide outlets in kitchen island designs transforms a functional necessity into an invisible asset. It’s about merging smart utility with serene aesthetics, and it’s more achievable than you might think.
The quest to hide these outlets isn’t just about vanity. It’s about safety, especially in a busy household where cords can dangle and little hands might explore. It’s about reclaiming every square inch of your countertop for meal prep, not for plugging in the toaster. And it’s about the final, satisfying detail that makes a kitchen look custom-built and thoughtfully designed. So, roll up your sleeves. We’re going to explore the fantastic methods, crucial safety rules, and design tricks to make that outlet vanish into thin air, leaving only the beauty of your island behind.
Key Takeaways
- Safety is Paramount: All island outlets must be GFCI-protected and have accessible covers to meet electrical codes, even when concealed.
- Pop-Up Outlets are King: For a completely invisible look when not in use, motorized or spring-loaded pop-up outlets are the most seamless solution.
- Drawer Integration is Highly Functional: Installing outlets inside a deep drawer hides them completely while providing a hidden charging station or workspace power source.
- Material Matching is Key: Choose outlet covers and surrounds that match your island’s countertop material (granite, quartz, wood) and finish for a cohesive look.
- Professional Installation is Non-Negotiable: Due to code requirements and the complexity of wiring within an island, always hire a licensed electrician for the final hookup.
- Plan Early in the Renovation: Decide on your concealment method during the design phase to ensure proper cabinetry, plumbing, and electrical rough-ins are aligned.
- Consider Future Tech: Incorporate USB-C ports or wireless charging pads into your hidden outlet design for a forward-thinking kitchen.
📑 Table of Contents
- Why Bother Hiding the Outlet? The Aesthetic and Practical Payoff
- The Method Menu: 5 Clever Ways to Hide Your Island Outlet
- Design & Aesthetic Considerations: Making it Blend
- Installation Insights: Planning, Codes, and Pros vs. DIY
- Safety First: Protecting Your Home and Family
- Creative & Tech-Forward Ideas: The Future-Proof Island
- Conclusion: The Invisible Foundation of a Beautiful Kitchen
Why Bother Hiding the Outlet? The Aesthetic and Practical Payoff
Before we dive into the “how,” let’s solidify the “why.” Concealing an island outlet offers benefits that go far beyond just looking pretty. It impacts how you use and feel in your kitchen every single day.
The Visual Clutter Factor
A standard outlet, especially if it’s hosting multiple adapters and chargers, becomes a magnet for visual noise. It interrupts the clean line of your island’s facade. By hiding it, you maintain the uninterrupted rhythm of your cabinetry and countertop. This is particularly critical in open-concept homes where the kitchen flows directly into living and dining areas. A hidden outlet helps the kitchen feel like an integrated part of the home’s design, not a utilitarian afterthought.
Enhanced Safety and Cleanliness
An exposed outlet on the side of an island is in a high-traffic zone. It’s prone to being splattered with water, oil, and food debris. Concealing it behind a cover or within a drawer protects the electrical components from moisture and grime, reducing fire risk and prolonging the life of the outlet. More importantly, it prevents accidental unplugging of appliances and deters curious children or pets from poking objects into the slots. A hidden outlet is, by its nature, a more secure outlet.
Maximizing Usable Counter Space
That little nook where the outlet lives? It’s often wasted space. You can’t easily place a small appliance there because the cord would hang awkwardly. By moving the outlet into a drawer or a pop-up mechanism, you free up that entire side surface. Now, that spot is perfect for a cutting board, a bowl of fruit, or your morning coffee mug without a cord in sight.
The Method Menu: 5 Clever Ways to Hide Your Island Outlet
Now for the fun part! There’s no one-size-fits-all solution. The best method depends on your island’s design, your budget, and how you typically use the space. Here are the most popular and effective strategies, from simplest to most sophisticated.

Visual guide about How to Hide Outlets in Kitchen Island
Image source: jennasuedesign.com
1. The Pop-Up Outlet: The Magic Trick
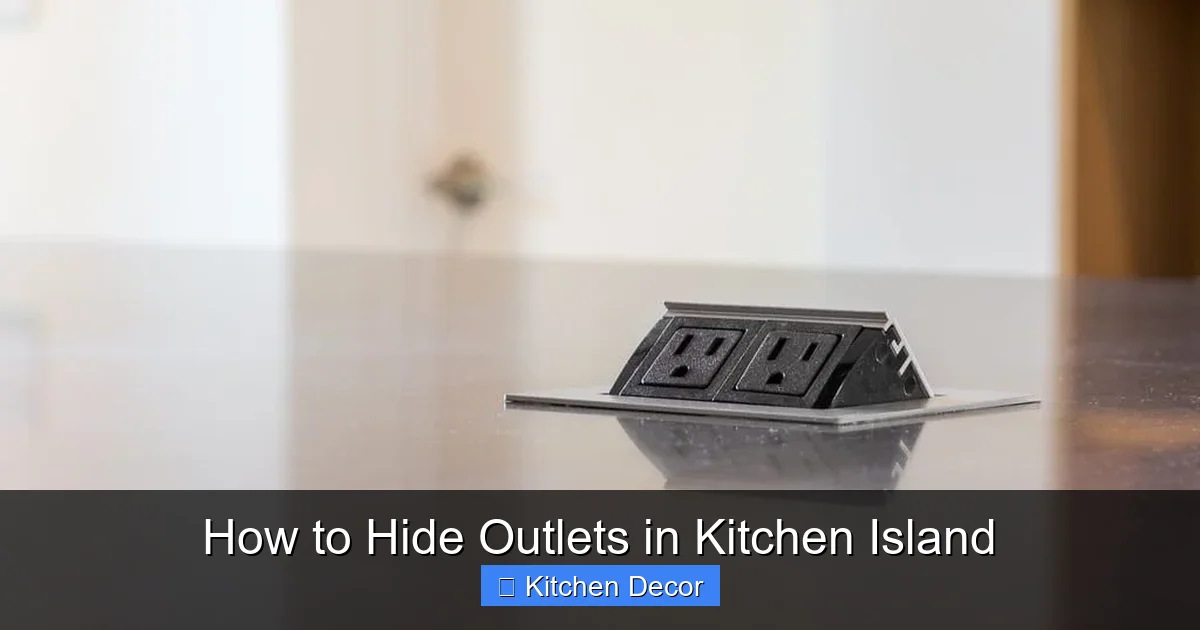
This is the gold standard for invisibility. A pop-up outlet is installed within a cutout in your countertop. When not in use, it sits flush with the surface—often with a blank cover that perfectly matches your quartz or granite. When you need power, you simply press a button or lever, and the outlet rises smoothly from the countertop. It’s pure magic.
- Pros: Ultimate seamless look when down. Very safe; the outlet is physically inaccessible when closed. Multiple outlets and USB ports are available in one unit.
- Cons: Most expensive option. Requires a precise cut in the countertop and sufficient depth in the island’s cabinet below. Motorized versions need an electrical source to operate the lift mechanism.
- Best For: High-end remodels, minimalist designs, and islands with a solid-surface countertop where a small, circular or rectangular blank can blend in perfectly.
Pro Tip: When selecting a pop-up, choose a model with a blank cover that matches your stone. Many suppliers can provide a custom piece of the same slab for a perfect match. Place it towards the back of the island or in an area less likely to be accidentally pressed.
2. The Drawer Power Station: Hidden in Plain Sight
This is a brilliantly practical solution. A standard electrical outlet is installed inside the back wall or bottom of a deep drawer. You run your appliance cord into the drawer and close it. The drawer becomes a hidden charging station, a secret home for the stand mixer, or a tidy spot for the blender. No cords on the counter, and the outlet is completely out of sight.
- Pros: Extremely functional and organized. Utilizes existing drawer space. Relatively simple installation for an electrician (just a standard outlet inside a cabinet). Cost-effective.
- Cons: The drawer must remain open while the appliance is in use, which may not suit all workflows. Requires a drawer deep enough to accommodate the plug and cord without bending it sharply.
- Best For: Islands with deep, unused drawers. Perfect for appliances you use frequently but don’t want on display, like a food processor, immersion blender, or a family charging station for phones and tablets.
Pro Tip: Install a small USB charging port alongside the standard outlet inside the drawer. Add a cord management clip to the drawer wall to keep cords neatly coiled when not in use.
3. The Cabinet or False Panel Cover: The Disguise
This method uses a standard outlet installed on the side or interior of the island cabinet, but it’s hidden behind a removable panel that looks exactly like the rest of your cabinet door or side panel. The panel might be held on with magnetic catches or small latches, allowing easy access when needed.
- Pros: Inexpensive and very effective visually. Works with any cabinet style. Can be DIY’d with some skill (fabricating the panel) or done by a carpenter.
- Cons: Requires you to remember to open the panel. Not as sleek as a pop-up when in use (the panel is off and sitting somewhere). The access point is obvious when open.
- Best For: Traditional or shaker-style islands where a small, recessed panel detail already exists. Great for islands where a pop-up isn’t feasible due to countertop material (like wood) or shallow depth.
Pro Tip: Use a magnetic catch system for a tool-free, silent open and close. Paint or veneer the panel to match your cabinet finish exactly. Consider adding a small finger pull or a routed groove for easy opening.
4. The Recessed Niche or Appliance Garage
This is more of a design integration than a simple cover. You create a small, recessed area or “garage” on the side or front of your island, specifically sized for an appliance like a coffee maker or toaster oven. The outlet is placed inside this niche. When the appliance is in use, the niche is open. When not, a small door or sliding panel closes, hiding both the appliance and the outlet.
- Pros: Hides both the outlet and the appliance. Creates a dedicated, organized spot for a frequently used item. Looks very built-in and custom.
- Cons: Requires significant cabinetry modification and planning. The niche takes up valuable island space. The appliance must stay in its “garage.”
- Best For: Homeowners with one or two small countertop appliances they use daily but want out of sight. Excellent for a coffee station or baking center.
Pro Tip: Include internal power strips and cord management inside the niche so you can plug the appliance in once and never touch the cord again. Add a small ventilation gap if the appliance generates heat.
5. The Furniture Approach: A Decorative Box or Tray
For a quick, non-permanent, and rental-friendly solution, use a decorative box, basket, or tray placed on the island that covers the outlet. When you need power, you simply lift the box. This works best if the outlet is on the side of the island and the box can sit in front of it.
- Pros: Zero installation, very cheap, completely reversible. Adds a decorative element (think a woven basket or a beautiful ceramic pot).
- Cons: Not a true “hide”—the box is still visible. You must move it every time you need an outlet. Not secure against spills or children.
- Best For: Renters, temporary solutions, or islands where the outlet is rarely used and can be covered by a permanent decorative item like a large vase or fruit bowl.
Pro Tip: Choose a box with a non-conductive material (wicker, ceramic, wood) and ensure it doesn’t trap heat. Cut a small notch in the back bottom corner to allow a cord to exit neatly if you leave a device plugged in inside.
Design & Aesthetic Considerations: Making it Blend
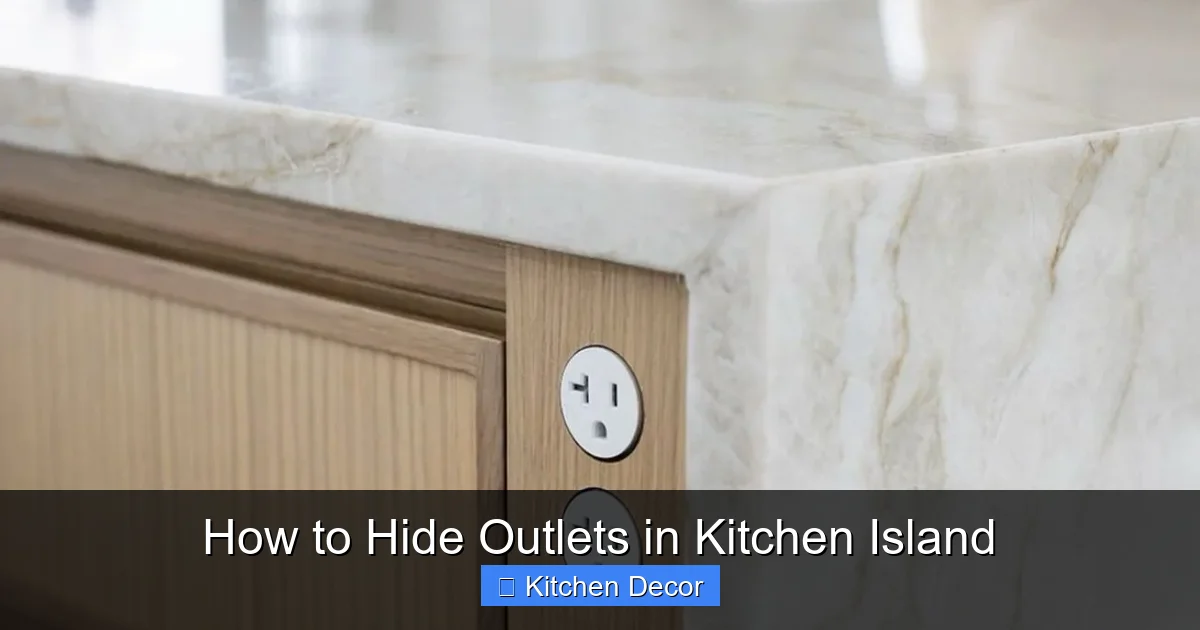
Choosing the method is step one. Making it look like it was always supposed to be there is step two. This is where material selection and placement become critical.
Visual guide about How to Hide Outlets in Kitchen Island
Image source: i.pinimg.com
Matching Your Countertop
If you’re going with a pop-up outlet, the blank cover is your canvas. For stone surfaces (granite, quartz, marble), you must source a piece of the same slab. This often means purchasing an extra slab during fabrication or working with your fabricator to use a remnant. For solid surface (Corian) or laminate, matching is easier as the material is more uniform. For wood or tile, this method is very challenging, pushing you toward drawer or cabinet concealment instead.
Hardware and Finish Coordination
For drawer outlets and cabinet panels, think about the visible hardware. The outlet cover plate itself comes in various finishes: white, almond, stainless steel, nickel, oil-rubbed bronze, and even matte black. Choose one that matches your other kitchen hardware (faucet, cabinet pulls, appliance handles). A brushed nickel cover will look intentional and integrated next to nickel pulls, while a stark white plate might stick out like a sore thumb on a dark island.
Placement Psychology
Where you put the hidden outlet matters. Don’t put it on the main face of the island if you can avoid it. The side panel or the back facade (facing the wall) are prime, less conspicuous locations. If using a pop-up, place it towards the back third of the island, not at the leading edge where someone might lean on it. For drawer outlets, the back wall of a drawer is ideal. The goal is to keep the outlet’s location a surprise, not a feature.
Installation Insights: Planning, Codes, and Pros vs. DIY
This is the most important section. Getting the installation right is non-negotiable for safety and legality.
Visual guide about How to Hide Outlets in Kitchen Island
Image source: i.pinimg.com
The Critical Role of the Rough-In
Concealment methods require advance planning. During the “rough-in” phase of your remodel—when the electrician runs wires before the walls and floors are closed up—you must tell them exactly where you want the outlet to end up. For a pop-up, they need to know the exact model so they can install the correct “box” in the floor of the island cabinet. For a drawer outlet, they need to know which drawer and on which wall. If you’re building a new island, the carpenter needs to build the cabinet with the correct cutouts and clearances for your chosen method. Communication is everything.
Electrical Code Compliance: The Non-Negotiables
The National Electrical Code (NEC) has strict rules for island outlets. First, any outlet in a kitchen island must be GFCI (Ground Fault Circuit Interrupter) protected. This is a life-saving device that cuts power if it detects an imbalance, like from a shock hazard. Your electrician will ensure this. Second, the outlet must be “readily accessible.” This is the trickiest part for concealment. The code means you shouldn’t have to move a heavy appliance or disassemble cabinetry to reach it. A pop-up outlet, when raised, is readily accessible. An outlet inside a drawer is generally considered accessible because the drawer is easy to open. An outlet behind a fixed false panel might not pass inspection because the panel would need to be removed. Always get confirmation from your licensed electrician that your chosen method meets local code.
Professional Installation vs. DIY: A Clear Verdict
Can you install a hidden outlet yourself? Technically, if you have significant electrical experience, you could wire a standard outlet into a drawer. But for anything involving cutting into a finished countertop, modifying cabinetry, or ensuring code compliance, we strongly advise hiring a licensed professional.
- Risk of Fire/Shock: Improper wiring, overloading a circuit, or poor connections are serious hazards.
- Code Violations: A DIY job may not pass inspection, causing problems when you sell your home and potentially voiding insurance.
- Warranty & Insurance: Many countertop and cabinet warranties are voided if unlicensed individuals modify them. Insurance may not cover damage from an unpermitted electrical job.
- Skill & Tools: Cutting a perfect hole in a stone slab requires specialized diamond-tooling. Mess it up, and you ruin a $3,000 countertop.
The cost of a professional electrician (typically $150-$300 for the service call plus hourly rate) is a small price to pay for safety, code compliance, and peace of mind. Think of it as an investment in your home’s value and your family’s safety.
Safety First: Protecting Your Home and Family
Hiding an outlet doesn’t mean forgetting about it. In fact, because it’s out of sight, you must be extra vigilant about safety.
GFCI Protection is Mandatory
As mentioned, this is code. But understand why: kitchens are wet environments. A GFCI outlet (or a GFCI breaker in your panel) monitors the current flowing through the hot and neutral wires. If it detects a difference as small as 4-5 milliamps (which could mean current is flowing through a person), it trips in a fraction of a second. Test your GFCI outlets monthly using the “Test” and “Reset” buttons.
Childproofing the Hidden Outlet
If you have young children, a concealed outlet is safer simply because it’s not exposed. However, if you use a drawer or cabinet method, ensure the outlet cover is a tamper-resistant (TR) type, which has internal shutters that require equal pressure on both blades to open. For pop-ups, the closed position is inherently childproof. Never rely solely on the concealment; the outlet itself must have safety features.
Avoiding Overloads
Kitchen islands often become the hub for multiple small appliances: toasters, blenders, Instant Pots, phone chargers, laptop chargers. A single outlet (or even a duplex) can be easily overloaded, tripping breakers or causing overheating. Consider having your electrician install a dedicated 20-amp circuit for your island outlets, which is standard for kitchen countertop circuits. If you anticipate heavy use, discuss installing two separate outlets on separate circuits within your island’s power system.
Creative & Tech-Forward Ideas: The Future-Proof Island
Why stop at just hiding a standard outlet? Use this opportunity to future-proof your kitchen with integrated technology.
Built-in USB Charging Ports
Almost everyone needs to charge phones, tablets, and earbuds. Instead of using up an outlet with a bulky USB adapter, have your electrician install USB-A and USB-C ports directly into your chosen concealment system. Many pop-up outlets and drawer power strips come with these built-in. This provides clean, always-available charging without the “wall wart” clutter.
Wireless Charging Pads
Take it a step further. Some modern pop-up outlets or drawer systems can integrate a Qi wireless charging pad. You simply place your compatible phone on a designated spot on the countertop (which might be a small, discreet pad set into the stone or a specific area of the drawer) and it charges cord-free. This is the ultimate in invisible tech.
Smart Home Integration
Imagine your island outlet turning on only when you need it. While less common, some systems allow for outlets to be controlled via a smart switch or timer. You could have a drawer outlet that only powers a charging station at night, or a pop-up that’s disabled when the kitchen is in “clean” mode to prevent accidental use with wet hands. Discuss these possibilities with a tech-savvy electrician.
Conclusion: The Invisible Foundation of a Beautiful Kitchen
Mastering how to hide outlets in kitchen island is one of those finishing touches that separates a good kitchen from a great one. It’s a statement that you value both form and function, that you’ve thought about the little details that make daily life smoother and your space more serene. Whether you choose the sleek magic of a pop-up, the practical genius of a drawer power station, or the simple elegance of a false panel, you are solving a problem with style.
Remember the golden rules: plan early in your design process, always prioritize safety and code compliance with a licensed electrician, and choose a method that genuinely fits your lifestyle. Don’t just hide the outlet for the sake of hiding it; integrate it in a way that makes your kitchen more usable and more beautiful. That little rectangle of utility doesn’t have to be an eyesore. With the right approach, it can become your kitchen’s best-kept secret and a testament to thoughtful, modern design. Now go make that outlet disappear.
Frequently Asked Questions
Is it safe to hide an electrical outlet in a kitchen island?
Yes, it is completely safe when done correctly. The key is using a code-compliant method like a pop-up outlet or a drawer installation that keeps the outlet protected from spills and accidental contact. All island outlets must be GFCI-protected, and the concealment method must allow for “readily accessible” service as defined by electrical code. A licensed electrician will ensure your solution is both safe and legal.
What is the most popular and effective method to hide an island outlet?
The most popular and visually effective method is the pop-up outlet. It provides a truly seamless look when not in use, as it sits flush with the countertop. When needed, it rises with the press of a button. It’s considered the gold standard for high-end kitchens because it completely hides the outlet and any cords, offering both superior aesthetics and safety.
Can I install a hidden island outlet myself to save money?
We strongly advise against a full DIY installation for concealed island outlets. While adding a standard outlet inside a drawer might seem simple, the process often involves cutting into expensive countertops, modifying cabinetry, and ensuring strict adherence to electrical codes. Improper installation risks fire, electric shock, voided warranties, and failed home inspections. Hiring a licensed electrician is a critical investment for safety and legality.
Will hiding an outlet in my island violate electrical code?
It will not violate code if you use an approved method. The National Electrical Code requires that kitchen island outlets be “readily accessible” and GFCI-protected. Methods like pop-up outlets (when raised) and outlets inside drawers are generally accepted as readily accessible because they can be used without removing any permanent parts of the structure. Outlets behind fixed, non-removable panels may not pass. Always confirm your specific plan with your local building department or a licensed electrician.
How can I childproof a hidden island outlet?
Concealment itself is a great first layer of protection. For added security, ensure the outlet is a tamper-resistant (TR) type, which has internal shutters that prevent children from inserting objects. If using a drawer method, you can install a simple child safety lock on the drawer front. Pop-up outlets are inherently childproof when in the closed position, as the electrical components are sealed beneath the countertop surface.
What is the average cost to have a professional hide an island outlet?
Cost varies widely by method and region. A simple drawer outlet installation might add $100-$250 to your electrician’s bill (mainly for the extra outlet and labor). A high-end pop-up outlet system, including the hardware and precise countertop cutting, can cost $200-$500 for the unit plus $150-$300 for professional installation. The most significant cost is often the custom countertop work required for a perfect pop-up fit. Always get multiple quotes from licensed professionals.