Low water pressure in your kitchen sink is almost always a fixable issue, not a major plumbing crisis. The solution typically lies in a few accessible spots: the faucet aerator, the supply shut-off valves, or the flexible supply lines. Start with the simplest, most common culprit—a clogged aerator—and work your way through a logical diagnostic process. Most repairs require only basic tools like an adjustable wrench and some vinegar, empowering you to solve the problem yourself before calling a professional.
Key Takeaways
- Most causes are simple and accessible: Over 80% of kitchen sink low water pressure issues stem from the aerator, shut-off valves, or supply lines—components you can see and touch without tearing open walls.
- Diagnosis is a systematic process: Always start by checking if the problem is isolated to the kitchen sink or affects the whole house. Then, isolate hot vs. cold water to narrow down the faulty side.
- The aerator is the #1 suspect: This tiny screen at the faucet’s tip is designed to catch sediment but frequently becomes clogged with mineral buildup, especially in hard water areas.
- Shut-off valves are critical and finicky: These valves under the sink can become partially closed, corroded, or fail internally. Ensuring they are fully open and functional is a key step.
- Supply lines can restrict flow: Old, kinked, or narrow plastic supply lines can severely restrict water volume. Replacing them with modern, larger-bore lines is a common fix.
- Know your limits: While many fixes are DIY, issues with the main water line, pressure regulator, or extensive pipe corrosion require a licensed plumber’s expertise and equipment.
- Prevention is possible: Installing a whole-house sediment filter or a simple aerator with a removable screen can drastically reduce future clogging and maintain consistent pressure.
📑 Table of Contents
- Introduction: That Frustrating Trickle
- Understanding Your Kitchen’s Water Highway: A Simple Diagram
- Step 1: Systematic Diagnosis – Finding the Bottleneck
- Fix #1: Unclogging the Faucet Aerator (The Most Common Fix)
- Fix #2: Inspecting and Replacing Supply Shut-Off Valves
- Fix #3: Evaluating and Replacing Flexible Supply Lines
- Addressing Less Common but Possible Hidden Issues
- When to Call a Professional Plumber
- Conclusion: Empowered and Flowing
Introduction: That Frustrating Trickle
You go to fill a pot for pasta, and instead of a robust, satisfying stream, you get a pathetic dribble. You watch the water swirl weakly around the sink basin, the sound more like a sigh than a rush. Low water pressure in your kitchen sink is more than a minor annoyance; it disrupts daily life, wastes time, and can even signal an underlying issue that, if ignored, might lead to bigger problems. Before you resign yourself to days of weak dishwashing or call an expensive plumber for what feels like a simple problem, take a deep breath. The good news is that in the vast majority of cases, the cause of low water pressure in a kitchen sink is right there in front of you—or just under it. This guide will walk you through a logical, step-by-step process to diagnose and fix the issue yourself, saving you money and restoring that powerful water flow you deserve.
We’ll approach this like detectives. First, we’ll understand the “water highway” that feeds your sink. Then, we’ll learn how to systematically check each potential bottleneck, from the faucet’s tip to the pipes in your basement. We’ll cover the most common culprit—the humble aerator—in detail, and then move on to shut-off valves, supply lines, and less frequent but possible hidden issues. With simple tools, clear instructions, and a focus on safety, you’ll gain the confidence to tackle this household challenge head-on.
Understanding Your Kitchen’s Water Highway: A Simple Diagram
To fix a problem, you must first understand the system. Water flows to your kitchen sink through a straightforward path, and pressure can drop at any point along that path. Think of it like a garden hose with several connectors. If the flow is weak at the end, the kink or blockage could be at the nozzle, in the middle connector, or even at the spigot.
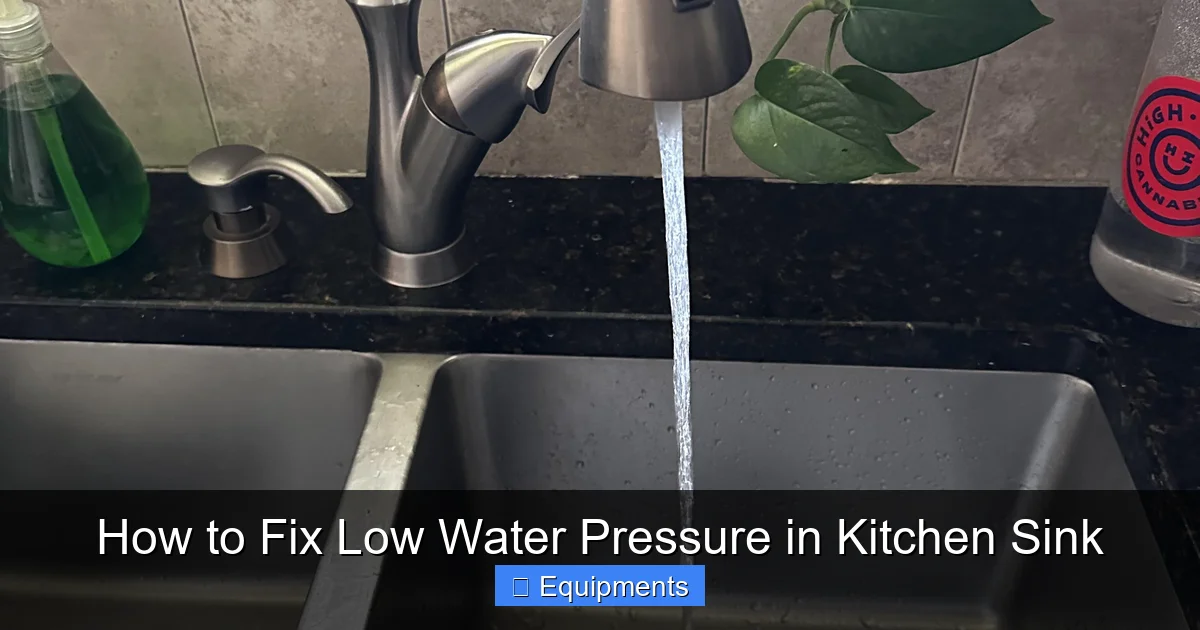
Visual guide about How to Fix Low Water Pressure in Kitchen Sink
Image source: i.redd.it
The Main Components of Flow
Your kitchen sink’s water supply consists of a few key parts:
- The Faucet & Aerator: This is the final exit point. The aerator is a small, mesh-screen device screwed onto the faucet tip. Its job is to mix air with water for a smooth, non-splashing flow and to catch sediment. It is the most common point of failure for low pressure.
- The Flexible Supply Lines: These are the braided metal or plastic tubes that connect the underside of your faucet to the water pipes in the wall or floor. They carry hot and cold water separately. Kinks, internal corrosion, or narrow diameters in these lines restrict flow.
- The Shut-Off Valves: Located under the sink where the supply lines meet the wall pipes, these small valves control water flow to the sink. They have a handle (usually a lever or a round knob) that you turn to stop water for repairs. If these are not fully open or have failed internally, they severely limit pressure.
- The Wall Pipes & Main Supply: These are the permanent pipes within your home’s structure. Issues here, like corrosion, mineral buildup, or a faulty pressure-reducing valve (if you have one), affect all fixtures on that line, not just the kitchen sink.
Our diagnostic journey will start at the faucet and work backward toward the main pipes.
Step 1: Systematic Diagnosis – Finding the Bottleneck
Before you grab a wrench, you need to play detective. Rushing to disassemble parts without a plan can lead to wasted effort or even minor damage. Follow this sequence to pinpoint the exact location of your low water pressure problem.

Visual guide about How to Fix Low Water Pressure in Kitchen Sink
Image source: i.ytimg.com
Check If It’s Isolated to the Kitchen Sink
The first and most crucial question: Is the low pressure only at the kitchen sink, or is it a house-wide issue?
- Turn on other faucets in the house—bathroom sinks, shower, outdoor spigot. Do they also have weak pressure? Pay attention to both hot and cold.
- Flush a toilet. Does the tank refill slowly?
If the low pressure is everywhere: The problem is likely with your main water supply, a faulty pressure regulator (common in homes with municipal water), a major leak, or extensive pipe corrosion. This usually requires a professional plumber.
If the low pressure is only in the kitchen sink: Excellent! The problem is localized between that faucet and its dedicated shut-off valves. We proceed to the next step.
Isolate Hot and Cold Water
Your kitchen faucet has two separate water sources: hot and cold. The issue might only affect one side.
- Turn the faucet handle to the cold position only. Run the water. Note the pressure.
- Now turn it to the hot position only. Run the water. Note the pressure.
If only the hot side is weak: The problem is likely on the hot water line. This could be a clogged aerator (if it’s a single-handle faucet with one aerator), a faulty hot water shut-off valve, or a kinked/kinked hot supply line. It could also indicate an issue with your water heater’s outlet or dip tube, but that’s less common.
If only the cold side is weak: The culprit is on the cold water line. Follow the same logic: aerator, cold valve, cold supply line.
If both hot and cold are weak: The problem is at a point common to both lines. This points directly to the aerator (on a single-handle faucet) or, less likely, a shared blockage at the faucet body itself.
Test the Aerator Directly
This is your first hands-on test. With the water running, carefully unscrew the aerator from the faucet tip by turning it counterclockwise. You may need to protect it with a cloth and use pliers if it’s tight. Once removed, run the water. The stream should now be a strong, unrestricted flow.
- If pressure is strong without the aerator: You have found your problem. The aerator is clogged. This is the most common and easiest fix. Proceed to the next major section.
- If pressure is still weak without the aerator: The blockage is downstream, in the faucet body, supply lines, or valves. Continue with our diagnostic journey.
Fix #1: Unclogging the Faucet Aerator (The Most Common Fix)
If your diagnosis pointed to the aerator, congratulations! You’ve identified the issue in 5 minutes with no cost. Aerators clog with a combination of sediment, mineral deposits (from hard water), and tiny particles of debris. The fix is simple cleaning.

Visual guide about How to Fix Low Water Pressure in Kitchen Sink
Image source: faucetshowerguide.com
Tools & Materials You’ll Need
- Adjustable wrench or pliers
- Small bowl or cup
- White vinegar
- An old toothbrush or small, soft-bristled brush
- A small pin or needle (optional, for stubborn holes)
- Teflon/plumber’s tape (optional, for re-sealing)
Step-by-Step Cleaning Process
- Remove the Aerator: As tested earlier, unscrew it from the faucet. Be gentle. If it’s stuck, wrap the jaws of your pliers in a cloth to prevent scratching the chrome finish.
- Disassemble the Aerator: Most aerators unscrew into two or three pieces: the outer housing, an inner basket with the screen, and sometimes a rubber washer. Carefully take it apart. Note the order of the parts so you can reassemble it correctly. Take a photo with your phone if you’re unsure.
- Soak in Vinegar: Place all the metal parts in a bowl of white vinegar. For heavy mineral buildup, you can heat the vinegar slightly (do not boil). Let them soak for at least 30 minutes, or overnight for severe clogs. The vinegar’s acetic acid dissolves calcium and lime deposits.
- Scrub: After soaking, use the toothbrush to scrub every surface, especially the fine mesh screen. Gently poke through each hole in the screen with the pin to dislodge any remaining particles. Rinse all parts thoroughly under running water.
- Reassemble and Reinstall: Put the aerator back together in the correct order. Ensure the rubber washer is seated properly. Screw the aerator back onto the faucet hand-tight, then give it a gentle quarter-turn with the pliers (wrapped in a cloth) to snug it. Do not overtighten, as this can damage the threads or aerator.
Pro Tip: If your aerator is very old, damaged, or the plastic parts are brittle, it’s cheaper and easier to simply buy a new one. They cost $2-$10 at any hardware store. Just take the old one with you to match the thread size (most are standard).
Fix #2: Inspecting and Replacing Supply Shut-Off Valves
If the aerator was clean or removal didn’t fix the issue, your attention moves under the sink. The shut-off valves are the next most common cause of localized low pressure.
What Can Go Wrong with Valves?
- Partially Closed: Someone may have turned the valve handle to stop a leak and never fully reopened it. The handle should be parallel to the pipe (fully open). If it’s perpendicular, it’s closed.
- Internal Failure/Corrosion: The internal mechanism (ball or cartridge) can wear out, get clogged with debris, or corrode, preventing it from opening fully even if the handle turns.
- Old Gate Valves: Many older homes have “gate valves” with a round wheel handle. The gate that stops water can become detached from the stem or get jammed by sediment.
- Leaking from the Handle: A slow drip from the valve stem when the water is on is a sign of a failing internal washer, which can also restrict flow.
Diagnosing Valve Issues
With the water ON, place a bucket under the valve connection. Have a helper turn the sink faucet on full blast. Watch the valve body and its connection to the supply line.
- Do you see any active leaks? A drip here means the valve’s internal seal is bad.
- Now, with the water still running, try to gently turn the valve handle a tiny bit further in the “open” direction (usually clockwise for lever handles, left for round knobs). Does the water pressure at the faucet increase noticeably? If so, the valve was not fully open or is sticking. This is a clear sign the valve needs replacement.
Replacing a Shut-Off Valve (DIY Project)
Replacing a valve is a fundamental plumbing skill. It’s a 30-minute job for a beginner.
- Turn Off the Water: Locate the main water shut-off for your house (usually near the water meter, basement, or garage). Turn it off. Open the kitchen sink faucet to relieve pressure and drain the lines.
- Disconnect the Supply Line: Place a bucket under the valve. Using an adjustable wrench, loosen the nut that connects the flexible supply line to the shut-off valve. Have the bucket ready for residual water.
- Remove the Old Valve: Use a second wrench to hold the pipe steady (to prevent stress on the wall pipe). Unscrew the valve from the wall pipe. This may require significant force if it’s old and corroded.
- Install the New Valve: Apply Teflon tape (clockwise direction) to the threads of the wall pipe. Screw the new valve on by hand first, then tighten with the wrench. Do not overtighten.
- Reconnect the Supply Line: Attach the supply line to the new valve. Hand-tighten, then give a quarter-turn with the wrench. Ensure the supply line isn’t kinked.
- Turn Water Back On: Slowly open the main valve. Check all connections for leaks. Then, test your kitchen sink pressure.
Important: When buying a new valve, get a “straight stop” or “angle stop” to match the old one. Angle stops (with the outlet pointing 90 degrees) are most common under sinks. Also, consider upgrading to a modern 1/4-turn ball valve, which is more reliable and easier to operate than old gate valves.
Fix #3: Evaluating and Replacing Flexible Supply Lines
If the valves are new and fully open but pressure is still low, the flexible supply lines themselves are the prime suspect. These lines can degrade internally.
Signs of a Bad Supply Line
- Kinks or Sharp Bends: Visually inspect the entire length of both hot and cold lines. Any sharp bend or kink acts like a kink in a garden hose, drastically reducing flow.
- Age and Material: Older plastic lines (often gray or white) can become brittle and develop internal cracks or collapses. Braided stainless steel lines are more durable but the internal plastic liner can still degrade over 10-15 years.
- Narrow Bore: Some older or very cheap supply lines have a smaller internal diameter (e.g., 3/8″ vs. standard 1/2″). This inherently restricts volume. Replacing them with a larger-bore line is a simple upgrade.
Replacing a Supply Line
This is perhaps the easiest plumbing fix. Supply lines are inexpensive ($5-$20 each) and require no special skills beyond using a wrench.
- Turn Off Water: As before, shut off at the main valve and open the sink faucet to drain.
- Disconnect Both Ends: Use an adjustable wrench to loosen the nuts at both the shut-off valve end and the faucet tailpiece end. Have a bucket ready. Be prepared for some water spillage.
- Remove the Old Line: Pull it out from under the sink.
- Install the New Line: Apply Teflon tape to the threads on the new line’s nuts (most have built-in washers, so tape is often not needed on the nut-to-connection threads, but it doesn’t hurt). Connect one end to the shut-off valve, the other to the faucet. Hand-tighten, then snug with a wrench. Ensure no kinks.
- Test: Turn water back on slowly. Check both connections for leaks. Run the sink on hot and cold. You should notice an immediate difference if the old line was the problem.
Pro Tip: When replacing, buy slightly longer lines than you think you need to avoid kinks. Also, consider “flood-safe” supply lines that have a built-in leak detector and automatic shut-off for extra peace of mind.
Addressing Less Common but Possible Hidden Issues
If you’ve meticulously checked the aerator, valves, and supply lines and the pressure is still unacceptably low, the problem lies deeper in the plumbing system. These issues are less frequent for a *single-sink* problem but are important to recognize.
Faucet Cartridge or Valve Body Failure
Modern single-handle faucets use a cartridge (for ceramic disc, ball, or cartridge types) to mix hot and cold water. If this cartridge becomes clogged with debris or fails, it can restrict flow to both sides. Diagnosis requires disassembling the faucet handle and inspecting the cartridge. This is more brand-specific (e.g., Moen, Delta, Kohler have different cartridges). Consult your faucet’s manual or manufacturer website for disassembly instructions and replacement part numbers. Replacing a cartridge is usually straightforward but requires identifying the correct part.
Pressure Balancing Valve Issue (For Showers/Tubs, Rare for Sinks)
Some home plumbing systems, especially those with a pressure-balancing valve for showers (to prevent scalding), can have a faulty valve that restricts flow to other fixtures when hot water is called. If your low pressure *only* happens when someone else is using hot water elsewhere (like a shower), this *might* be the cause. Fixing this is complex and requires a plumber.
Partial Blockage in the Wall Pipe
It’s possible for the small pipe segment between the shut-off valve and the faucet (inside the wall) to become partially blocked by debris from past work or severe mineral buildup. This is rare. Diagnosis involves disconnecting the supply line from the faucet side (with water on) and seeing if pressure is strong *from the open wall pipe*. If it is, the blockage is in the faucet. If it’s weak, the blockage is in the wall. This usually requires a plumber to snake or replace the section of pipe.
When to Call a Professional Plumber
Your DIY spirit is commendable, but knowing when to stop and call an expert is crucial to avoid costly water damage or safety hazards. Here are the clear red flags:
- The problem affects multiple fixtures on the same floor or side of the house, indicating a main branch line issue.
- You hear loud banging or hammering in the pipes when you turn the water off (water hammer), which can indicate a failing pressure regulator or air chamber.
- You suspect issues with the main water line (the pipe from the street or well), a broken pressure regulator, or extensive corrosion in galvanized pipes. These require excavation, specialized tools, and major work.
- You are uncomfortable working with plumbing or lack the basic tools (wrenches, pipe thread sealant). A small mistake can lead to a major flood.
- After all the above fixes, pressure is still low. At this point, the problem is almost certainly in the walls or main system.
A professional plumber has diagnostic tools like pressure gauges, pipe inspection cameras, and the experience to quickly identify complex issues. For a service call, explain what you’ve already tried—this saves them time and you money.
Conclusion: Empowered and Flowing
Fixing low water pressure in your kitchen sink is a perfect example of a household problem that seems daunting but is usually solved by addressing the most accessible components first. You now have a clear, logical roadmap: diagnose to isolate the problem, then attack the most likely suspects in order—the aerator, the shut-off valves, and the supply lines. Armed with a few basic tools and the knowledge from this guide, you can confidently tackle the issue yourself, restoring a strong, satisfying water flow to your kitchen.
Remember the golden rule of DIY plumbing: always turn off the water supply before disconnecting any lines, and work slowly and methodically. Document your steps with photos if needed. Celebrate the small victory of a clean aerator or a new valve. Not only have you saved the cost of a service call, but you’ve also gained valuable skills and a deeper understanding of your home’s systems. Should you encounter a problem that extends beyond these common fixes, you now know the signs that signal it’s time to bring in the pros. Here’s to powerful streams and successful repairs!
Frequently Asked Questions
Can low water pressure in just my kitchen sink indicate a problem with the main water line?
No, if the low pressure is isolated to only the kitchen sink, the main water line is almost certainly not the issue. Main line problems affect all fixtures in your home. Your problem is almost certainly localized to the sink’s dedicated faucet, aerator, supply lines, or shut-off valves.
Is it safe to replace my own shut-off valves if I’ve never done plumbing before?
Yes, replacing a shut-off valve is one of the safest and most beginner-friendly plumbing projects. The key is to ensure the main water supply to the house is completely turned off before you start. Work slowly, use an adjustable wrench, and have towels and a bucket ready for any residual water in the lines.
What’s the difference between a standard aerator and a “cache” aerator? Does it matter for cleaning?
A standard aerator screws on and off with visible threads. A “cache” aerator (common in Moen and some other brands) has hidden threads and often requires a special key (included with the faucet) to remove. It matters for cleaning because you need the correct tool to remove it. If you can’t unscrew it by hand, search online for “[Your Faucet Brand] cache aerator removal tool” to find the right key.
My sink has low pressure on both hot and cold, but I cleaned the aerator and the pressure is still weak. What’s next?
Since both sides are affected and the aerator is clean, the problem is at a point common to both lines. Your next steps are: 1) Ensure both hot and cold shut-off valves under the sink are fully open. 2) Visually inspect the flexible supply lines for kinks or damage. 3) Consider replacing both supply lines as a pair, as internal degradation can restrict flow.
Could a faulty pressure-balancing valve (like in my shower) cause low kitchen sink pressure?
It’s possible but rare for a sink. A pressure-balancing valve is designed to prevent shower scalding by balancing hot and cold. If this valve fails, it *can* restrict flow to other fixtures when hot water is in use elsewhere. However, this would typically cause a pressure drop *only when another hot water fixture is running*. If your sink pressure is always low, this is an unlikely cause.
My home has very hard water. How can I prevent future aerator clogs?
For hard water, prevention is key. Consider installing an inline sediment filter on your kitchen sink’s cold water line under the sink. These inexpensive filters ($20-$50) catch minerals and particles before they reach the faucet. Additionally, plan to clean your aerator every 3-6 months by soaking it in vinegar, which dissolves mineral buildup before it becomes a severe clog.
