Drying plums in your oven is a simple, rewarding process that transforms fresh fruit into sweet, chewy prunes. By following a few key steps—selecting ripe plums, slicing them evenly, and using a low oven temperature—you can create a healthy, preservative-free snack. This method locks in flavor and nutrients, giving you full control over the texture and quality of your dried fruit.
Key Takeaways
- Select Ripe, High-Quality Plums: The best dried plums (prunes) start with fruit that is fully ripe, fragrant, and free of bruises for optimal sweetness and texture.
- Prep is Crucial for Even Drying: Washing, pitting, and slicing plums uniformly (¼-inch thick) ensures they dry at the same rate, preventing some from becoming too hard while others stay soft.
- Low and Slow is the Golden Rule: A consistent oven temperature between 130°F and 160°F (55°C-70°C) gently removes moisture without cooking the fruit, preserving flavor and nutrients.
- Patience and Monitoring are Key: Drying time varies (6-12 hours). Check periodically for a leathery, pliable texture that sticks to itself but doesn’t feel wet.
- Conditioning Ensures Moisture Balance: After drying, let plums “condition” in a sealed container for 7-10 days to redistribute any remaining moisture evenly and prevent spoilage.
- Proper Storage Extends Shelf Life: Store fully conditioned prunes in airtight containers in a cool, dark place for up to a year, or freeze for even longer storage.
- Versatile and Nutritious: Homemade dried plums are a fantastic source of fiber, vitamins, and antioxidants, perfect for snacks, baking, or adding to savory dishes.
[FEATURED_IMAGE_PLACEHOLDER]
📑 Table of Contents
- Introduction: The Sweet Reward of Oven-Dried Plums
- Why Choose the Oven Method? Understanding the Magic of Drying
- Step 1: Selecting and Preparing Your Plums
- Step 2: Setting Up for the Oven Drying Process
- Step 3: The Drying Timeline and How to Check for Doneness
- Step 4: Conditioning and Storing Your Homemade Prunes
- Creative Ways to Use Your Homemade Dried Plums
- Troubleshooting Common Problems
- Conclusion: Your Journey to Perfect Prunes is Complete
Introduction: The Sweet Reward of Oven-Dried Plums
There is something deeply satisfying about taking a simple, beautiful piece of fruit and transforming it into a condensed version of its former self, brimming with concentrated sweetness and a delightfully chewy texture. If you’ve ever wondered how to dry plums in the oven, you’re about to unlock a classic food preservation technique that is easier and more rewarding than you might think. Forget the store-bought varieties that often contain added sugars or preservatives. When you dry your own plums, you control every aspect: the variety, the sweetness level, the thickness, and the final texture. The result is a truly wholesome, nutrient-dense snack that captures summer’s bounty to enjoy all year long. This comprehensive guide will walk you through every single step, from selecting the perfect plums at the market to storing your finished prunes like a pro. Get ready to fill your kitchen with the incredible aroma of gently drying fruit.
Why Choose the Oven Method? Understanding the Magic of Drying
Before we dive into the “how,” let’s appreciate the “why.” Drying is one of humanity’s oldest methods of food preservation. By removing the water content, you inhibit the growth of bacteria, yeast, and mold that cause spoilage. Plums are an ideal candidate for drying because they have a high sugar and acid content, which naturally aids preservation. While you can use a food dehydrator, the oven is a tool almost everyone has, making this method highly accessible.
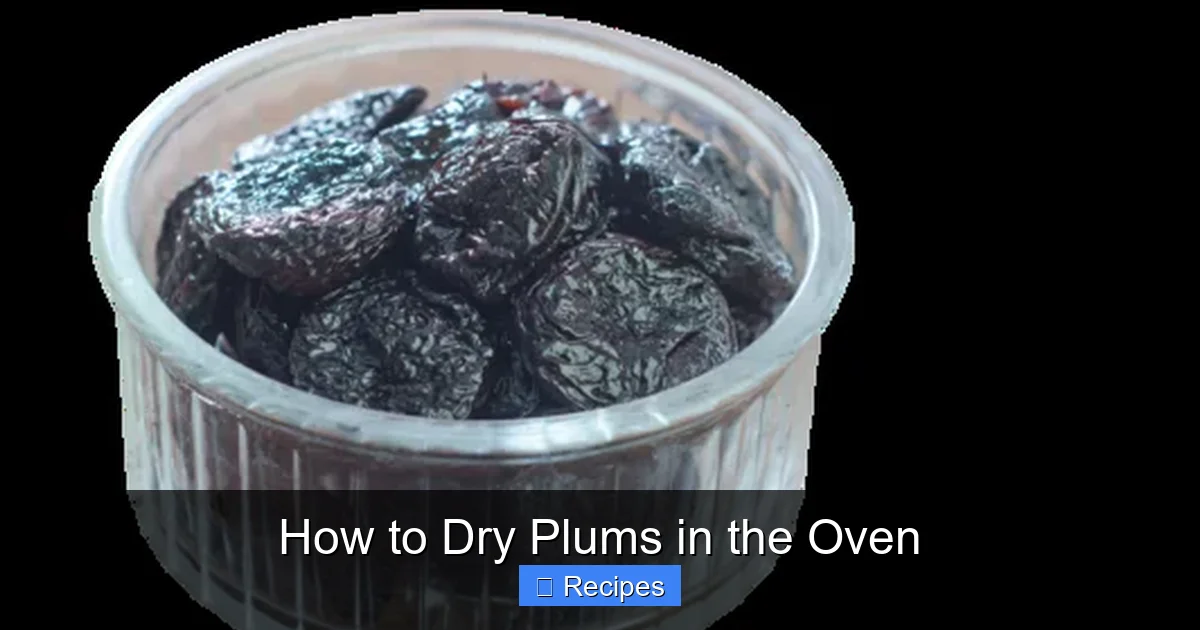
Visual guide about How to Dry Plums in the Oven
Image source: png.pngtree.com
The Science of Dehydration
When you apply gentle heat to a plum slice, the water molecules inside begin to evaporate. The goal is to remove enough moisture (typically reducing the fruit’s water content from about 80% to 20% or less) so that microbial life cannot thrive. The low, slow heat of an oven mimics the sun-drying process but gives you complete control over the environment, eliminating the risks of weather, insects, or inconsistent drying that come with outdoor methods.
Oven vs. Dehydrator: Pros and Cons
While a dedicated dehydrator offers excellent air circulation and precise temperature control, your oven can achieve fantastic results. The main advantage of the oven is convenience—no extra appliance needed. However, some ovens, especially older models, may not maintain very low temperatures accurately. A dehydrator’s circulating air can sometimes lead to more uniform drying. Don’t worry; with the tips in this guide, you can absolutely master the oven method. The rich, caramelized flavor you achieve from the gentle, enclosed heat of an oven is truly unique and delicious.
Step 1: Selecting and Preparing Your Plums
The foundation of exceptional dried plums is exceptional fresh plums. Your choice here will dramatically impact the final product’s flavor, color, and texture.

Visual guide about How to Dry Plums in the Oven
Image source: png.pngtree.com
Choosing the Right Variety
Not all plums are created equal for drying. You want plums with a high sugar-to-water ratio. European prune plums (Prunus domestica), like the ‘Italian’ or ‘French’ varieties, are the classic choice. They are oval, have a deep purple or blue-black skin, and a freestone pit (meaning the flesh separates easily from the pit). These varieties dry into the traditional, dark purple, chewy prune. Japanese plums (Prunus salicina), which are often rounder, juicier, and have red or yellow skin, can also be dried but will yield a different, sometimes chewier and less intensely flavored result. For the best traditional prunes, seek out prune plums. Farmer’s markets in late summer are the best place to find them.
The Ripeness Test
Ripeness is non-negotiable. Underripe plums will be tart and may not dry properly. Overripe plums can be too soft and messy to slice. Look for plums that yield slightly to gentle pressure at the stem end. They should feel heavy for their size and have a rich, fragrant aroma. The skin should be taut and free of major bruises, soft spots, or mold. A little skin discoloration or “bloom” (the natural powdery coating) is perfectly fine and actually indicates freshness.
Essential Prep Work: Wash, Pit, Slice
Once you have your perfect plums, the prep work is straightforward but must be done carefully.
- Wash Thoroughly: Rinse the plums under cool running water. Use a vegetable brush to gently scrub the skins, as they will be included in the final product. Pat them completely dry with a clean kitchen towel. Any surface moisture will increase initial drying time.
- Pitting the Plums: You must remove the pits. A plum pitter is a fantastic tool for this job, making quick work of dozens of plums. If you don’t have one, you can slice the plum in half around the pit and twist, then carefully cut the pit out. Try to keep the halves as intact as possible.
- Slicing for Success: This is the most critical step for even drying. Slice the pitted plum halves into consistent pieces. For standard prunes, ¼-inch (about 6mm) thick slices are ideal. You can cut them into halves, quarters, or even circles. Consistency is key! A mandoline slicer set to ¼-inch is the best tool for achieving perfectly uniform slices across dozens of plums. If slicing by hand, take your time to measure with your eye. Uneven slices will dry at different rates, leaving you with a mix of leathery and brittle pieces.
Step 2: Setting Up for the Oven Drying Process
With your plum slices ready, it’s time to prepare your oven and baking setup. Proper setup ensures maximum air circulation and prevents sticking.
Visual guide about How to Dry Plums in the Oven
Image source: psmuae.com
Choosing Your Baking Vessels
You have two excellent options:
- Baking Sheets with Cooling Racks: This is the preferred method. Place a layer of plum slices on a cooling rack set inside a rimmed baking sheet. The rack elevates the fruit, allowing hot air to circulate above and below each slice. This is the closest you can get to a dehydrator’s airflow in a standard oven.
- Directly on Baking Sheets: If you don’t have racks, you can place slices directly on parchment paper-lined baking sheets. The parchment prevents sticking and makes cleanup easy. However, the side touching the sheet may dry more slowly and be less leathery. You’ll need to flip the slices halfway through the drying time.
Arranging the Slices
Lay the plum slices in a single, non-overlapping layer on your prepared racks or sheets. Leave a small gap (about ½-inch) between slices. This is crucial! If they touch, they will steam each other instead of drying, creating tough, chewy patches. It’s better to use multiple baking sheets and do several batches than to overcrowd a single sheet. Work in batches if necessary.
Oven Temperature: The Low and Slow Secret
This is the single most important technical detail. Your goal is to dehydrate, not bake. The ideal temperature range for drying fruit in a home oven is 130°F to 160°F (55°C to 70°C).
- Why So Low? Temperatures above 170°F (77°C) can cause the fruit to “case harden.” The outer surface dries and forms a tough skin, trapping moisture inside. This inner moisture then leads to spoilage later. Low heat allows moisture to evaporate steadily from the inside out.
- How to Achieve It: Most home ovens have a minimum setting of 170°F (77°C) or 200°F (93°C). This is too hot! Here’s the workaround: set your oven to its absolute lowest temperature (often 170°F/200°F). Then, prop the oven door open slightly with a wooden spoon or a commercial oven venting tool. This allows hot air to escape and brings the internal temperature down into the safe 130-160°F range. Use an oven thermometer placed on a rack to verify the actual temperature inside. This step is essential for success.
Step 3: The Drying Timeline and How to Check for Doneness
Now, the waiting game begins. Drying time is highly variable and depends on your plum slice thickness, oven accuracy, humidity, and the number of batches. It can take anywhere from 6 to 12 hours.
The Drying Process: What to Expect
Place your loaded baking sheets in the preheated, propped-open oven. The slices will slowly change. First, they will darken in color as sugars concentrate. They will shrink considerably as moisture leaves. You may see some juice bubbling on the surface initially. After several hours, they will begin to feel tacky and look translucent.
How to Test for Perfect Doneness
Don’t rely on time alone. Start checking after about 6 hours. To test if your prunes are done:
- Remove a slice from the oven and let it cool for a minute on the counter. Warm fruit feels different than cool, finished fruit.
- The Texture Test: A properly dried plum should be leathery and pliable. It should bend without breaking. It should feel dry to the touch, not sticky or wet. When you tear a piece apart, you should not see any moisture beads on the inside surface.
- The Touch Test: Press a cooled slice between your fingers. It should feel dry and slightly tacky, like a raisin. It should not feel damp or soft.
- The Fold Test: Fold a slice in half. It should fold easily without cracking.
If the slice feels cool and pliable, it’s done. If it’s still cool, damp, and soft in the center, it needs more time. Return it to the oven and continue checking every 30-60 minutes. Remember, slices on lower racks or in less-convective ovens may need more time. It’s perfectly fine to remove some slices that are done earlier and let the thicker ones continue.
Step 4: Conditioning and Storing Your Homemade Prunes
Your plums are out of the oven, but they’re not quite ready to eat or store yet. Two final steps ensure perfect texture and long-term preservation.
The Critical Conditioning Period
Even after oven drying, some moisture may remain hidden in the center of the thicker pieces. “Conditioning” is a rest period that allows this residual moisture to redistribute evenly throughout all the pieces. Here’s how:
- Once all your plum slices are completely cool, place them in a large, clean, airtight glass or food-grade plastic container. Do not pack them tightly.
- Seal the container and leave it at room temperature (out of direct sunlight) for 7 to 10 days.
- Every day or two, open the container and stir or shake the prunes gently to separate them and allow air circulation.
During this time, you might notice a few pieces feel slightly softer or even see a tiny bit of condensation on the container walls. This is normal. The moisture from the plum centers is migrating out. After the full conditioning period, all pieces should have a uniform, leathery texture. If any pieces feel noticeably damp or sticky after 10 days, they were likely not dried enough initially. You can return them to the oven for another 1-2 hours and then re-condition.
Long-Term Storage Solutions
Properly dried and conditioned prunes are shelf-stable for months.
- Short-Term (Up to 6 Months): Store in airtight glass jars or heavy-duty resealable plastic bags. Keep them in a cool, dark, and dry pantry or cupboard. A basement or cellar is ideal. Avoid exposure to heat, light, and humidity.
- Long-Term (Up to 1 Year or More): For maximum shelf life, store your sealed containers in the refrigerator or freezer. The freezer will halt any potential enzymatic activity and keep your prunes fresh for over a year. There’s no need to thaw them before eating; they’re delicious straight from the freezer.
Always check for signs of spoilage before eating: an off smell (other than sweet, fruity plum), any signs of mold, or a slimy texture means the batch should be discarded.
Creative Ways to Use Your Homemade Dried Plums
Now for the best part—enjoying your creation! While eating them straight from the jar is a perfect, healthy snack, the uses for your homemade prunes are endless.
Beyond the Snack Bag
- Trail Mix & Granola: Chop them up and add to homemade granola, trail mix, or oat bars for a natural sweet chew.
- Baking Boost: Finely chop and add to muffins, breads (like zucchini or pumpkin), cookies, and scones for bursts of flavor and moisture.
- Savory Applications: Don’t just think sweet! Finely diced prunes add incredible depth to tagines, stews (like Moroccan chicken or pork), and stuffings for poultry. They pair beautifully with rich meats like duck or lamb.
- Breakfast & Oatmeal: Stir whole or chopped prunes into morning oatmeal, yogurt parfaits, or chia pudding.
- Cheese Boards: A few whole prunes on a cheese board with sharp cheddar, blue cheese, or goat cheese is a classic and elegant combination.
- Rehydrate for Sauces: Soak prunes in warm water, tea, or juice for 20-30 minutes to plump them up. Use the plumped fruit and flavorful soaking liquid in compotes, sauces, or desserts.
Troubleshooting Common Problems
Even with the best instructions, a few things can go wrong. Here are solutions to the most common issues.
Problem: My prunes are sticky or wet in the middle.
Solution: This means they weren’t dried long enough or the oven temperature was too high, causing case hardening. Return the pieces to the oven at the correct low temperature for several more hours. If they are sticky after conditioning, they are likely unsalvageable and should be used immediately (e.g., in a baked good) or composted.
Problem: My prunes are rock-hard and brittle.
Solution: They were dried for too long or at a temperature that was too high. Unfortunately, you cannot rehydrate brittle prunes back to a chewy texture. Use them as a crunchy topping for salads or yogurt, or grind them into a powder for flavoring smoothies or oatmeal.
Problem: The pieces are drying unevenly.
Solution: This is almost always due to uneven slicing. Use a mandoline next time. Also, ensure your oven has good air circulation. Rotate your baking sheets front-to-back and top-to-bottom halfway through the drying process. If using baking sheets without racks, flip each slice halfway through.
Problem: My prunes have an off or fermented smell.
Solution: This indicates spoilage due to insufficient drying or contamination. Discard the entire batch. In the future, ensure your fruit is pristine, your slicing implements are clean, and your drying time is sufficient. The conditioning period also helps equalize moisture and prevent spoilage pockets.
Conclusion: Your Journey to Perfect Prunes is Complete
Learning how to dry plums in the oven is a simple skill that connects you to traditional foodways and rewards you with a superior, homemade product. It requires patience more than expertise. By selecting ripe fruit, slicing with care, maintaining a truly low oven temperature, and honoring the conditioning step, you will consistently produce beautiful, leathery, sweet prunes that are far more flavorful than anything from a package. This process transforms a seasonal fruit into a pantry staple, a nutritious snack, and a versatile ingredient. So, the next time you see a pile of deep purple prune plums at the market, don’t hesitate. Bring them home, fire up your oven, and experience the magic of dehydration for yourself. Your future self, reaching for a jar of your own homemade dried plums on a cold winter’s day, will thank you.
Frequently Asked Questions
Can I dry plums without pitting them first?
No, you should always pit plums before drying. The pits contain compounds that can impart a bitter, almond-like flavor (from amygdalin) to the surrounding fruit as it dries. They also make for an unpleasant, inedible center.
My oven doesn’t go below 170°F. Is it still possible to dry plums?
Yes, but you must prop the oven door open slightly with a wooden spoon to allow heat to escape. Use an oven thermometer to monitor the internal temperature and aim for 130-160°F. The drying process will take longer, and you must be extra vigilant to prevent case hardening.
How do I know if my dried plums have enough moisture to prevent spoilage?
Properly dried plums should be leathery and pliable, not sticky, wet, or rock-hard. The conditioning period in an airtight container for 7-10 days is the final safeguard, allowing any hidden moisture to distribute. If after conditioning a piece feels cool and damp, it needs more oven drying.
Do I need to blanch or treat the plums before drying?
No pretreatment is necessary for plums. Unlike apples or peaches that are often dipped in lemon juice or ascorbic acid to prevent browning, plums naturally hold their dark color well. Simply washing, pitting, and slicing is sufficient.
Can I use other fruits like apricots or peaches with this same method?
The same low-and-slow oven method works well for many fruits. However, stone fruits like peaches and apricots are often treated with an acid wash to preserve color. Their drying times may also differ slightly due to different flesh textures. Always research specific fruit guidelines for best results.
My dried plums are great, but can I make them softer or chewier?
The final texture is determined by the drying endpoint. For a chewier, moister prune, remove it from the oven when it is still slightly more supple and has a bit more give. For a drier, more leathery texture, dry it a bit longer. Experiment with a few slices to find your personal preference.