Drying peppers in an air fryer is a fast, efficient method to preserve your harvest or bulk buys. It locks in intense flavor and vibrant color better than oven drying, using minimal oil and space. You can dry any pepper variety—from mild bell peppers to fiery habaneros—to create versatile seasonings, flakes, or powders for year-round cooking. Follow simple prep steps and precise timing for crispy, shelf-stable results every time.
There’s something magical about walking into a kitchen in the dead of winter and being greeted by the smoky, sweet, or fiery aroma of summer peppers. For home gardeners and savvy shoppers alike, preserving that peak-season bounty is a culinary superpower. While sun-drying is traditional and dehydrators are purpose-built, what if I told you your countertop air fryer—that marvel of crispy fries and roasted veggies—is arguably the best tool in your kitchen for drying peppers? It’s true. The same technology that gives chicken wings their crackly skin and Brussels sprouts their caramelized edges works absolute wonders for transforming fresh peppers into intensely flavored, shelf-stable treasures. This isn’t a hack; it’s a revelation. Let’s dive deep into the precise, step-by-step process of how to dry peppers in an air fryer, turning your appliance into a powerhouse preservation tool.
First, let’s clear the air—pun intended. When we say “dry,” we mean removing nearly all moisture from the pepper flesh so that it becomes brittle, lightweight, and resistant to spoilage. This is different from roasting, where you aim for soft, caramelized edges. In an air fryer, the powerful fan-forced heat evaporates water rapidly while concentrating the pepper’s essential oils and sugars. The result? Flakes and powders with a flavor intensity that often surpasses even commercial varieties. Whether you have a basket-style or oven-style air fryer, the principles are the same: low temperature, patience, and attention. Forget complicated setups; with a few minutes of active prep, your air fryer does the rest while you go about your day. Ready to unlock a new dimension of flavor? Let’s get started.
Key Takeaways
- Speed & Efficiency: An air fryer dries peppers 2-3 times faster than a conventional oven, often in 1-2 hours, saving significant time and energy.
- Flavor Preservation: The rapid, circulating hot air locks in the peppers’ natural sugars and capsaicin, resulting in a more vibrant, concentrated flavor than slower drying methods.
- Versatility is Key: Any fresh pepper—bell, jalapeño, serrano, cayenne, or even rehydrated store-bought—can be successfully dried for flakes, powders, or whole storage.
- Prep is Critical: Uniform slicing (¼-inch thick), removal of seeds/membranes for milder flakes, and a single, non-overlapping layer in the basket are non-negotiable for even drying.
- Low & Slow Wins: Start at 200°F (93°C) and adjust based on thickness. Higher temperatures cook rather than dry, leading to uneven results and potential bitterness.
- Storage is Simple: Fully cooled, bone-dry peppers must be stored in airtight containers with oxygen absorbers in a cool, dark place to prevent mold and maintain potency for up to a year.
- Endless Culinary Uses: Your homemade dried peppers become instant chili flakes, spice blends, BBQ rubs, or can be rehydrated for sauces, salsas, and stews with a depth store-bought can’t match.
📑 Table of Contents
- Why the Air Fryer is a Pepper-Drying Powerhouse
- Selecting and Prepping Your Peppers for Success
- Mastering the Air Fryer Drying Process: Temperature and Time
- Storing Your Dried Peppers for Maximum Shelf Life
- From Flakes to powders: Using Your Air-Dried Peppers
- Frequently Asked Questions (FAQs)
- Conclusion: Your New Favorite Preservation Method
Why the Air Fryer is a Pepper-Drying Powerhouse
Before we get to the “how,” understanding the “why” will make you a more confident and successful pepper dryer. The air fryer combines two critical elements for perfect dehydration: precise, low-temperature control and unparalleled air circulation.
The Science of Rapid, Even Drying
Traditional oven drying often suffers from hot spots and inefficient air movement, leading to some slices turning leathery while others are still damp. An air fryer’s core technology is a powerful fan that circulates super-heated air at high speed around every nook and cranny of the cooking chamber. This constant movement wicks moisture away from the pepper surfaces exponentially faster than still, ambient oven air. Think of it like a mini, turbo-charged dehydrator. The heat is forced into the crevices of a sliced pepper, into the seed cavities, and across every surface simultaneously. This means every piece dries at nearly the same rate, eliminating the need to constantly rotate trays or worry about uneven batches. For a process that relies on complete moisture removal, this uniformity is everything.
Flavor Concentration: The Real Winner
Here’s where the air fryer truly sings. Because it works so quickly (often in under two hours for most slices), the pepper’s delicate flavor compounds—those fruity, floral, or smoky notes—have far less time to degrade or cook off. In a slow oven dryer, peppers can spend 6-8 hours at low heat, during which subtle flavors can fade and sugars can over-caramelize into a one-note sweetness. The air fryer’s speed is a flavor preserver. You’ll taste the difference. A pinch of air-fried dried jalapeño will have a brighter, greener, more complex heat than its slow-dried cousin. The capsaicin (the compound that makes peppers hot) is also concentrated, so a little goes a very long way.
Energy and Space Efficiency
Let’s be practical. A full-size food dehydrator takes up significant counter space. Your oven, while large, heats up your entire kitchen and uses a ton of energy for a small task. The air fryer? It’s a countertop appliance you already own. It preheats in minutes and uses a fraction of the electricity of a full oven. For a small to medium batch (a few pounds of peppers), it’s the most economical choice. No need to invest in a single-purpose gadget when your air fryer wears so many hats.
Selecting and Prepping Your Peppers for Success
Your drying success is 80% determined before you even turn the air fryer on. The right peppers, prepped correctly, will dry evenly and store beautifully. Skip this step, and you’ll get a mix of chewy, moist pieces and bitter, burnt shards.
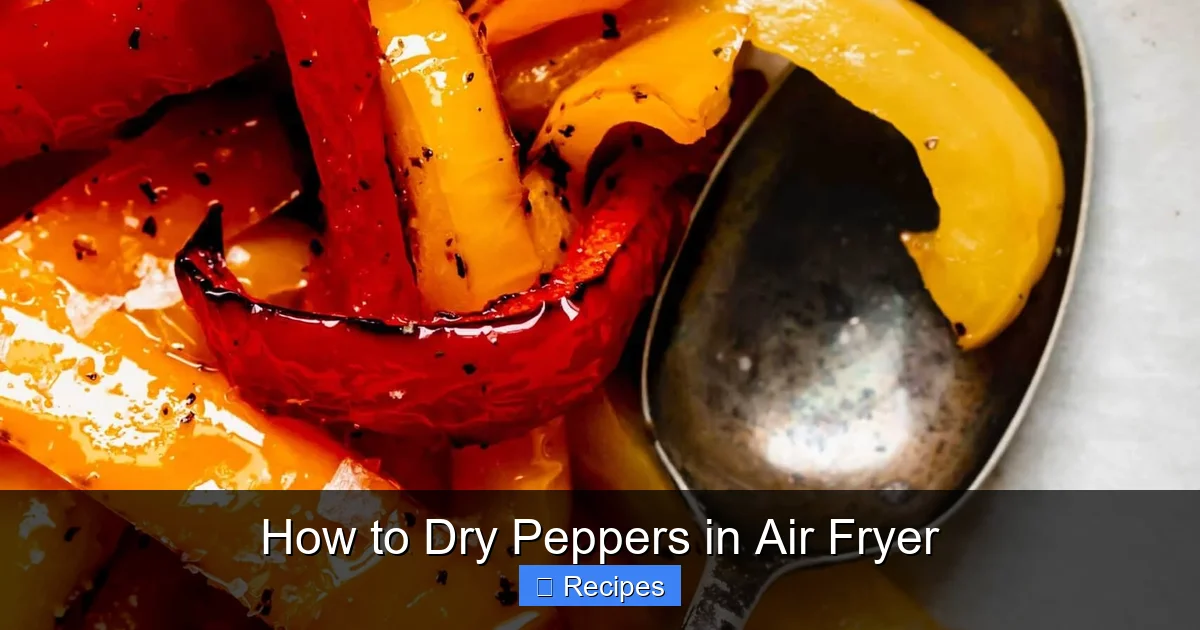
Visual guide about How to Dry Peppers in Air Fryer
Image source: platingsandpairings.com
Choosing the Best Peppers to Dry
The beauty of this method is its universality. You can dry any fresh pepper:
- Sweet Bell Peppers: Red, yellow, orange, and green bells are perfect. They dry into sweet, colorful flakes great for sprinkling on pizza or into salads. Use slightly overripe ones for maximum sweetness.
- Mild to Medium Chilies: Poblanos, Anaheims, and jalapeños are classic choices. They yield a balanced heat and flavor. For jalapeños, consider leaving the seeds and white membranes in for full heat, or removing them for milder, green-focused flakes.
- Hot Chilies: Habaneros, scotch bonnets, serranos, and cayennes are fantastic for making potent, fiery powders and flakes. Handle with gloves! Their thin walls dry very quickly.
- Thick-Walled Peppers: Larger varieties like some poblano or New Mexico chiles may need extra time due to their dense flesh.
Pro Tip: The best peppers for drying are firm, glossy, and unblemished. Any with soft spots, wrinkles, or mold will spoil the entire batch. If you’re drying peppers from your garden, harvest them on a dry, sunny morning after the dew has evaporated.
The Non-Negotiable Prep Steps
This is the gospel of air fryer drying. Follow these exactly:
- Wash and Dry Thoroughly: Rinse peppers under cold water to remove any dirt or pesticides. Pat them completely dry with a clean towel. Any surface moisture will steam the peppers initially, extending drying time.
- Remove Stems and Seeds (Optional but Recommended): For most applications, you’ll want to remove the stems. For flakes and powders, scooping out the seeds and white pith (placenta) is highly recommended. The seeds can be bitter and the pith holds most of the heat in many peppers. Removing them gives you more control over the final product’s heat level and texture. However, if you want maximum heat, leave them in.
- Slice Uniformly: This is the most important step. Use a sharp knife or mandoline to slice peppers into ¼-inch (about 6mm) thick rings or strips. Uniform thickness ensures every piece dries at the same rate. Thick chunks will trap moisture; paper-thin slices can burn. For very small peppers like Thai birds eye or cayenne, you can often slice them in half lengthwise without further cutting.
- No Overcrowding: Arrange the slices in a single, non-overlapping layer in your air fryer basket. If they are touching or piled, air cannot circulate, and you will get steamed, soft spots. You will likely need to do multiple batches. Do not be tempted to overfill; it’s the #1 cause of failure.
Mastering the Air Fryer Drying Process: Temperature and Time
Now, the main event. The actual drying process is hands-off but requires you to be a keen observer. There is no single “set it and forget it” time because pepper size, thickness, humidity, and your specific air fryer model all play a role. Here is your definitive guide.
Visual guide about How to Dry Peppers in Air Fryer
Image source: everydayfamilycooking.com
The Golden Rule: Low and Slow (Relatively)
Set your air fryer to 200°F (93°C). This is the sweet spot. It’s hot enough to evaporate moisture efficiently but not so hot that it cooks the exterior before the interior dries, which traps steam and causes toughness or unevenness. Some very thin slices (like half a small chili) might tolerate 225°F (107°C), but start at 200°F. If your air fryer doesn’t have a 200°F setting, use the lowest possible temperature (often 250°F/121°C on some models) but check very frequently.
The Step-by-Step Drying Timeline
Follow this protocol for perfect results:
- Initial Run (20-30 minutes): Place your single layer of pepper slices in the basket. Run the air fryer at 200°F. After 20 minutes, carefully open it and check. The peppers will have shrunk and darkened slightly. Flip each slice with tongs. This promotes even drying.
- Midpoint Checks (Every 10-15 minutes): Continue drying, checking and flipping every 10-15 minutes. The time from here varies wildly:
- Thin slices (jalapeño rings, small chili halves): Total time: 45-75 minutes.
- Medium slices (standard bell pepper strips): Total time: 75-120 minutes.
- Thick slices or large pieces: Total time: 90-150 minutes.
- The Crisp Test: A piece is done when it is brittle and snaps cleanly when bent. It should feel lightweight and have no leathery flexibility. The color will be a deeper, richer version of its fresh self—think vibrant red, deep green, or orange. If it bends or feels at all pliable, it needs more time.
- The Final Cool-Down: Once your batch is done, remove all pieces to a cooling rack. Do not stack them while hot. Let them cool completely at room temperature for at least 30 minutes. As they cool, any residual moisture will redistribute. After cooling, do a final snap test. If any piece is not fully crisp, return it to the air fryer for 5-10 minute increments.
Common Mistakes and How to Avoid Them
Even with a great appliance, pitfalls exist:
- Mistake: Slicing peppers too thick. Fix: Aim for that ¼-inch benchmark. Use a mandoline for consistency.
- Mistake: Overcrowding the basket. Fix: Be patient. Do 3 perfect batches rather than one ruined batch. Your air fryer’s performance depends on airflow.
- Mistake: Using too high a temperature. Fix: Stick to 200°F. If your appliance runs hot, start at 180°F (82°C) if possible.
- Mistake: Not flipping. Fix: Use tongs to flip every 15 minutes or so. This ensures both sides dry evenly.
- Mistake: Storing while warm. Fix: Always cool completely. Trapped heat = condensation = mold.
Storing Your Dried Peppers for Maximum Shelf Life
Your beautifully dried peppers are a treasure, but improper storage will turn them into a tragic, moldy mess. The enemy is moisture and oxygen. Follow these steps for a year of flavor.
Visual guide about How to Dry Peppers in Air Fryer
Image source: i.pinimg.com
The Cooling and Conditioning Phase
After your peppers are bone-dry and cooled, you must “condition” them. This is a food-safety step that ensures no hidden moisture pockets exist. Place the completely cooled, crisp pepper pieces in a large, clean glass jar. Seal it tightly. Leave it at room temperature for 7-10 days. Shake the jar daily. If you see any condensation on the jar walls or the peppers feel less than crisp, they need more drying time. Return them to the air fryer for another 15-30 minutes, cool, and re-condition. Only once the jar remains completely dry and condensation-free for the full period are they ready for long-term storage.
Long-Term Storage Containers and Location
For storage beyond a few months, use:
- Glass Mason Jars with Oxygen Absorbers: This is the gold standard. Place a small (50-100cc) oxygen absorber packet (food-grade, from a dehydration supply store) into a clean, dry pint or quart jar. Fill with your conditioned peppers, seal tightly. The absorber will suck out any residual oxygen, dramatically extending shelf life and preventing rancidity of oils.
- Heavy-Duty Zipper Freezer Bags: For shorter storage (3-6 months), use high-quality freezer bags. Squeeze out as much air as possible before sealing. Store in the freezer for maximum longevity.
- Vacuum Sealing: If you have a vacuum sealer, this is excellent. Portion peppers into bags, vacuum seal, and store in a cool, dark cupboard.
Storage Location: Always store in a cool, dark, and dry place. A pantry cupboard away from the stove or dishwasher is ideal. Light and heat are flavor-killers. Properly stored, your dried peppers will retain their vibrant color and punchy flavor for 12-18 months.
From Flakes to powders: Using Your Air-Dried Peppers
Now for the fun part! Your dried peppers are a blank canvas. Here’s how to turn them into kitchen staples.
Making Chili Flakes
This is the most common use. Simply place your dried pepper slices (seeds and all, if you like heat) into a food processor or high-powered blender. Pulse in short bursts until you reach your desired flake size. For a coarse, rustic flake, pulse just a few times. For a finer powder, process longer. Sift through a fine-mesh sieve to separate any larger, unprocessed pieces, which you can re-process or use whole. Store your flakes in a small jar with a shaker lid for instant pizza topping, pasta seasoning, or stir-fry boost.
Creating Custom Chili Powders
For a truly fine, versatile powder, you need to go beyond the food processor. Use a high-quality spice grinder (a dedicated coffee grinder works in a pinch, but be warned—it will make your coffee taste like peppers forever!). Grind the dried peppers in batches to a fine, powdery consistency. For complex flavor, blend different peppers—a smoky chipotle with a fruity aji amarillo, for instance. You can also toast your dried pepper slices briefly in a dry skillet before grinding to deepen their smoky notes. This homemade powder will revolutionize your chili, tacos, and rubs.
Rehydrating for Sauces and Stews
Don’t forget you can bring them back to life! To rehydrate, cover dried pepper pieces with hot water and let soak for 20-30 minutes until soft and pliable. Drain (reserve the flavorful soaking liquid for soups or sauces!) and use as you would fresh peppers in salsas, moles, enchilada sauces, or stews. The rehydrated peppers will have a more concentrated, often slightly sweeter flavor than fresh.
Infusing Oils and Vinegars
Add a few whole dried peppers (like a few dried chiles de árbol or Thai chilies) to a bottle of olive oil or white wine vinegar. Seal and let sit in a cool, dark place for 1-2 weeks. The oil or vinegar will take on a beautiful color and a gentle, building heat. Use the oil for frying or drizzling, and the vinegar for vibrant vinaigrettes.
Frequently Asked Questions (FAQs)
Can I dry peppers with seeds and membranes still inside?
Yes, absolutely. Leaving the seeds and white membranes in will result in a much hotter, more pungent final product, as that’s where most of the capsaicin resides. It’s a personal preference. For milder flakes and powders, it’s best to remove them during prep.
What’s the absolute minimum temperature I can use?
While 200°F (93°C) is ideal, if your air fryer’s lowest setting is 250°F (121°C), you can still succeed. You must be extremely vigilant, checking and flipping every 5-10 minutes starting at the 15-minute mark. The higher temperature drastically increases the risk of burning thin slices before the thick parts are dry.
How do I know if my peppers are fully dry and safe from mold?
The “snap test” is your best friend. A fully dried pepper should be brittle and break with a clean snap, not bend. It should feel very lightweight. The conditioning step in a sealed jar for 7-10 days is your final safety net. If any moisture is present, you’ll see condensation on the jar. If the jar stays perfectly dry and the peppers remain crisp, they are safe for long-term storage.
Can I dry different types of peppers together in the same batch?
It’s not recommended. Different peppers have different moisture contents, wall thicknesses, and drying times. Drying a thick bell pepper strip alongside a thin habanero half will mean the habanero is likely burnt by the time the bell pepper is done. For best results, dry similar-sized and -thickness peppers together in dedicated batches.
My air fryer smokes while drying peppers. Is that normal?
A small amount of smoke or vapor is normal, especially with very juicy peppers like ripe bells. It’s moisture being evaporated. However, if you see thick, continuous smoke or smell burning, stop immediately. This usually means your temperature is too high, your slices are too thick, or you have bits of pepper skin or seeds burning on the bottom of the basket. Ensure your basket is clean and lower the temperature.
Can I use an oven-style air fryer (with racks) instead of a basket style?
Yes, and it can be even easier for larger batches. The principle is identical: use the lowest temperature setting (200°F/93°C), arrange peppers in a single layer on the racks without touching, and rotate the racks halfway through the drying time for even exposure to the fan.
Conclusion: Your New Favorite Preservation Method
Drying peppers in an air fryer isn’t just a neat trick; it’s a fundamental skill for anyone who loves cooking with real, vibrant flavor. It democratizes preservation, making it accessible without special equipment. You’ve learned that the magic lies in the details: uniform ¼-inch slices, a patient 200°F setting, the critical flip, and the non-negotiable cool-down and conditioning. You’ve seen how this method outperforms others in speed, flavor retention, and efficiency.
Now, go forth. Take that bag of surplus jalapeños from the farmer’s market, that bumper crop of bells from your garden, or that intriguing hot chili you bought on a whim. Transform them. That jar of homemade, air-fried chili flakes on your counter isn’t just a condiment; it’s a story of summer captured in a spice jar. It’s the smoky ghost of a roasted poblano in your February chili, the bright green punch of a dried serrano on your avocado toast. It’s control over your flavor palette. So fire up that air fryer, embrace the process, and taste the difference that proper, thoughtful drying makes. Your future self, stirring a pot of rich, complex sauce on a cold night, will thank you.
Frequently Asked Questions
Can I dry peppers with seeds and membranes still inside?
Yes, you can. Leaving the seeds and white membranes in will produce a much hotter and more pungent final product, as the capsaicin is concentrated there. It’s a matter of personal preference for heat level.
What’s the absolute minimum temperature I can use in my air fryer?
The ideal temperature is 200°F (93°C). If your air fryer’s lowest setting is higher, like 250°F (121°C), you can still dry peppers but must monitor them extremely closely, checking and flipping every 5-10 minutes to prevent burning.
How do I know if my dried peppers are fully safe from mold?
They must pass the “snap test”—be brittle and break cleanly when bent. After cooling, they must then undergo a 7-10 day “conditioning” period in a sealed jar. If no condensation appears on the jar walls and the peppers remain crisp, they are safe for long-term storage.
Can I dry different types of peppers together in one batch?
It’s not recommended. Peppers vary greatly in thickness and moisture content (e.g., a thin Thai chili vs. a thick bell pepper). Drying them together will result in some burning while others are still moist. For best results, dry similar types and thicknesses in separate batches.
My air fryer smokes while drying peppers. Should I be concerned?
A small amount of vapor is normal. Thick, continuous smoke or a burning smell means the temperature is likely too high, slices are too thick, or debris is burning on the basket bottom. Stop the process, check your settings and slices, and clean the basket.
How long do air-dried peppers last in storage?
When fully dried, conditioned, and stored in an airtight container with an oxygen absorber in a cool, dark place, they will retain peak flavor and quality for 12-18 months. Without oxygen absorbers, aim to use them within 6-9 months.