Drying oregano in the oven is a simple, efficient way to preserve your herb garden’s bounty. This method locks in potent flavor and aroma in under an hour, requiring minimal equipment. Follow our precise temperature and timing guidelines to achieve perfectly crisp, store-bought-quality dried oregano every time.
Key Takeaways
- Low and Slow is Key: Use the lowest possible oven temperature (140-170°F / 60-75°C) to dehydrate oregano without cooking or burning it, which destroys delicate essential oils.
- Prep is Crucial: Always wash, dry thoroughly, and remove leaves from stems. Uniform size ensures even drying and prevents mold.
- Ventilation Matters: Keep the oven door slightly ajar with a wooden spoon to allow moist air to escape, which is essential for proper dehydration.
- Test for Doneness: Properly dried oregano leaves will be brittle and crumble easily between your fingers. They should not feel leathery or pliable.
- Cool Completely Before Storage: Let the dried oregano cool to room temperature in a dry area to prevent condensation in the storage container, which causes clumping and spoilage.
- Store in Darkness: Keep your dried oregano in an airtight container in a cool, dark, and dry place like a pantry, away from heat and light to preserve its vibrant flavor for up to a year.
📑 Table of Contents
- Why Dry Your Own Oregano?
- Selecting and Harvesting Your Oregano
- Essential Pre-Drying Preparation
- The Oven Drying Method: A Step-by-Step Guide
- How to Know When Your Oregano is Perfectly Dried
- Cooling, Storing, and Using Your Dried Oregano
- Troubleshooting: Common Problems and Solutions
- Beyond the Basics: Tips for Superior Flavor
Why Dry Your Own Oregano?
There’s something magical about walking out to your garden and snipping fresh oregano. That pungent, earthy aroma is a cornerstone of countless dishes, from robust tomato sauces to zesty grilled meats. But what do you do when your plant produces more than you can use fresh? The answer is simple: dry it. Learning how to dry oregano in the oven is a game-changer for any home cook or gardener. It transforms an abundant, fleeting harvest into a shelf-stable pantry staple that captures the essence of summer.
Store-bought dried oregano is convenient, but it often sits on shelves for months, losing its vibrant flavor and aromatic oils. When you dry your own, you control every step. You harvest at peak potency, process it immediately, and end up with an herb that is infinitely more flavorful than its commercial counterpart. A little sprinkle of your homemade dried oregano can elevate a simple scrambled egg or a bowl of soup in a way that pre-ground dust simply cannot. Plus, it’s an incredibly satisfying way to reduce food waste and connect with your ingredients on a deeper level.
While air-drying is the traditional method, drying oregano in the oven offers a faster, more controlled alternative. It’s perfect for those humid climates where air-drying can lead to mold, or when you need your herbs ready in hours, not weeks. This method uses gentle, low heat to evaporate moisture while preserving those precious volatile oils that give oregano its characteristic peppery, slightly bitter bite. Let’s walk through the entire process, from garden to jar.
Selecting and Harvesting Your Oregano
The journey to perfect dried oregano begins long before you turn on the oven. The quality of your starting material dictates the quality of your final product. Harvesting at the right time and from the right plants is your first critical step.
Visual guide about How to Dry Oregano in the Oven
Image source: wikihow.com
Timing is Everything
The best time to harvest oregano for drying is just before the plant flowers. Once the flower buds begin to form, the plant’s energy shifts from leaf production to reproduction, and the essential oil concentration in the leaves—which carries all the flavor—starts to decline. You want to catch the leaves when they are most lush and aromatic. Typically, this is mid-morning, after the dew has dried but before the full heat of the sun has had a chance to evaporate some of those precious oils. A quick, gentle rinse to remove any garden dirt or insects is fine, but the leaves must be completely dry before they hit the oven. Any surface moisture will steam the herbs instead of drying them, leading to a musty, inferior product.
Choosing the Best Stems
Don’t just grab any old sprig. Look for healthy, vibrant green stems with no signs of disease, pest damage, or yellowing. The leaves should be plump and firmly attached. If you have a large harvest, you can cut entire stems, but for the most efficient drying, it’s best to strip the leaves from the stems. This creates a uniform layer that dries evenly. Use your fingers to gently pull the leaves off the stem, or use a small knife to slice them off. Discard any woody or thick stems, as they dry much slower than the tender leaves.
Essential Pre-Drying Preparation
Patience in preparation prevents a ruined batch. Skipping these steps is the most common reason for moldy, discolored, or flavorless dried oregano.

Visual guide about How to Dry Oregano in the Oven
Image source: wikihow.com
Washing and Drying: The Non-Negotiable Step
Even if your garden is organic, a rinse is wise. Fill a large bowl or clean sink with cool water and gently swish the oregano bunches to dislodge any hidden soil or tiny critters. Lift them out, letting excess water drip back. Now, for the most important part: drying. You must remove every trace of surface water. The best method is a two-part approach. First, use a salad spinner. Load the leaves (still on stems is fine here) and spin vigorously in batches. This removes 90% of the water. Then, spread the leaves out in a single layer on a clean kitchen towel or a few layers of paper towels. Pat them gently but thoroughly. Let them air-dry on the towel for another 15-30 minutes. You should be able to run your hand over the leaves and feel no cool, dampness. They should feel dry to the touch. This step cannot be rushed.
De-stemming and Chopping (Optional)
For the most efficient oven drying, strip all the leaves from the stems. You can leave the leaves whole, which is great for storing and crushing later. However, many people prefer to give the leaves a rough chop before drying. This increases the surface area, significantly reducing drying time. The trade-off is that chopped leaves can be more prone to burning if you’re not vigilant, and they create more “dust” when you go to use them. If you’re a beginner, start with whole leaves. They are more forgiving. If you’re experienced and watch your oven closely, a coarse chop is perfectly fine and very efficient.
The Oven Drying Method: A Step-by-Step Guide
Now, for the main event. This method is reliable and fast, but it requires attention. Your oven is a tool, and you must learn to use it gently. The goal is to dehydrate, not bake.
Visual guide about How to Dry Oregano in the Oven
Image source: wikihow.com
Step 1: Preheat and Prepare Your Baking Sheets
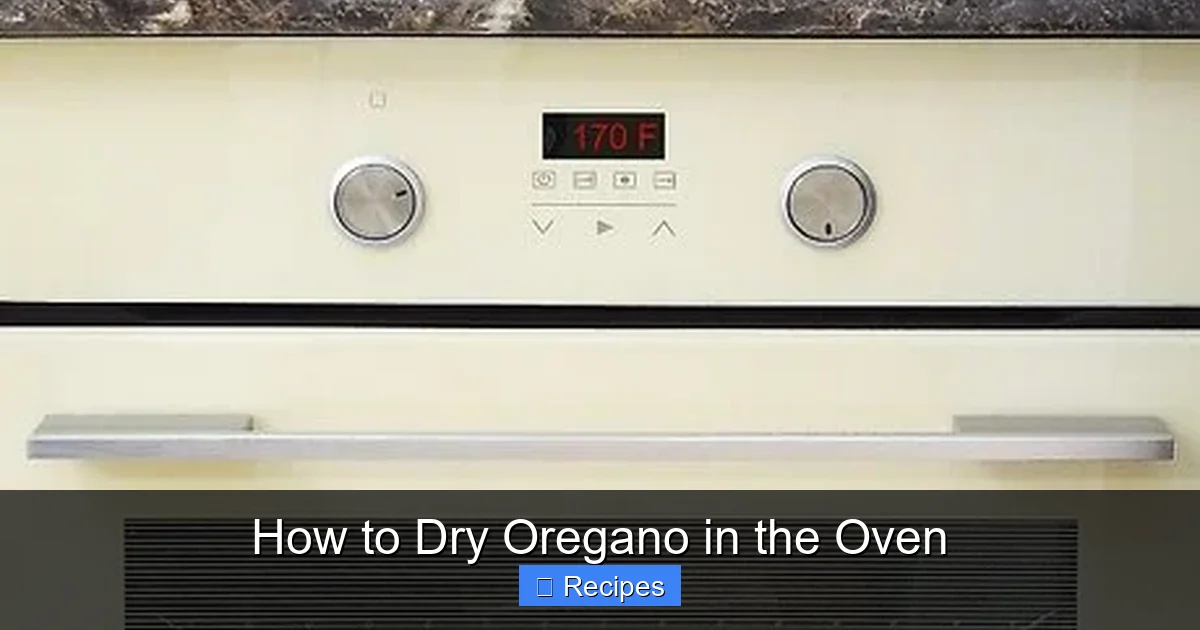
Preheat your oven to the lowest possible temperature. For most home ovens, this is between 140°F and 170°F (60°C – 75°C). If your oven has a “warm” setting or a dedicated dehydrate function, use that. Do not exceed 200°F (93°C). Higher temperatures will cook the herbs, turning them brown and causing a harsh, bitter flavor as the essential oils volatilize or burn. Line your baking sheets with parchment paper. This is not strictly necessary but makes cleanup a breeze and prevents tiny leaf fragments from sticking. Do not use aluminum foil directly, as it can reflect heat and create hot spots.
Step 2: Arrange the Oregano
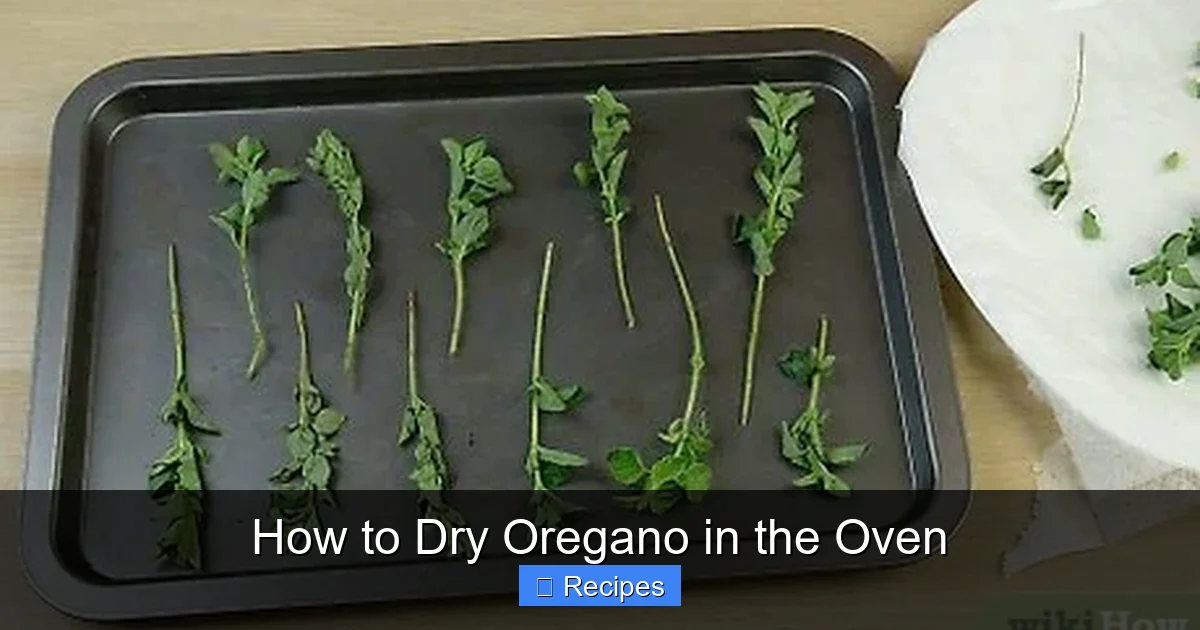
Spread your completely dry oregano leaves in a single, loose layer on the prepared baking sheets. Do not pile them up or crowd them. Think of it like a green, leafy carpet. Overcrowding traps moisture and leads to steaming, which results in chewy, mold-prone herbs. If you have a lot of oregano, use multiple racks and rotate them during the drying process. For chopped oregano, the layer can be slightly thicker but still aim for even distribution without deep piles.
Step 3: Create Ventilation
This is the most important technical step. You must allow the moist, warm air inside the oven to escape. If you close the door tightly, you are essentially creating a mini-sauna that will steam your herbs. Prop the oven door open slightly. The best way is to insert a wooden spoon handle or a rolled-up towel into the top of the door. A gap of about 1-2 inches is ideal. This constant airflow is what pulls the moisture out of the leaves and carries it away. It also keeps the internal temperature from rising too high due to the oven’s cycling.
Step 4: Dry, Check, Rotate
Place the sheets in the preheated oven. Set a timer for 15 minutes. After 15 minutes, open the door (carefully, the air will be warm) and check the leaves. Gently stir them with a spatula or shake the sheet to redistribute them and promote even drying. Check for dryness by taking a leaf and letting it cool for a second, then trying to crumble it. It should be brittle and shatter easily. If it’s still pliable or leathery, it needs more time. Return it to the oven, stirring again. Continue this process, checking every 10-15 minutes. Total drying time can vary from 30 minutes to 1.5 hours depending on your oven’s true temperature, humidity, leaf size, and quantity. Whole leaves on the stem will take longer than loose, chopped leaves.
How to Know When Your Oregano is Perfectly Dried
Knowing when to pull your oregano from the oven is a skill. Under-drying is a disaster waiting to happen (hello, mold!), but over-drying is a waste of time and can subtly degrade flavor. Here’s your definitive checklist.
The Crunch Test
This is your primary indicator. Remove a few leaves from different spots on the baking sheet. Let them cool for 30 seconds on the counter—hot leaves can feel more brittle than they are. Then, use your thumb and forefinger to gently crush a leaf. Properly dried oregano will shatter or crumble into small pieces with a distinct, crisp sound. It should not bend, roll, or feel leathery. If it’s still slightly flexible, it has residual moisture and needs more time. If it’s turning a darker green-brown or starting to blacken at the edges, it’s burning—your oven is likely too hot.
The Visual and Aromatic Cues
Look at the color. Dried oregano should be a muted, dusty green or grey-green. It should not retain the bright, vibrant green of fresh oregano (that indicates it was likely freeze-dried or treated with preservatives). A slight color shift to a duller shade is normal. The aroma should be intensely concentrated and pungent. When you pull your baking sheet out, you should be hit with a wave of that classic oregano scent—earthy, peppery, and slightly camphorous. If it smells faint or “flat,” the drying process may have been too long or too hot, driving off the volatile oils. If it smells musty or grassy, it wasn’t dried enough.
Cooling, Storing, and Using Your Dried Oregano
You’ve survived the drying process! But your work isn’t done. How you handle the herbs after they come out of the oven is just as important as the drying itself.
The Critical Cooling Phase
As soon as your oregano passes the crunch test, immediately remove the baking sheets from the oven. Do not let it cool on the hot sheet. The residual heat from the pan can continue to “cook” the leaves, leading to darkening and flavor loss. Gently pour or scoop the dried leaves into a large, clean, dry bowl or onto a clean kitchen towel. Spread them out to cool completely at room temperature. This should take 30-60 minutes. It must be truly cool. Any residual warmth will create condensation when you seal it in a container, introducing the moisture you worked so hard to remove. This is the #1 cause of clumping and spoilage in home-dried herbs.
Storage Solutions for Maximum Freshness
Once completely cool, it’s jar time. Choose small, airtight glass jars with tight-sealing lids—Mason jars are perfect. The smaller the jar, the less air space, which is better. Avoid plastic bags for long-term storage, as they are not truly airtight and can allow odors and moisture to penetrate. Fill the jars, leaving about a half-inch of headspace. You can gently press the leaves down, but don’t crush them until you’re ready to use them. Store the jars in a cool, dark, and dry place. A pantry cupboard away from the stove or dishwasher is ideal. Light and heat are the enemies of dried herbs, rapidly degrading their flavor and color. Properly dried and stored oregano will retain its potent flavor for 6 to 12 months. After a year, it will be safe but significantly faded. Label your jars with the date!
Cooking with Your Homemade Dried Oregano
The flavor of your homemade dried oregano is more robust and complex than store-bought. Use it with confidence! A general rule: dried herbs are more potent than fresh. Start with about 1/3 the amount called for if a recipe uses fresh oregano. For example, if a recipe calls for 1 tablespoon of fresh chopped oregano, start with 1 teaspoon of your dried version. You can always add more. Because it’s so flavorful, add it early in the cooking process—sauté it with onions, simmer it in sauces, or rub it onto meats before roasting. This allows the delicate oils to infuse the dish. To release maximum flavor, crush the dried leaves between your palms or rub them between your fingers as you add them to the pot. This breaks the cell walls and awakens the aromatic oils.
Troubleshooting: Common Problems and Solutions
Even with the best instructions, things can go awry. Here’s how to diagnose and fix the most common issues when you dry oregano in the oven.
Problem: The Oregano is Chewy or Leathery
Cause: Insufficient drying time or high humidity in the oven (from not propping the door). The leaves still contain too much moisture.
Solution: Return the leaves to the oven. Stir them and continue drying in 10-minute increments, keeping the door ajar. Be patient. It’s better to spend an extra 20 minutes than to have moldy herbs in a week. Ensure your leaves were completely dry to the touch before starting.
Problem: The Oregano is Brown or Blackened
Cause: Oven temperature is too high. You are cooking/burning the herbs, not drying them. This destroys flavor and creates a bitter, unpleasant taste.
Solution: Your oven’s actual temperature is likely higher than its dial setting. Use an independent oven thermometer to verify. Next time, set your oven to its lowest setting (even if it’s 150°F instead of 170°F) and prop the door open wider. You may need to dry in shorter batches at an even lower temp. If only a few leaves are dark, pick them out and discard them.
Problem: The Oregano Smells Musty or “Grassy” After Storage
Cause: Trapped moisture from not cooling completely before storage, or from insufficient initial drying. Mold spores can develop in the hidden moisture.
Solution: Unfortunately, if it smells musty, it’s best to discard the entire batch. Mold can produce invisible toxins. For next time, implement the two-part cooling: cool on the pan for 5 minutes, then transfer to a bowl to finish cooling for an hour before jarring.
Beyond the Basics: Tips for Superior Flavor
Once you’ve mastered the core technique, these pro tips will help you elevate your dried oregano from great to exceptional.
Harvest in Batches
Don’t try to dry your entire garden’s worth at once if your oven is small. Work in batches. It’s better to have multiple small, perfectly dried batches than one large, poorly dried one. The quality will be worth the extra effort.
Consider Mixing Varieties
If you grow different types of oregano—Greek, Italian, Mexican—dry them separately first to understand their individual flavors. Then, you can create your own custom blends. Mexican oregano (actually a different species, Lippia graveolens) has a more citrusy, pungent note that pairs beautifully with cumin and chili powders.
Save and Use the Stems
Don’t throw away the stripped stems! Once your leaves are dried and stored, you can add the clean, dried stems to soups, stews, or stocks while they simmer. They still contain flavor and infuse the liquid beautifully. Just fish them out before serving. It’s a zero-waste way to get every last drop of flavor.
Crush Just Before Use
The essential oils in dried herbs are volatile. Once the leaves are crushed, the surface area exposed to air increases, and the flavor begins to degrade faster. For the most potent punch, store your oregano in whole-leaf form and crush it with your fingers or a mortar and pestle right when you’re ready to add it to your dish.
Frequently Asked Questions
Can I dry oregano with the stems on?
Yes, you can dry whole sprigs. However, stems take significantly longer to dry than leaves and can retain moisture, potentially leading to mold if not dried thoroughly. For the most efficient and even drying, stripping the leaves is highly recommended.
What is the absolute lowest safe oven temperature?
Aim for 140°F (60°C) if your oven can maintain it. The key is to use the lowest setting possible. Many ovens’ lowest “bake” setting is 170°F (75°C), which is acceptable if you prop the door open and monitor closely. Never exceed 200°F (93°C), as this will cook and bitter the herbs.
My oven doesn’t go below 200°F. Can I still use it?
It’s very challenging. At 200°F, you risk cooking the oregano. You would need to prop the door wide open and use an external fan to blow air across the baking sheets, essentially turning your oven into a low-temperature dehydrator. For consistent results, an oven that can maintain 170°F or below is ideal.
How long does oven-dried oregano last?
When completely dried, cooled, and stored in an airtight container in a cool, dark, and dry place, your homemade dried oregano will retain good flavor for 6 to 12 months. After a year, it will be safe but will have lost much of its potency and aroma.
Can I rehydrate dried oregano?
You can, but it’s not recommended for culinary use. Rehydrated dried oregano will be limp and significantly less flavorful than fresh. Its primary use is as a dry spice. If you need a soft herb texture, it’s always better to use fresh oregano.
Is it safe to leave the oven door open for that long?
Yes, it is safe. You are only propping it open a small amount (1-2 inches) with a wooden spoon. The oven’s heating element will cycle on and off to maintain the low temperature. Keep the oven clear of anything flammable and monitor the herbs. This method is standard for low-temperature dehydrating and is perfectly safe for several hours.