Drying fresh rosemary in the oven is a fast, efficient method to preserve your herb garden’s bounty. By using low heat and proper preparation, you can create crisp, flavorful dried rosemary that lasts for months. This guide covers everything from selecting sprigs to perfect storage, ensuring you never waste another fragrant bunch.
There’s something magical about a thriving rosemary plant. That heady, pine-like scent that hits you when you brush against it in the garden or bring a bunch into your kitchen. Fresh rosemary is a culinary superhero, elevating roasted meats, focaccia, and roasted potatoes with its potent, resinous flavor. But let’s be honest: that one beautiful, bushy plant can produce more sprigs than you can use in a week. What’s a home cook to do with the surplus? The answer is simple: dry it. And the fastest, most accessible way to do that is by learning how to dry fresh rosemary in the oven.
Forget the days of hanging dusty bundles from your rafters for weeks on end. Oven-drying transforms your fragrant harvest into crisp, intensely flavored flakes or leaves in a matter of hours, not days. It’s a game-changer for preserving the essence of summer. But to get it right—to capture that bright, woody aroma without turning your precious herbs into bitter, flavorless dust—you need to know the specifics. This isn’t just about turning on the oven and tossing herbs on a tray. It’s a gentle, precise process. So, let’s roll up our sleeves and dive into the complete guide for perfectly oven-dried rosemary, from garden to jar.
Key Takeaways
- Low & Slow is Key: Always use the lowest possible oven temperature (ideally 180°F/82°C or lower) to gently evaporate moisture without cooking away essential oils.
- Prep Prevents Problems: Properly washing, drying, and stripping leaves from stems ensures even drying and prevents mold or sogginess.
- Airflow is Non-Negotiable: Use a baking sheet with a rack or a dehydrator tray to allow air to circulate freely around each rosemary sprig.
- Test for True Crispness: Dried rosemary is ready when leaves crumble easily between your fingers and stems snap, not just bend.
- Storage Dictates Longevity: Store completely cooled rosemary in an airtight container in a dark, cool, dry place to lock in flavor for up to a year.
- Oven vs. Dehydrator: The oven is a great accessible tool, but a dehydrator offers more consistent, hands-off results with even less flavor loss.
📑 Table of Contents
- Why Dry Rosemary? The Flavor & Economy of Preservation
- Why the Oven is Your Best Friend for Drying Rosemary
- Essential Prep: Setting the Stage for Perfect Dried Rosemary
- The Oven-Drying Process: A Step-by-Step Guide
- Storage Solutions: Keeping Your Dried Rosemary Potent
- Common Mistakes & How to Avoid Them
- Beyond Basic Flakes: Creative Uses for Your Oven-Dried Rosemary
- Conclusion: Your Year-Round Taste of Summer
Why Dry Rosemary? The Flavor & Economy of Preservation
Before we get to the “how,” let’s talk about the “why.” Drying herbs is one of the oldest forms of food preservation, and for good reason. It concentrates flavor, extends shelf life exponentially, and gives you a taste of your garden year-round.
The Alchemy of Drying: Flavor Concentration
When you dry fresh rosemary, you’re removing its water content. This does two crucial things. First, it prevents the microbial growth that causes spoilage. Second, and more interestingly, it concentrates the herb’s essential oils and flavor compounds. Think of it like this: a single cup of fresh rosemary leaves is mostly water. Remove that water, and you’re left with a smaller volume of intensely flavorful plant matter. That’s why a pinch of good dried rosemary can pack a flavor punch that rivals a whole fresh sprig in a slow-cooked dish. The key is to dry it gently enough that those precious, volatile oils aren’t steamed away or degraded by high heat.
Economic and Environmental Sense
If you buy fresh rosemary from the grocery store, you know it’s not cheap, and a single recipe might call for just a few sprigs, leaving the rest to wilt in the fridge. Drying your own harvest—whether from a backyard bush or a farmers’ market haul—is incredibly economical. You’re capturing peak-season flavor at a fraction of the future cost. It also reduces food waste dramatically. That bumper crop doesn’t have to go to waste. Plus, there’s a profound satisfaction in self-sufficiency. Opening a jar of rosemary you dried yourself connects you directly to the source of your food.
Why the Oven is Your Best Friend for Drying Rosemary
You have options for drying herbs: air-drying, using a dedicated food dehydrator, or a microwave. So why champion the humble oven? It comes down to speed, control, and accessibility.
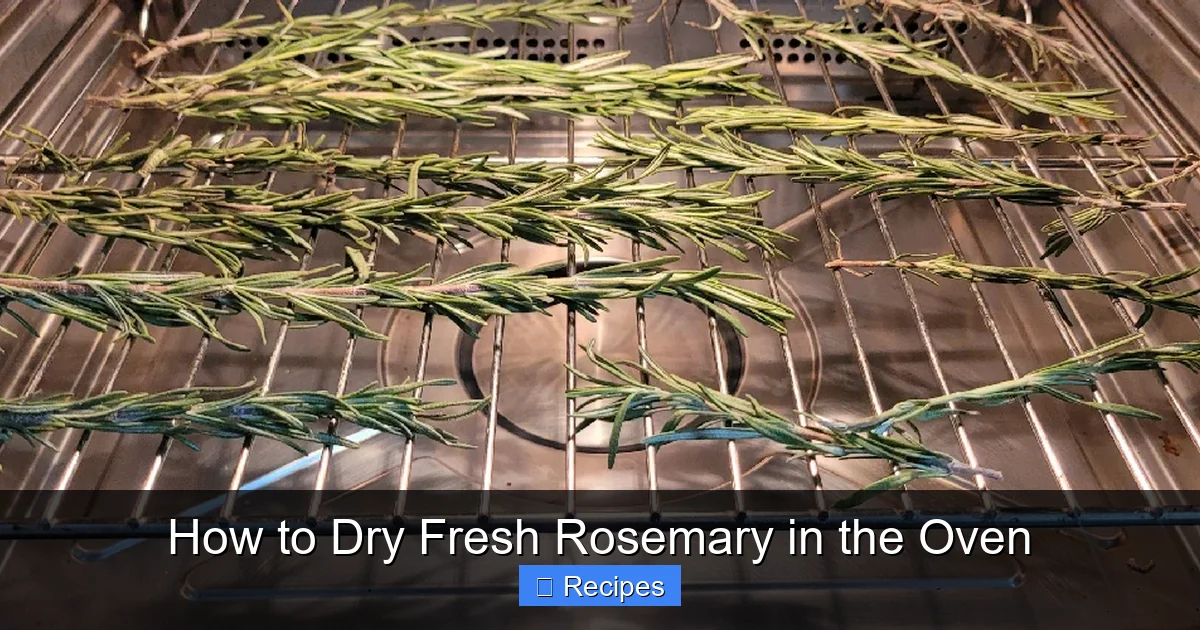
Visual guide about How to Dry Fresh Rosemary in the Oven
Image source: thekitchenix.com
Speed and Predictability
Air-drying rosemary can take 1-2 weeks, depending on humidity and airflow. It’s passive and weather-dependent. The oven, however, provides a controlled, dry heat environment that typically dries a batch of rosemary to perfection in 1 to 3 hours. You don’t have to watch the weather report; you just set a timer. This speed is invaluable when you have a large harvest that needs processing quickly to prevent spoilage.
Universal Accessibility
Not everyone owns a food dehydrator. But almost everyone has an oven. This method democratizes herb preservation. You don’t need special equipment—just a baking sheet, perhaps a cooling rack, and your oven. It’s the perfect solution for the casual home cook who wants to dip a toe into preserving without investing in new gadgets.
Superior to Air-Drying for Rosemary
Rosemary’s needle-like structure is actually well-suited for air-drying, but the oven has a distinct advantage: it guarantees a dry environment. In humid climates or seasons, air-drying can lead to mold or slow, uneven drying where the outer leaves are crisp but the inner stem cores remain moist—a recipe for spoilage in storage. The oven’s consistent, warm, dry air circulates (especially if you use a rack) and removes moisture uniformly from all surfaces, minimizing this risk significantly.
But a word of caution: the oven’s main rival, the dehydrator, often wins on pure flavor preservation. Dehydrators operate at even lower temperatures (95-115°F / 35-46°C) and have built-in fans for superb airflow. If you dry herbs frequently and have the budget, a dehydrator is a fantastic investment. For occasional use, your oven, used correctly, is a perfectly effective and efficient tool.
Essential Prep: Setting the Stage for Perfect Dried Rosemary
Success in the kitchen is 90% preparation, and drying rosemary is no exception. Rushing this stage is the #1 cause of failed batches—herbs that are bitter, moldy, or unevenly dried. Here’s your pre-oven checklist.
1. Selecting the Right Rosemary
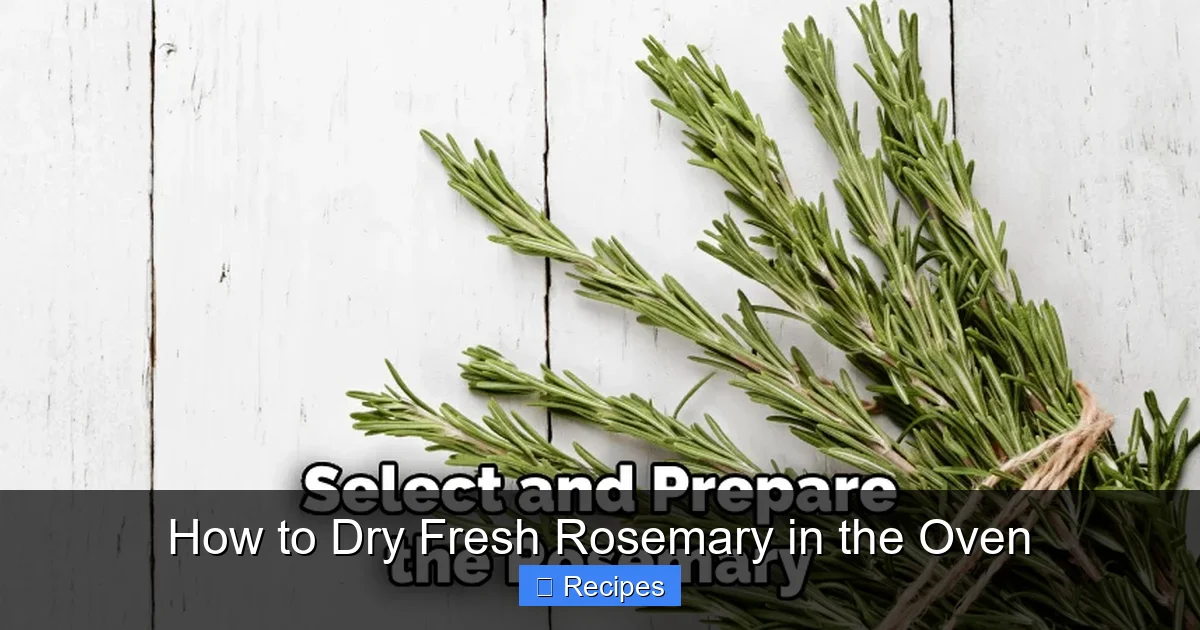
Timing is everything. Harvest your rosemary in the morning after the dew has dried but before the peak sun has hit. This is when the plant’s essential oils are at their highest concentration. Choose sprigs that are vibrant green, firm, and free from any signs of disease, discoloration, or pest damage. Avoid anything that’s already starting to wilt or yellow. If you’re buying from a store, give the bunch a gentle shake; fresh, firm rosemary will feel springy and release a strong scent.
2. The Critical Wash and Dry
Even if your rosemary looks clean, it likely has dust, tiny insects, or garden residue. You must wash it. Fill a bowl or your sink with cool water and gently swish the sprigs around. Don’t rub or agitate harshly, as the delicate leaves can break off. Lift them out and let excess water drip off. Now, this is the most important part: they must be completely dry before they hit the oven. Any surface moisture will turn to steam in the oven, essentially steaming the herbs instead of drying them, leading to sogginess and potential spoilage. Use a salad spinner for the initial spin, then lay the sprigs out on a clean kitchen towel or paper towels in a single layer. Pat them gently if needed, and let them air-dry for 30-60 minutes. They should feel dry to the touch, especially at the base of the stems.
3. To Strip or Not to Strip?
This is a key decision point with two schools of thought. Option A (Recommended for Beginners & Even Drying): Strip the leaves from the stems before drying. Simply hold the top of a sprig with one hand and run your other hand down the stem, pinching the leaves off. This exposes maximum surface area, ensures every leaf dries evenly and quickly, and gives you ready-to-use flakes right out of the oven. Option B (Traditional & For Whole Sprigs): Dry the sprigs whole. This can look rustic and allows you to store whole sprigs to crumble as needed. The downside is that the inner stems take much longer to dry, and you risk having a moist core that can cause mold in storage. If you choose this method, you must be extra vigilant about ensuring stems are completely crisp. For guaranteed success and efficiency, stripping the leaves is the superior method.
The Oven-Drying Process: A Step-by-Step Guide
Now for the main event. Follow these steps precisely for batch after batch of perfect, aromatic dried rosemary.
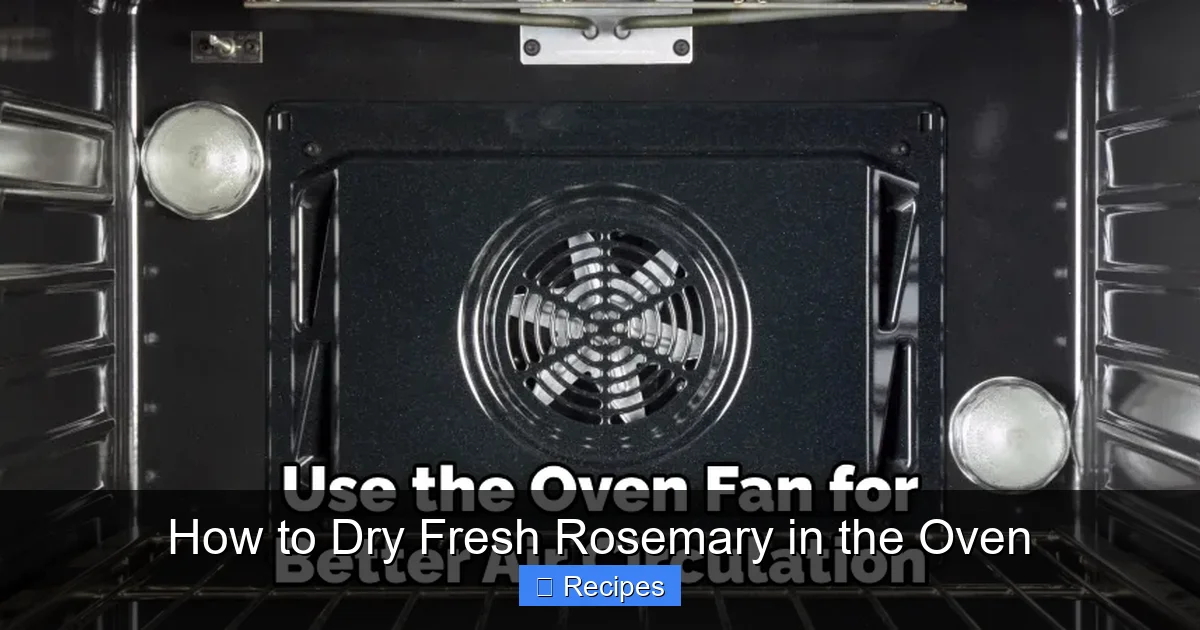
Visual guide about How to Dry Fresh Rosemary in the Oven
Image source: thekitchenix.com
Step 1: Preheat Your Oven—The Right Way
This is the single most important technical step. You want the lowest possible temperature your oven can reliably maintain. The goal is to evaporate water, not cook the herb. High heat will cook the rosemary, destroying its delicate flavor compounds and essential oils, leaving you with something that tastes dusty and bitter. Set your oven to its lowest setting. For most home ovens, this is 170°F to 200°F (77°C to 93°C). If your oven has a “Warm” setting or can go as low as 150°F (65°C), even better. Do not use the broiler setting—that is instant incineration. If your oven’s lowest setting is 200°F, you may need to prop the door open slightly with a wooden spoon to keep the internal temperature from climbing too high. Use an oven thermometer to be sure of your actual temperature.
Step 2: Prepare Your Baking Setup
Line a baking sheet with parchment paper for easy cleanup. For optimal airflow—which is crucial—place a wire cooling rack on top of the baking sheet. If you don’t have a rack, you can use a baking sheet with a perforated design or even a dehydrator tray if it fits. The principle is: you want air to circulate under and over each piece of rosemary. If you just lay leaves on a solid sheet, the bottoms will steam and become less crisp. Spread your stripped rosemary leaves (or whole sprigs) in a single, loose layer on the rack. Do not pile them up. Overcrowding blocks airflow and leads to steaming and uneven drying. You may need to do multiple batches if you have a large harvest.
Step 3: Dry with Patience and Observation
Place the prepared sheet in the preheated oven. Set a timer for 30 minutes. After 30 minutes, check the rosemary. Gently stir or flip the leaves to promote even drying. The total drying time will vary based on your oven’s true temperature, humidity, and the volume/thickness of your leaves. For stripped leaves, it typically takes 1 to 1.5 hours. For whole sprigs, it can take 2 to 3 hours. The key is to watch, not just time. The rosemary is done when it feels completely dry, papery, and crisp. The leaves should crumble easily between your fingers. The stems, if left on, should snap cleanly when bent, not just flex. Remove any leaves that are drying faster than others to prevent burning.
Step 4: The Crucial Cool-Down
Once your rosemary is crisp, turn off the oven and let the tray sit inside with the door closed for 10-15 minutes. This allows any residual heat to finish the job and lets the herbs cool slightly in the dry oven environment. Then, carefully remove the tray and let the rosemary cool completely on the rack at room temperature. Do not store it while warm. Any trapped warmth will create condensation in your storage container, introducing moisture and leading to mold. This step is non-negotiable for long-term storage success.
Storage Solutions: Keeping Your Dried Rosemary Potent
All your careful work is wasted if you store your dried herbs improperly. The enemies of dried herbs are light, heat, air, and moisture. Your storage method must defeat all four.
Visual guide about How to Dry Fresh Rosemary in the Oven
Image source: thekitchenix.com
Container Choice: Glass is King
The best containers for dried rosemary are airtight glass jars with tight-sealing lids—think small canning jars (Mason jars) or spice jars. Glass is non-reactive, won’t absorb odors, and you can see the contents. Avoid plastic bags for long-term storage, as they can be permeable to air and odors over time and can degrade. If you must use a bag, choose a heavy-duty, airtight freezer bag and squeeze out as much air as possible, then store that bag inside a dark container.
The Ideal Storage Environment
Place your sealed jar in a cool, dark, dry place. A pantry shelf away from the stove or dishwasher is ideal. A dark cupboard is even better. Light and heat are flavor-killers, degrading the essential oils over time. Do not store it above the stove or in direct sunlight. With proper storage, your oven-dried rosemary will retain its best flavor for 6 to 12 months. After a year, it will slowly lose potency but will still be safe to use.
Label and Date
Always label your jars with the contents and the date you dried them. It’s easy to forget, and you want to use your oldest herbs first. As a general rule, use your dried herbs within a year for peak flavor.
Common Mistakes & How to Avoid Them
Even with a great guide, pitfalls exist. Here are the most common errors and how to sidestep them.
Mistake: Oven Temperature Too High
The Problem: You’re cooking, not drying. The rosemary turns brown, becomes brittle and crumbly (not pleasantly crisp), and loses its vibrant, piney aroma, tasting instead dusty and sometimes bitter.
The Fix: Always verify your oven’s actual temperature with an oven thermometer. If it won’t go below 200°F, prop the door open a half-inch with a wooden spoon to allow heat to escape. Monitor closely. Lower is always better.
Mistake: Insufficient Drying Time
The Problem: The rosemary feels dry on the surface but retains moisture in the leaf folds or stem cores. This trapped moisture leads to mold growth in the jar, ruining the entire batch.
The Fix: The “snap test” is your best friend. After cooling, try to crumble a leaf. It should turn to powder with gentle pressure. Bend a stem—it should snap. When in doubt, dry it for another 15-30 minutes. It’s better to over-dry slightly than under-dry.
Mistake: Storing While Warm or in a Humid Environment
The Problem: Trapped heat causes condensation inside the jar, introducing moisture. Storing in a humid pantry or near a sink has the same effect.
The Fix: Enforce the cool-down rule. Let herbs sit on the counter for hours after drying until they are utterly room temperature. Store jars in the driest part of your pantry, not next to the kettle or sink.
Mistake: Not Stripping Leaves (When in Doubt)
The Problem: Whole sprigs have a much higher risk of containing a moist stem core, especially if your oven temperature fluctuates or airflow is poor.
The Fix: For your first few batches, strip the leaves. It’s simpler, faster, and more foolproof. Once you’re comfortable with your oven’s performance, you can experiment with whole sprigs.
Beyond Basic Flakes: Creative Uses for Your Oven-Dried Rosemary
Now that you have jars of golden-green, fragrant rosemary, what do you do with it? The uses extend far beyond sprinkling it on roasted chicken.
Infused Oils and Vinegars
Place a few sprigs of your dried rosemary in a clean jar, cover with a high-quality olive oil or white wine vinegar, seal, and store in a cool, dark place for 1-2 weeks. Strain and use the infused liquid for dressings, marinades, or dipping bread. The dried herb infuses cleanly without risk of the water content in fresh herbs causing spoilage.
Homemade Seasoning Blends
Grind your dried rosemary into a finer powder using a spice grinder or mortar and pestle. Use it to make your own “Herbes de Provence,” a rustic “Rosemary Salt” (mix with flaky sea salt), or a “BBQ Rub” with paprika, garlic powder, and brown sugar. Having your own custom dried herb base is the secret to incredible homemade seasoning.
Floral and Aromatic Decor
Dried rosemary isn’t just for eating. Its pleasant, long-lasting scent makes it perfect for homemade potpourri. Mix it with dried lavender, cedar chips, and a few drops of essential oil. You can also use small bundles to scent drawers or as a rustic, fragrant element in wreaths and centerpieces.
Flavor-Boosting Infusions for Stocks and Soups
Toss a couple of whole dried rosemary sprigs into a pot of simmering stock, broth, or soup. Because it’s dried, it holds up to long cooking times without disintegrating into an unpleasant texture, and it imparts a deep, steady rosemary flavor that you can easily remove with a spoon before serving.
Conclusion: Your Year-Round Taste of Summer
Drying fresh rosemary in the oven is more than a kitchen chore; it’s an act of preservation and intention. It’s about capturing the sun-washed scent of your garden in a jar, transforming a fleeting abundance into a pantry staple that will deepen the flavor of your cooking all winter long. You now have the roadmap: select the best sprigs, wash and dry them meticulously, strip the leaves for even drying, use the lowest oven temperature possible with excellent airflow, and store the completely cooled herb in a dark, airtight jar. By respecting the process—by being gentle and patient—you honor the herb and unlock its most potent, delicious form. So next time you see that beautiful rosemary bush bursting with growth, don’t hesitate. Harvest, dry, and fill your kitchen with the promise of countless flavorful meals to come. Your future self, stirring a pot of rich stew on a cold night, will thank you.
Frequently Asked Questions
What is the best oven temperature for drying rosemary?
The absolute best temperature is the lowest your oven can maintain, ideally between 150°F and 180°F (65°C to 82°C). The goal is to gently evaporate moisture without cooking the herb, which destroys its delicate flavor oils. If your oven’s lowest setting is 200°F, prop the door open slightly with a wooden spoon to prevent the internal temperature from rising too high.
How can I tell when the rosemary is completely dry?
Dried rosemary is ready when the leaves feel completely crisp, papery, and crumble easily between your fingers. If you dried whole sprigs, the stems should snap cleanly when bent, not just flex. A slight bend indicates residual moisture, which can cause mold in storage. When in doubt, dry it for another 15-30 minutes.
Should I wash the rosemary before drying it?
Yes, you should always wash rosemary to remove dirt, insects, and residues. However, this step is critical: after washing, you must thoroughly pat and air-dry the sprigs until they are completely dry to the touch. Any surface moisture will steam the herbs in the oven instead of drying them, leading to sogginess and potential spoilage.
Is it better to dry rosemary leaves separately or on the whole sprig?
For guaranteed, even, and efficient drying, stripping the leaves from the stems before drying is the superior method. It exposes maximum surface area, eliminates the risk of a moist stem core, and gives you ready-to-use flakes. Drying whole sprigs is possible but takes longer and requires extra vigilance to ensure the stems snap, not bend.
How long will oven-dried rosemary last and what’s the best way to store it?
When properly dried and stored, oven-dried rosemary will retain its best flavor for 6 to 12 months. Store it in an airtight glass jar (like a small Mason jar) in a cool, dark, and dry place away from heat and light. Always let the rosemary cool completely to room temperature before sealing the jar to prevent condensation.
Can I use a dehydrator instead of an oven, and is it better?
Yes, a food dehydrator is an excellent alternative and is often considered superior for flavor preservation because it operates at lower temperatures (95-115°F) with consistent, powerful airflow. It’s more hands-off and energy-efficient for large batches. However, an oven is a perfectly effective and accessible tool for most people, provided you use the lowest temperature setting and ensure good airflow with a rack.
Pingback: Chilli Sauce Recipes Fresh Chillies - kitchenandhouseware.com
Pingback: Fresh Lobster Boiling Time per Tail - kitchenandhouseware.com
Pingback: Fresh Thyme to Dried - kitchenandhouseware.com