Floating shelves are a versatile kitchen upgrade that adds storage and style without the bulk of traditional cabinets. This guide teaches you how to plan your layout, master key styling principles like the rule of three, and choose the right materials for your kitchen’s aesthetic. You’ll learn room-specific ideas for open concepts, small spaces, and various design styles, plus essential safety and maintenance tips to keep your shelves looking beautiful and functional for years.
Key Takeaways
- Plan Your Layout First: Measure carefully, consider spacing (typically 12-18″ between shelves), and map out zones for function (cooking, prep, display) before hanging anything.
- Embrace the “Rule of Three”: Group items in odd numbers (3, 5, 7) to create visual interest and balance. Vary heights, shapes, and textures within these groups.
- Blend Form and Function: Integrate everyday items like oils, spices, and mugs with decorative pieces. Store what you use, display what you love.
- Create a Cohesive Color Story: Stick to a limited palette (2-3 colors plus neutrals) and repeat materials (wood, metal, ceramic) to unify the look and prevent clutter.
- Choose Materials Wisely: Match shelf material to your kitchen’s style—warm wood for farmhouse, sleek metal for modern, painted wood for cottage—and ensure it’s properly sealed for kitchen humidity.
- Prioritize Safety: Always anchor shelves into wall studs or with heavy-duty toggle bolts, respect weight limits, and keep heavy items on lower shelves for stability.
- Edit and Rotate Seasonally: Avoid static displays. Curate collections, remove one item to add another, and swap pieces with the seasons to keep your kitchen feeling fresh and personal.
📑 Table of Contents
- Why Floating Shelves? The Perfect Blend of Function and Flair
- Phase One: The Critical Planning & Layout Stage
- Styling Principles: The Art of the Arrangement
- Room-Specific Styling Ideas & Inspiration
- Material & Color Choices: Making It Cohesive
- Safety & Maintenance: The Non-Negotiables
- Conclusion: Your Kitchen, Your Gallery
Why Floating Shelves? The Perfect Blend of Function and Flair
Let’s be honest: kitchen cabinets can feel a bit… boxy. They solve storage, sure, but they often mute a room’s personality. Enter the floating shelf—that sleek, minimalist strip of wood or metal seemingly defying gravity on your wall. It’s one of the most transformative and accessible kitchen decor updates you can make. Unlike bulky uppercabinets, floating shelves open up visual space, making even a small kitchen feel airier and more connected to the rest of your home. They turn your everyday dishes, favorite cookbooks, and cherished ceramics into a curated gallery. But here’s the secret: a stunning floating shelf setup isn’t an accident. It’s a deliberate blend of smart planning, styling savvy, and a dash of personal flair. This guide will walk you through every single step, from the first pencil mark on the wall to the final decorative flourish. We’ll move beyond just “putting things on shelves” to creating a cohesive, functional, and beautiful focal point that truly makes your kitchen yours.
The Allure of Open Storage
What makes floating shelves so compelling? It’s the psychology of open storage. They invite you in. They tell a story. When you display your grandmother’s mixing bowls alongside a collection of vibrant spice jars and a few well-chosen plants, you’re not just storing items; you’re sharing a piece of your life. This creates a warm, lived-in feel that closed cabinets simply can’t replicate. Furthermore, in an open-concept home where the kitchen flows into the dining or living area, floating shelves act as a beautiful transitional element. They tie the spaces together decoratively, allowing you to carry design themes from one room to the next seamlessly. They are the ultimate compromise between the stark minimalism of nothing on the walls and the visual heaviness of full cabinetry.
Phase One: The Critical Planning & Layout Stage
Before you buy a single shelf or lift a hammer, you must plan. Rushing this stage is the number one cause of floating shelf regret. A poorly planned arrangement can look messy, feel impractical, or worse—fail structurally. We’re going to break this down into three non-negotiable steps: measurement, zoning, and hardware selection.
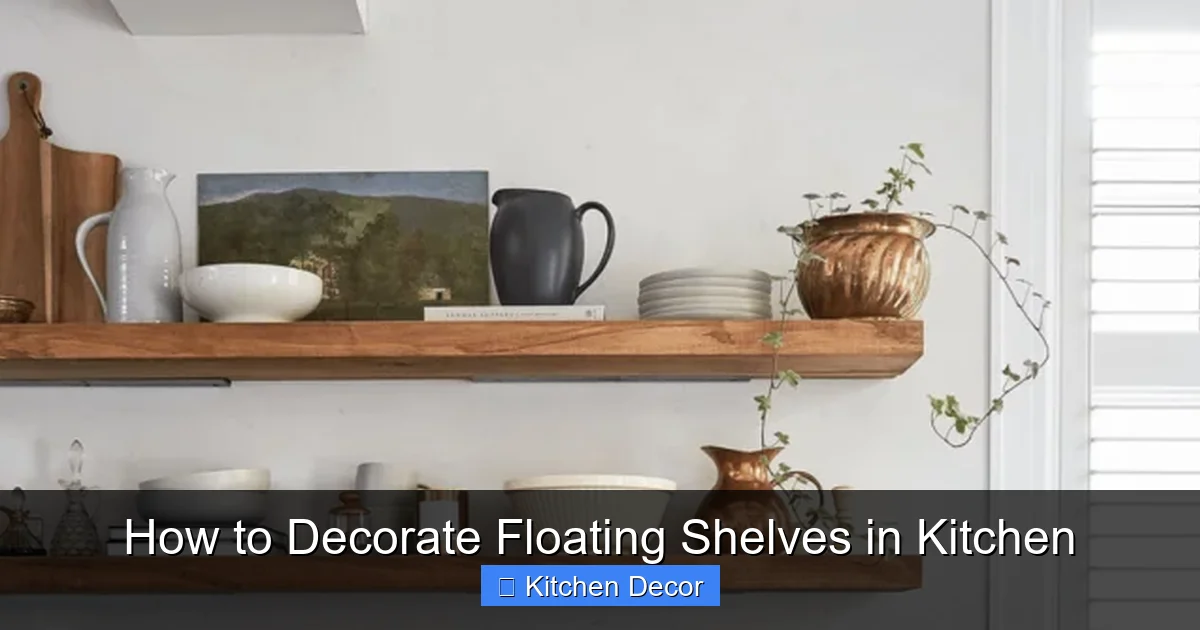
Visual guide about How to Decorate Floating Shelves in Kitchen
Image source: houseilove.com
Step 1: Measure Twice, Hang Once (The Technical Bits)
Grab your tape measure and a notepad. You need to know your wall’s exact dimensions, the location of any electrical outlets, and—most critically—the location of your wall studs. Studs are the vertical wooden framing members inside your wall that provide the essential support for heavy shelves. Use a stud finder to mark their positions. If your perfect shelf span doesn’t align with studs, you have two options: adjust your shelf placement to hit at least two studs, or use heavy-duty toggle bolts (like Togglebolts or Snaptoggles) rated for the weight you’ll carry. Never, ever rely on simple drywall anchors for a fully loaded kitchen shelf. As a general rule, shelves should be placed 12 to 18 inches apart vertically to accommodate most items comfortably. For upper shelves, the bottom edge should be at least 18-20 inches above your countertop to avoid head bumps and allow for workspace. For a backsplash, leave a 1-2 inch gap between the shelf and the tile for easy cleaning.
Step 2: Define Your Zones (The Practical Bits)
Look at your kitchen’s workflow. Where do you chop vegetables? Where do you reach for olive oil? Where do you grab a coffee mug? Map these activities. A shelf directly above or near your stove or main prep area is prime real estate for cooking oils, salts, and frequently used utensils. A shelf near the sink might hold everyday dishes or a pretty soap dispenser. A higher, more decorative shelf can house cookbooks, plants, or sentimental pieces. Assigning a primary “zone” to each shelf prevents chaos. A shelf that tries to be both a spice rack and a plant stand will likely fail at both. Decide: is this shelf for function, display, or a balanced mix? This decision will guide everything that follows.
Step 3: Choose Your Shelf & Hardware
The shelf itself is a major style player. Consider:
- Material: Solid wood (oak, walnut, pine) offers warmth and character. Reclaimed wood adds rustic story. MDF (medium-density fibreboard) painted to match your cabinets offers a seamless, built-in look. Metal (steel, iron) provides industrial sleekness. Glass creates a barely-there modern feel.
- Depth: Standard depths are 8-12 inches. Deeper shelves (12″) can hold more but can feel bulkier. Shallow shelves (8″) are great for small items and maintain a light profile.
- Bracket vs. Hidden: Visible brackets (black iron, brass, wood) can be a decorative feature themselves. Hidden bracket systems (using metal supports inside the wood) create that true “floating” illusion and are ideal for a minimalist aesthetic.
- Finish: Ensure any wood is properly sealed with a food-safe, moisture-resistant polyurethane or wax, especially in a steam-filled kitchen. Painted finishes should be high-quality, scrubbable paint.
Your brackets or internal supports must be rated for the combined weight of the shelf and its contents. When in doubt, over-engineer. It’s better to have a shelf that’s stronger than it needs to be than one that sags or fails.
Styling Principles: The Art of the Arrangement
Now for the fun part! Styling is where your personality shines. But even art has rules. Mastering these core principles will ensure your shelves look intentional and collected, not cluttered and haphazard.
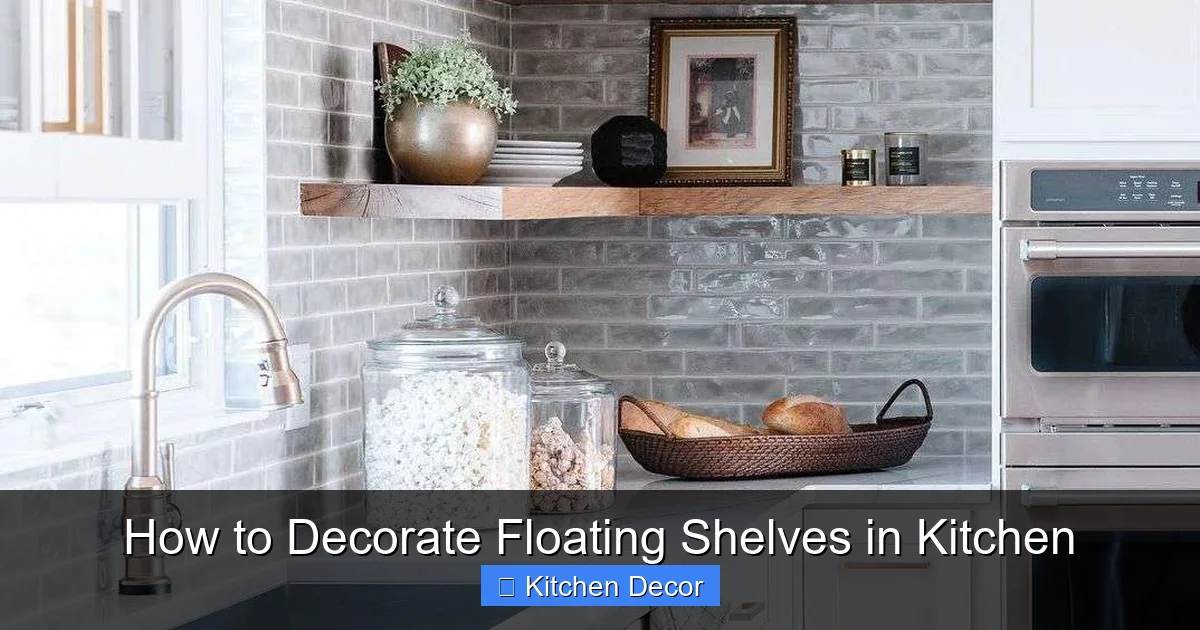
Visual guide about How to Decorate Floating Shelves in Kitchen
Image source: thespruce.com
The Golden Rule: The Rule of Three (and Five)
The human eye finds odd numbers more dynamic and pleasing than even ones. This is the cornerstone of shelf styling. Group items in clusters of three or five. For a long shelf, you might have two distinct groups of three items each, with a single anchor piece in between. But don’t just count objects; think about visual weight. A large, dark vase counts as more “weight” than three small white ceramic bowls. Your goal is to balance this visual weight across the shelf. If you have a heavy item on the left, counterbalance it with a cluster of medium-weight items on the right. Play with height! Vary items from tall (a slender vase, a stack of books) to short (a small bowl, a knob) to create a rhythmic, undulating line that guides the eye along the shelf.
Color, Texture, and Material Harmony
A chaotic color scheme is the fastest track to visual noise. Choose a primary color palette for your shelves and stick to it. A foolproof method is the 60-30-10 rule: 60% dominant color (often neutrals like wood tones, white, black, or beige from your shelves and larger items), 30% secondary color (a complementary hue like navy, sage green, or terracotta from ceramics or textiles), and 10% accent color (a pop of gold, a bright yellow, or a deep red from a small object or plant). Texture is your best friend in preventing monotony. Mix smooth (glazed pottery, glass) with rough (woven baskets, unglazed stoneware, raw wood). Mix hard (metal, ceramic) with soft (linen towels, a small sheepskin, a trailing plant). This interplay creates depth and makes the shelf feel tactile and inviting.
The Essential Mix: Utility Meets Beauty
Never treat your kitchen shelves as purely decorative museums. The magic is in the blend. Your everyday spaghetti pot might be beautiful—display it! Your go-to set of nesting bowls? Perfect shelf fodder. Integrate true function seamlessly:
- Cooking Zone: Beautiful oil and vinegar bottles, a ceramic garlic keeper, a wooden spoon collection, a knife block (if safely secured).
- Prep/Drink Zone: A stack of favorite recipe books, a row of matching mugs, a tray holding tea bags and honey, a cutting board leaned against the back.
- Display Zone: A collection of vintage salt and pepper shakers, a piece of art leaned against the wall, a framed family photo, a beautiful plant.
The key is that everything on the shelf should be something you either use regularly or genuinely love to look at. If it’s neither, it doesn’t belong.
Room-Specific Styling Ideas & Inspiration
There is no one-size-fits-all solution. The best shelf styling responds to your kitchen’s specific size, layout, and overall design theme. Let’s explore how to tailor your approach.
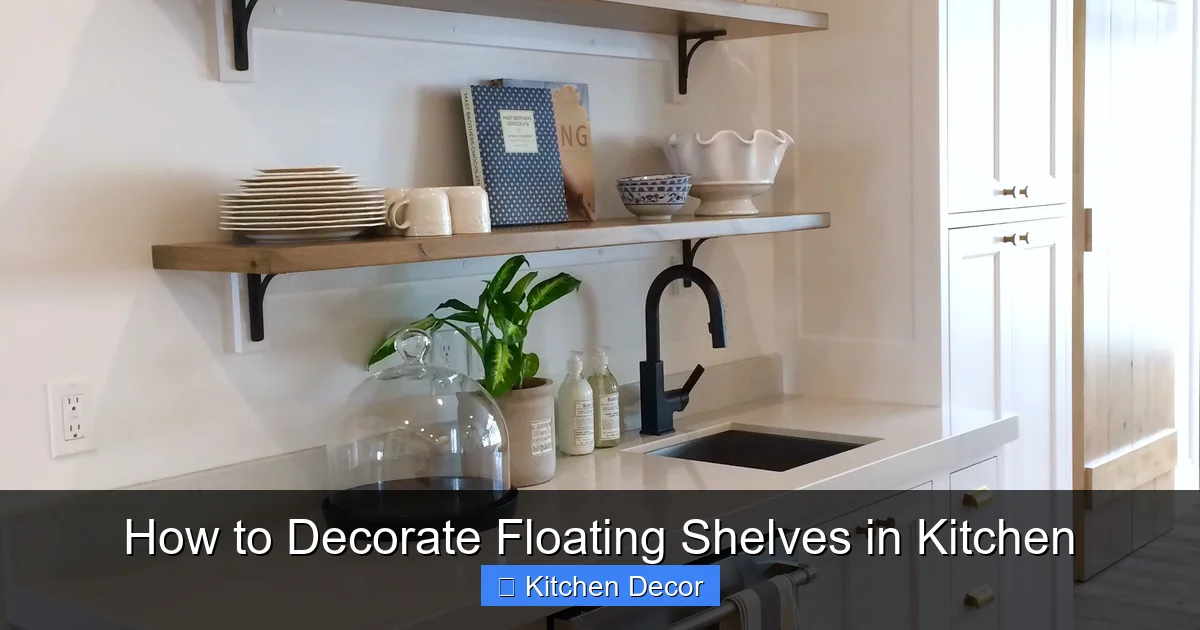
Visual guide about How to Decorate Floating Shelves in Kitchen
Image source: i.pinimg.com
For the Open-Concept Kitchen/Living Area
Here, your shelves are a bridge. They need to speak the design language of both spaces. Opt for materials and colors that appear elsewhere—use the same wood tone as your living room coffee table, or introduce a metal (brass, black iron) that matches your living room lighting. Style with items that tell a broader story: a stack of design books, a sculptural object from your travels, a plant that complements your living room greenery. Keep the look cohesive but not identical to your living room shelves. It’s about creating a harmonious flow, not a duplicate. Avoid overly kitchen-specific items like bulky appliances or rows of canned goods if they would feel out of place in the adjacent room.
For Small or Galley Kitchens
Space is precious. Your strategy must be about lightness and efficiency.
- Go Vertical: Use tall, narrow items to draw the eye upward. A single tall, slender vase or a stack of vertically-oriented books creates height without width.
- Embrace Negative Space: Resist the urge to fill every inch. Purposeful gaps make the space feel larger and prevent claustrophobia. One stunning piece on a shelf can be more powerful than three mediocre ones.
- Light Colors & Reflective Surfaces: White or light wood shelves, glass containers, and metallic accents bounce light and create an airy feel.
- Fully Functional: In a tiny kitchen, your shelves likely must be highly functional. Use uniform containers for pantry items (glass jars with labels), hang mugs from hooks under the shelf, and use every inch for storage you actually need. The style comes from the uniformity and curation of the functional items themselves.
For Modern & Minimalist Kitchens
The mantra here is “less, but better.” Floating shelves are a natural fit.
- Material Palette: Stick to a monochromatic or near-monochromatic scheme. Think white oak shelves with white ceramic, black steel shelves with matte black accessories, or all-white with varying textures.
- Clean Lines: Use geometric shapes—cylinders, squares, rectangles. Avoid fussy patterns or ornate details.
- Limited Objects: A shelf might have only two or three carefully chosen items: a single sculptural vase, a set of three identical planters with the same succulent, a single linen towel folded neatly.
- Hidden Storage: Use beautiful, identical canisters to hide the clutter of tea bags, coffee pods, or snacks. The outside view is serene; the inside is functional.
The goal is a feeling of calm, order, and intentionality.
For Farmhouse & Traditional Kitchens
Warmth and character are key. Embrace imperfection and history.
- Materials: Reclaimed wood, painted wood (often in soft blues, greens, or creams), and wrought iron brackets.
- Collections: Group collections of vintage pottery, blue-and-white ceramics, enamelware, or Mason jars. The slight variations in a collection are part of the charm.
- Layered Textiles: Incorporate linen tea towels, crocheted doilies, or small quilts draped over a shelf edge.
- Practical Rusticity: Display your everyday enamel pot, a wooden rolling pin, a wire egg basket. The items should look useful and loved.
- Greenery: Potted herbs in terracotta pots, a trailing ivy, or a bunch of dried lavender or wheat tied with twine add life and a farmhouse feel.
The vibe should be welcoming, functional, and gently curated, not overly staged.
Material & Color Choices: Making It Cohesive
Your shelf material is the foundation of your entire look. It sets the tone more than any single object you place on it. Let’s match the shelf to your dream kitchen aesthetic.
Wood: The Warm & Versatile Champion
Wood is the most popular choice for its warmth and adaptability.
- Light Oak / Pine: Perfect for Scandi, modern farmhouse, or coastal styles. Pairs beautifully with white, black, navy, and greenery.
- Walnut / Darker Woods: Adds richness and sophistication. Ideal for modern, transitional, or moody kitchens. Looks stunning with brass, gold, cream, and deep green accents.
- Reclaimed Wood: Injects instant rustic, industrial, or farmhouse character. Its unique history and imperfections are its selling point. Ensure it’s properly cleaned and sealed.
- Painted Wood: White, black, or a color from your cabinetry palette creates a seamless, custom-built look. It’s a great way to make the shelves disappear visually, letting your objects pop. Use a semi-gloss or satin finish for durability and easy wiping.
Pro Tip: If you have existing wood tones in your kitchen (table, island, floors), try to match or complement that undertone (warm vs. cool) for a harmonious feel.
Metal & Glass: The Sleek & Modern Contingent
- Black Steel / Iron: The go-to for industrial, modern, and contemporary kitchens. It’s strong, sleek, and provides a beautiful graphic line. Works with almost any color scheme but is especially potent with neutral palettes and pops of color.
- Brass / Gold: Adds warmth and a touch of glamour to modern or traditional settings. It pairs wonderfully with marble, navy blue, and dark wood. Be mindful of the finish—brushed brass is more casual than polished brass.
- Stainless Steel: For a professional, ultra-modern, or minimalist kitchen. It’s seamless and cool but can feel a bit cold or clinical if not balanced with warm textures (wooden spoons, linen towels, plants).
- Glass: The ultimate in lightness. Glass shelves mounted on invisible brackets create a stunning “floating” effect. Best for displaying a few beautiful, lightweight items. Be cautious with heavy or breakable objects, and know that glass shows fingerprints and dust more readily.
Safety & Maintenance: The Non-Negotiables
Beautiful shelves are safe shelves. This section is not glamorous, but it is absolutely critical.
Installation: The Anchor is Everything
This bears repeating: you must anchor into wall studs or use heavy-duty toggle bolts rated for the load. A common mistake is using small plastic anchors meant for picture hanging. They will fail under the weight of dishes and books. For heavy-duty shelves or those holding significant weight, use 3/16″ or 1/4″ toggle bolts, spreading the load across a wider area of drywall. If you’re ever in doubt, consult a professional handyman. The shelf must be perfectly level during installation; use a long level. For long shelves spanning multiple studs, use a continuous support cleat (a long piece of wood or metal attached to the wall studs) to support the entire back edge of the shelf, distributing weight evenly and preventing sagging in the middle.
Weight Distribution & Limits
Evenly distribute weight across the shelf. Don’t place all heavy items on one end. Store the heaviest items (cast iron pans, large canisters, stacks of plates) on the lowest shelves to lower the center of gravity and improve stability. Respect the manufacturer’s weight limit. If you’re building custom shelves, a good rule of thumb for solid wood is that a 1″ thick shelf can safely hold about 20-25 lbs per linear foot when properly supported, but this varies by wood species and support method. When in doubt, be conservative.
Daily Cleaning & Long-Term Care
Kitchens are greasy, steamy places. Choose finishes that can handle it.
- Wood: Wipe with a damp cloth and mild soap. Avoid soaking. Reapply a food-safe mineral oil or beeswax every 6-12 months to maintain the seal and prevent drying. Immediately wipe up any spills, especially oils or acidic substances (lemon juice, vinegar).
- Painted/Metal/Glass: These are the easiest. Use a soft cloth with all-purpose cleaner or a vinegar-water solution. Dry thoroughly to prevent water spots on glass.
- General: Dust shelves weekly. Give a deeper clean monthly, removing all items. This is also your chance to edit and rearrange! Check brackets and supports periodically for any signs of stress or loosening.
Conclusion: Your Kitchen, Your Gallery
Decorating floating shelves in your kitchen is more than a weekend project; it’s an ongoing practice of curation. It’s the art of blending the tools of your daily nourishment with the objects that spark joy. Start with the solid foundation of careful planning and safe installation. Then, let your creativity flow within the guardrails of good styling principles—balance, rhythm, and cohesion. Don’t be afraid to try an arrangement, live with it for a week, and then tweak it. The most beautiful shelves often evolve over time, reflecting the seasons of your life and the stories you accumulate. They become a living, breathing part of your kitchen’s soul. So measure your wall, find your studs, and start building your gallery. Your perfectly decorated, deeply personal floating shelves await.
Frequently Asked Questions
How much weight can floating shelves hold?
Weight capacity depends entirely on the shelf material, thickness, bracket type, and installation method. A properly installed 1.5″ thick solid wood shelf with hidden steel supports anchored into multiple studs can hold 50+ pounds per linear foot. Always follow the manufacturer’s rating and err on the side of caution, placing heaviest items on lower shelves.
What is the ideal spacing between floating shelves?
>The standard and most functional spacing is 12 to 18 inches between the bottom of one shelf and the top of the shelf below. This accommodates most books, canisters, and decorative objects. For displaying tall items like vases or large art, you may need up to 24 inches. Ensure there’s enough clearance from countertops (at least 18″) and above (to avoid head bumps).
How do I style floating shelves in a very small kitchen?
Focus on lightness and efficiency. Use light-colored shelves (white or pale wood). Stick to a monochromatic or limited color palette to reduce visual clutter. Incorporate vertical items (tall slender vases, vertically-stacked books) to draw the eye upward. Embrace negative space—it’s better to have a few perfect items than many crowded ones. Use the shelves for essential, attractive storage with uniform containers.
Can I mix different materials and styles on my shelves?
Yes, but do it intentionally. The key is to find a unifying element—a color, a material, or a theme. For example, you can mix wood, metal, and ceramic if they all share a common color story (e.g., all in warm neutrals) or if you repeat each material at least twice to create balance. Random mixing leads to clutter; curated mixing tells a story.
How do I avoid my floating shelves looking cluttered?
Follow the “rule of three” for groupings, leave intentional negative space, and edit ruthlessly. Every item should be either highly functional or deeply loved. Group similar items together (all your mugs, all your plants). Use trays or small baskets to corral small, miscellaneous items into a single visual unit. Step back frequently to assess the overall balance and remove anything that doesn’t fit.
Are floating shelves safe in a kitchen with kids and pets?
They can be, but with extra precautions. Ensure installation is flawless—into studs with heavy-duty hardware. Avoid placing heavy, breakable, or valuable items on lower shelves within reach. Secure any items that could be pulled (like a mug hook) with museum putty. Consider using safety brackets or cables as an extra backup. Regularly check for any loosening, especially if shelves are bumped frequently.