Drying luffa in your oven is a fast, reliable method to transform fresh gourds into durable, natural sponges or craft materials. Unlike air-drying, which can take weeks and risks mold, oven drying gives you control over the process, typically completing in 4-8 hours at a low temperature. By following precise temperature guidelines and proper preparation, you can achieve a perfectly dried, long-lasting luffa every time.
Key Takeaways
- Oven drying is significantly faster than traditional air-drying, often completing in a single day. This method eliminates the weeks-long wait and reduces the risk of mold or spoilage from unpredictable weather.
- Low and slow is the golden rule: temperatures between 150°F – 200°F (65°C – 93°C) are ideal. Higher heat will scorch the fibrous interior, making it brittle and unusable.
- Uniform slicing is crucial for even drying. Slices should be consistent in thickness (¼ to ½ inch) to ensure all pieces dry at the same rate without some burning while others remain moist.
- Proper pre-cleaning and peeling removes all sap and skin, which is essential to prevent sticking and off-flavors. A fully cleaned luffa will have a smooth, off-white interior.
- Drying is complete when the luffa feels completely rigid, lightweight, and sounds hollow when tapped. It should feel dry to the touch with no cool, damp spots.
- Storage in an airtight container with a food-grade desiccant packet is key for long-term preservation. Any residual moisture will lead to mildew, ruining your dried luffa.
- Dried luffa has versatile uses beyond bathing, including crafts, gardening, and even cooking. Understanding these applications helps you decide on the ideal slice thickness and final dryness level for your project.
📑 Table of Contents
- Introduction: The Magic of the Luffa Gourd
- Understanding Your Luffa: Harvesting and Selection
- Essential Preparation: Cleaning and Peeling Your Luffa
- Step-by-Step: The Oven Drying Process
- Alternative Drying Methods: Air, Sun, and Dehydrator
- Storing Your Dried Luffa for Longevity
- Beyond the Bath: Creative Uses for Your Dried Luffa
- Conclusion: Your Journey to Perfect Dried Luffa
Introduction: The Magic of the Luffa Gourd
You might know it as that rough, yellow sponge you use in the shower, but the luffa (also spelled loofah) starts its life as a fascinating vegetable. It’s a member of the cucumber family, and when young, it’s actually edible. But for our purposes, we let it mature fully on the vine until it turns brown and the fibers inside develop into the strong, network-like structure we recognize. The process of turning this plump gourd into a useful, long-lasting tool is called drying, and doing it in your kitchen oven is one of the most foolproof methods available.
Why choose the oven? If you’ve ever tried air-drying a luffa, you know it’s a game of patience and weather-watching. It can take several weeks to months, and you’re constantly battling humidity, unexpected rain, and the ever-present threat of mold sneaking into the thick interior. Oven drying hands you the controls. You set the temperature, you monitor the progress, and you get a beautifully dried product on your schedule. It’s a transformative process that takes something perishable and makes it practically indestructible. Whether you want a natural bath sponge, a scrubbing pad for pots, or a unique material for crafts, learning how to dry luffa in oven is a valuable homesteading and DIY skill.
This guide will walk you through every single step, from selecting the perfect gourd at the farmer’s market to storing your finished, dried luffa for years. We’ll cover the critical preparation stages that make or break the process, the exact oven settings to use, how to troubleshoot common issues, and even creative ideas for your dried fiber. Let’s get started on turning that humble gourd into a household staple.
Understanding Your Luffa: Harvesting and Selection
Before you even turn on the oven, your success depends on the raw material. A poorly chosen or improperly harvested luffa will be an uphill battle to dry correctly. Understanding what you’re working with is the first, most important step.
Visual guide about How to Dry Luffa in Oven
Image source: theherbprof.com
When to Harvest: The Visual and Auditory Cues
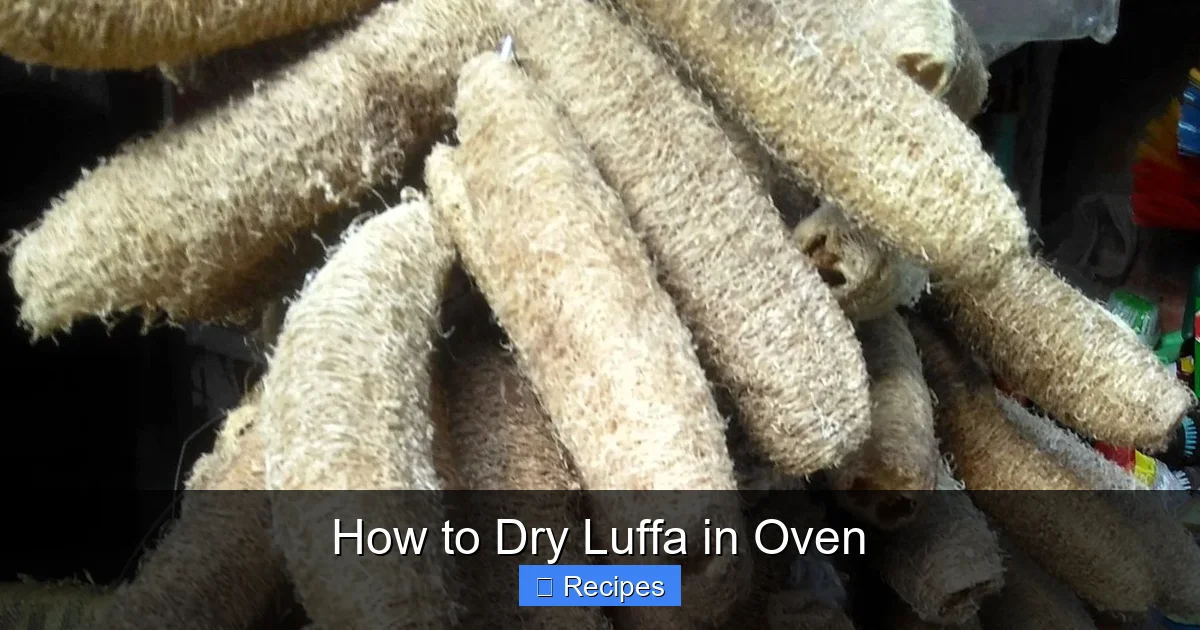
Timing is everything. You must harvest the luffa when it is fully mature. A young, green luffa is soft, fleshy, and edible—it has not yet developed the strong internal fiber matrix. If you try to dry one of these, it will simply rot. A mature luffa ready for drying gives off clear signals.
- Color: The skin should be a deep, golden yellow or light brown. It often looks dry and leathery. Any remaining green patches mean it’s not ready.
- Sound: This is the fun part. Shake the gourd gently. You should hear the seeds rattling around inside. That loose rattle indicates the flesh has dried and shrunk away from the fibrous network, which is exactly what we want.
- Weight: A mature luffa feels surprisingly light for its size because so much moisture has already transpired from the vine.
If you’re growing your own, leave the gourds on the vine until the leaves around them begin to die back. If you’re buying them, seek out farmers at markets who specifically sell them for drying. They can confirm they were left to mature fully.
Inspecting for Flaws
Once you have your mature luffa, give it a thorough inspection. You’re looking for any soft spots, mold, or significant cracks in the skin. A small, superficial crack isn’t a deal-breaker, but deep cracks can allow moisture and contaminants to penetrate the inner fibers, making proper drying very difficult. Choose gourds that are firm and sound intact. Also, consider the shape. While you can slice oddly shaped ones, a long, straight luffa is easier to work with and yields more uniform slices.
Essential Preparation: Cleaning and Peeling Your Luffa
This stage is non-negotiable and directly impacts the final quality of your dried luffa. Skipping or rushing here guarantees a sticky, unpleasant result. Think of it like prepping a potato—you need to remove the outer layer entirely.
Visual guide about How to Dry Luffa in Oven
Image source: thumbs.dreamstime.com
The Deep Clean: Removing Sap and Debris
First, give your luffa a good rinse under cool running water. Use a vegetable brush to scrub away any dirt, sap, or grit stuck to the skin. Pay special attention to the stem end and any crevices. At this point, you’re just cleaning the outside. The real work comes next.
Peeling: Liberating the Fiber
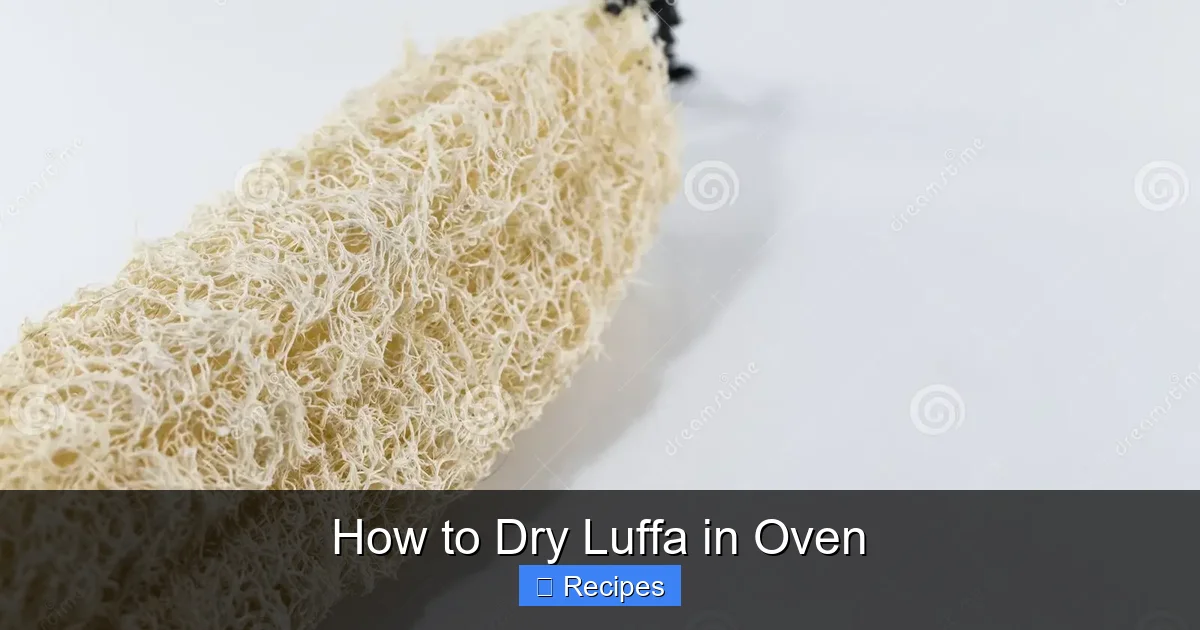
Now, you must remove the tough, outer skin completely. The easiest tool for this is a sturdy vegetable peeler or a sharp paring knife. Work from the stem end down. The skin should come off in strips. If it’s stubborn, make shallow cuts with the knife to get it started. Your goal is to reveal the underlying layer, which is the actual fibrous network you want to dry. This layer is typically a creamy off-white or light tan color and has a distinct, honeycomb-like texture. Be patient and thorough; any bits of skin or dark green flesh left behind will turn black in the oven and can impart a musty smell.
After peeling, rinse the luffa again. Now, you need to deal with the seeds. The easiest way is to cut the luffa in half lengthwise and then scoop out the seed mass with a spoon. You can also shake them out if you’ve done a good job shaking it earlier! Once the seeds are out, give the interior one more rinse. At this point, your cleaned luffa halves or whole small gourds should feel clean, slightly slimy (that’s the natural fiber), and look uniformly pale.
Final Sanitation (Optional but Recommended)
For absolute peace of mind, especially if you plan to use the luffa for bathing or kitchen scrubbing, you can give it a quick dip in a solution of 1 tablespoon of white vinegar per cup of water. Let it soak for 5 minutes, then rinse thoroughly. This helps kill any surface bacteria. Pat the luffa completely dry with a clean towel before moving to slicing. Any excess surface water will extend your oven drying time.
Step-by-Step: The Oven Drying Process
Now we reach the core of our guide: how to dry luffa in oven. This is where patience and attention to detail pay off. The process is simple, but the settings matter immensely.
Visual guide about How to Dry Luffa in Oven
Image source: thumbs.dreamstime.com
Step 1: Preheat and Prepare
Preheat your oven to the lowest possible setting. This is the most critical number. Ideal temperature is 150°F – 175°F (65°C – 80°C). If your oven doesn’t go that low, set it to its lowest setting and prop the door open slightly with a wooden spoon to allow moisture and heat to escape. Never exceed 200°F (93°C). High heat will cook the fibers, making them brittle and yellowed instead of the desired creamy white. While the oven preheats, prepare your baking sheets. Line them with parchment paper for easy cleanup. Do not use foil directly, as it can reflect heat and create hot spots.
Step 2: Slice with Purpose
How you slice your luffa depends on its intended use. For a traditional bath sponge, you’ll want a shape that fits comfortably in your hand. For scrubbing pads, you might prefer smaller, rectangular pieces.
- For Bath Sponges: Slice the luffa crosswise into rounds that are about 1 to 1.5 inches thick. You can also slice it lengthwise for a longer, more ergonomic shape.
- For Scrubbing Pads/Crafts: Slice it into ¼ to ½ inch thick rounds or planks. Thinner slices dry faster and are more flexible when rehydrated.
Use a sharp, serrated knife or a sturdy chef’s knife. A dull knife will crush the delicate fibers. Try to keep all slices as uniform in thickness as possible. This ensures even drying—you don’t want ¼-inch slices burning while ½-inch slices are still damp.
Step 3: Arrange on Trays
Place the luffa slices in a single layer on your prepared baking sheets. Leave a small gap (about ½ inch) between each piece. This is crucial for air circulation. If they are touching, the areas in contact will steam rather than dry, leading to soft spots and potential mold. Do not overcrowd the trays. You may need to use multiple trays and dry in batches.
Step 4: The Drying Marathon
Place the trays in the preheated oven. Set a timer for 1 hour. After one hour, check the luffa. Carefully flip each slice over using tongs. Rotate the trays (move the top tray to the bottom and vice versa) to compensate for any hot spots in your oven. The total drying time can vary widely based on slice thickness, luffa size, humidity, and your oven’s accuracy. Expect anywhere from 4 to 8 hours for ½-inch slices, and possibly longer for thicker pieces.
The key is to dry it out, not cook it. You will smell a mild, earthy, “gourd-y” aroma. If you ever smell anything burning or see pieces turning dark brown, your oven is too hot. Immediately reduce the temperature.
Step 5: The Touch Test for Completion
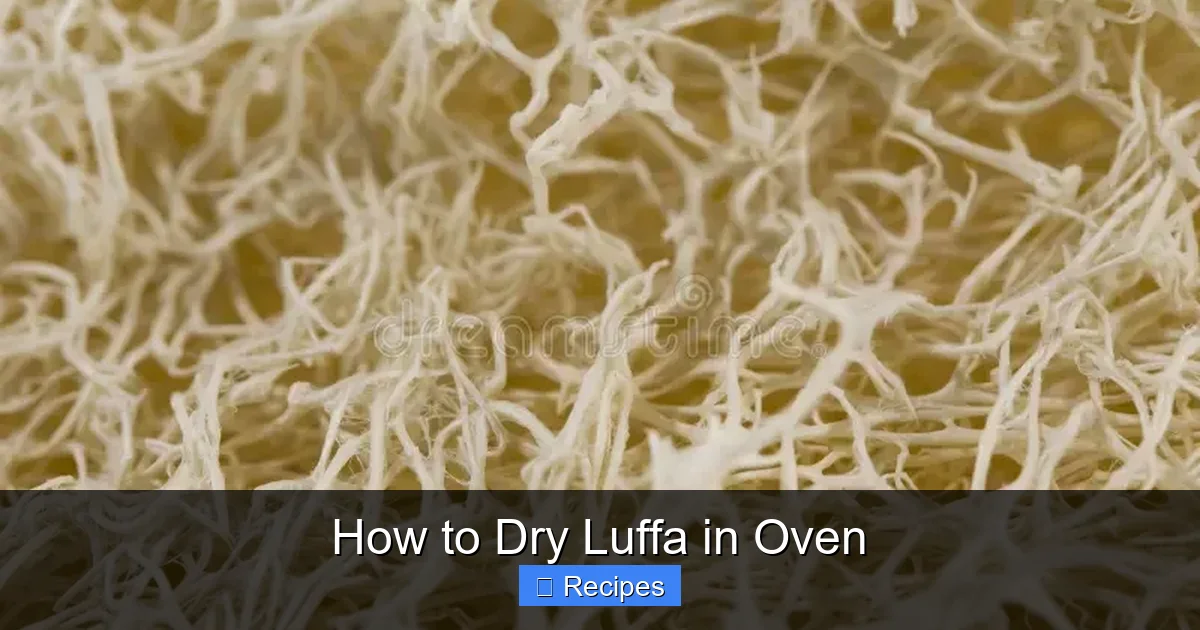
After the minimum time has passed, begin testing for doneness. Remove a slice and let it cool for a minute (it will feel soft when hot). Once cool, it should be:
- Completely rigid—no bend or give.
- Very lightweight—you’ll be surprised how much water evaporated.
- Dry to the touch—no cool, damp feeling anywhere.
- Auditory confirmation: Tap it. It should sound hollow and crisp, like a piece of thick cardboard.
If it fails any of these tests, return it to the oven for another 30-60 minutes and test again. It’s better to slightly over-dry than under-dry. Under-dried luffa will develop mold in storage.
Alternative Drying Methods: Air, Sun, and Dehydrator
While the oven is our star method, it’s helpful to understand the alternatives. Each has its place depending on your resources, climate, and timeline.
Traditional Air-Drying
This is the old-school method. After cleaning and seeding, you hang whole luffas in a warm, dry, well-ventilated area—like an attic, garage, or covered porch. It can take 4-8 weeks. The pros are zero energy cost and hands-off simplicity. The cons are the long timeline and extreme vulnerability to high humidity, which can cause surface mold even if the interior dries. If you choose this method, ensure excellent airflow and consider wiping the surface with a vinegar solution if you see any fuzzy spots appear.
Solar Drying (Sun Drying)
Place cleaned luffa slices on screens or mesh trays in direct sunlight. Cover with a thin, breathable cloth (like cheesecloth) to keep insects off. The sun provides gentle heat and excellent airflow. This method is faster than pure air-drying but is entirely weather-dependent. Bring the trays inside at night or if rain threatens. The UV light can also help sanitize the surface. However, prolonged direct sun can slightly fade the color and may not provide consistent low heat like an oven, leading to uneven drying.
Food Dehydrator Method
A food dehydrator is an excellent, energy-efficient alternative to the oven. Set it to its lowest setting, usually between 125°F – 135°F (52°C – 57°C). Arrange slices on the trays without overlapping. The dehydrator’s circulating air works very efficiently, and drying times are often similar to or slightly faster than a propped-open oven. The main limitation is the size of your dehydrator and its trays—large luffa slices might not fit well.
Comparison: The oven offers the most control and space for most home cooks. A dehydrator is great for smaller batches and uses less energy. Air/sun drying is free but slow and risky. For guaranteed, predictable results, especially for your first time, the oven is the recommended path.
Storing Your Dried Luffa for Longevity
All your careful work will be for naught if you store the dried luffa improperly. Moisture is the enemy. The goal is to keep the internal bone-dry structure from ever reabsorbing humidity.
The Perfect Storage Container
Store your completely cooled dried luffa pieces in an airtight container. Glass jars with tight-sealing lids, heavy-duty resealable plastic bags (press out all air), or plastic storage bins with locking lids all work well. The container should be opaque or stored in a dark cupboard, as prolonged direct sunlight can slowly degrade the fibers over years.
The Desiccant Defense
This is a pro tip that makes a huge difference. Place one or two food-grade desiccant packets (the kind you find in packaged foods or can buy in bulk) in the storage container with your luffa. These silica gel packets actively absorb any trace moisture that might seep in or was trapped in the luffa. They are non-toxic and reusable (you can dry them out in the oven). This simple addition can extend the usable life of your luffa by years and is the best insurance against mysterious mildew.
Ideal Storage Conditions
Keep your sealed container in a cool, dry, and dark place. A pantry shelf, a closet, or a basement (if dry) are perfect. Avoid storing it near the stove, dishwasher, or sink where steam and heat fluctuate. With proper drying and storage in a cool, dry place with a desiccant, your luffa can easily last 5-10 years or more. Periodically check on it. If you ever sense a slight musty odor or see any discoloration, it has absorbed moisture. You can often rescue it by re-drying it in a very low oven (150°F) for an hour or two.
Beyond the Bath: Creative Uses for Your Dried Luffa
Once you’ve mastered how to dry luffa in oven, a world of applications opens up. The natural, fibrous material is incredibly versatile.
The Classic: Natural Bath and Kitchen Sponges
This is the most common use. A 1-inch thick slice makes a perfect, exfoliating body sponge. Soak it in warm water for a minute before use to soften the fibers. For the kitchen, use a thinner slice (¼ inch) as a powerful, non-scratch scrubber for pots, pans, and countertops. It’s perfect for cleaning cast iron—it removes stuck-on food without stripping the seasoning.
Crafting and DIY Projects
The dried luffa’s texture is a crafter’s dream.
- Luffa Stamps: Carve simple shapes (stars, hearts, leaves) into the flat surface of a dried slice with a craft knife. Dab in paint and stamp onto paper or fabric for a unique texture.
- Ornaments: Slice luffa into thin rounds, drill a small hole near the edge, thread with twine, and hang as rustic, natural ornaments. You can dye them with natural dyes or leave them natural.
- Filler Material: Crumbled or shredded luffa fibers can be used as a sustainable, biodegradable filling for pillows, pet beds, or draft stoppers.
Gardening and Plant Care
- Seed Starters: Soak a small luffa piece until it expands, then plant a seed directly into the hollow center. The luffa will retain moisture for the seedling and eventually decompose, adding organic matter to the soil.
- Pest Deterrent: Place dried luffa slices around the base of plants. The rough texture can deter slugs and snails from crossing.
Culinary Surprise
Yes, you can cook with it! A *very* young, green luffa (harvested at 4-6 inches) is a delicacy in many Asian cuisines, with a texture similar to zucchini. But your dried, mature luffa has a use too: as a natural sponge for frying. Soak a small piece in water, then squeeze it out. Wipe the inside of a wok or hot pan with it before adding oil. It creates a fantastic, non-stick surface without adding any flavor. (Ensure your luffa is 100% clean and from a pesticide-free source if using this method!).
Conclusion: Your Journey to Perfect Dried Luffa
Learning how to dry luffa in oven empowers you to create a sustainable, plastic-free alternative for countless household tasks. It connects you to a simple, traditional process that transforms a garden gourd into a durable, functional tool. The magic lies in the details: selecting a mature gourd, the meticulous peeling, the patient low-heat baking, and the vigilant storage. Don’t be discouraged if your first batch isn’t perfect. Note what you did—was the slice too thick? Was the oven a degree too hot? Each attempt hones your intuition.
The rewards are immense. Imagine pulling a perfectly white, rigid, fragrantly earthy luffa slice from your oven, knowing you created it from start to finish. That slice will serve you for years, whether buffing your skin, scrubbing your pans, or sparking a creative project. It’s a small act of self-reliance and a nod to a time before disposable sponges. So, find a good luffa, preheat that oven low and slow, and get ready to experience the profound satisfaction of drying your own natural fiber. You’ve got this!
Frequently Asked Questions
Can I dry a luffa that still has some green skin on it?
No. Any remaining green skin or flesh must be completely removed before drying. That organic matter contains moisture and sugars that will rot or mold inside the oven, ruining the fibrous interior. Always peel down to the pure, pale fiber network.
What is the absolute lowest safe oven temperature to use?
Aim for 150°F (65°C). If your oven’s lowest setting is 170°F (77°C), that is generally acceptable, but you must monitor it very closely and may need to prop the door open slightly to prevent scorching. Never use temperatures above 200°F (93°C).
How thick should I slice the luffa for a bath sponge?
For a comfortable, effective bath sponge, slice your luffa into rounds that are 1 to 1.5 inches (2.5 to 4 cm) thick. This provides enough substance to hold suds and exfoliate without being too harsh or too flimsy when wet.
My dried luffa feels a little flexible. Is it dry enough?
No. A properly dried luffa should be completely rigid and brittle. If it has any bend or give, especially if it feels cool to the touch (indicating residual moisture), it is not done. Return it to the low oven for another hour and test again. Flexibility means mold risk in storage.
How do I rehydrate a dried luffa for first use?
Simply soak the dried luffa slice in warm water for 5-10 minutes. It will expand and soften dramatically, becoming pliable and ready for use. This also helps rinse out any remaining fine dust from the drying process.
Can I use my toaster oven to dry luffa slices?
You can, but it’s challenging. Toaster ovens are small, often have less accurate thermostats, and can have hot spots. If you try, use the lowest setting, bake one or two small slices on the tray, and watch it like a hawk, rotating frequently. It’s doable for a tiny batch but not recommended for larger quantities.