Drying peppers in your oven is a simple, effective way to preserve your harvest or bulk-bought peppers year-round. By using low heat and proper airflow, you can transform fresh peppers into intensely flavorful, shelf-stable flakes, powders, or whole pods. This guide walks you through every step, from selecting the right peppers to perfect storage, ensuring delicious results whether you’re a beginner or an expert.
Key Takeaways
- Select firm, unblemished peppers: The best drying results start with the highest quality, fresh peppers free of soft spots or mold.
- Low and slow is the golden rule: Oven temperatures between 125°F and 175°F (52°C–80°C) prevent cooking and ensure even dehydration.
- Uniform sizing is crucial: Slicing peppers to the same thickness (¼-inch strips or whole small peppers) guarantees they dry at the same rate.
- Airflow is non-negotiable: Use oven racks spaced apart and prop the door open slightly to allow moist air to escape.
- Dryness is defined by texture: Properly dried peppers should be brittle and snap cleanly, not bend or feel leathery.
- Cool completely before storage: Trapped moisture in warm peppers will cause clumping and spoilage in your airtight containers.
- Ventilation is for your safety: Always use your oven’s exhaust fan or open windows to clear spicy fumes and protect your eyes.
📑 Table of Contents
- Unlock Year-Round Flavor: The Magic of Oven-Dried Peppers
- Step 1: Pepper Selection and Preparation – The Foundation of Success
- Step 2: Oven Setup and Technique – Mastering the Environment
- Step 3: How to Tell When Peppers Are Done – The Snap Test
- Step 4: Storage and Usage – Preserving Your Hard Work
- Step 5: Troubleshooting Common Issues
- Conclusion: Your Pantry’s New Best Friend
Unlock Year-Round Flavor: The Magic of Oven-Dried Peppers
There’s something deeply satisfying about taking a bumper crop of fiery jalapeños or sweet bell peppers and turning them into a concentrated, shelf-stable powerhouse of flavor. Drying peppers is one of the oldest and most effective preservation methods, stripping away water to halt spoilage while magnifying their inherent sweetness, smokiness, or heat. While sun-drying or a dedicated food dehydrator are popular, your kitchen oven is a remarkably accessible and powerful tool for the job. It offers precise temperature control and works regardless of humidity or weather, making it a foolproof method for almost anyone.
This comprehensive guide will demystify the process of how to dry peppers in an oven. We’ll move beyond basic instructions to explore the science of dehydration, the nuances of different pepper varieties, and pro-level tips to ensure your dried peppers are perfectly crisp, vibrant, and bursting with flavor. Forget limp, chewy results—we’re aiming for brittle, glassy shards that grind into exceptional chili flakes or rehydrate into a taste of summer any day of the year. Let’s get started on transforming your pepper pile into a pantry staple.
Step 1: Pepper Selection and Preparation – The Foundation of Success
Your journey to perfect oven-dried peppers begins long before you turn the oven on. The prep work you do upfront is the single biggest factor in determining your final product’s quality, flavor, and shelf life. Rushing or skipping these steps is the most common cause of uneven drying, wasted produce, or disappointing texture.
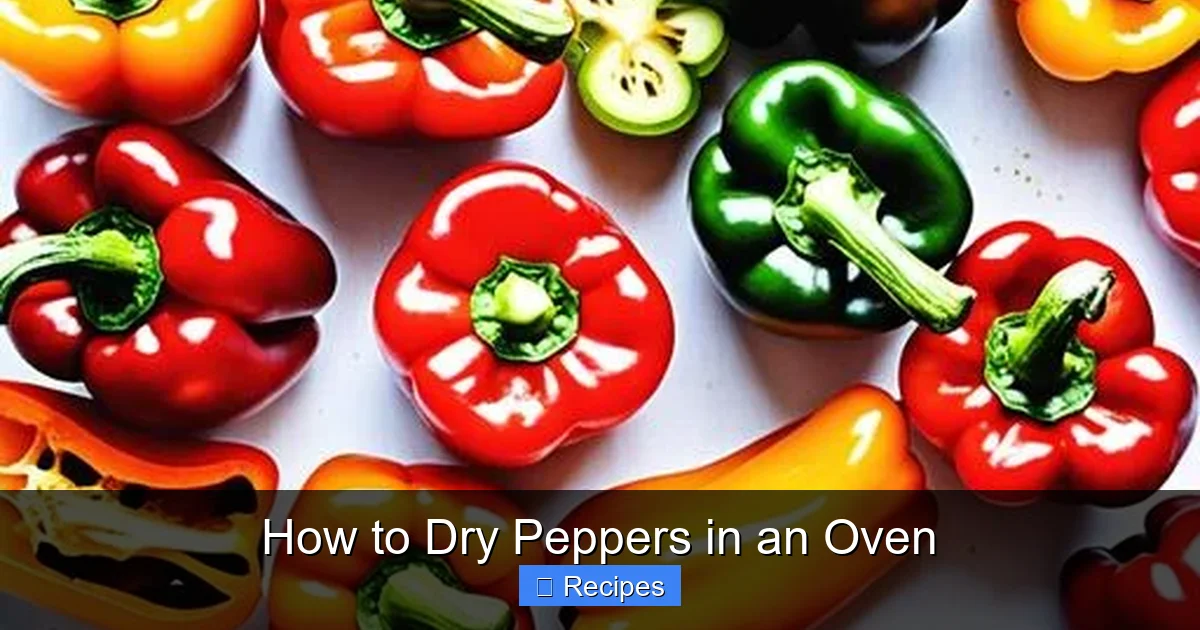
Visual guide about How to Dry Peppers in an Oven
Image source: janeovenrecipes.com
Choosing the Right Peppers for Drying
Not all peppers are created equal when it comes to drying. Your goal is to select peppers that are at their peak of freshness and ripeness.
- Firmness & Skin: Look for peppers that are firm, heavy for their size, and have taut, glossy skin. Wrinkled or soft spots indicate age or decay, which will only worsen during drying.
- Ripeness: Dry fully ripe peppers. A green bell pepper will dry to a dull, olive-green color. A red, yellow, or orange bell pepper will dry to a vibrant, beautiful hue and have a significantly sweeter, more complex flavor. The same applies to chilies—a fully red habanero will be more flavorful than a green one.
- Varieties: Thinner-walled peppers like jalapeños, serranos, cayennes, and Anaheims are ideal for beginners as they dry quickly and evenly. Thicker-walled bell peppers and poblanos require more attention (slicing) but yield fantastic results. Avoid extremely watery varieties like some sweet banana peppers.
Cleaning and Handling: A Matter of Safety and Quality
Capsaicin, the compound that makes peppers hot, can linger on your skin and cause intense irritation. Proper handling is essential.
- Wash Thoroughly: Gently scrub peppers under cool running water to remove any dirt, pesticides, or debris. Pat them completely dry with a clean towel. Any surface moisture will extend drying time.
- Wear Gloves: Always wear disposable nitrile or latex gloves when handling hot peppers, especially if you’ll be slicing a large quantity. The oils can penetrate skin and cause burning, and accidentally touching your eyes is a painful experience you never want to have.
- Remove Stems and Seeds (Mostly): For most applications, you’ll want to remove the stems. You can also remove seeds and membranes to reduce heat if desired, but note that the seeds themselves don’t hold much heat—the white pith (placenta) attached to them does. For a milder dried pepper, scoop out the pith with a spoon. Many people leave seeds in for full flavor and heat, as they will dry along with the flesh.
The Critical Cut: Slicing for Even Drying
This is the most important preparation step. The goal is to create pieces of uniform thickness so they dehydrate at the same rate.
- Whole Small Peppers: Tiny peppers like Thai bird’s eye chilies or small jalapeños can be dried whole. Simply pierce each one once with a toothpick or skewer to allow steam to escape from the interior.
- Halves or Quarters: Medium peppers (like jalapeños or serranos) should be cut lengthwise into halves. For very thick peppers, you can quarter them lengthwise.
- Rings or Strips: Large bell peppers and poblanos should be sliced into ¼-inch thick strips or rings. A mandoline slicer set to ¼-inch is a fantastic tool for achieving perfect, uniform slices quickly and safely.
- Why Uniformity Matters: Imagine one thick slice next to a thin sliver. The thin one will be brittle while the thick one is still leathery and moist. You’d have to over-dry the thin one to get the thick one done, sacrificing quality. Uniform pieces dry together.
Step 2: Oven Setup and Technique – Mastering the Environment
With your pepper pieces prepped and ready, it’s time to configure your oven for optimal dehydration. The core principles here are low temperature and excellent airflow. Remember, you are not cooking the peppers; you are very, very slowly removing water.
Visual guide about How to Dry Peppers in an Oven
Image source: janeovenrecipes.com
Temperature: The Most Important Dial
The ideal temperature range for drying peppers in a conventional oven is between 125°F and 175°F (52°C–80°C).
- The Danger Zone (Above 200°F/93°C): Temperatures that are too high will “cook” the peppers. The outer layer will harden into a tough, impermeable skin (case hardening), trapping moisture inside. This leads to spoilage, uneven drying, and a cooked, less vibrant flavor.
- The Sweet Spot (125°F–150°F/52°C–65°C): This is the gold standard. It’s slow, taking 6-12 hours depending on thickness, but it preserves the most color, flavor, and nutrients. If your oven doesn’t go this low, 175°F is a acceptable compromise, but monitor closely.
- How to Achieve Low Heat: Most home ovens have a minimum setting of 170°F–200°F. If yours won’t go low enough, you have two excellent workarounds:
- Use the “Warm” Setting: Many ovens have a “Warm” or “Proofing” setting, typically around 100°F–150°F. This is often perfect.
- Prop the Door Open: This is the most common and effective technique. After preheating to your lowest setting (e.g., 170°F), turn the oven off, prop the door open 1-2 inches with a wooden spoon or oven-safe silicone handle, and then turn it back on to the lowest bake setting. The open door allows hot, moist air to escape and keeps the internal temperature in the safe, low range. You must use an oven thermometer to verify the actual temperature inside with the door ajar!
Arrangement and Airflow: Don’t Crowd the Pan
How you place the peppers on your baking sheets is critical for circulation.
- Use the Right Pans: Choose rimless baking sheets (jelly roll pans) or regular baking sheets. Avoid solid-sided roasting pans or dishes that trap steam.
- Line with Parchment (Optional but Helpful): Lining sheets with parchment paper makes cleanup easier and prevents sticky juices from caramelizing on the pan. It does not significantly impede heat transfer for drying.
- Single Layer, No Touching: Arrange pepper pieces in a single, uncrowded layer with space between them. Think of it like a crowded subway car—if they’re touching, the areas in contact will steam rather than dry, leading to soft spots. If you have a lot of peppers, use multiple racks and rotate them.
- Rack Placement: Place racks in the upper and lower third of your oven, avoiding the very top (which can get too hot from the broiler element) and the very bottom (which may have uneven heat from the burner).
The Drying Process: Patience and Monitoring
Now, let the oven do its work, but don’t just walk away.
- Initial Check: After 1-2 hours, check your peppers. They should be starting to look drier and may curl at the edges.
- Rotate and Swap: Every 1-2 hours, rotate your baking sheets front-to-back and swap the positions of the upper and lower racks. Ovens have hot spots, and this ensures even drying.
- Time Estimates: Drying times vary wildly based on pepper type, thickness, humidity, and your oven’s true temperature.
- Thin chili peppers (Thai, cayenne), sliced: 4-8 hours
- Jalapeños, halved: 6-10 hours
- Bell pepper strips: 8-14 hours
- Whole small peppers: 10-16 hours
- The Door Stays Open: If you propped your door open, keep it that way for the entire process. Closing it will cause temperature and humidity to spike.
Step 3: How to Tell When Peppers Are Done – The Snap Test
There is one foolproof method to determine if your peppers are perfectly dried: the snap test. Visual cues can be deceiving, but texture is everything.
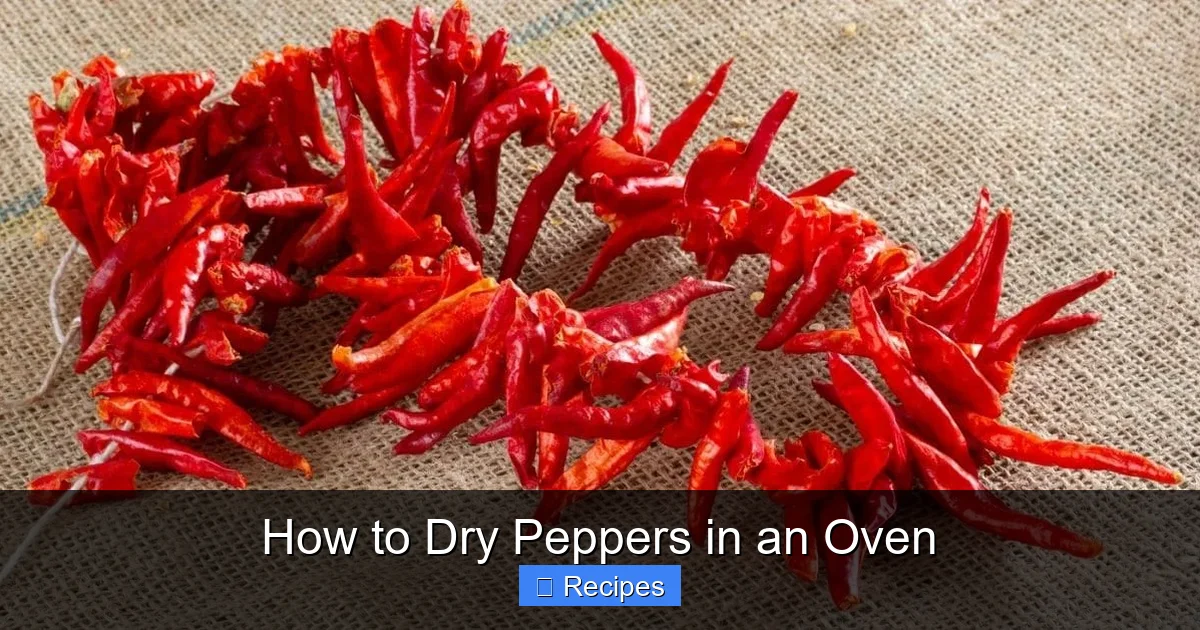
Visual guide about How to Dry Peppers in an Oven
Image source: kitchenous.com
- The Perfect Snap: Remove a piece from the oven and let it cool for 1-2 minutes (it will crisp up slightly as it cools). Try to bend it. A properly dried pepper should be brittle and snap cleanly into pieces, like a thin cracker. It should not bend, feel leathery, or be pliable.
- The Undercooked Trap: If it bends or feels slightly moist or rubbery, it needs more time. Undried peppers will mold in storage.
- The Overcooked Risk: While less common with low oven temps, peppers that have been in too long may start to darken excessively, become almost powdery, or develop a slightly burnt smell. They’re still usable but may have a less vibrant flavor.
- Spot Checking: Test peppers from different parts of your sheets and from the center of thicker pieces. The largest, thickest pieces will be the last to finish.
Once your peppers pass the snap test, remove all trays from the oven and let them cool completely on the counter. This cooling period is vital; any residual heat will create steam and moisture if you seal them up while warm.
Step 4: Storage and Usage – Preserving Your Hard Work
Congratulations! Your peppers are dried and cooled. Now, protect your investment with proper storage to maintain their flavor and prevent spoilage for months or even a year.
Storage Containers: Airtight is Key
Moisture is the enemy. Your dried peppers must be kept in a completely airtight environment.
- Best Options: Glass mason jars with tight-sealing lids, high-quality plastic food storage containers with locking mechanisms, or heavy-duty resealable freezer bags (squeeze out all air).
- Add a Food-Safe Desiccant: For extra insurance, especially in humid climates, include a food-grade desiccant packet (like those found in supplement bottles) in the jar. This will absorb any trace moisture.
- Store in a Cool, Dark Place: A pantry, cupboard, or basement that stays consistently cool (below 70°F/21°C) and dark is ideal. Light and heat degrade flavor and color over time. Avoid storing above the stove or near the oven.
From Whole Pods to Powder: Prep for Your Pantry
You can store your dried peppers whole or process them further based on how you plan to use them.
- Whole Dried Peppers: Store halved or whole small dried peppers as-is. They are perfect for adding to soups, stews, chilis, or braising liquids where they will rehydrate. You can also briefly toast them in a dry pan before grinding.
- Chili Flakes: Place dried peppers (seeds and all) in a food processor, spice grinder, or blender. Pulse until you reach your desired consistency. For a coarse, rustic flake, pulse briefly. For a fine powder, grind longer. Sift through a fine-mesh sieve to remove any larger, unground pieces. Store the flakes in a small, airtight jar.
- Chili Powder: For a true chili powder (not to be confused with generic “chili powder” blends), toast your dried whole peppers in a dry skillet over medium heat for 2-3 minutes until fragrant. Let cool, then grind with a mortar and pestle or grinder into a fine powder. This toasting step deepens the smoky, complex flavors.
Step 5: Troubleshooting Common Issues
Even with the best plan, things can go awry. Here’s how to diagnose and fix common problems.
Problem: Peppers Are Leathery, Not Brittle
Cause: Incomplete dehydration. The internal moisture hasn’t been removed.
Solution: Return the peppers to the oven for another 1-2 hours. Ensure your oven temperature is truly in the low range (use a thermometer!). This is often caused by peppers that were sliced too thickly or overcrowded on the pan.
Problem: Peppers Are Darkening Excessively or Smelling Burnt
Cause: Oven temperature is too high, or peppers are drying for too long.
Solution: Verify your oven’s actual temperature with a standalone oven thermometer. If using the door-propping method, the gap may be too small, trapping heat. Increase the gap slightly. Rotate trays more frequently. While some darkening is normal (especially with red peppers), a burnt smell means they are cooking, not drying.
Problem: Mold Spots Appear in Storage
Cause: Peppers were not dried enough before storage, or they absorbed moisture during the cooling process.
Solution: This batch is unfortunately a loss. For next time, perform a stricter snap test. Ensure peppers are completely cool before sealing containers. Always store in a truly airtight container with a desiccant packet in a cool, dry place.
Problem: Uneven Drying – Some Pieces Are Done, Others Are Not
Cause: Inconsistent sizing or poor oven airflow/rotation.
Solution: Be more meticulous with your slicing to achieve uniform thickness. Rotate and swap trays more frequently during the drying process. If your oven has a convection setting, using it (with the door closed, as convection ovens circulate air well) can help, but you may need to lower the temperature by 10-15°F as convection is more efficient.
Conclusion: Your Pantry’s New Best Friend
Mastering how to dry peppers in an oven opens a world of culinary possibility. It connects you to traditional food preservation, reduces waste, and gives you complete control over the flavor and heat level of your spice arsenal. The process rewards patience and attention to detail—selecting the best peppers, slicing them uniformly, respecting the low-and-slow principle, and ensuring they are bone-dry before storage. The result is a transformative ingredient: a jar of homemade chili flakes that elevates pizza, pasta, and popcorn; a stash of dried ancho chilies for rich, smoky mole sauces; or sweet bell pepper powder to add a pop of summer to deviled eggs and rubs.
Your oven is more than a tool for baking cakes and roasting meats; it’s a dehydrator, a flavor concentrator, and a gateway to self-sufficiency. So next time you see a vibrant pile of peppers at the farmers market or a surplus in your garden, don’t despair. Gather your baking sheets, prop open that oven door, and let the gentle heat work its magic. In a matter of hours, you’ll have created a shelf-stable, intensely flavorful treasure that will brighten your cooking all year long. Happy drying!
Frequently Asked Questions
What is the best temperature to dry peppers in the oven?
The ideal temperature range is between 125°F and 175°F (52°C–80°C). The lower end of this range (125°F–150°F) is perfect for preserving maximum color and flavor but takes longer. If your oven doesn’t go this low, use the “warm” setting or prop the door open slightly to keep the internal temperature in this safe zone and prevent cooking.
How long does it take to dry peppers in an oven?
>Drying time varies significantly based on pepper thickness, variety, and your oven’s true temperature. Thin-walled chilies like Thai peppers can take 4-8 hours, while sliced bell peppers may require 8-14 hours. Always rely on the “snap test” (peppers should be brittle and snap cleanly) rather than the clock to determine doneness.
Can I dry peppers with the oven door closed?
It is not recommended to dry peppers with the oven door fully closed. The moist air needs to escape, and a closed door will cause humidity to build up inside, leading to steaming instead of drying and potentially causing case hardening (a tough outer skin). Propping the door open 1-2 inches is essential for proper airflow and consistent low-temperature dehydration.
Do I need to remove the seeds before drying peppers?
You don’t have to, but it’s a matter of preference. The seeds themselves are not very hot, but the white pith (placenta) attached to them holds most of the capsaicin. Removing the pith and seeds will yield a milder dried pepper. For maximum heat and flavor, many people leave them in. Seeds can also make your ground powder grittier.
How do I rehydrate dried peppers?
To rehydrate, place dried peppers in a bowl and cover with very hot (not boiling) water. Let them soak for 20-30 minutes until soft and pliable. For a richer flavor, use broth, stock, or even beer instead of water. Drained and chopped rehydrated peppers are excellent for sauces, salsas, and stuffings. The flavorful soaking liquid can also be used in recipes.
How long do oven-dried peppers last?
When completely dried, cooled, and stored in an airtight container in a cool, dark, and dry place, oven-dried peppers will typically last for 6-12 months and retain good flavor. For the longest shelf life (up to 2 years), store them in the refrigerator or freezer. Always check for any signs of moisture, mold, or off smells before using them.
Pingback: Pickled Peppers - kitchenandhouseware.com