Setting the clock on your Samsung Smart Range is a simple yet essential task that unlocks the full potential of your smart appliance. This guide provides clear, model-specific instructions for setting the time via the touchscreen control panel, traditional button interface, or remotely through the SmartThings app. We also cover crucial troubleshooting steps for common issues like time resets and daylight saving time adjustments, ensuring your oven’s timer, scheduled cooking, and energy-saving features work perfectly.
Key Takeaways
- Locate Your Control Type: Identify if your Samsung Range uses a full touchscreen, a digital display with buttons, or a mix of both, as the steps vary significantly.
- Access the Settings Menu: The clock setting is almost always found within the “Settings,” “Clock,” or “Time” menu on the range’s main interface, not on the cooking modes screen.
- Auto vs. Manual Time: Most modern Samsung Smart Ranges can automatically set the correct time via Wi-Fi (Network Time Protocol), but you can always override it manually.
- Power Loss Resets Clock: A common trait is that the clock will typically reset to 12:00 or 00:00 after a complete power outage or if the circuit breaker is tripped.
- App Syncing is Key: For remote control and scheduling, the clock on the range must be accurately set and synced with the time in the SmartThings app on your phone.
- DST Requires Manual Adjustment: Samsung ranges do not automatically adjust for Daylight Saving Time; you must update the hour manually twice a year unless using network time sync.
- Consult Your Specific Model’s Manual: While this guide covers general methods, your model’s user manual is the final authority for exact menu names and button sequences.
📑 Table of Contents
- Why Your Range’s Clock Matters More Than You Think
- Method 1: Setting the Clock on Touchscreen Control Models
- Method 2: Setting the Clock on Button/Dial Control Models
- Method 3: Setting the Clock via the SmartThings App
- Troubleshooting: When the Clock Won’t Set or Keeps Resetting
- The Smart Clock: Unlocking Advanced Features and Scheduling
- Conclusion: A Few Minutes for Lasting Convenience
Why Your Range’s Clock Matters More Than You Think
That simple digital display on the front of your Samsung Smart Range isn’t just for showing the time. It’s the central nervous system for your appliance’s intelligence. An accurately set clock is the foundational requirement for using the most powerful and convenient features of your modern oven and cooktop. From setting a precise timer for your cookies to programming the oven to start cooking your dinner right when you get home, everything relies on that clock being correct. It also enables energy-saving modes that optimize heating schedules and provides accurate timestamps for any alerts or notifications you receive on your phone. Without a properly set clock, your “smart” range is essentially just a regular appliance with a fancy screen. Taking five minutes to set it correctly transforms your cooking experience from routine to remarkably efficient.
We understand that navigating the menus of a sophisticated appliance can feel daunting. The good news is that Samsung has designed the process to be intuitive, with multiple pathways to achieve the same goal. Whether you have the latest model with a sleek, full-color touchscreen or a more traditional model with physical buttons and a digital readout, this comprehensive guide will walk you through each method step-by-step. We’ll also explore how to manage the clock remotely via the SmartThings app and tackle the frustrating issue of the clock resetting after a power outage. Let’s get your range’s time synchronized with your life.
Method 1: Setting the Clock on Touchscreen Control Models
The majority of Samsung’s newer premium ranges, such as those in the NE6xT series or NX58 series, feature a large, responsive glass touchscreen. This interface consolidates all settings, including the clock, into a user-friendly menu system. The process is logical and consistent across these models.
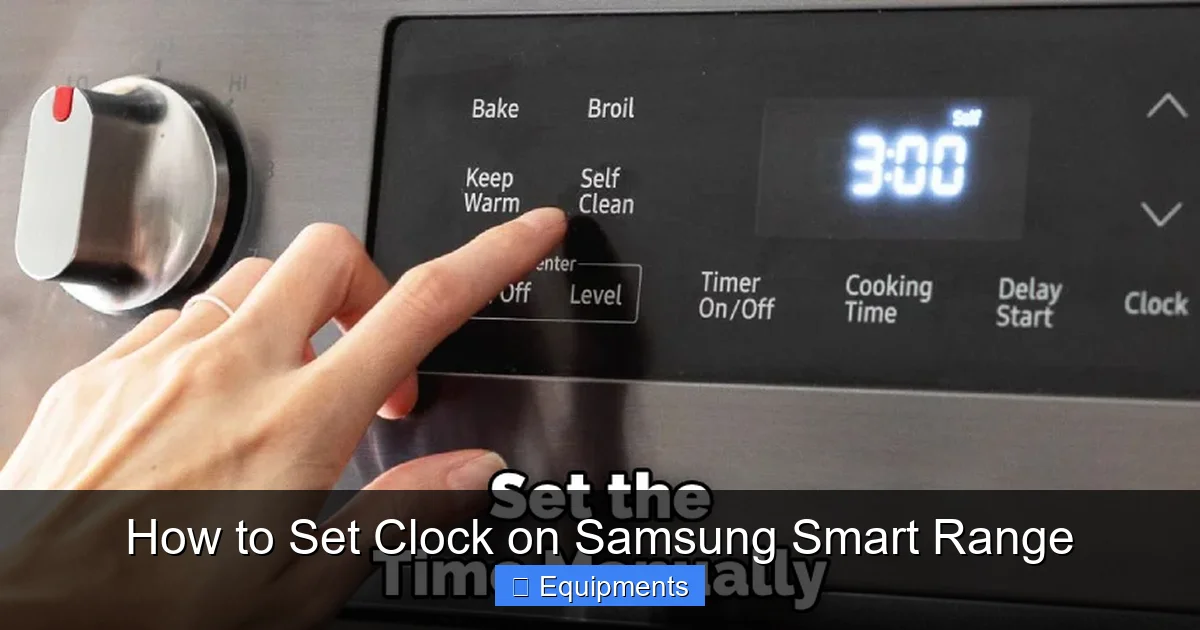
Visual guide about How to Set Clock on Samsung Smart Range
Image source: thekitchenix.com
Step-by-Step Touchscreen Navigation
Begin by ensuring the range is powered on. You should see the home screen displaying the current time, temperature, and cooking mode icons.
- Access the Settings Menu: Look for an icon that resembles a gear ⚙️, or the word “Settings,” usually located in a corner of the home screen or within a “More” or “Menu” tab. Tap it to open the settings panel.
- Find the Clock/Time Option: Within the settings menu, scroll through the list. You are looking for an entry labeled “Clock,” “Time & Date,” “Set Time,” or sometimes “General.” Tap on it.
- Enter the Time: The screen will now display the current time (likely incorrect or 12:00). You will typically see a keypad or up/down arrows. Use these to adjust the hours and minutes. Pay close attention to the AM/PM indicator. On a 24-hour format display, this will not appear, so ensure you’re setting the correct hour (e.g., 13:00 for 1 PM).
- Confirm and Save: Once the correct time is displayed, look for a “Save,” “Apply,” “Set,” or checkmark (✓) button. Tap it. The screen should briefly confirm the change, and the home screen will now show your newly set time.
Pro Tip: On some models, after tapping the time field, a full numeric keypad will appear. Simply type in the time (e.g., for 3:45 PM, you might enter “1545” on a 24-hour clock or “345” on a 12-hour clock, depending on the model). Always confirm the format before entering numbers.
Enabling Automatic Network Time
This is the “set it and forget it” feature. If your range is connected to your home Wi-Fi network, it can sync its internal clock with internet time servers, which are incredibly accurate and automatically adjust for time zones and Daylight Saving Time.
To enable this, go to the same Clock/Time settings menu. Look for a toggle switch or checkbox labeled “Automatic Time”, “Network Time”, or “Set Automatically.” Turn this feature ON. The range will then fetch the correct time from the network. If you later manually change the time, this automatic setting will often override your manual entry after a few minutes or upon the next reboot. For ultimate convenience, leave this feature enabled if your range is always online.
Method 2: Setting the Clock on Button/Dial Control Models
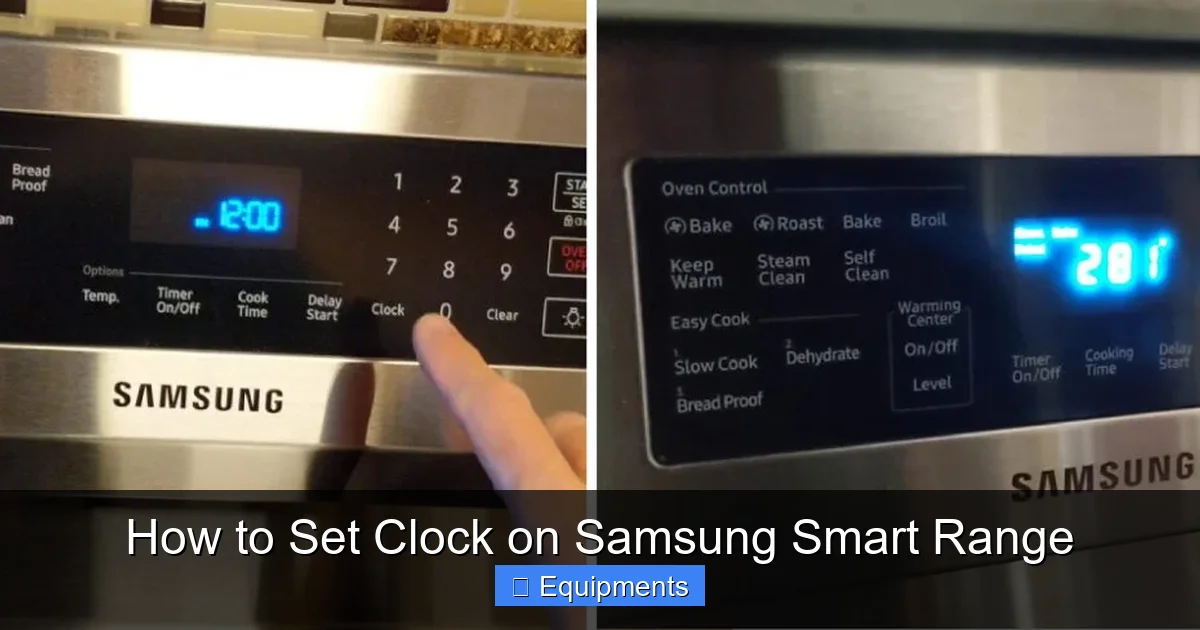
Samsung still produces many excellent ranges that use a combination of a digital LED/LCD display and physical buttons or a rotary dial for control. Models like the popular NE59 series or various FTQ series cooktops use this interface. The method is different but equally straightforward once you know the sequence.
Visual guide about How to Set Clock on Samsung Smart Range
Image source: thekitchenix.com
Identifying the Correct Buttons
On these models, you won’t find a “Settings” menu in the same way. Instead, clock setting is a dedicated function accessed through a specific button combination. Locate the following buttons on your control panel:
- Clock or Timer Button: This is often a button explicitly labeled “CLOCK” or shown with a clock icon.
- Up/Down Arrows or “+”/”-” Buttons: These are used to adjust numerical values.
- Start/Enter or OK Button: This confirms your selection, often labeled with a circle, checkmark, or “Start.”
If there is no dedicated “Clock” button, the function is often accessed by pressing and holding the “Timer” button for 3-5 seconds.
The Standard Button Sequence
Follow this precise sequence to set the time:
- Enter Clock Set Mode: Press and hold the “Clock” button (or “Timer” button) for about 3 seconds. The display will likely change, showing the time with the hour digits flashing, or it may show “CL” or “SET.” This indicates you are in clock-setting mode.
- Adjust the Hours: While the hour digits are flashing, press the ▲ (Up) or ▼ (Down) arrow buttons to increase or decrease the hour. Ensure you set the correct AM/PM (if applicable; some displays use a small “A” or “P” indicator that may also flash).
- Move to Minutes: After setting the hour, press the “Clock” button again (or sometimes the “Timer” button). The minute digits should now begin flashing.
- Adjust the Minutes: Use the ▲/▼ arrows to set the correct minutes.
- Confirm and Exit: Press the “Start/Enter” or “OK” button to confirm the time and exit the setup mode. The display should stop flashing and show the stable, correct time. If you do not press confirm, the setting may time out after 10-15 seconds and revert.
Important Note: On models with a rotary dial, you typically turn the dial to navigate menus. You would turn to “Settings” or “Clock,” press the dial to select, turn to adjust hours/minutes, and press again to confirm. The user manual for your specific dial-based model is highly recommended for exact steps.
Method 3: Setting the Clock via the SmartThings App
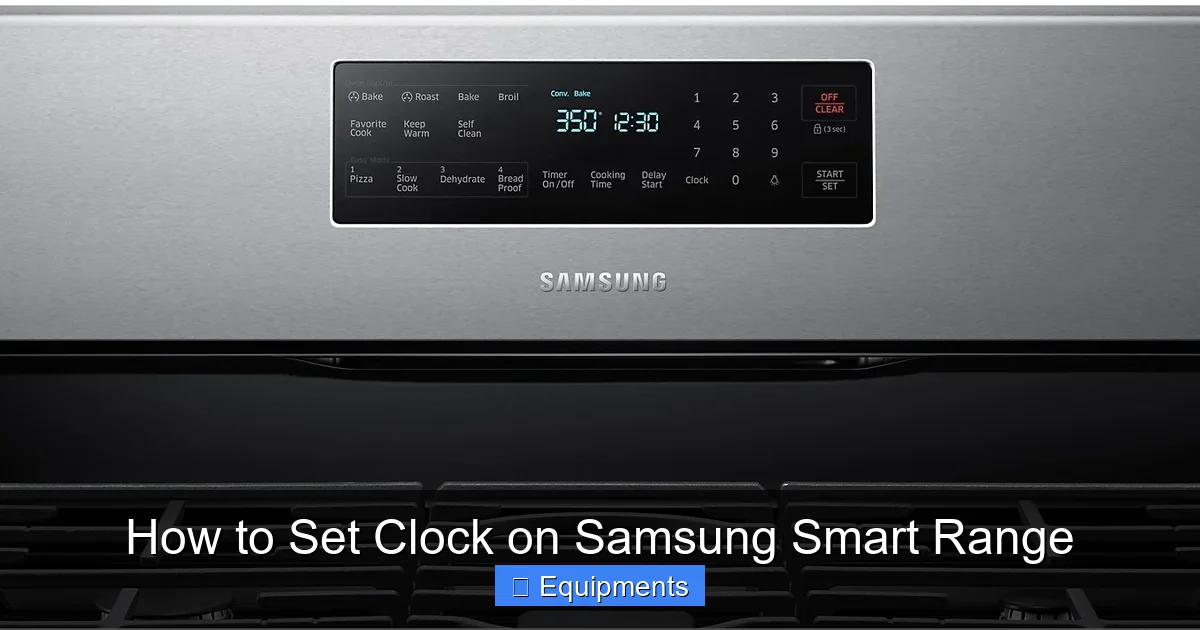
For the ultimate in convenience, especially if your range is installed in a location that’s hard to reach (like a built-in wall oven), you can set the clock directly from your smartphone using the SmartThings app. This method requires that your range is already connected to your Wi-Fi network and linked to your SmartThings account.
Visual guide about How to Set Clock on Samsung Smart Range
Image source: content.blueport.com
Prerequisites and Initial Setup
Before you begin, ensure:
- Your Samsung Smart Range is powered on and connected to your home Wi-Fi network. (This is usually done once during the initial setup via the range’s own network settings menu).
- You have the SmartThings app installed on your iOS or Android device and are logged into your Samsung account.
- The range appears as a device in your SmartThings app’s “Devices” list.
If the range is not yet connected to SmartThings, you must perform the initial Wi-Fi pairing process first. This typically involves putting the range into “Pairing Mode” (often found in Network Settings) and following the prompts in the app. You cannot set the clock via the app if the appliance isn’t first connected to your account.
Steps to Adjust Time in the App
- Open SmartThings: Launch the app and tap on your range’s device tile to open its control dashboard.
- Find Settings: Look for a gear icon ⚙️, a “More” button (three dots), or a “Settings” tab within the range’s control screen. Tap it.
- Locate Time Settings: In the device settings menu, scroll to find an option like “Time & Date,” “Clock,” or “Device Information.” Tap it.
- Adjust and Save: You should see the current time displayed. Use the provided wheels or keypad to set the correct hour and minute, and select the proper time zone if prompted. Tap “Save” or “Update.”
- Sync Confirmation: The app will send the command to your range. Within a few seconds, the clock on the range’s physical display should update to match the time you set in the app.
Key Advantage: Using the app ensures the time on your range is perfectly synced with your phone’s time, which is almost always correct. It’s also the best way to adjust for travel across time zones without needing to be in your kitchen.
Troubleshooting: When the Clock Won’t Set or Keeps Resetting
Even with clear instructions, you might encounter hiccups. The most common issues are a clock that won’t accept input or one that reverts to 12:00 after a power loss. Let’s diagnose and fix them.
Issue: “The Time Flashes/Changes But Won’t Save.”
This is the most frequent frustration. It usually means one of two things:
- Unconfirmed Selection: You adjusted the time but did not press the final “Enter,” “Start,” or “OK” button to lock it in. On button models, the display will often flash for about 10 seconds before reverting. Always make that final press.
- Control Lock is Engaged: Many Samsung ranges have a “Control Lock” or “Child Lock” feature (often a padlock icon 🔒). When active, it prevents any changes to the settings. Check your display for a lock symbol. To disable it, you usually press and hold a specific button (like the “Timer” or “Cook Time” button) for 3 seconds. Consult your manual for the exact sequence.
Issue: “The Clock Reset to 12:00 After a Power Outage.”
This is generally normal and by design for most Samsung ranges. The internal clock memory requires a constant small amount of power. During a full power outage, this backup memory is lost, and the clock defaults to 12:00. To fix it, simply follow the setting instructions for your model type (touchscreen or button).
Permanent Solution? There is no consumer-accessible battery to replace. However, if the clock resets every time there’s a minor blip (not a full outage), it could indicate a loose power connection to the range. Ensure the power cord is plugged in firmly and the circuit breaker is fully on. If the problem persists, it may require a service technician to inspect the appliance’s internal power supply.
Issue: “The SmartThings App Won’t Change the Time.”
If the app shows the setting but the range’s display doesn’t update:
- Check Connectivity: Ensure your range is still online in the SmartThings app. The device tile should be green/active, not gray. If it’s offline, your range has lost its Wi-Fi connection. You’ll need to reconnect it via the range’s network settings menu.
- Force Close and Reopen: Close the SmartThings app completely and reopen it. Sometimes the command gets stuck in a queue.
- Power Cycle the Range: Turn the range off at the wall switch or breaker for 60 seconds, then turn it back on. This forces a reboot and often re-establishes a stable connection with the hub/cloud.
- App and Firmware: Ensure your SmartThings app is updated to the latest version. Also, check for any available firmware updates for your range in the app’s device settings, as bugs are sometimes fixed this way.
The Smart Clock: Unlocking Advanced Features and Scheduling
Once your clock is correctly set, a world of smart functionality opens up. Understanding these features will make you appreciate that little digital display.
Precision Timers and Cook Times
This is the most basic use. You can set a countdown timer for any dish. But the real power is in the “Cook Time” or “Start Time” functions. For example, you can load a dish into the oven, set it to start cooking at 5:30 PM, and have it automatically shut off at 6:15 PM. This requires the clock to be accurate so the oven knows when “5:30 PM” arrives. You can combine this with Delay Start for meals that need to be ready at a precise moment, perfect for coordinating with family schedules.
Energy Optimization and Eco Modes
Samsung Smart Ranges often have energy-saving features that learn your cooking patterns or allow you to set “eco” periods. For these to function correctly—like preheating more efficiently during off-peak hours or entering a low-power standby mode at night—the appliance needs to know the actual time of day. An incorrect clock will render these energy-saving features ineffective or cause them to activate at the wrong times.
Seamless SmartThings Integration
A correct clock is non-negotiable for reliable smart home integration. When you create an automation in SmartThings like “When I leave for work, turn off the oven if it’s on after 8:00 AM,” or “Notify me if the oven is still on at 10:00 PM,” these time-based triggers depend entirely on the range’s internal clock matching the system time. A discrepancy will cause automations to fail or trigger at the wrong hour. Setting the clock via the app, as described earlier, is the best way to guarantee this synchronicity.
Conclusion: A Few Minutes for Lasting Convenience
Setting the clock on your Samsung Smart Range is one of those small setup tasks that pays continuous dividends. It’s the key that unlocks the appliance’s smart scheduling, precise timing, and energy-efficient operation. As you’ve seen, the method is tailored to your specific control interface—touchscreen, button/dial, or the SmartThings app. Remember the golden rule: after any full power interruption, you will need to reset the clock.
Bookmark this guide or save your model’s user manual PDF for quick reference. By mastering this simple procedure, you move from just operating an oven to truly *managing* a smart kitchen appliance. You gain control over your cooking schedule, integrate it flawlessly into your connected home, and ensure you’re getting every innovative feature you paid for. So take a moment now, follow the steps for your model, and sync that clock. Your future self, enjoying a perfectly timed dinner, will thank you.
Frequently Asked Questions
Why does my Samsung range clock keep resetting to 12:00?
This is normal after a complete power outage, as the clock’s backup memory loses power. Simply reset the time using your control panel. If it resets after minor power fluctuations, check that the range’s power cord is secure and the circuit breaker is fully on.
How do I adjust for Daylight Saving Time on my Samsung range?
Samsung ranges do not automatically adjust for DST unless you have the “Automatic Time” (Network Time) feature enabled in the settings menu. If you set the time manually, you must manually add or subtract one hour twice a year when DST begins and ends.
Can I set the time on my Samsung range without using the buttons on the appliance?
Yes, absolutely. If your range is connected to Wi-Fi and linked to the SmartThings app, you can set and change the clock directly from your smartphone through the device’s settings in the app, which is often more convenient.
What’s the difference between the “Clock” and “Timer” functions?
The Clock is the permanent, current time of day displayed on your range. The Timer is a temporary countdown you set for a specific cooking task (e.g., 15 minutes). The timer uses the correct current time as its starting point but operates independently once set.
My range has a touchscreen but I don’t see a “Clock” option in Settings. Where is it?
>On some touchscreen models, the clock setting is nested under a broader category like “General,” “System,” or “Date & Time.” Carefully scroll through all sub-menus in the Settings panel. If you still can’t find it, your model may set the time automatically via network sync only, or the manual will have the exact location.
Is it better to use automatic network time or set it manually?
Using Automatic Network Time is strongly recommended if your range is consistently connected to Wi-Fi. It ensures absolute accuracy, automatically adjusts for time zones and DST, and guarantees perfect sync with your SmartThings automations. Manual setting is a reliable fallback if your Wi-Fi is unstable.