Installing your Instant Pot sealing ring correctly is the single most important step for safe and efficient pressure cooking. A improperly seated ring is the #1 cause of “burn” errors, failed pressure builds, and steam leaks. This guide provides a detailed, foolproof process to ensure your ring is perfectly positioned every time, extending your pot’s life and guaranteeing perfect results. We cover preparation, installation techniques, testing, and essential maintenance.
Key Takeaways
- Position is Everything: The sealing ring must sit flush and even within the dedicated groove on the lid, with no twists or gaps.
- Clean Before You Install: Always ensure both the ring and the lid’s groove are completely clean and dry before installation to prevent slippage and ensure a proper seal.
- The Finger Test is Key: After installation, run your finger around the entire ring; you should feel it seated evenly with no raised sections.
- Know When to Replace: Sealing rings typically last 12-18 months with regular use. Replace if you notice cracks, tears, stiffness, or persistent odor retention.
- It’s Not Just for Pressure: A good seal is critical for all functions, including slow cooking and yogurt making, to maintain accurate temperatures and times.
- Color-Coding Helps: Consider using different colored rings for sweet vs. savory dishes to prevent flavor cross-contamination.
📑 Table of Contents
- Why That Little Ring Matters More Than You Think
- Getting to Know Your Instant Pot’s Sealing Ring
- Preparation: The Critical First Step (You’ll Thank Yourself Later)
- The Installation: A Simple, 4-Step Process
- Testing Your Work: The Water Test
- Maintenance, Care, and Knowing When to Replace
- Conclusion: Confidence in Every Click
Why That Little Ring Matters More Than You Think
You’ve unboxed your shiny new Instant Pot. You’ve read the manual cover to cover. You’re ready to make your first batch of legendary yogurt or a stunning beef stew. But before you even plug it in, there’s one tiny, flexible, silicone component that holds the entire magic of pressure cooking in its grip: the sealing ring. Often overlooked, frequently misplaced, this humble O-ring is the unsung hero of your electric pressure cooker. Getting it installed correctly isn’t just a minor setup step; it’s the fundamental prerequisite for safety, efficiency, and delicious results. An incorrectly installed ring doesn’t just mean your pot won’t pressurize—it can trigger frustrating “burn” warnings, cause messy steam leaks, and in rare cases, compromise safety. This guide will walk you through everything you need to know, transforming this simple task from a guess into a guaranteed, confident routine.
Getting to Know Your Instant Pot’s Sealing Ring
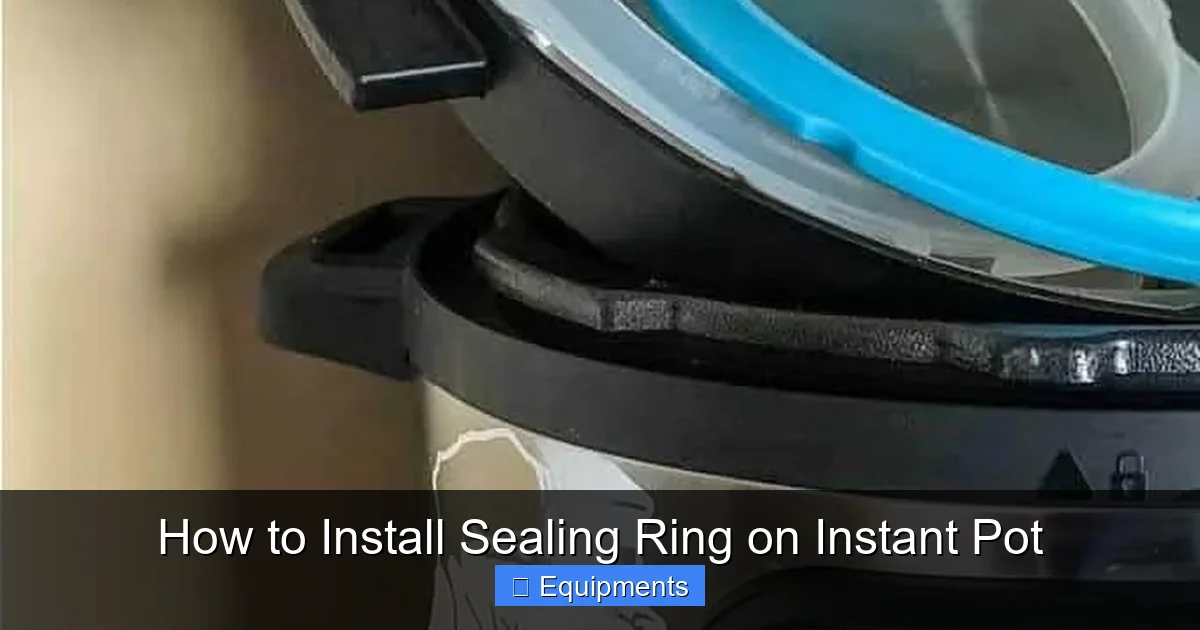
Before we touch anything, let’s understand what we’re working with. The sealing ring, sometimes called a gasket, is a food-grade silicone ring, typically about 9-10 inches in circumference for most 6-quart models. It’s pliable, slightly tacky, and designed to create an airtight seal between the Instant Pot’s metal lid and the inner pot’s rim. This seal traps steam inside, building the pressure that cooks food faster and more efficiently.
Visual guide about How to Install Sealing Ring on Instant Pot
Image source: karacarrero.com
The Anatomy of a Proper Seal
Look closely at your ring. It has a specific shape: a wider, flatter bottom section and a narrower, rounded top. When installed, the wider bottom sits within a corresponding groove on the underside of the lid. The rounded top then presses against the inner pot’s stainless steel rim. This design ensures that as pressure builds from the inside, the ring is pushed more firmly into the groove, tightening the seal—a brilliant piece of engineering. The ring’s material is also key. High-quality, BPA-free silicone is heat-resistant, flexible when cold, and should not retain strong odors after proper cleaning.
Common Ring Problems & What They Mean
Understanding failure modes helps you diagnose issues. A twisted ring is the most common culprit—it creates a channel for steam to escape. A stretched or misshapen ring won’t fit the groove properly. A dirty or greasy ring will slip and slide. A dry, cracked, or hardened ring has lost its elasticity and sealing ability. Finally, a ring that is the wrong size or model simply won’t fit. We’ll address how to prevent all of these.
Preparation: The Critical First Step (You’ll Thank Yourself Later)
Rushing to slap the ring on is the biggest mistake. Proper preparation is 80% of the battle. A clean, dry, and correctly oriented ring is non-negotiable for a perfect seal.

Visual guide about How to Install Sealing Ring on Instant Pot
Image source: i1.wp.com
Step 1: Inspect Your Ring
Take a moment to look at your sealing ring. Check for any visible defects like cuts, tears, or deformities from manufacturing or storage. Run your fingers along its entire length. It should be smooth and uniformly flexible. If it feels stiff, powdery, or has any nicks, do not use it. Contact Instant Pot support for a replacement under warranty if it’s new. For an older ring, it’s time for a replacement.
Step 2: Clean Both Components Meticulously
This is the most vital step people skip. You must clean two things: the ring itself and the lid’s sealing groove.
- Cleaning the Ring: Wash it with warm, soapy water. Use your fingers to feel inside all the crevices. For stubborn food particles or odors, soak it in a solution of white vinegar and water (1:1 ratio) for 15-20 minutes. Avoid abrasive scrubbers; a soft sponge or your fingers is sufficient. Rinse thoroughly under running water.
- Cleaning the Groove: This is often the hidden trouble spot. Flip the lid over. Locate the wide, shallow channel that runs around the entire underside of the lid. Use a damp cloth or a soft-bristled brush (like a clean toothbrush) to scrub inside this groove. Food particles and grease love to hide here. Any debris here will prevent the ring from sitting flush. Wipe it completely dry with a clean towel.
Step 3: The Dryness Check
Moisture is the enemy of a good seal. After washing, place both the ring and the lid groove on a dry towel. Pat them thoroughly. You should see no water beads. Any residual moisture will cause the ring to slip as you try to position it. If in doubt, let them air dry for an extra 5 minutes.
The Installation: A Simple, 4-Step Process
Now, with clean and dry parts, we install. The key is to avoid twisting and ensure even placement. Follow these steps in order.
Visual guide about How to Install Sealing Ring on Instant Pot
Image source: thekitchenix.com
Step 1: Orient the Ring Correctly
Hold the ring. Notice one side is slightly flatter and wider (the “bottom”), and the other is more rounded (the “top”). The flatter, wider side is the side that sits inside the lid’s groove. The rounded side will face downward, toward the inner pot when the lid is on. A common error is installing it upside down. If your ring has a small tab or mark (some models do), ensure it aligns with any corresponding mark on the lid.
Step 2: Position the Ring at the Starting Point
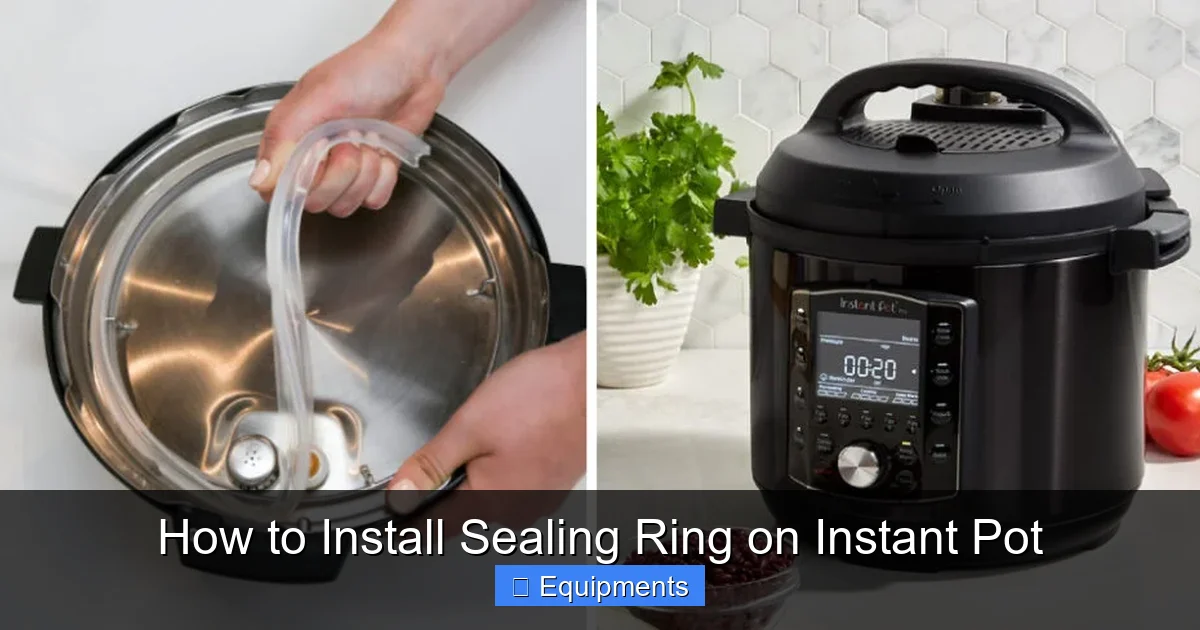
Hold the lid with the underside (the grooved side) facing up. Find a natural starting point—often near the handle or where the lid’s locking mechanism is. Gently stretch the ring just enough to get it over the lip of the groove at this starting point. Do not force it; it should snap into the groove with gentle pressure. Think of tucking a bedsheet corner; you want it seated at the edge first.
Step 3: Work Your Way Around the Lid
With the ring anchored at your starting point, use your thumbs to gently press the rest of the ring into the groove. Work in small sections, about 2-3 inches at a time. Use your fingers to feel from underneath the lid (if possible) to ensure the ring is fully seated in the channel. The ring should not be stretched taut; it should sit comfortably with a tiny bit of slack. As you go, periodically stop and look at the ring from the side. It should form a perfect, smooth circle with no kinks, twists, or areas where it’s popped out of the groove.
Step 4: The Final Seat and Inspection
Once you’ve gone all the way around, give the entire ring a final, gentle press with your thumbs all around its circumference. Now, for the ultimate test: the finger test. Place the lid on a flat surface, grooved side up. Run your index finger firmly around the entire ring. You should feel a continuous, even ridge. There should be no spots where the ring feels higher or lower than the rest. If you feel a bump or a dip, that’s a twist or an unseated section. Gently press that area down into the groove and re-test. The ring must be perfectly flush and even.
Testing Your Work: The Water Test
Even with a perfect visual and finger inspection, it’s wise to do a quick functional test before your next big cook.
How to Perform the Water Test
- Place your inner pot inside the Instant Pot base.
- Add 1 cup of water.
- Place the lid on, ensuring it locks into place. You should hear a solid click as it locks.
- Close the steam release handle to the “Sealing” position.
- Select the “Manual” or “Pressure Cook” setting on high pressure for 2 minutes.
You should hear the pot begin to build pressure within a minute or two. Watch the metal float valve (the little pin) rise. Once it’s up, you should hear a steady, low hiss of steam from the steam release handle—this is normal as the pot regulates pressure. If the pot takes an excessively long time to pressurize (more than 5-7 minutes for 1 cup of water) or you see steam escaping from around the lid (not the valve), your seal is compromised. Turn off the pot, release pressure carefully, and re-inspect your ring installation.
Interpreting Test Results
A successful test means the float valve rises, the pot pressurizes quickly, and you only hear steam from the release handle. If it fails, the most likely cause is a twisted ring. Remove the lid, take off the ring, and start the installation process again from scratch, being extra mindful of keeping it untwisted. Sometimes, a tiny food particle in the groove is the culprit—recall the importance of cleaning!
Maintenance, Care, and Knowing When to Replace
Your sealing ring is a consumable item. With proper care, it will last 12-18 months with regular use. Here’s how to maximize its life and know when it’s time for a new one.
Daily & Weekly Care
After each use, remove the ring. Wash it with the rest of your lid and inner pot. Never leave it on the lid while storing, as this can cause it to retain odors and shapes. Store it separately in a drawer. Once a week, give it a deeper clean with a vinegar soak as described earlier. Never put it in the dishwasher unless your specific model’s manual explicitly states it’s dishwasher-safe (most are not, as the heat and detergents can degrade silicone faster).
Signs of a Ring That Needs Replacing
Silicon degrades. Here are the unmistakable signs it’s time for a new ring:
- Visible Damage: Cracks, tears, or chunks missing.
- Permanent Deformation: It no longer forms a perfect circle and sits unevenly even when installed correctly.
- Loss of Elasticity: It feels hard, stiff, or brittle instead of supple and slightly tacky.
- Odor Retention: It smells like last week’s garlic or fish even after multiple washes.
- Constant Failure: You’ve re-installed it perfectly and cleaned everything, but you still get frequent “burn” messages or sealing failures.
Pro-Tip: The Two-Ring System
Many veteran Instant Pot users keep two (or more) rings: one dedicated exclusively for savory dishes (meats, stews, beans) and another for sweet dishes (yogurt, desserts, fruit). Silicone is porous and can absorb strong flavors and colors. A ring used for a pungent chili will subtly flavor your delicate custard. Using color-coded rings (Instant Pot sells them in different colors) is an inexpensive way to guarantee flavor purity and is a game-changer for anyone who cooks a wide variety of foods.
Conclusion: Confidence in Every Click
Installing your Instant Pot sealing ring is a ritual of care, not a chore. By taking those extra 60 seconds to inspect, clean, and install it with deliberate attention, you are setting the stage for every single successful cook. You are preventing errors, saving time on cleanup, and ensuring your appliance operates safely and at peak efficiency. Remember the mantra: Clean, Dry, Untwisted, Even. Master this, and you’ve mastered the foundational skill of pressure cooking. Your delicious, perfectly cooked meals start not with the ingredients, but with that perfect, quiet, airtight seal. Now go install that ring with confidence and get cooking!
Frequently Asked Questions
How often should I replace my Instant Pot sealing ring?
With regular use (a few times per week), a sealing ring typically lasts 12-18 months. Replace it immediately if you see cracks, tears, or if it becomes stiff and loses its elasticity. Frequent “burn” errors or failure to pressurize can also signal a worn ring.
Why is my Instant Pot not pressurizing even with a new ring?
First, ensure the ring is installed correctly—untwisted and seated evenly in the clean, dry groove. Second, check that the lid is properly locked and aligned. Third, verify the steam release handle is in the “Sealing” position. Finally, ensure you have at least 1 cup of liquid in the pot, as all pressure cooking requires a minimum amount of steam.
Can I put my Instant Pot sealing ring in the dishwasher?
While some newer rings may be labeled dishwasher-safe, it is generally not recommended. The high heat and harsh detergents in dishwashers can degrade silicone faster, causing it to become brittle and lose its sealing properties. Hand washing with warm, soapy water is the safest method to prolong its life.
What’s the difference between the regular sealing ring and the “silicone sealing ring for lid”?
There is no functional difference; they are the same part. Instant Pot may sell them under different names or as “replacement” rings. Ensure you purchase one specifically designed for your Instant Pot model (e.g., for DUO, Ultra, etc.), as sizes can vary slightly between models and generations.
My ring smells like last night’s curry. How do I get the smell out?
Soak the ring overnight in a solution of warm water and baking soda (1 tablespoon per cup of water) or a 50/50 white vinegar and water solution. Rinse thoroughly the next day. For persistent odors, boiling the ring in a pot of water for 5-10 minutes can help. If the smell remains, the ring has likely absorbed the odor permanently and should be replaced.
Is it normal for the ring to leave a small imprint on the inner pot?
Yes, a very slight indentation or ring mark on the inner pot after cooking is normal and indicates a good seal. However, if the ring is sticking to the pot or leaving thick residue, it may be overly greasy or worn. Ensure you are cleaning the ring and the pot rim thoroughly after each use.