Unlock the full potential of your GE oven’s Delay Start feature to have your meals ready exactly when you need them. This guide provides clear, step-by-step instructions on how to program this convenient timer function for baking, roasting, and more. We’ll cover compatible cooking modes, essential safety precautions for food safety, and practical examples to transform your cooking routine. Mastering Delay Start means coming home to a perfectly cooked meal, saving energy, and managing your time with newfound flexibility.
Key Takeaways
- Delay Start is a programmable timer: It lets you set a future start time for your oven, so cooking begins automatically hours later, not immediately.
- It only works with specific modes: Delay Start is typically available for Bake, Roast, and sometimes Proof modes, but NOT for broil, convection bake/roast (on many models), or self-clean cycles.
- Safety is paramount with perishables: Never use Delay Start for foods that require immediate cooking (like raw meat or poultry) due to the “danger zone” for bacterial growth during the delay period.
- The setting process is universal: While button labels vary slightly, the core steps are: select your mode, set cook time, press the Delay Start button, and then set the desired start time.
- It’s ideal for non-perishable or pre-prepared foods: Perfect for baking bread, cakes, casseroles (from frozen or chilled), warming plates, or dehydrating herbs where the food can safely wait.
- Always consult your specific model’s manual: GE oven interfaces differ (dial vs. digital keypad). Your manual provides the definitive guide for your appliance’s exact capabilities and button sequence.
- Troubleshooting often involves mode selection: If Delay Start won’t activate, you are likely in an incompatible cooking mode or the oven is too hot from a recent cycle.
📑 Table of Contents
- Welcome to Effortless Meal Timing: Your GE Oven’s Secret Weapon
- How the Delay Start Feature Actually Works: The Simple Tech Behind It
- Step-by-Step: How to Set Delay Start on Your GE Oven
- Perfectly Timed: Practical Applications and Real-World Examples
- Safety First: Non-Negotiable Rules for Using Delay Start
- Troubleshooting: Why Your Delay Start Isn’t Working
- Beyond the Basics: Advanced Tips and Model-Specific Nuances
- Conclusion: Your Kitchen, On Your Schedule
Welcome to Effortless Meal Timing: Your GE Oven’s Secret Weapon
Imagine this: it’s a busy weekday. You have to run to the school recital, the soccer game, and the grocery store. But you also need a perfectly roasted chicken for dinner. What if you could get everything ready in the morning—season the chicken, place it in the cold oven—and have it start cooking itself at 5:30 PM, just as you’re pulling into the driveway? That’s not magic; that’s the incredibly useful Delay Start feature on your GE oven. It’s one of the most underutilized yet powerful tools in your kitchen arsenal, transforming your oven from a reactive appliance into a proactive one. This comprehensive guide will walk you through everything you need to know, from the absolute basics to advanced tips, ensuring you use this feature safely, confidently, and effectively. We’ll break down the technology, the step-by-step process, and the real-world scenarios where it shines.
First, let’s clarify exactly what Delay Start is and, just as importantly, what it is not. It is not a “cook until a specific time” feature (sometimes called “Finish By” or “Auto Off”). Instead, Delay Start is a start timer. You tell the oven, “Begin the cooking process at 4:00 PM.” The oven then counts down from your programmed start time and ignites the heating elements at that precise moment. From there, it cooks for the duration you’ve set. Understanding this distinction is crucial for safe and effective use. The clock on your oven’s display is your command center for this feature. Throughout this article, we’ll use common GE oven terminology, but always remember that button labels and sequences can vary slightly between model series (like Profile™, Café™, or standard GE). Your user manual is your final reference, but this guide will give you the universal principles that apply across the vast majority of GE electric and gas ranges.
How the Delay Start Feature Actually Works: The Simple Tech Behind It
At its heart, Delay Start leverages the same basic timer technology found in a coffee maker, but integrated into your oven’s sophisticated control board. When you engage the feature, you’re programming two separate but linked timers into the oven’s memory. The first is the Delay Timer, which counts down from the future start time you set (e.g., 4 hours, 30 minutes). The second is the Cook Timer, which is the actual duration the oven will run once it starts (e.g., 1 hour, 15 minutes). The oven’s computer manages these two timers in sequence. During the delay period, the oven remains completely off and cool. It is simply waiting. Once the delay timer reaches zero, the oven powers on, heats to your set temperature, and begins the cook timer. At the end of the cook timer, the oven automatically shuts off. On most modern GE models, you’ll also hear a beep or see an “End” message on the display.
Visual guide about How to Use Delay Start on Ge Oven
Image source: thekitchenix.com
The Critical Safety Interlock: Temperature and Mode Checks
Your GE oven is designed with several smart safety checks that can prevent Delay Start from activating. This is a good thing! The oven will typically refuse to start a delayed cycle if:
- The oven cavity is already hot from a recent cooking or cleaning cycle. It must be cool.
- The current time on the oven clock is not set correctly. (Yes, this seems basic, but it’s a common oversight after a power outage).
- The selected cooking mode is incompatible. This is the most common hurdle. As a rule, Delay Start works with steady, low-to-medium heat functions like Bake and Warm (on some models). It is almost universally disabled for Broil (due to extreme, instant heat), Self-Clean (for obvious safety), and often for Convection Bake/Roast on older or certain model lines. The intense, circulating heat of convection requires more precise control, and manufacturers often disable delay start for these modes to ensure food safety and optimal results. Always check your manual for your specific model’s compatible modes.
Understanding these mechanics helps you troubleshoot why a delayed start might not be engaging. The oven isn’t broken; it’s protecting you and your food.
Step-by-Step: How to Set Delay Start on Your GE Oven
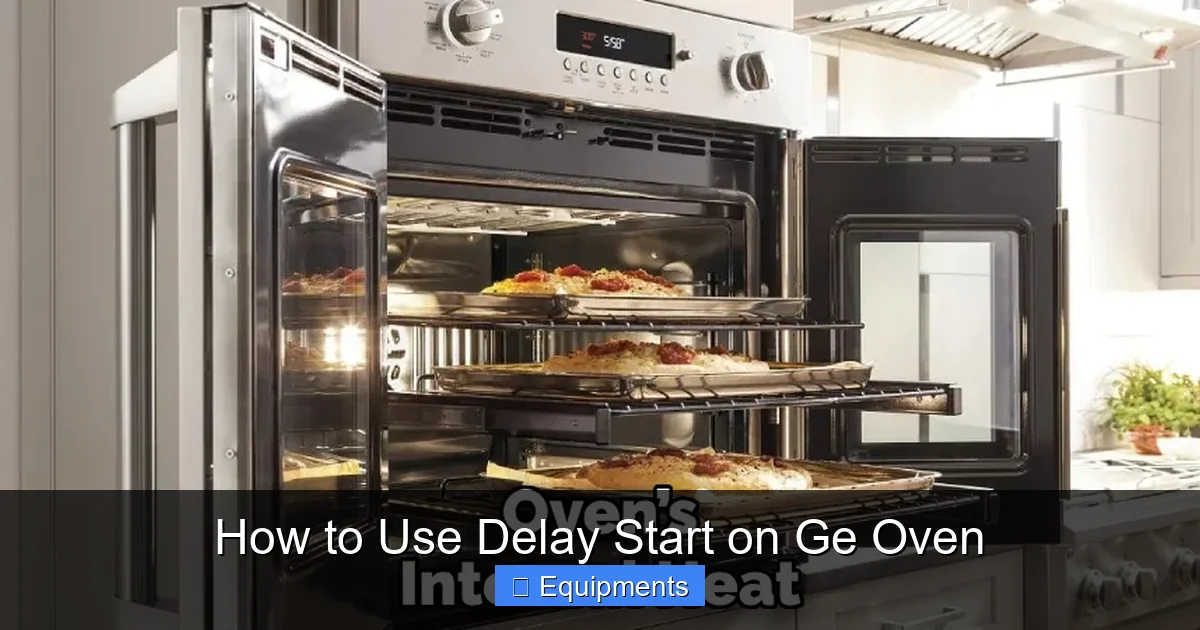
Now for the hands-on part. While button layouts differ, the logical sequence is remarkably consistent across GE’s digital control panels. Grab your oven’s manual for exact button names, but follow this universal flow. We’ll use a classic example: you want to bake a casserole that takes 1 hour at 350°F, and you want it to start at 6:00 PM. It’s currently 2:00 PM.
Visual guide about How to Use Delay Start on Ge Oven
Image source: thekitchenix.com
The Universal Programming Sequence
Step 1: Ensure the Oven is Off and Cool. Press the “Off” or “Cancel” button to clear any previous settings. Make sure the oven interior is cool to the touch.
Step 2: Select Your Cooking Mode. Press the button for your desired mode—most commonly BAKE. The display will likely show “Bake” and a temperature (maybe 350°F by default). Use the arrow keys or temperature dial to set your target temperature (e.g., 350°F).
Step 3: Set the Cook Time (Duration). This is the time you want the oven to actually be on and cooking. Look for a button labeled TIME, COOK TIME, or a clock icon. Press it, then use the number keypad or arrow keys to enter your cook time (e.g., 1:00 for one hour). Confirm by pressing the same button or “Start.” The display should now show your set temperature and the cook time counting down (e.g., “350°F 1:00”).
Step 4: Engage the Delay Start Function. This is the key step. Find the button labeled DELAY START, START TIME, or sometimes just a clock icon with a “+” or arrow. Press this button. The display will usually change, perhaps blinking the cook time or showing “Delay.”
Step 5: Set the Delay Start Time. After pressing Delay Start, use the number keypad or hour/minute arrows to enter the future time of day you want cooking to begin (e.g., 18:00 for 6:00 PM). On some models, you may need to set the delay as a duration (e.g., “4:00” hours from now). The display will typically show both the start time and the cook time (e.g., “Start 6:00PM” and “Cook 1:00”).
Step 6: Activate the Program. Press the START button. The oven should now be in a “waiting” state. The display will often show the current time, the programmed start time, and maybe a small icon indicating a delayed start is set. It will not begin heating until the clock reaches your set start time.
Step 7: Verification. Double-check the display. It should clearly indicate a future start time, not a countdown from the current time. If it shows a countdown (e.g., “4:00”), that’s likely the cook time, and you successfully set the delay.
Perfectly Timed: Practical Applications and Real-World Examples
Knowing how to set it is one thing; knowing when to use it is where you’ll truly gain kitchen freedom. The golden rule: Delay Start is best for foods that are either non-perishable, pre-cooked, or can safely withstand a period at cool/room temperature before cooking begins. Here’s where it excels.
Visual guide about How to Use Delay Start on Ge Oven
Image source: longroadhomeproject.com
Baking: Bread, Cakes, and Cookies
This is the classic use case. You can mix your bread dough, place it in a cold oven for its final rise (if your recipe allows for a cold start), and set Delay Start so the oven kicks on for the bake phase right when the dough is perfectly proofed. For cakes, you can prepare the batter, load the cold pan, and set the delay. The batter is stable, and you avoid the common problem of the cake sitting in a hot, preheated oven while you finish other tasks, which can cause doming or over-browning. You get a perfectly even bake because the oven and the batter heat up together.
Roasting and Casseroles from Chilled or Frozen
Here’s a pro tip for meal prep: on Sunday, assemble a large roast or a frozen lasagna in your baking dish. Do not preheat. Place it in the cold oven and set a Delay Start so cooking begins an hour before you plan to eat. The food starts from cold, which can actually help cook a roast more evenly from edge to center. For frozen casseroles, the delay period serves as an extended, gentle thawing phase before the cooking phase begins, often leading to better texture than cooking from frozen at a high temp immediately. Caveat: Ensure your specific recipe is suitable for a cold start. Some delicate fish or thin-cut meats are not.
Dehydrating and Low-Temperature Cooking
Need to dry herbs or make beef jerky? These processes often require 6-12 hours at very low temperatures (140°F-170°F). Set it before bed! Load your trays, set the mode to Bake at a low temp, set a long cook time (e.g., 8 hours), and then use Delay Start to have it begin at 2:00 AM. You wake up to finished snacks. The same applies to slow-cooking beans or tough cuts of meat at a low temp over many hours.
Warming and Holding
Some GE ovens have a dedicated Warm mode (usually around 170°F-200°F). You can use Delay Start to have this mode activate just before guests arrive, keeping a finished dish warm without overcooking it. Place the food in the cold oven, set Warm mode, a long cook time, and delay the start until 30 minutes before serving.
Safety First: Non-Negotiable Rules for Using Delay Start
This is the most important section. The convenience of Delay Start is fantastic, but it comes with a significant responsibility: food safety. The “danger zone” for bacterial growth in food is between 40°F and 140°F. Leaving raw protein (meat, poultry, fish, eggs) or cooked food at room temperature for more than 2 hours (1 hour if the room is above 90°F) allows dangerous bacteria to multiply rapidly. The delay period on your oven is, by definition, a period where food is sitting at room temperature. Therefore:
- NEVER use Delay Start with raw meat, poultry, or fish. Do not season a raw chicken, place it in a cold oven, and set a 5-hour delay. That chicken will spend 5 hours in the danger zone. This is a serious food poisoning risk.
- Avoid Delay Start for cooked foods that need reheating if they have been sitting out. Reheat leftovers promptly and to the correct internal temperature.
- It is generally safe for: Baked goods (bread, cakes, cookies from batter/dough), pre-cooked or frozen convenience meals (like a frozen lasagna that goes from freezer to cold oven), vegetables, and dishes where the primary ingredients are non-perishable (like a dry bean casserole that gets liquid added). When in doubt, assume a food is perishable and do not use Delay Start.
- Use your senses and common sense. If you wouldn’t leave the prepared food on the counter for the delay period, don’t put it in the oven with a delayed start.
- Ensure your oven’s door seal is intact. A poor seal can cause temperature fluctuations during the eventual cooking cycle, but more importantly, it’s a general safety and efficiency issue.
Additionally, be mindful of your home’s safety. Do not set a delayed start for a long broil cycle (which you shouldn’t be able to do anyway) or for a self-clean cycle. Never leave flammable items (oven mitts, towels, plastic) inside the oven, even during a delay.
Troubleshooting: Why Your Delay Start Isn’t Working
So you’ve followed the steps, but the oven just sits there, or the Delay Start button is unresponsive. Don’t panic. Here are the most common culprits and fixes, in order of likelihood:
1. Incompatible Cooking Mode
Symptom: The Delay Start button does nothing or is grayed out on the display.
Fix: You are almost certainly in Broil, Convection Bake/Roast (on many models), or Self-Clean. Press “Off,” then select Bake or Warm and try again. Consult your manual for the definitive list of compatible modes for your model.
2. Oven is Too Hot
Symptom: You just finished a long bake or roast and immediately try to set a new delayed cycle.
Fix: The oven’s safety interlock requires a cool cavity. Wait for the oven to cool completely (this can take 30-60 minutes). You’ll often see a “Cooling” or “Hot” message on the display. Once it’s gone, try again.
3. Incorrect Clock Time
Symptom: The programmed start time seems off, or the feature won’t activate.
Fix: After a power outage, the clock resets to 12:00 or flashes. You must set the correct current time before any timer or Delay Start function will work. Find the CLOCK or TIME button and set it.
4. Cook Time Not Set First
Symptom: You press Delay Start immediately after selecting Bake.
Fix: Remember the sequence: Mode -> Temperature -> Cook Time -> Delay Start -> Start Time -> Start. The oven needs to know the cook duration before it can calculate a start time. Go back and set the cook time first.
5. Control Panel Glitch
Symptom: Nothing seems wrong, but it’s not working.
Fix: Try a full reset. Turn the oven off at the circuit breaker for 2-3 minutes, then turn it back on. This clears the control board’s temporary memory. Reset your clock, and try the sequence again.
6. Model Limitation
Symptom: You can’t find a Delay Start button at all.
Fix: Some very basic or older GE models may not have a Delay Start feature, or it may be called something else like “Program” or “Set Start.” If you truly cannot find it after checking the manual, your model may not include this function.
Beyond the Basics: Advanced Tips and Model-Specific Nuances
Once you’ve mastered the fundamentals, you can fine-tune your use for even better results.
Syncing Delay Start with Your Weekly Routine
Think beyond a single meal. Use Delay Start for weekly batch cooking. On Sunday morning, assemble three sheet-pan dinners (chicken, veggies, potatoes) on three separate racks. Place all three in the cold oven, set Bake at 375°F, a cook time of 45 minutes, and a Delay Start for 5:00 PM. When you walk in the door at 5:15 PM, you have three fully cooked, hot dinners ready to plate. This is a game-changer for meal prep.
Understanding “Delay Start” vs. “Timed Cook”
Some GE models have both. Timed Cook (or “Cook Time”) is the function where the oven cooks for a set duration and then turns off immediately after you press Start. It does not delay the start. Delay Start explicitly adds a waiting period before the cook time begins. If your manual mentions both, use Delay Start for the “start later” function.
Convection and Delay Start: The Gray Area
As mentioned, many GE models disable Delay Start for Convection modes. Why? Convection fans circulate air, which can cause faster browning and more rapid heat transfer. Starting from cold with convection active might lead to unpredictable results, like a cake that rises too fast then collapses. If your model does allow Delay Start in Convection Bake, experiment cautiously with recipes, reducing the suggested cook time slightly (by about 25%) as convection cooks faster, even from a cold start. When in doubt, use standard Bake mode for delayed starts.
The Sabbath Mode Consideration
GE ovens with a Sabbath Mode (designed to comply with certain religious practices that prohibit operating electrical devices during Sabbath) will have this mode override all other timers and delays. If Sabbath Mode is active, Delay Start will not function. Ensure Sabbath Mode is off.
Conclusion: Your Kitchen, On Your Schedule
The Delay Start feature on your GE oven is more than just a timer; it’s a tool for reclaiming your time and reducing daily stress. By understanding the clear distinction between a start delay and a cook duration, respecting the critical food safety boundaries, and mastering the simple button sequence, you can integrate this feature seamlessly into your cooking life. From baking morning muffins that are ready when you wake up to having a Sunday roast piping hot right after church, the possibilities are limited only by your imagination and food safety sense. Remember the core mantra: Delay Start for baked goods, pre-prepared, and non-perishables. Never for raw meat. Keep your oven’s manual handy for model-specific quirks, but with the foundational knowledge in this guide, you’re now equipped to press those buttons with confidence. Experiment with a loaf of bread first—it’s the safest and most rewarding way to see the magic happen. You’ll wonder how you ever cooked without it.
Frequently Asked Questions
What’s the difference between Delay Start and Timed Cook on my GE oven?
Delay Start schedules the oven to begin cooking at a future time. Timed Cook (or Cook Time) sets a duration for the oven to run once you press Start, but it begins immediately. Delay Start adds a waiting period before the cooking cycle begins.
Can I use Delay Start to cook a raw chicken or a frozen pizza?
No, you should not. Raw meat and poultry must not sit at room temperature during the delay period due to the risk of dangerous bacterial growth in the “danger zone” (40°F-140°F). Delay Start is safe for pre-mixed baked goods, pre-cooked meals, or frozen items that are safe to thaw slowly at cool temperatures.
Why is my Delay Start button not working or grayed out?
The most common reasons are: 1) You are in an incompatible mode like Broil, Self-Clean, or Convection Bake (on many models). 2) The oven cavity is still hot from a previous use. 3) The clock time is not set correctly. 4) You have not first set a cook time. Try selecting Bake mode, ensuring the oven is cool, and setting a cook time first.
Can I use Delay Start with the Convection Bake setting?
It depends on your specific GE model. Many models disable Delay Start for all convection modes. Some newer models may allow it. Consult your user’s manual. If it is allowed, be aware that convection cooks faster and may brown more quickly, so you might need to adjust your recipe’s cook time slightly.
What happens if there’s a power outage after I’ve set Delay Start?
If a power outage occurs after you’ve programmed Delay Start but before the cycle has begun, the program will be cleared from the oven’s memory when power is restored. You will need to reset the clock and reprogram the delayed start cycle. If the power goes out during the cooking cycle, the oven will stop and will not resume automatically.
Can I change or cancel a Delay Start once it’s set?
Yes. While the oven is in its delayed waiting period, you can usually press the Off/Cancel button to clear the entire program. To change the time, you may need to cancel and reprogram from the beginning. The display will typically show the pending start time, so you know it’s active. Always double-check before leaving the house.