Don’t panic when your dishwasher stops working. Most issues are simple fixes you can handle yourself. Start with the absolute basics: check for power, ensure the door is latched, and verify water supply valves are open. Clogged filters and spray arms are the #1 cause of poor cleaning. For drainage problems, inspect the drain hose and air gap. Always prioritize safety—unplug the appliance before internal checks. If these steps fail, it may be a faulty part requiring a professional.
Key Takeaways
- Safety First: Always disconnect power (unplug or turn off breaker) before inspecting internal components or hoses.
- Check the Obvious: Ensure the door is fully closed/latched, the control lock isn’t on, and the cycle was selected properly.
- Power & Water Are Primary: Verify the dishwasher is receiving power and that the hot water supply valve under the sink is fully open.
- Clean Filters & Spray Arms: A clogged filter or blocked spray arm holes are the most common reasons for dirty dishes and poor performance.
- Drainage Issues Have Multiple Causes: Check the drain hose for kinks/clogs, clean the air gap, and inspect the drain pump for debris.
- Listen and Observe: Unusual noises (grinding, humming, silence) can pinpoint specific mechanical or electrical failures.
- Know When to Call a Pro: If you’ve checked all basics and the problem persists, or if you suspect faulty wiring, heating elements, or control boards, seek professional repair.
📑 Table of Contents
- Introduction: Your Dishwasher Stopped Working—Now What?
- Section 1: The Absolute Basics—Power, Door, and Settings
- Section 2: Water Supply—The Lifeblood of Your Dishwasher
- Section 3: Draining and Leaking—Where Is the Water Going?
- Section 4: Cleaning and Performance—Why Are My Dishes Still Dirty?
- Section 5: Noises and Mechanical Problems
- Section 6: When All Else Fails—Advanced Checks and Calling a Pro
Introduction: Your Dishwasher Stopped Working—Now What?
You press the start button, hear the familiar hum, and walk away. Later, you open the door to find dishes still dirty, a pool of water, or worse—complete silence. The immediate reaction is frustration, followed by a sinking feeling: “How do I get my dishwasher to work?” Before you resign yourself to hand-washing or an expensive service call, take a deep breath. The vast majority of dishwasher problems are not catastrophic failures but rather straightforward issues stemming from everyday use, minor clogs, or simple oversights.
This guide is your comprehensive troubleshooting companion. We will walk you through a logical, safe, and methodical process to diagnose and often fix the problem yourself. Think of it as a conversation with a seasoned appliance repair technician. We’ll start with the absolute simplest checks that solve 50% of all calls and gradually move to more complex internal inspections. Our goal is to empower you with knowledge, save you money, and get that essential appliance running smoothly again. Remember, patience and a systematic approach are your best tools.
Section 1: The Absolute Basics—Power, Door, and Settings
Before you pull out a screwdriver or call for help, you must eliminate the simplest, most common culprits. These are the checks every frustrated homeowner should do first. They require no tools and take less than two minutes.
Visual guide about How Do I Get My Dishwasher to Work
Image source: cdn11.bigcommerce.com
1.1 Is It Actually Plugged In and Powered On?
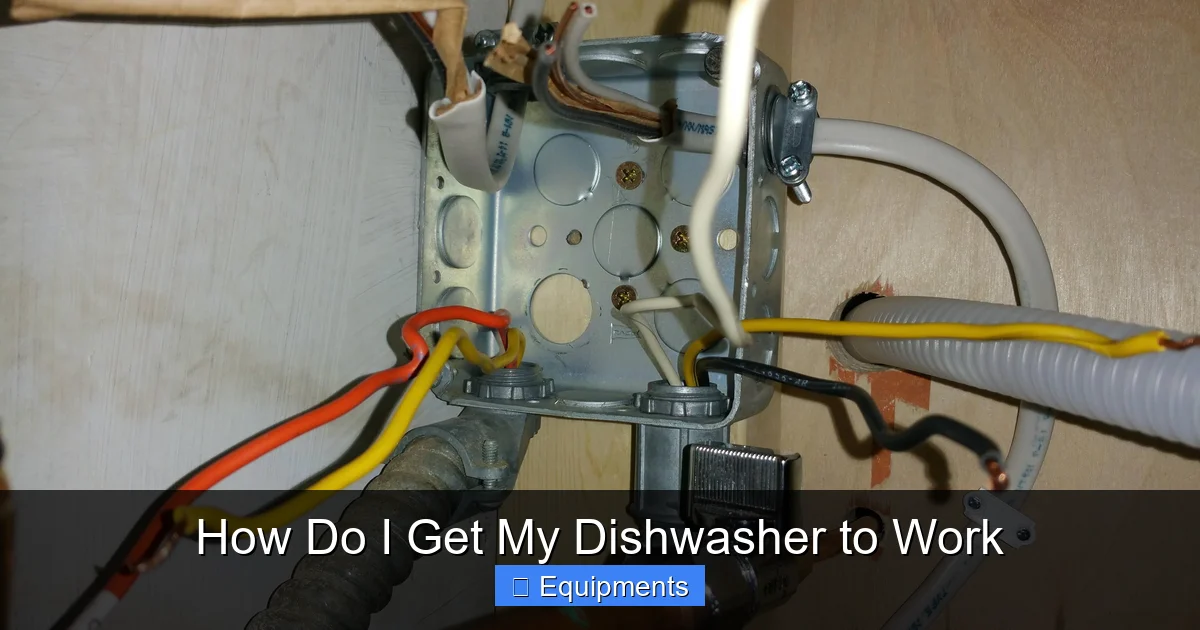
This seems absurdly obvious, but it’s the #1 missed step. Check the dishwasher’s power cord. Is it firmly plugged into the wall outlet under the sink? If it’s hardwired, ensure the junction box cover is on and the connection is tight. Next, head to your home’s electrical panel. Did a circuit breaker trip or a fuse blow? Look for a breaker in the “off” or middle position, often labeled “Dishwasher” or “Kitchen.” Flip it fully to “off” and then back to “on” to reset it. For fuse boxes, replace any blown fuses. If the breaker trips again immediately when you try to run the dishwasher, there’s a short circuit—stop and call a pro.
1.2 The Door Switch and Latch: The Silent Gatekeeper
Your dishwasher has a critical safety interlock: it will not run if the door isn’t securely latched. This prevents water from flooding your kitchen. First, physically push on the door while it’s closed. Does it feel loose or not fully sealed? Check for obstructions—a stray utensil, a dish protruding, or a worn door gasket (the rubber seal) can prevent a tight seal. Listen for the distinct “click” when you close the door. If you don’t hear it, the door latch assembly or the micro-switch inside it may be faulty. Try opening and closing the door firmly several times. Sometimes the latch just needs to be reseated.
1.3 Control Lock and Cycle Selection
Modern dishwashers have a “Control Lock” feature (often a padlock icon) to prevent accidental cycle changes or starts by children or during cleaning. It’s easy to engage accidentally. Check your control panel; is there a lit lock icon? Hold the “Control Lock” button (or sometimes the “Heated Dry” button) for 3-5 seconds to unlock it. Next, verify a cycle is actually selected. If the display is blank or shows an error code, consult your manual’s error code section. Finally, ensure you pressed “Start” or “Start/Resume” after selecting the cycle. Some models require a 3-5 second press.
Section 2: Water Supply—The Lifeblood of Your Dishwasher
A dishwasher can’t wash without water. If it’s filling with little to no water, or if the water is cold, the issue lies in the supply line. This section covers the path from your home’s pipes to the dishwasher’s tub.
Visual guide about How Do I Get My Dishwasher to Work
Image source: i.stack.imgur.com
2.1 Locate and Open the Water Supply Valve
Under your kitchen sink, you’ll find two small copper or plastic pipes (hot and cold) feeding the dishwasher faucet adapter or directly to the dishwasher. The hot water line should have a small shut-off valve (a lever or round knob). This valve is often accidentally turned off during sink plumbing work or by a well-meaning family member. Turn this valve counter-clockwise (lefty-loosey) until it stops. You should hear water begin to flow into the dishwasher within 30 seconds of starting a cycle. If the valve is already open, proceed to the next step.
2.2 Inspect the Inlet Valve and Screen
The water enters the dishwasher through the water inlet valve, an electrically controlled solenoid. Inside the valve’s inlet connection is a tiny mesh screen designed to catch sediment. Over time, this screen can become clogged with mineral deposits or debris, severely restricting water flow. To check it, you’ll need to turn off the water supply valve and disconnect the power. Pull the dishwasher out gently (or unscrew the bottom front kickplate) to access the valve, usually behind the lower front panel. Place a towel under the connection, then disconnect the water supply line from the valve inlet. Use needle-nose pliers to pull out the small screen. Soak it in white vinegar for an hour to dissolve scale, then rinse thoroughly. Reinstall and test. If water flow is still weak, the inlet valve itself may be faulty and not opening fully—this requires replacement.
2.3 Is the Water Hot Enough?
Dishwashers are designed to connect to the hot water line. They rely on your home’s water heater to provide sanitizing temperatures (typically 120°F-150°F). If connected to the cold line, cycles will be long and ineffective. Confirm the supply line connected to the dishwasher is the hot line (it will be the one coming from your water heater). Also, if your water heater is set too low (<110°F) or has failed, the dishwasher won't perform well. Run the hot water at your sink for 30 seconds before starting the dishwasher to clear out any cold water in the line.
Section 3: Draining and Leaking—Where Is the Water Going?
This category covers two opposite but related problems: water that won’t drain (leaving a pool at the bottom) and water that leaks from the machine during a cycle. Both involve the drain system.

Visual guide about How Do I Get My Dishwasher to Work
Image source: solutiontales.com
3.1 Clogged Filters: The First Line of Defense
At the very bottom of your dishwasher tub, you’ll find a cylindrical or flat mesh filter assembly. Its job is to catch food particles, glass shards, and seeds to prevent them from clogging the drain pump. If this filter is clogged, water cannot exit the tub efficiently, leading to poor drainage and dirty water recirculating onto your “clean” dishes. Remove the lower rack. Twist or lift out the filter assembly (consult your manual for exact method). Take it to the sink and scrub it vigorously with a soft brush under hot water. Use a toothpick to clear debris from the mesh holes. This simple 5-minute monthly maintenance task solves countless drainage problems.
3.2 Inspect the Drain Hose
The drain hose is a flexible tube that carries dirty water from the dishwasher to your sink drain or garbage disposal air gap. It’s a common site for clogs and kinks. First, check the entire visible length under the sink. Is it looped too high? It must be installed with a high loop (at least 18-20 inches above the floor) or an air gap to prevent sink water from siphoning back into the dishwasher. Is it kinked or crushed? Gently straighten it. Next, disconnect the hose from the dishwasher (have towels ready!) and blow through it. If air doesn’t pass freely, it’s clogged. You can try to clear it with a long, flexible brush or by carefully using a wet/dry vacuum on the hose’s end. If the clog is stubborn, replace the hose.
3.3 The Air Gap and Garbage Disposer Connection
If you have an air gap (a small cylindrical fixture on your countertop near the faucet), it can become clogged with debris. Remove the chrome cap and clean out any gunk inside. If your dishwasher drains into a garbage disposer, the connection might be blocked. Run the disposer with cold water to clear it. Also, ensure the “knockout plug” was removed from the disposer’s dishwasher inlet when it was installed (a common oversight during new installs).
3.4 Leaks: Diagnosing the Source
Leaks are often mistaken for drainage issues. A leak occurs during the wash or rinse cycle. Common sources: a torn or misaligned door gasket (rubber seal), a loose spray arm that sprays water directly at the door seal, a cracked tub (rare, often from impact), or a loose connection at the inlet or drain hose. Run a short cycle and watch closely. Is water dripping from the bottom front corners? Likely the door gasket. Is it streaming from under the unit? Check hose connections and the drain pump area. Tighten connections, reseat the gasket, and ensure spray arms spin freely without hitting dishes or the tub walls.
Section 4: Cleaning and Performance—Why Are My Dishes Still Dirty?
Your dishwasher runs through its cycles without error, but dishes come out with food residue, film, or spots. This is a performance issue, not a breakdown. The causes are almost always related to water, detergent, or physical obstructions.
4.1 The Spray Arms: Your Dishwasher’s “Sprinklers”
Spray arms—usually one at the bottom and one under the top rack—must spin freely and have clear jets. If the holes are clogged with hard water scale or food, water pressure drops dramatically. Remove the lower rack and spin the lower spray arm by hand. It should rotate smoothly. If it’s stiff or doesn’t move, remove it (usually a simple twist-lock or screw) and inspect the holes. Use a paperclip or toothpick to gently clear each hole. Soak the arm in vinegar if scale is visible. Check the upper spray arm similarly by removing the middle rack.
4.2 Detergent, Rinse Aid, and Water Hardness
Using the wrong detergent or too little is a prime suspect. Always use detergent specifically labeled for dishwashers. Never use dish soap. Check the detergent cup—is it clogged with old, caked-on detergent? Scrape it clean. For hard water areas (most of the U.S.), rinse aid is non-negotiable. It breaks surface tension so water sheets off dishes, preventing spots and film. Refill the rinse aid compartment monthly. If you have very hard water (>15 grains), consider a whole-house softener or a dedicated dishwasher salt (for European models with built-in softeners).
4.3 Loading Practices Matter
Improper loading blocks water and detergent. Plates and bowls should face the center on the bottom rack, not stacked. Utensils should be mixed in the basket to prevent nesting. Large pots and pans should be angled down on the bottom rack. Nothing should touch or block the spray arms. Glasses and small items go on the top rack, secured so they don’t fall and block water. Consult your manual’s loading diagram—it’s there for a reason.
4.4 Run a Deep Cleaning Cycle
Mineral buildup and greasy film can coat the interior, pump, and spray arms, reducing performance. Place a cup of white vinegar on the top rack and run the hottest, longest cycle (empty). Follow this by sprinkling a cup of baking soda on the bottom and running a short hot cycle. This combination dissolves scale and deodorizes. For severe buildup, use a commercial dishwasher cleaner according to package directions. Do this monthly if you have hard water.
Section 5: Noises and Mechanical Problems
Unusual sounds are your dishwasher’s way of talking to you. A quiet hum during the cycle is normal. Grinding, buzzing, clicking, or complete silence are red flags.
5.1 Grinding or Rattling Noises
This is often a simple obstruction. A broken glass, a seed pit, or a piece of plastic has lodged in the pump intake or is being hammered by the spray arm. Immediately stop the cycle and check the filter and pump area. Remove the filter (as described in Section 3) and reach into the pump housing (the area where the filter sits). You may feel and pull out debris. Also, check inside the spray arm holes and the spinner at the bottom of the pump. If the noise persists after clearing debris, the pump motor bearings may be worn out, requiring pump replacement.
5.2 A Loud Hum or Buzz That Won’t Start
This sound, often from the bottom of the unit, typically means the motor is trying to start but is jammed or the start capacitor is failed. First, try to manually spin the motor fan. You’ll need to access the motor, usually behind the lower front panel. Unplug power first. Remove the panel and locate the motor (a round, cylindrical component with a fan blade). Try to turn the fan blade by hand. If it’s seized and won’t budge, the motor is locked up and needs replacement. If it turns freely, the issue may be a faulty start capacitor or a failed motor winding—both require a professional diagnosis and part replacement.
5.3 Clicking Sounds During Fill or Drain
Normal clicking comes from the solenoid valves (inlet valve, drain solenoid) energizing. Excessive or continuous clicking during the fill cycle might indicate the inlet valve is failing or not getting steady water pressure. During drain, clicking could be the drain pump trying to engage but encountering too much resistance (from a clog) or a failing pump motor. Isolate the sound by listening from the front bottom panel. If it’s the drain cycle and you have standing water, you’ve already pinpointed a drain pump or clog issue.
5.4 The Silent Dishwasher
If you press start and absolutely nothing happens—no lights, no sounds, no water—the problem is almost certainly electrical. Re-check the power (Section 1.1). If power is confirmed at the outlet, the issue could be a blown thermal fuse (a safety device on the control board or door latch assembly), a faulty control board, or a broken wire. Diagnosing this requires a multimeter to test for continuity and voltage. Unless you are comfortable with electrical diagnostics, this is the point to call a technician. Incorrect handling can be dangerous and cause further damage.
Section 6: When All Else Fails—Advanced Checks and Calling a Pro
You’ve methodically worked through the basics, water supply, drainage, cleaning, and noises. The dishwasher still doesn’t work. It’s time for a deeper dive or to recognize when expertise is needed.
6.1 The Float Switch and Float
Inside the tub’s sump (the lowest point) is a plastic float and a float switch. Its job is to detect water level and signal the inlet valve to stop filling. If the float is stuck “up” (by debris or a broken float), the switch tells the dishwasher the tub is full, so it won’t fill. Locate the float—it’s a small plastic cylinder that should move up and down freely. Gently lift and lower it. It should move smoothly without binding. If it’s stuck, clean around it. You can also test the float switch for continuity with a multimeter (consult a wiring diagram for your model). A failed switch is a common failure point.
3.2 Heating Element (For Dry or Sanitize Cycles)
If your dishes aren’t drying, or if the water during the final rinse isn’t hot, the heating element may be faulty. Visually inspect the exposed element (usually a black coil at the bottom of the tub). Look for breaks in the coil or blisters/charring. A visual break means it’s dead. If it looks intact, you can test it for continuity with a multimeter (set to ohms, reading should be between 15-50 ohms, check manual for spec). A “open” reading (infinite resistance) means it needs replacement. Note: some models use a “heat dry” option that uses the element; if that doesn’t work but the element tests good, the control board may not be sending power.
3.3 The Drain Pump Motor
If you have standing water and have ruled out clogs in the filter and hose, the drain pump motor itself has likely failed. Access it by removing the lower front panel. It’s usually a small motor with two wires and a clear plastic housing. Test for continuity across its terminals. No continuity means the motor is burnt out and needs replacement. Listen carefully during the drain cycle: if you hear a hum but no water movement, the motor is trying to run but is jammed or its impeller is broken.
3.4 Knowing When to Call a Professional
Call a qualified appliance repair technician if:
- You’ve completed all basic troubleshooting and the problem persists.
- You need to test/replace electronic control boards, wiring harnesses, or motor windings.
- You smell burning or see signs of arcing/smoke.
- The tub is cracked or leaking from the bottom (often requires tub replacement or major seal job).
- You are uncomfortable or unsure about any step involving electricity or plumbing.
Professional repair costs can range from $150-$400+ depending on the part and labor. For older units (10+ years), replacement might be more cost-effective than repair.
Frequently Asked Questions
Can I reset my dishwasher like a computer?
Yes, many dishwashers have a reset sequence. Often, turning the unit off at the breaker for 5 minutes, then restoring power, will reset the control board. Some models require a specific button sequence (e.g., “Heated Dry” + “Normal Wash” held for 3 seconds). Check your manual. This can clear error codes and temporary glitches.
Is it safe to work on my dishwasher myself?
For basic troubleshooting—checking power, cleaning filters, unclogging hoses—it is very safe. Always disconnect the power supply (unplug or turn off the dedicated circuit breaker) before touching any internal wiring, hoses, or components. Do not attempt to repair the control board, wiring, or sealed system parts (motor, pump) unless you have electrical expertise. When in doubt, call a pro.
Why does my dishwasher smell bad?
Bad odors usually come from trapped food debris in the filter, drain hose, or air gap. Start by thoroughly cleaning the filter assembly. Then, run an empty cycle with a cup of white vinegar on the top rack, followed by a cycle with baking soda on the bottom. Ensure you’re scraping large food particles off dishes before loading. If the smell persists, the drain hose may need to be replaced as it can harbor bacteria.
My dishwasher runs but doesn’t fill with water. What now?
First, confirm the water supply valve under the sink is open. Next, check the inlet valve screen for clogs (Section 2.2). If the screen is clean and water flows from the supply line when disconnected, the inlet valve solenoid may be faulty and not opening. Listen for a faint “click” when the cycle starts; if you don’t hear it, the valve or its control signal is the likely culprit.
Why are my glasses coming out with a white, chalky film?
This is almost always caused by two things: hard water and insufficient rinse aid. The film is mineral deposits. First, refill the rinse aid dispenser to the maximum line. Second, clean the interior with vinegar (Section 4.4). If the problem continues, your water is very hard, and you may need a water softener or a dishwasher with a built-in water softening system that uses special salt.
How often should I clean my dishwasher’s filter?
For optimal performance and to prevent clogs, clean the filter at least once a month. If you use your dishwasher daily, have hard water, or frequently wash heavily soiled pots, clean it every two weeks. This is the single most important maintenance task you can perform and takes less than 5 minutes.