Removing the plates from your Cuisinart waffle maker is a simple but crucial maintenance task. Always start by ensuring the appliance is completely cool and unplugged. Locate the release latches or buttons on the sides or front, engage them, and gently lift the top plate assembly straight up. For stuck plates due to batter residue, patience and gentle, even pressure are key—never use forceful prying tools. This process allows for thorough cleaning, prevents buildup, and extends the life of your beloved kitchen tool.
There’s a special kind of joy that comes from pulling a perfectly golden, crispy Belgian waffle from your Cuisinart waffle maker. That satisfying steam, the fluffy interior, the crisp exterior—it’s a weekend breakfast ritual many of us cherish. But behind that delicious moment lies a necessary, often overlooked task: cleaning the appliance properly. And the cornerstone of that deep clean is knowing how to remove the plates from your Cuisinart waffle maker. It might seem daunting, like you’re performing delicate surgery on a beloved kitchen gadget. You might worry about breaking a hinge, snapping a latch, or simply not knowing where to even begin. This guide will walk you through every single step, transforming that anxiety into confident, routine maintenance. We’ll cover the universal principles, dive into the specifics for different Cuisinart models, troubleshoot stubborn situations, and establish a cleaning rhythm that will keep your waffle maker performing like new for years. Think of this not as a repair manual, but as a friendly conversation between you and your appliance, learning its language and caring for it properly.
Key Takeaways
- Safety First: Always unplug the waffle maker and let it cool completely for at least 30-45 minutes before attempting plate removal to avoid burns or damage.
- Locate the Mechanism: Identify your specific model’s release system—most Cuisinart models use side latches, a front lever, or a center button to disengage the plate assembly.
- Lift Straight Up: Once released, grip the plate assembly firmly and lift it vertically in one smooth motion. Avoid angling or twisting to prevent hinge damage.
- Patience with Stuck Plates: If plates resist, do not force them. Apply gentle, even pressure, or let the unit sit with a damp cloth to soften hardened batter residue.
- Clean Before Reassembling: Never reattach plates while wet or dirty. Ensure both plates and the interior are completely dry to prevent rust and ensure even cooking.
- Regular Maintenance is Key: Removing and cleaning the plates after every few uses prevents stubborn buildup and maintains optimal performance and flavor.
- Know Your Model: Consult your user manual for model-specific instructions, as designs vary between classic vertical waffle makers and modern flip models.
📑 Table of Contents
- Why Removing the Plates is Non-Negotiable for Proper Care
- Universal First Steps: Preparation and Safety
- Identifying Your Cuisinart Waffle Maker’s Release Mechanism
- The Step-by-Step Removal Process: A Detailed Guide
- Troubleshooting: What to Do When Plates Won’t Budge
- Cleaning, Inspecting, and Reassembling for Perfect Performance
- Establishing a Maintenance Routine for Longevity
Why Removing the Plates is Non-Negotiable for Proper Care
Before we get our hands dirty, let’s understand why this step is so important. Simply wiping the exterior or brushing the plates while they’re attached is like cleaning a car by only wiping the windshield. It’s surface-level and misses the critical grime that builds up where you can’t see it.
The Hidden Enemy: Baked-On Batter and Grease
With every use, a fine mist of oil, tiny droplets of batter, and microscopic crumbs find their way into the deepest recesses of your waffle maker. This happens in the gap between the plate and the housing, around the hinges, and in the seams of the non-stick coating. Over time, this layer bakes on under high heat, becoming a carbonized, stubborn residue. This buildup does more than just look unsightly. It can:
- Smoke and Burn: Old batter will scorch during the next cooking cycle, creating unpleasant smoke and bitter flavors that transfer to your fresh waffles.
- Reduce Non-Stick Efficacy: A dirty surface is a sticky surface. Buildup compromises the non-stick coating, causing waffles to tear or stick, leading to frustration and wasted batter.
- Create Fire Hazard: In extreme cases of neglect, significant grease buildup can become a fire risk.
- Shorten Appliance Lifespan: Grime forces the motor and heating elements to work harder, accelerating wear and tear.
Only by removing the plates can you access these hidden nooks and crannies with a soft brush, mild soap, and water to completely eradicate this baked-on enemy.
Accessing the Hinges and Seals
The hinge mechanism is the moving heart of your waffle maker. It’s also a magnet for drips and splashes. When plates are fixed in place, you can only clean around the hinge pin. Removing the upper plate assembly exposes the entire hinge structure, allowing you to wipe away any congealed oil or batter that could impede smooth operation or cause squeaking.
Similarly, the sealing gasket or the area where the two plates meet (the “clamshell” seam) is a prime spot for leakage. Removing plates lets you inspect and clean this critical sealing surface, ensuring perfect waffle formation and preventing batter from oozing out onto the countertop.
Universal First Steps: Preparation and Safety
No matter if you own a classic Cuisinart Round Classic Waffle Maker or a fancy Belgian-style flip model, the first steps are identical and absolutely critical. Skipping these is the number one cause of user error and potential damage.
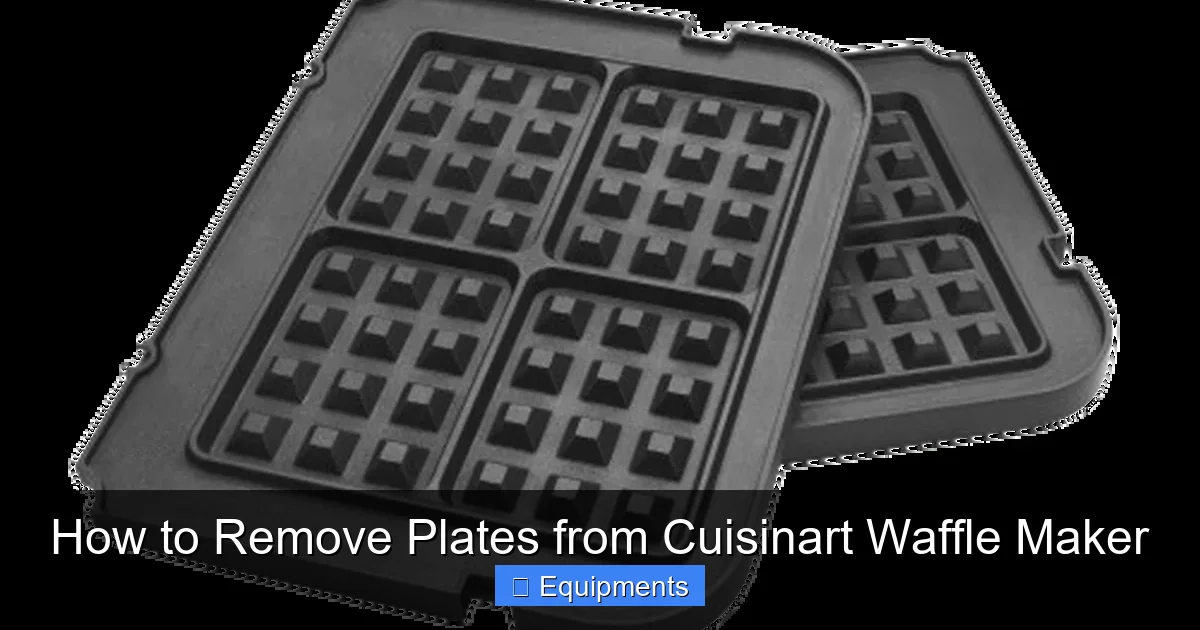
Visual guide about How to Remove Plates from Cuisinart Waffle Maker
Image source: cuisinart.com
1. The Golden Rule: Cool and Unplug
This cannot be stressed enough. Your waffle maker’s cooking surfaces reach temperatures upwards of 375°F (190°C). Touching the plates or housing immediately after use is a guaranteed burn. More insidiously, the metal contracts as it cools. Trying to release latches on a hot, expanded unit can be difficult and can force components in ways they weren’t designed to move. Always wait at least 30-45 minutes after your last waffle. A good test is to carefully hover your hand an inch above the plates—if you feel radiant heat, it’s still too hot. Once cool to the touch, unplug the machine from the wall outlet. This eliminates any risk of accidental activation and is a fundamental electrical safety practice.
2. Gather Your Gentle Tools
You don’t need a toolbox, just a few soft, non-abrasive items. Aggressive scrubbers will destroy the precious non-stick coating. Assemble:
- Soft Microfiber Cloths: For wiping and drying.
- Soft-Bristled Brush: A toothbrush dedicated to appliance cleaning is perfect for scrubbing hinges and textured surfaces.
- Mild Dish Soap: A few drops in warm water.
- Warm, Soapy Water Bowl: For soaking cloths and brushing.
- Plastic or Wooden Spatula (Optional): For gently lifting stuck-on bits, never metal.
- Rubber Gloves (Optional): For grip and hygiene.
3. Initial Wipe-Down
Before you even touch the release mechanism, use a dry or slightly damp microfiber cloth to wipe away any loose crumbs, oil splatter, or batter drips from the exterior and the open plate surfaces. This prevents this loose debris from falling into the hinge or locking mechanism when you open the unit, which could cause jams.
Identifying Your Cuisinart Waffle Maker’s Release Mechanism
Cuisinart has produced several waffle maker designs over the years. The plate removal method hinges (pun intended) on which release system your specific model uses. Here’s how to identify yours.
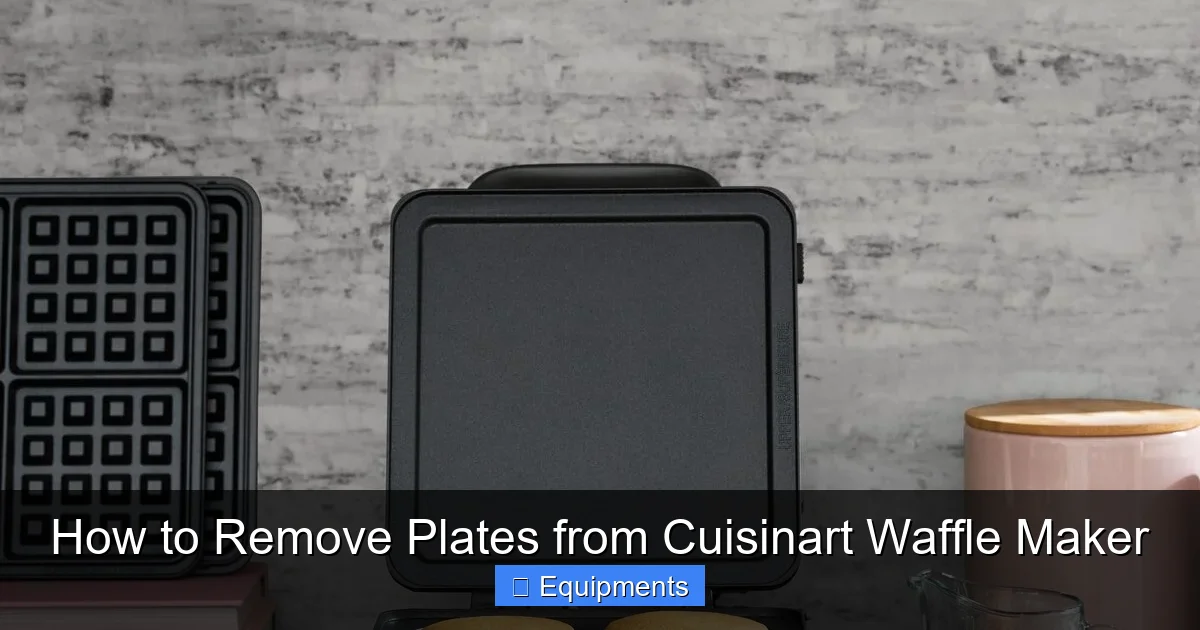
Visual guide about How to Remove Plates from Cuisinart Waffle Maker
Image source: cuisinart.com
Model A: The Side Latch System (Most Common)
This is the classic design found on models like the Cuisinart Round Classic Waffle Maker (WMR-CA) and many others. Look at the sides of the upper housing, near where it meets the base. You’ll see one or two small, plastic lever arms or sliding tabs. These are the latches.
- How it Works: The latches hook into corresponding slots on the lower housing, locking the plates in the closed position. To disengage, you push or slide these latches inward (toward the center of the machine) or upward, depending on the design.
- Visual Cue: You’ll often hear a distinct “click” or feel a pop when the latch fully releases from its catch.
Model B: The Front Lever or Button
Some vertical, square, or Belgian-style models, like certain versions of the Cuisinart Belgian Waffle Maker (WMR-2), feature a prominent lever or button on the front center of the upper housing.
- How it Works: You press down on the lever/button. This mechanism typically pushes a connecting rod that simultaneously disengages both side latches for you. It’s a one-touch system.
- Visual Cue: A large, easy-to-press plastic piece, often with a textured surface for grip, right at the front edge of the top plate assembly.
Model C: The “Flip” Model Plate Removal
Cuisinart’s popular flip models, like the Cuisinart Waffle Maker with Flip (WMR-2A), have a different structure. The entire upper cooking plate and its housing rotate around a central pivot. Plate removal on these is slightly different.
- How it Works: First, ensure the flip handle is locked in the upright (closed) position. Then, look for the same side latches as in Model A. However, because the upper unit pivots, you may need to support the weight of the upper assembly more carefully as you release the latches and lift.
- Key Difference: The upper unit is a single, heavier piece that includes the plate and its outer shell. Lift it straight up and off the pivot pin.
Pro Tip: If you still have your user manual, the “Cleaning” section will have a diagram. If not, a quick image search for “Cuisinart [Your Model Number] plate removal” will yield clear photos. Identifying your mechanism is 90% of the battle.
The Step-by-Step Removal Process: A Detailed Guide
Now, let’s put theory into practice. This process is the same for all models once you’ve located the release.
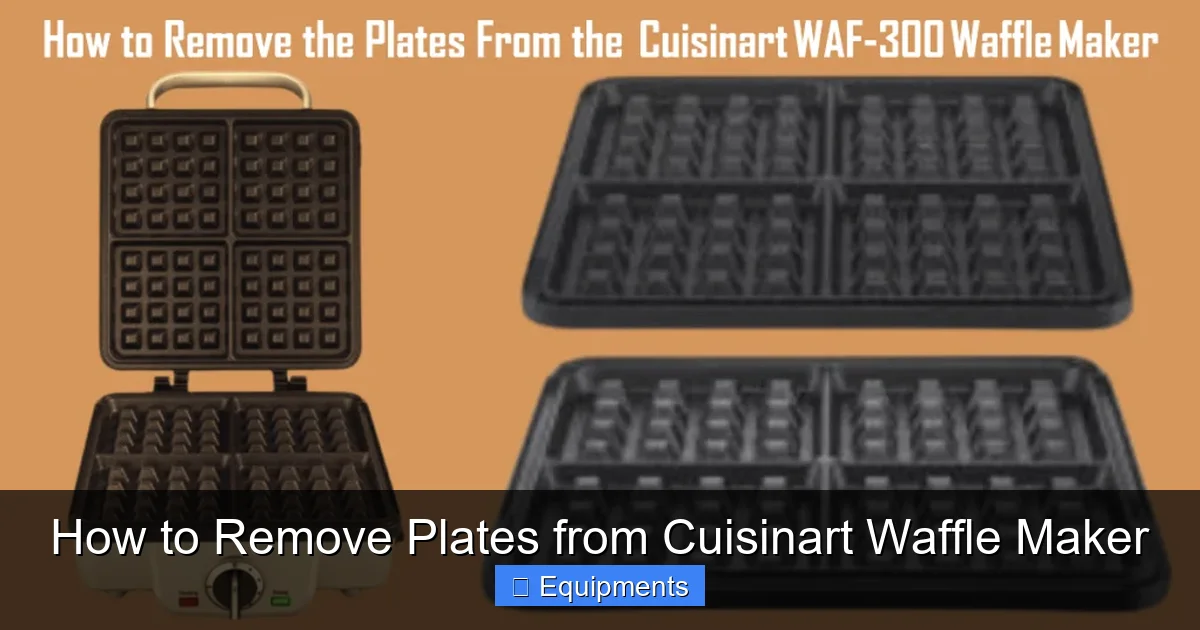
Visual guide about How to Remove Plates from Cuisinart Waffle Maker
Image source: wafflemakercenter.com
Step 1: Secure Access and Positioning
Place your clean, cool, unplugged waffle maker on a stable, flat surface with plenty of light—your kitchen counter is perfect. Have your soft cloths ready. If your model is a flip model, ensure it is sitting on its base and the flip handle is locked in the closed, upright position.
Step 2: Engage the Release Mechanism
This is the moment of truth. Using your fingers (dry for best grip), firmly press and hold the side latches inward (for side-latch models) or press down the front lever/button (for front-button models). You should feel a disengagement—a slight give or a click. Keep the mechanism held in the disengaged position. On some models, the latches will stay retracted on their own; on others, you may need to hold them continuously.
Step 3: The Lift – Technique is Everything
This is where most people get nervous. With your other hand, place your fingers under the outer edge of the upper housing (the part you normally lift to open the waffle maker). For side-latch models, you can also place your palm on the top of the upper housing. The lift must be straight up, perpendicular to the counter. Do not tilt it forward, backward, or to the sides. Lift in one smooth, confident motion. The upper plate assembly, complete with its non-stick plates and outer shell, should come free from the lower housing and the hinge pin. If it feels stuck, stop immediately. Go back to Step 2 and ensure the latches are fully disengaged. A partial release is the most common cause of a stuck-feeling assembly.
Step 4: Place the Assembly Down Carefully
Once free, gently place the upper assembly upside-down (plates facing up) on a clean, soft towel or your countertop. This protects the non-stick surface from scratches. You now have full, unimpeded access to both the upper and lower plates, the hinge pin, and the interior cavity of the lower housing.
Troubleshooting: What to Do When Plates Won’t Budge
Even with perfect form, sometimes plates refuse to separate. This is almost always due to one thing: pressure from hardened batter residue. Here is your graduated response plan, from gentle to more involved.
First: Reassess and Apply Gentle, Even Pressure
Are you sure it’s fully released? Double-check both latches. Sometimes one side releases but the other remains caught. Press both firmly and simultaneously. Then, try the lift again, but this time, use both hands to apply absolutely even upward pressure on the entire front edge of the upper housing. Uneven pressure can cause one side to bind.
Second: The Warm, Damp Cloth Method
If gentle force fails, do not resort to prying. Instead, get a microfiber cloth dampened with warm (not hot) soapy water. Wring it out thoroughly so it’s only moist. Place this cloth directly in the sealed seam where the two plates meet, right along the front edge. Let it sit for 10-15 minutes. The mild moisture and warmth will begin to soften the carbohydrate-based batter glue. After soaking, try the lift again.
Third: Targeted Heat Application (Use with Extreme Caution)
If the damp cloth didn’t work, you can use very low, indirect heat. This is risky and must be done carefully. With the waffle maker unplugged and cool, set a hairdryer to its lowest, warm (not hot) setting. Wave it back and forth along the seam of the closed plates for 30-45 seconds. The goal is to gently warm the metal and the residue, not to cook it further. Immediately try the release and lift. Do not overheat, as this can damage the non-stick coating or warp the plates.
Fourth: The Plastic Tool Nudge
As a last resort, after applying heat or a damp cloth, you can use a wooden or plastic spatula. With the unit still closed, gently insert the thin edge of the spatula into the front seam. Do not lever it up like a crowbar. Instead, gently wiggle it back and forth to break the adhesive bond of the residue. You might feel a slight “give.” Once you feel it, immediately engage the latches and try the straight lift again. Never use metal tools.
Cleaning, Inspecting, and Reassembling for Perfect Performance
With the plates finally free, the real work begins. But it’s easy work if you have the right approach.
The Gentle Clean: Soap, Water, and Patience
Fill your sink or a basin with warm water and a drop of mild dish soap. Submerge the upper plate assembly and the lower plate (if removable—most lower plates are fixed). Use your soft-bristled brush to gently scrub every surface, paying special attention to:
- The Hinge Pin Area: Brush around the pin hole on both the upper and lower housings.
- The Plate Seams: The edges where the non-stick coating meets the metal housing.
- The Non-Stick Surfaces: Use a circular motion with soft cloth or brush. For stubborn bits, let them soak in the soapy water for 10 minutes before scrubbing.
Critical: Never immerse the electrical base housing that contains the heating elements and wiring. Only the removable plates and the upper housing shell (if it comes off) should get wet. If your lower housing is fixed, clean it with a wrung-out damp cloth while the plates are removed.
Drying: The Step That Prevents Rust
This is as important as the washing. Water left on the carbon steel core of the plates (beneath the non-stick coating) can cause rust that eventually bubbles up and ruins the coating. Dry every single component meticulously with a dry microfiber towel. Pay extra attention to the hinge pin holes and any seams. Then, let all parts air-dry on a rack for at least 30 minutes to ensure zero trapped moisture. Reassembling with any dampness is a fast track to rust and sticking.
Inspection and Lubrication (Optional)
While everything is apart, give your appliance a health check. Look at the non-stick coating for any scratches, chips, or peeling. If the coating is compromised, it’s time to consider replacement plates (if available for your model) or a new appliance. Check the plastic latches for cracks. Finally, if your hinges feel stiff after cleaning, you can apply a tiny drop of food-grade mineral oil to a cotton swab and lightly coat the hinge pin. Wipe away any excess. Do not use vegetable oil, as it will turn rancid.
Reassembly: The Reverse Process
Ensure everything is bone dry. Take the upper plate assembly. Align the hinge pin on the upper housing with the hole in the lower housing. Gently lower the upper unit straight down until it seats fully. You should feel it settle. Now, engage the release latches in the opposite direction—push them outward (for side latches) or release the front lever. You should hear/feel a solid, satisfying click as they lock into place. Give the closed unit a gentle shake; there should be no wobble or rattle. The plates should be perfectly aligned with no gaps.
Establishing a Maintenance Routine for Longevity
Knowing how to remove the plates is one thing; knowing when to do it is what protects your investment for the long haul.
Frequency: The “After Every Few Uses” Rule
For the average household making waffles once a week or on weekends, plan on a full plate removal and deep clean every 3-5 uses. If you notice waffles starting to stick more, or if you see visible residue around the edges, that’s your cue. For heavy users (e.g., a family making waffles daily), clean after every 2-3 uses. Think of it like changing your car’s oil—it’s a small, regular task that prevents catastrophic failure.
Between Deep Cleans: The Daily Wipe
After each use, while the machine is still warm (not hot), use a dry paper towel or a damp (well-wrung) cloth to wipe down the plates and the interior. Use a wooden or silicone spatula to gently lift any batter that has spread to the outer edges. This daily habit removes fresh, soft batter before it bakes on, drastically reducing the work needed during your weekly deep clean.
Storage: Keep it Clean and Open
Never store your waffle maker with the plates clamped shut. Over time, this constant pressure can cause the plates to stick together, especially if there’s the slightest bit of moisture or oil trapped. Always store it with the lid propped open. Many models have a small latch or hook on the side to hold it open. This airs out the interior and prevents the plates from bonding together.
Frequently Asked Questions
Do I need any special tools to remove the plates?
No. You only need your clean, dry hands and possibly a soft cloth for grip. Never use screwdrivers, knives, or other tools to pry the plates, as this will permanently damage the plastic latches and non-stick coating.
How often should I completely remove the plates for cleaning?
For typical home use, perform a full plate removal and deep clean every 3-5 uses. If you notice waffles sticking, see visible buildup, or use the maker very frequently, clean it more often. A quick wipe-down is recommended after every single use.
My plates are really stuck. What’s the safest way to get them apart?
First, ensure it’s completely cool and unplugged. Confirm all release latches are fully engaged. Try lifting with even, straight pressure. If stuck, place a warm, damp cloth in the seam for 15 minutes to soften residue. As a last resort, use a hairdryer on low, warm heat along the seam for 30 seconds, then try again. Never use force or metal tools.
Can I put the removable plates in the dishwasher?
Cuisinart generally recommends against it. The harsh detergents and high heat of dishwashers can degrade the non-stick coating over time, causing it to lose its effectiveness and eventually flake. Hand washing with mild soap and a soft brush is always the safest method for preserving the coating.
What should I do if the plastic latch breaks?
A broken latch means you cannot securely close the waffle maker, and it’s unsafe to use as batter will leak everywhere. Contact Cuisinart customer support to inquire about replacement latch parts. In many cases, it may be more cost-effective to replace the entire upper housing assembly if available, or consider a new appliance if the model is older.
Is it normal for the plates to feel a little loose after reattaching?
No. When properly reassembled, the upper plate assembly should fit snugly onto the lower housing with no lateral movement or wobble. If it feels loose, the latches are likely not fully engaged. Re-open the unit, ensure the latch mechanisms are clear of debris, and attempt to lock them again until you hear/feel a solid click. If it remains loose, the latch mechanism may be worn or broken.