Running a stove pipe through a wall is a critical task that demands precision and strict adherence to building codes. Improper installation poses severe fire hazards and risks carbon monoxide poisoning. This guide details the essential planning, required materials like firestops and thimbles, and the meticulous step-by-step process to ensure a safe, efficient, and legal venting system for your wood stove.
The crackle and glow of a wood stove bring an unmatched warmth and ambiance to a home. But that comforting heat relies on a perfectly functioning venting system. A central, and often most daunting, part of that system is running the stove pipe through an exterior wall. It’s a task that sits at the intersection of DIY ambition and serious safety responsibility. Done correctly, it provides years of safe, efficient heat. Done incorrectly, it can lead to catastrophic house fires or silent, deadly carbon monoxide leaks. This comprehensive guide will walk you through every consideration, from initial planning to final inspection, ensuring you can run a stove pipe through a wall with confidence and compliance.
The process isn’t simply about drilling a hole and poking a pipe through it. It’s a calculated sequence involving understanding thermal dynamics, respecting building materials, and using specialized, listed components. We will break down the “why” behind each step, so you’re not just following instructions, but understanding the principles of safe stove pipe installation. Whether you’re replacing an old, deteriorated section or installing a new stove in a room without a existing chimney, mastering this skill is fundamental for any wood stove owner.
Key Takeaways
- Safety is Paramount: Incorrect stove pipe installation is a leading cause of home fires. Always prioritize clearances, fire-rated components, and professional consultation.
- Know Your Codes: Local building and fire codes vary. Obtain permits and have the finished work inspected. Never assume national standards apply locally.
- Material Matters: Use only listed, high-temperature components (double-wall pipe, firestop collars, thimbles) rated for stove pipe use. Never substitute with HVAC or dryer vent parts.
- Clearances are Non-Negotiable: Maintain minimum distances from combustibles (studs, siding, framing). Double-wall pipe reduces these required clearances significantly.
- Plan the Route: The path should be as straight and short as possible, avoiding bends within walls. The vertical rise through the wall is the most critical segment.
- Air-Tight Sealing: All penetrations through the wall must be sealed with fire-resistant caulk around the thimble and within the wall assembly to prevent smoke and gas leaks.
- When in Doubt, Call a Pro: If any step is unclear, or if your wall configuration is complex (load-bearing, multiple layers), hire a certified chimney sweep or installer.
📑 Table of Contents
- 1. The Foundation of Safety: Planning and Code Compliance
- 2. Gathering the Essential Tools and Listed Materials
- 3. Preparing the Wall: Cutting the Opening
- 4. Installing the Pipe and Thimble Assembly
- 5. Exterior Termination and Sealing the System
- 6. The Final Check: Inspection and Startup
- Conclusion: The Warmth of Peace of Mind
1. The Foundation of Safety: Planning and Code Compliance
Before you buy a single tool or touch a drill, you must engage in thorough planning. This phase is 80% of the work. Rushing into a wall with a hole saw is the single biggest mistake homeowners make. The consequences of poor planning are severe and immediate.
Understanding Clearance Requirements
Clearance is the minimum safe distance between the hot stove pipe and any combustible material—wood framing, drywall, insulation, siding, etc. This distance is not arbitrary; it’s determined by rigorous testing of the pipe you use. There are two primary types of stove pipe:
- Single-Wall Pipe: This is the traditional, black steel pipe. It gets very hot on the outside and requires larger clearances, typically 18 inches from combustibles when passing through a wall or ceiling.
- Double-Wall (or Triple-Wall) Pipe: This has an inner pipe for exhaust and an outer pipe with an air gap, acting as insulation. It stays significantly cooler and requires reduced clearances, often as little as 6-9 inches when passing through a wall, but you must check the specific manufacturer’s listing.
Using double-wall pipe for the wall penetration is highly recommended, as it dramatically reduces the size of the hole you need to cut and the amount of framing work required to create a safe chase.
Researching Local Building Codes
This is non-negotiable. Your local building department has the final say. Codes are based on the International Residential Code (IRC) but have local amendments. You must:
- Call or Visit Your Building Department: Ask specifically about requirements for “solid fuel heating appliance venting” and “stovepipe through wall” installations.
- Obtain a Permit: Most jurisdictions require a permit for this work. The permit process ensures a plan is reviewed and the final installation is inspected. This is for your safety and is often required for insurance purposes.
- Use Listed Components: Codes mandate the use of components (pipes, elbows, thimbles, firestop collars) that are listed by a recognized testing agency (UL, CSA, etc.) for the specific application. Do not use “generic” parts.
Mapping the Perfect Route
The ideal path has three characteristics: it’s straight, it’s short, and it avoids combustibles within the wall cavity.
- Straight Shot: Every 90-degree elbow inside a wall creates a turbulent flow zone where creosote can accumulate and restricts draft. The vertical rise through the wall should be as direct as possible. Any necessary horizontal run should be outside the wall, on the exterior side of the thimble.
- Shortest Path: The shorter the pipe run, the better the draft and the less heat loss. Plan the stove’s location with the exterior wall exit in mind.
- Combustible Check: Use a stud finder with wire detection. You need to know exactly where studs, plates, and any wiring or plumbing are located. Your hole must be framed between studs, or you must plan to build a protective, non-combustible chase around the pipe if it must pass through a stud.
2. Gathering the Essential Tools and Listed Materials
Having the correct tools and, more importantly, the correct listed materials before you start is crucial for a safe and efficient installation. Using the wrong part invalidates the entire system’s safety certification.
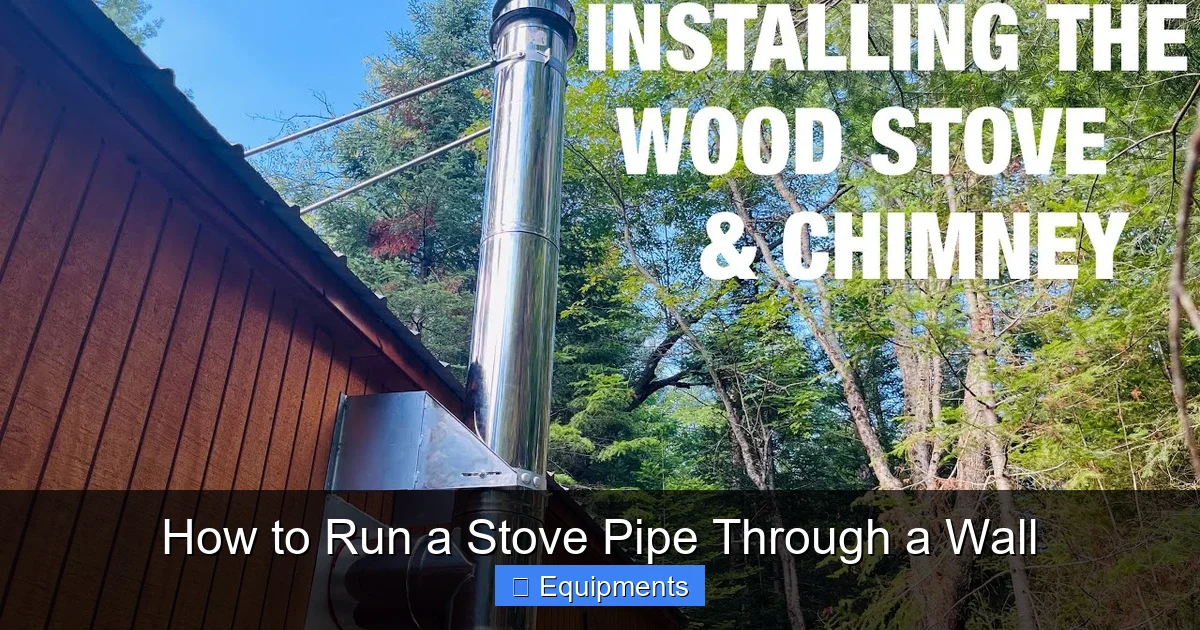
Visual guide about How to Run a Stove Pipe Through a Wall
Image source: i.ytimg.com
Core Venting Components (Must Be Listed for Stove Pipe)
- Stove Pipe: Either single-wall or double-wall, depending on your clearance calculations. Double-wall is the modern standard for through-wall applications.
- Wall Thimble or Support Sleeve: This is the single most important part for the wall penetration. It’s a factory-built, fire-rated assembly that creates a safe, framed opening. It maintains the required clearance to combustibles on both sides of the wall and provides a nailing flange. Do not attempt to build your own from sheet metal.
- Firestop Collar: A clamp-on device that seals the annular space (gap) between the pipe and the thimble on the interior side of the wall. It’s packed with high-temperature fire-resistant sealant and is required by code to prevent flame and gas spread into the wall cavity.
- Adjustable Wall Strap: Secures the pipe to the wall framing for stability, required at specific intervals (usually every 4-6 feet).
- Rain Cap and Spark Arrestor: The terminus on the exterior. Must be designed for solid fuel appliances.
- High-Temperature Silicone Sealant: Specifically rated for flue gas (e.g., 1200°F+). For sealing the firestop collar and any exterior joints.
Essential Tools
- Drill with Long Auger Bits or Hole Saw: For drilling through framing and sheathing. A 6-8 inch hole saw is common for double-wall pipe.
- Reciprocating Saw (Sawzall) or Circular Saw: For cutting through siding, sheathing, and interior finished wall.
- Stud Finder: With AC wire detection.
- Level, Tape Measure, Carpenter’s Square: For precision layout.
- Pry Bar, Hammer, Chisel: For removing interior finish and exterior siding carefully.
- Drill Bits for Masonry (if applicable): If your exterior is brick or block, you’ll need a core drill or hammer drill with masonry bits.
- Safety Gear: Safety glasses, gloves, dust mask, and hearing protection.
3. Preparing the Wall: Cutting the Opening
With your route mapped and materials gathered, the physical work begins. Precision here prevents major repairs later.
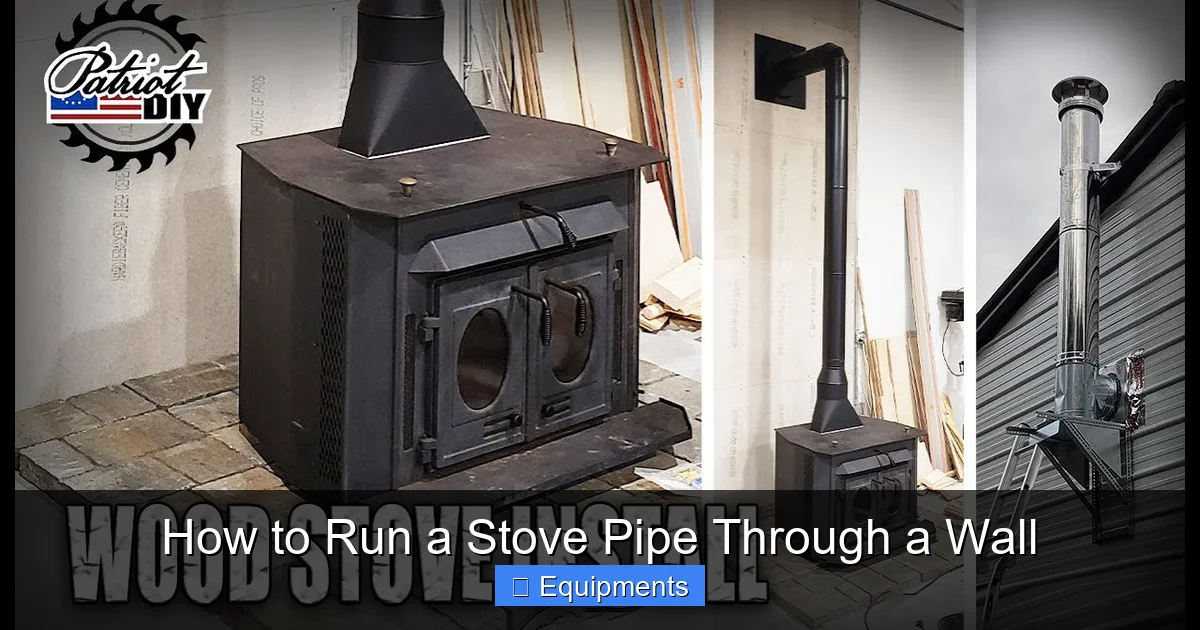
Visual guide about How to Run a Stove Pipe Through a Wall
Image source: i.ytimg.com
Marking the Interior and Exterior
From the inside, locate the exact center point of your planned pipe exit on the wall. Use your level to mark a vertical plumb line up from the stove connection point to this spot. On the exterior, use a long level or a plumb bob to transfer this center point accurately. The hole must be perfectly aligned. Double-check all measurements. Remember, the thimble’s outer flange will cover a significant area of your exterior siding, so mark the final, finished opening size, not just the pipe diameter.
Cutting the Interior Opening
Turn off and allow the stove to cool completely. Remove any interior wall covering (drywall, paneling) in a rectangle slightly larger than the thimble’s interior flange. This gives you access to the wall studs and insulation. Be careful not to damage surrounding finish. You will see the wall cavity. This is your last chance to check for wiring, plumbing, or insulation that needs to be rerouted or removed. If you find insulation, it must be cleared from the entire chase area.
Framing the Opening (If Needed)
If your hole falls between studs, you may simply need to install short nailers (1×4 or 2×4) horizontally between the studs to provide a nailing surface for the thimble’s flange. If the hole must pass through a stud, you must build a non-combustible chase. This involves cutting the stud out and installing a steel plate or building a small, framed box with metal sheeting (like 26-gauge steel) to create a 2-inch air gap between the pipe and the wood stud. This is a complex job; consulting an engineer or inspector is wise here.
Cutting the Exterior Opening
With the interior framing prepared, move outside. For vinyl, wood, or fiber cement siding, use a drill to start a pilot hole at your mark, then use a hole saw or reciprocating saw to cut the final opening. For masonry, a core drill is necessary. The opening must be cut perfectly level and plumb. The thimble’s exterior flange will usually overlap the siding; you may need to remove a few courses of siding or trim around the opening to install the thimble’s flashing properly. The goal is a weather-tight seal where the thimble meets the exterior wall.
4. Installing the Pipe and Thimble Assembly
This is the core installation phase. It requires careful handling of the rigid pipe and attention to the sequence of components.
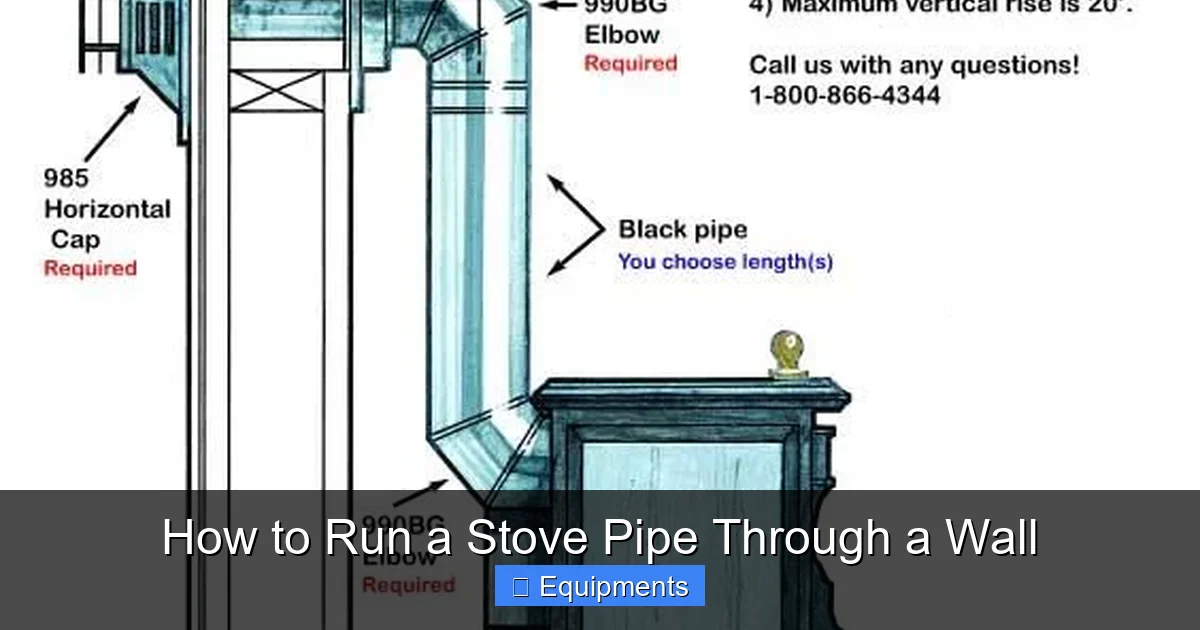
Visual guide about How to Run a Stove Pipe Through a Wall
Image source: i.pinimg.com
Installing the Wall Thimble
The thimble is a two-part unit (inner and outer) or a single unit with a deep collar. Apply a generous bead of high-temperature silicone sealant to the back of the thimble’s interior flange. From the inside, press the thimble firmly into the framed opening, ensuring it is level and plumb. The flange should sit flush against the interior wall surface (or the nailers you installed). Secure it with the provided screws or nails through the pre-drilled holes in the flange. From the exterior, apply sealant to the back of the exterior flange and secure it to the sheathing/siding. Install any provided flashing or counter-flashing to ensure water runs down the wall, not into the hole.
Feeding the Pipe Through
This is often a two-person job. Starting from the stove, assemble the first section of pipe and an elbow if needed to change direction toward the wall. Work the pipe up to the thimble. You may need to temporarily remove the thimble’s inner section to feed the pipe through from the outside, then reinstall it. Alternatively, assemble the pipe in place from the inside. The key is that the pipe must slide smoothly through the thimble’s opening without forcing. The annular gap (space between pipe and thimble) must be uniform.
Securing and Supporting
Once the pipe is through the thimble and aligned, secure it. First, install the firestop collar on the interior side of the wall. This collar wraps around the pipe and clamps to the thimble’s interior flange. Tighten the screws evenly. The collar’s built-in sealant will compress, filling the gap. This is your critical fire barrier. Next, install an adjustable wall strap on the interior side, securing the pipe to a stud or solid framing. This strap prevents the pipe from moving due to thermal expansion or vibration. Continue assembling pipe sections upward and outward on the exterior side, securing with additional wall straps as per the manufacturer’s spacing requirements (usually every 4-6 feet of vertical run).
5. Exterior Termination and Sealing the System
The job isn’t done when the pipe sticks out of the wall. The exterior termination must be correctly installed to prevent rain, snow, and animals from entering the flue, and to maintain proper draft.
Installing the Cap and Spark Arrestor
The final pipe section should be a straight piece that extends at least 12 inches above the roof or wall peak if it’s a sidewall exit, to avoid wind-induced downdraft. Attach the listed rain cap and spark arrestor to the top. The cap must have sufficient clearance from the roof surface (usually 2-3 feet, check code). Use the provided screws. The spark arrestor is a fine mesh screen that prevents embers from escaping and igniting nearby vegetation.
Final Joint Sealing and Weatherproofing
Inspect all pipe joints from the stove to the cap. All male/female joints (where one pipe slides into the next) should have at least three screws securing them. For single-wall pipe, a high-temperature silicone sealant is often applied to the joint before assembly. For double-wall pipe, follow the manufacturer’s instructions—some joints are sealed, some are not. On the exterior, where the thimble meets the siding, ensure the flashing is intact. You may apply a final bead of exterior-grade, paint-matched silicone caulk over the top edge of the thimble’s flashing for a perfect weather seal, but do not seal the bottom, allowing any moisture that gets behind to escape.
6. The Final Check: Inspection and Startup
Before you light your first fire, a methodical check is essential.
The Pre-Fire Inspection Checklist
- Visual Inspection: Check all screws in joints and straps. Ensure the firestop collar is snug and sealed. Verify the thimble is secure and flashing is in place.
- Clearance Verification: Use a ruler or feeler gauge to double-check the distance from the pipe (at the thimble and along the interior run) to any combustibles. It must meet or exceed the listed minimum.
- Draw Test: With all doors and windows closed, light a small, hot fire in the stove. From the exterior, observe the smoke. It should be a thin, white or light gray plume, rising steadily. Dark, thick smoke indicates poor draft or a restriction. Feel for air leaks around the thimble and joints on the interior.
- Carbon Monoxide Check: During the draw test, use a CO detector in the room with the stove to ensure levels are negligible (<10 PPM is normal for a well-vented system).
Calling the Inspector
Schedule your final inspection with the local building department. The inspector will verify clearances, component listings, proper support, and termination height. They will likely perform a smoke test or draw test. Passing this inspection is your official certification that the installation is safe and legal. Keep the inspection report and all component manuals with your home’s documentation.
Conclusion: The Warmth of Peace of Mind
Running a stove pipe through a wall transforms a room from a living space into a heated sanctuary. But that transformation is only positive when underpinned by absolute safety. The process we’ve outlined—meticulous planning, using only listed components, respecting clearances, and securing a final inspection—is the blueprint for that peace of mind. It’s a project that rewards patience and precision. The investment in time and correct materials pays dividends in the form of reliable, worry-free warmth for years to come. Remember, a wood stove is a beautiful, powerful tool. Treating its venting with the seriousness it deserves is the first and most important step in enjoying it fully. When in doubt, pause and consult a certified professional. The cost of a consultation is infinitesimal compared to the risk of a fire.
Frequently Asked Questions
What is the minimum clearance required for a stove pipe going through a wall?
The clearance depends entirely on the pipe type. Single-wall pipe typically requires 18 inches from combustibles. Double-wall pipe, when listed for reduced clearance, may require as little as 6 inches. You must use the specific clearance requirements from the manufacturer’s installation instructions for the exact pipe you purchase.
Can I use a regular HVAC duct or dryer vent for a wood stove pipe through the wall?
Absolutely not. HVAC and dryer vent components are not designed for the extreme temperatures and corrosive byproducts (creosote) of wood combustion. They will fail quickly, creating an extreme fire hazard. Only use components specifically listed and labeled for solid fuel (wood stove) applications.
Is it ever okay to drill through a load-bearing wall stud to run a stove pipe?
No. You cannot drill a large hole through a structural load-bearing stud. The correct method is to frame the opening between studs or, if unavoidable, build a protective, non-combustible steel chase that transfers the load around the pipe opening. This often requires consultation with a structural engineer and your building inspector.
How do I seal the gap around the stove pipe where it goes through the wall?
You do not seal this gap yourself with regular caulk. The firestop collar is the listed component designed specifically for this. It clamps to the thimble and compresses high-temperature sealant into the annular space, creating a fire-resistant and gas-tight barrier that is code-compliant.
What is a thimble, and why can’t I just use a metal sleeve from the hardware store?
A thimble is a factory-assembled, listed support and protection unit for the wall penetration. It maintains the required air gap between the hot pipe and the wall framing, provides a nailing flange, and integrates with flashing. A generic metal sleeve has no tested clearance, no integrated flashing, and no way to properly secure a firestop collar, making it a serious code violation and fire risk.
Do I really need a building permit for this project?
Yes, in virtually all jurisdictions. Installing a wood stove vent is considered a permanent alteration to your home’s structure and fire safety systems. A permit ensures your plan is reviewed by an expert and the final work is inspected for compliance. Skipping the permit can void your homeowner’s insurance in the event of a fire and creates a major liability when you sell your home.