Folding prosciutto beautifully on a charcuterie board transforms a simple ingredient into a stunning centerpiece. It prevents sticking, showcases texture, and makes for easy grabbing. By using a dry surface and mastering a few simple folds like the fan or roll, you can create an arrangement that looks as incredible as it tastes. This guide provides step-by-step techniques and pro tips for a picture-perfect board every time.
Have you ever stared at a beautiful, expensive slab of prosciutto, only to watch it clump together into a sad, greasy mess the moment you try to place it on your carefully arranged charcuterie board? You’re not alone. That delicate, paper-thin meat is famously fickle. But here’s the secret that separates a casual snack platter from a show-stopping centerpiece: knowing how to properly fold prosciutto. It’s not just about making it look pretty—though it absolutely does that. Folding is a functional art form that creates air pockets, separates the sticky slices, and turns each piece into a neat, grab-and-go package. It elevates the entire presentation from “nice spread” to “wow, where did you learn to do that?” This guide will walk you through everything you need to know, from the essential prep step everyone skips to five professional folding techniques you can master in minutes. Get ready to transform your prosciutto from a board-filler into the star of the show.
Key Takeaways
- Dryness is Critical: Always pat prosciutto slices very dry with a paper towel before folding to remove surface moisture and prevent sticking.
- Choose the Right Fold: Select a folding style (fan, roll, envelope) based on the prosciutto’s thickness and your board’s overall design.
- Work Quickly and Gently: Prosciutto is delicate. Handle slices minimally and work in a cool environment to keep them pliable and prevent tearing.
- Create Visual Variety: Mix folding styles and orientations (vertical, horizontal) on the board to add dynamic height and interest.
- Balance Your Board: Position folded prosciutto near complementary items like cheese, fruit, or nuts to guide the eye and palate.
- Embrace Imperfection: Rustic, slightly uneven folds look more artisanal and intentional than rigid, perfect ones.
📑 Table of Contents
- Why Folding Prosciutto Isn’t Just for Show
- Essential Prep: The Non-Negotiable First Step
- 5 Professional Folding Techniques for Prosciutto
- Arranging Your Folded Prosciutto on the Board
- Beyond Folding: Complete Board Considerations
- Troubleshooting: When Folding Goes Wrong
- The Art of Serving and Enjoyment
Why Folding Prosciutto Isn’t Just for Show
Before we dive into the “how,” let’s talk about the “why.” Folding prosciutto is a technique born from necessity and refined into an art. Understanding its purpose will make you more intuitive as you practice.
The Problem with Laying It Flat
Laying a prosciutto slice flat on a board seems logical, but it’s the fastest route to a sticky disaster. Prosciutto is cured, not cooked, and retains a significant amount of fat and natural oils. When two oily surfaces meet—like two flat slices of prosciutto—they bond instantly due to a combination of moisture, fat, and the slight tackiness of the meat’s surface. They become impossible to separate without tearing, leaving unsightly rips and forcing your guests to wrestle with their food. Furthermore, a flat slice offers no texture contrast; it’s just a uniform, somewhat floppy rectangle.
The Magic of Air and Structure
Folding introduces air. When you fold a slice, you create layers with tiny gaps between them. These gaps allow air to circulate, preventing the direct, full-surface contact that causes sticking. The fold itself also adds structural integrity. A well-folded piece has a slight rigidity or defined shape that holds its place on the board, resisting the pull of gravity and the jostle of a serving spoon. It becomes a little architectural element. This structure also showcases the beautiful marbling of fat and lean meat in a three-dimensional way that a flat slice never can. You’re essentially creating a edible sculpture that is both functional and beautiful.
Essential Prep: The Non-Negotiable First Step
You could fold prosciutto perfectly, but if you skip this step, it will all be for nothing. This is the single most important piece of advice in this entire guide.
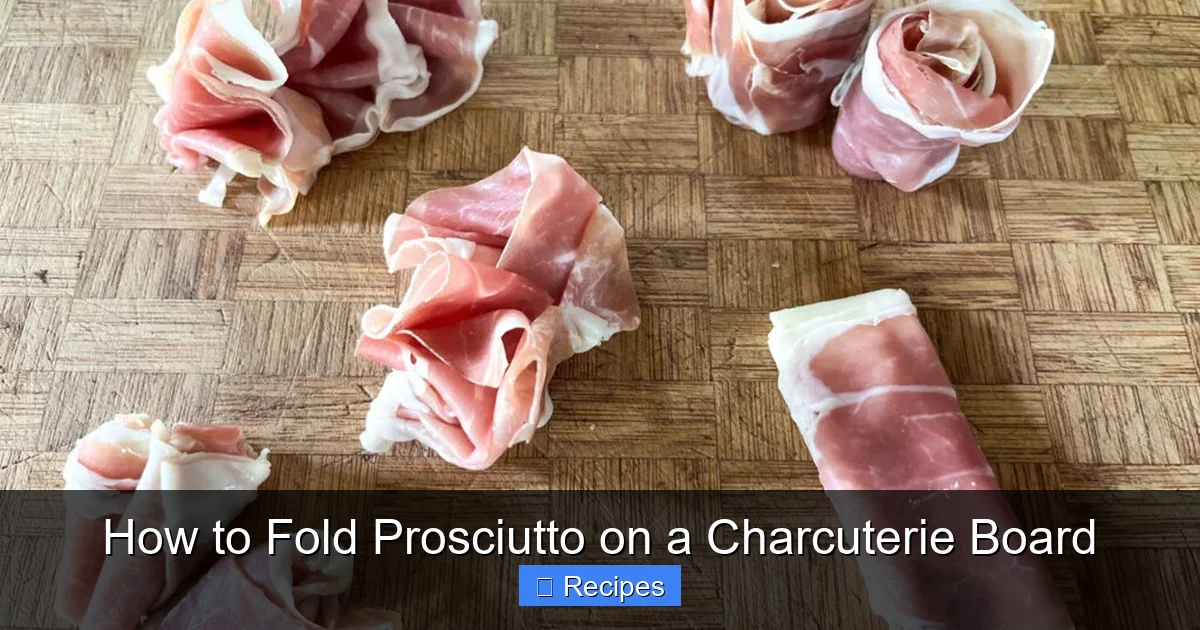
Visual guide about How to Fold Prosciutto on a Charcuterie Board
Image source: amazingcharcuterieboards.com
Pat It Dry, Pat It Dry, Pat It Dry
Take your prosciutto slices out of their packaging. You’ll notice a slight sheen on them—that’s moisture and surface fat. Lay a slice on a clean, dry paper towel. Place another paper towel on top. Gently press down, absorbing the excess liquid. Do this for every slice you plan to fold. Why is this so critical? That surface moisture acts like glue. It’s the primary reason slices fuse together. Removing it gives the meat a slightly tackier, but not sticky, surface that holds a fold better and separates from neighboring pieces with ease. It also helps the prosciutto crisp up slightly at the edges if your board sits out for a while, adding a delightful textural contrast.
Tools of the Trade
You don’t need special equipment, but having the right basics on hand makes the process smoother. Use a large, clean, and completely dry cutting board or a marble slab as your workspace. The cold surface of marble is particularly helpful on warm days, as it keeps the fat in the prosciutto more solid. Have a few extra dry paper towels within reach for quick pat-drying. You’ll also want clean fingertips. If your hands are cold or damp, the prosciutto will stick to you. Warm, dry hands are ideal. Some people like to use clean kitchen tweezers for ultra-precise placement, but for most home cooks, fingers are perfectly adequate and more intuitive.
5 Professional Folding Techniques for Prosciutto
Now for the fun part. Each technique creates a different visual and functional result. Practice with a few slices first to find your favorites. Remember: gentle, confident motions work best. Rushing or using too much force will lead to tears.
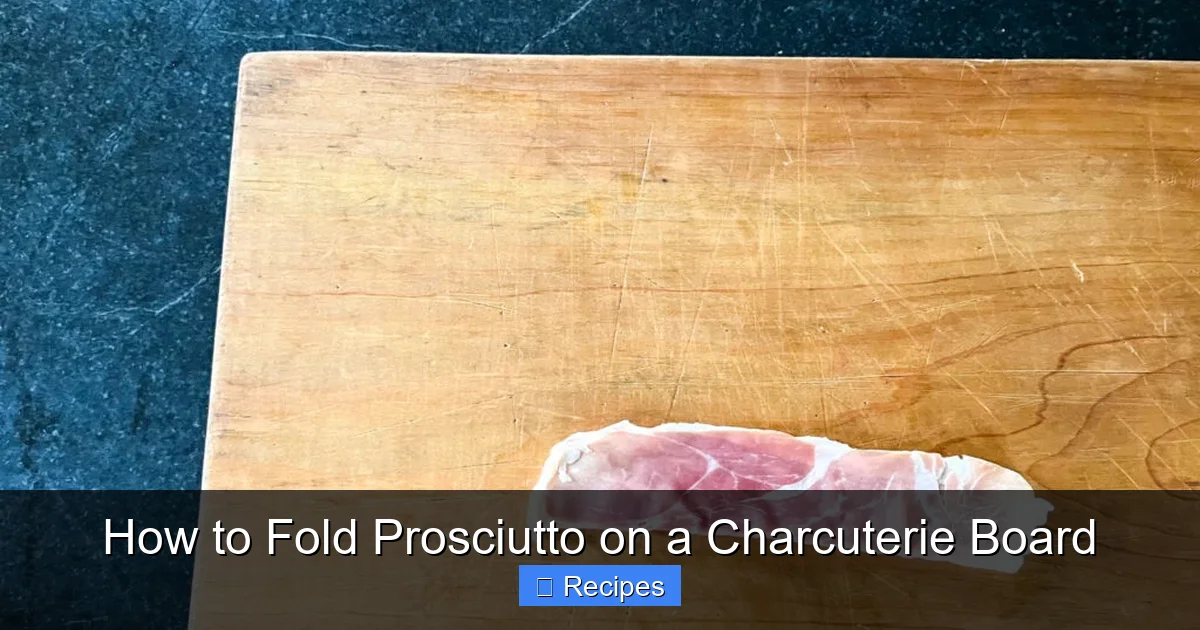
Visual guide about How to Fold Prosciutto on a Charcuterie Board
Image source: amazingcharcuterieboards.com
1. The Classic Fan Fold (The Most Versatile)
This is the go-to technique for most boards. It’s elegant, creates great air gaps, and is incredibly simple.
- Step 1: Lay your dry prosciutto slice horizontally on your work surface.
- Step 2: Starting from one short end, make a small, accordion-style fold (about 1-inch wide).
- Step 3: Continue making consecutive folds in the same direction, like you’re folding a letter or a handheld fan, until you reach the other end.
- Step 4: Gently grasp the folded stack in the center and lift it. It should hold its shape. Place it on the board, seam side down.
Pro Tip: For a more dynamic look, make the initial fold slightly smaller or larger than the subsequent ones, creating an asymmetrical fan. Place these fans in clusters of three, leaning them slightly against each other for support.
2. The Simple Roll (For Thicker Cuts)
Perfect for slightly thicker prosciutto slices (like some domestic varieties) or when you want a cylindrical shape that’s easy to pick up.
- Step 1: Lay the slice flat.
- Step 2: Starting from one long edge, begin rolling tightly but gently toward the opposite long edge.
- Step 3: Continue rolling until you have a neat log.
- Step 4: Place it on the board, seam side down. You can leave it as a log or gently press it to form a slight curve.
Pro Tip: Before rolling, you can place a small dollop of soft cheese or a thin asparagus spear on the slice and roll it inside, creating a filled prosciutto roll. Secure with a toothpick if needed.
3. The Envelope Fold (For a Clean, Rectangular Shape)
This fold creates a tidy, rectangular packet that sits flat and looks very neat. It’s excellent for filling with cheese or fruit.
- Step 1: Lay the slice in a diamond shape (point facing you).
- Step 2: Fold the bottom point up to meet the top point, forming a triangle.
- Step 3: Fold the left and right points of the triangle inward toward the center, overlapping them slightly.
- Step 4: You now have a small rectangular packet. Flip it over so the seam is on the bottom.
Pro Tip: Place a small piece of cheese or a fig half in the center before making the first triangle fold. The envelope becomes a self-contained bite.
4. The Loose Scarf or Drape (For Rustic Elegance)
This isn’t a tight fold but a gentle drape that creates beautiful, flowing curves. It’s perfect for filling gaps and adding a sense of abundance.
- Step 1: Pick up the slice by the center, letting it drape over your fingers.
- Step 2: Gently twist it once or twice in the middle, like you’re wringing out a very delicate cloth.
- Step 3: Lay the twisted prosciutto on the board, allowing the ends to fall naturally in soft curls.
Pro Tip: This technique works wonders over the handle of a wooden spoon or a small ramekin to create a dramatic, elevated drape. It’s also great for using up smaller, irregular slices.
5. The Half-Moon Rosette (For a Decorative Centerpiece)
This creates a flower-like shape that makes a stunning focal point for your board.
- Step 1: Fold your prosciutto slice in half lengthwise (long edge to long edge), creating a long, narrow rectangle.
- Step 2: Starting at one short end, roll this rectangle into a spiral, like you’re making a cinnamon roll.
- Step 3: Tuck the end underneath the coil. Gently pull at the outer edges to loosen them slightly, creating a “petal” effect.
- Step 4: Place it on the board, ideally in a central or prominent location.
Pro Tip: Use a very long, thin slice for this. You can nestle a small cheese round or a cluster of grapes in the center of the rosette for added color and flavor.
Arranging Your Folded Prosciutto on the Board
Folding is only half the battle. Where and how you place these folded pieces on the charcuterie board is what brings the whole composition together.
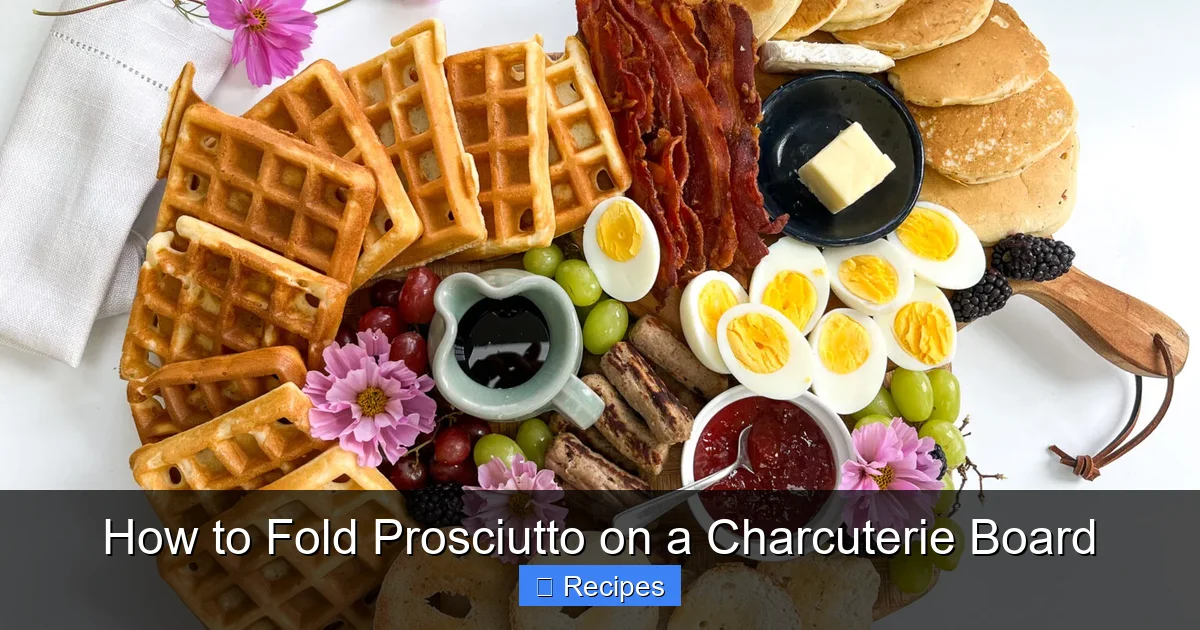
Visual guide about How to Fold Prosciutto on a Charcuterie Board
Image source: amazingcharcuterieboards.com
Think in Triangles and Clusters
The human eye is drawn to groups of three. Instead of scattering single folds randomly, group them. Place three fan folds together in a small triangle formation. Or cluster two rolls and one rosette, letting them lean into each other for support. This creates visual weight and looks intentional. Leave intentional gaps between clusters to let other board elements—crackers, nuts, cheese—breathe.
Vary the Height and Orientation
A flat board is a boring board. Use your folded prosciutto to create dimension. Place a rosette or a stack of two envelope folds slightly elevated (you can nestle it against a cheese rind or a small ramekin). Alternate between horizontal and vertical placements. A vertical fan next to a horizontal roll creates dynamic lines. This variation guides the eye around the board and makes the arrangement feel lush and abundant.
Proximity is Key: Pairing with Purpose
Don’t let your prosciutto float in isolation. Place its cluster near complementary items. A fan fold of prosciutto looks stunning nestled against a wedge of aged parmesan or pecorino—the sharp cheese cuts through the fat. Position rosettes near sweet elements like honeycomb, fig jam, or clusters of grapes to encourage the classic sweet-and-salty pairing. Place more rustic, loose drapes near earthy, mushroom-based pâtés or coarse mustard. This thoughtful placement tells a flavor story and makes the board intuitive to navigate.
Beyond Folding: Complete Board Considerations
Your beautifully folded prosciutto deserves a supportive stage. The rest of your board setup can make or break the experience.
The Foundation: Board Size and Material
Choose a board large enough that your ingredients aren’t crowded. A good rule is to have about 2-3 ounces of prosciutto per person, which translates to 4-6 folded pieces. Your board should have ample negative space. Wood (like walnut or maple) or slate are classic choices that provide a neutral, textured backdrop. Ensure the board is completely dry before assembling anything.
Strategic Placement of Other Elements
Use crackers, breadsticks, and toast points as “anchors.” Place them in small stacks at intervals around the board. They provide structure and a base for toppings. Soft cheeses (brie, goat cheese) should be placed in small bowls or left in their whole form with a knife. Hard cheeses can be pre-sliced or broken into chunks. Nuts (marcona almonds, spiced pecans) and dried fruits (apricots, cherries) should be scattered in small piles in the gaps between protein clusters. These items are dry and won’t cause sticking, so they’re perfect for filling spaces.
The Final Touch: Garnishes and Drizzles
Right before serving, add fresh, colorful garnishes. A few sprigs of rosemary or thyme add fragrance and height. A drizzle of high-quality extra virgin olive oil or a reduction of balsamic vinegar over the entire board (or just the cheese) adds a final glossy sheam and layer of flavor. A few final grinds of black pepper over everything is a simple, elegant finish. Garnish last to keep everything looking fresh and vibrant.
Troubleshooting: When Folding Goes Wrong
Even with the best technique, sometimes prosciutto misbehaves. Here’s how to fix common issues.
“My prosciutto is tearing as I fold it!”
This is almost always a temperature or dryness issue. Prosciutto that is too cold from the fridge can be brittle and crack. Let it sit, uncovered, on your dry work surface for 5-10 minutes to warm slightly. Conversely, if it’s room temperature and still tearing, it’s likely too moist. Pat it with a new, dry paper towel again. Sometimes a particular slice is just thinner or more delicate—set that one aside for a loose drape instead of a tight fold.
“The folded pieces are still sticking together on the board.”
You likely didn’t pat them dry enough. This is the #1 culprit. Take the pieces off the board, lay them on fresh paper towels, and press gently again. Also, check your board. Any residual moisture or oil from previous use will cause sticking. Wipe the board with a dry cloth, then a cloth slightly dampened with white vinegar, and dry it thoroughly.
“My folds look sloppy and don’t hold their shape.”
Embrace the sloppiness! Rustic is the goal. However, if they’re completely collapsing, your folds are probably too loose. Make your accordion folds in the fan fold tighter. For rolls, roll a bit more firmly. For rosettes, ensure your initial lengthwise fold is crisp before rolling. A quick chill in the refrigerator for 5 minutes after folding (on a parchment-lined tray) can help set the shape before you arrange the board.
The Art of Serving and Enjoyment
The final step is the easiest and most rewarding: serving your masterpiece. Have your cheese knives, small spoons for spreads, and cocktail forks ready. Encourage guests to build their own bites: a folded prosciutto, a piece of cheese, a nut, and a dab of honey is the holy grail of charcuterie. As people graze, the strategic gaps you left between clusters will allow for easy access without disturbing the entire arrangement. Your board is a conversation starter, a testament to a little bit of technique and a lot of care. It says you value not just taste, but the entire sensory experience of sharing food. So take a step back, pour yourself a glass of something crisp, and enjoy the compliments that are surely coming your way.
Frequently Asked Questions
Can I fold prosciutto ahead of time?
Yes, but with caution. Fold the prosciutto and arrange it on a parchment-lined baking sheet. Cover loosely with another sheet of parchment and refrigerate for up to 2-3 hours. This helps set the folds. Bring it to room temperature for 15-20 minutes before transferring to your final board, as cold prosciutto can be brittle and may crack when handled.
What if I don’t have paper towels?
A clean, lint-free kitchen towel or a cloth napkin can work in a pinch, but you must ensure it is completely dry and clean. The goal is to absorb surface moisture. A slightly damp cloth will make the problem worse. For best results, use a paper towel—it’s more absorbent and disposable, ensuring no hidden moisture.
Is there a prosciutto that’s easier to fold?
Generally, prosciutto from Italy (like Prosciutto di Parma or San Daniele) is very thinly sliced and can be more delicate. Some domestic prosciuttos are cut slightly thicker, making them a bit more forgiving and easier to roll or fold into shapes that hold well. For beginners, a slightly thicker slice is a great practice canvas.
Can I use the same folding techniques for other cured meats?
Absolutely! These techniques work beautifully for other thin-sliced, fatty cured meats like soppressata, capocollo (coppa), or even very thin slices of bresaola. Thicker, more rigid meats like hard salami might not fold as neatly but can be rolled or draped. Always pat dry first.
Why does my prosciutto taste rubbery?
This is usually a storage issue, not a folding one. Prosciutto that has been exposed to air for too long in the fridge will dry out and become leathery or rubbery. Always store unopened prosciutto as directed. Once opened, re-wrap it tightly in plastic wrap or parchment paper, then foil, and use it within 1-2 weeks for optimal texture and flavor.
Should I separate the prosciutto slices before I start?
Yes, and carefully. If your prosciutto came in a vacuum-sealed package, slices may be stuck together. Gently separate them one by one while they are still on the paper towel you’re using to pat them dry. Working with individual slices from the start prevents you from trying to pull apart stuck pieces later, which almost always results in tears.