Cleaning a plastic grinder doesn’t have to be a chore. With a few household items and simple steps you can remove resin, oils, and odors in minutes. Follow our easy guide to keep your grinder working smoothly and extend its life.
Key Takeaways
- Gentle cleaning agents work best: Use isopropyl alcohol, baking soda, or vinegar to avoid scratching plastic.
- Disassemble before cleaning: Separate the lid, screen, and chamber to reach every crevice.
- Soak, shake, and brush: A short soak followed by a gentle shake and a soft brush removes most buildup.
- Rinse and dry thoroughly: Moisture left inside can cause mold or affect flavor.
- Regular maintenance prevents heavy build‑up: A quick clean after each use keeps the grinder fresh.
- Avoid harsh chemicals: Acetone, bleach, and strong detergents can melt or discolor plastic.
- Store properly: Keep the grinder in a dry, airtight container to maintain cleanliness longer.
📑 Table of Contents
- Why Keeping Your Plastic Grinder Clean Matters
- What You’ll Need: Simple Supplies You Probably Already Have
- Step‑by‑Step Guide to Cleaning a Plastic Grinder
- Maintaining Your Grinder Between Deep Cleans
- Special Cases: Removing Tough Stains and Odors
- Safety Tips and Common Mistakes to Avoid
- Conclusion: A Clean Grinder Equals a Better Experience
Why Keeping Your Plastic Grinder Clean Matters
When you grind herbs or spices, tiny particles stick to every surface inside the grinder. Over time those particles turn into a sticky, smelly mess that can affect flavor, potency, and even the lifespan of the tool. A clean grinder delivers a consistent grind, preserves the true taste of your material, and prevents mold or bacterial growth. Plus, a sparkling grinder just feels good to use—like a fresh coffee mug each morning.
Unlike metal or wood, plastic is lightweight and affordable, but it also reacts differently to cleaning agents. It can warp, crack, or become cloudy if you use the wrong chemicals. That’s why it’s essential to follow a method that respects the material while still getting rid of stubborn residue.
What You’ll Need: Simple Supplies You Probably Already Have
Basic cleaning kit
- Isopropyl alcohol (70% or higher)
- Baking soda
- White vinegar
- Warm water
- Soft‑bristle toothbrush or small paintbrush
- Paper towels or lint‑free cloth
- Seal‑able plastic bag or small container
Optional upgrades
- Ultrasonic cleaner (great for heavy users)
- Silicone cleaning mat (prevents scratches)
- Reusable cleaning spray bottle
Step‑by‑Step Guide to Cleaning a Plastic Grinder
1. Disassemble the Grinder
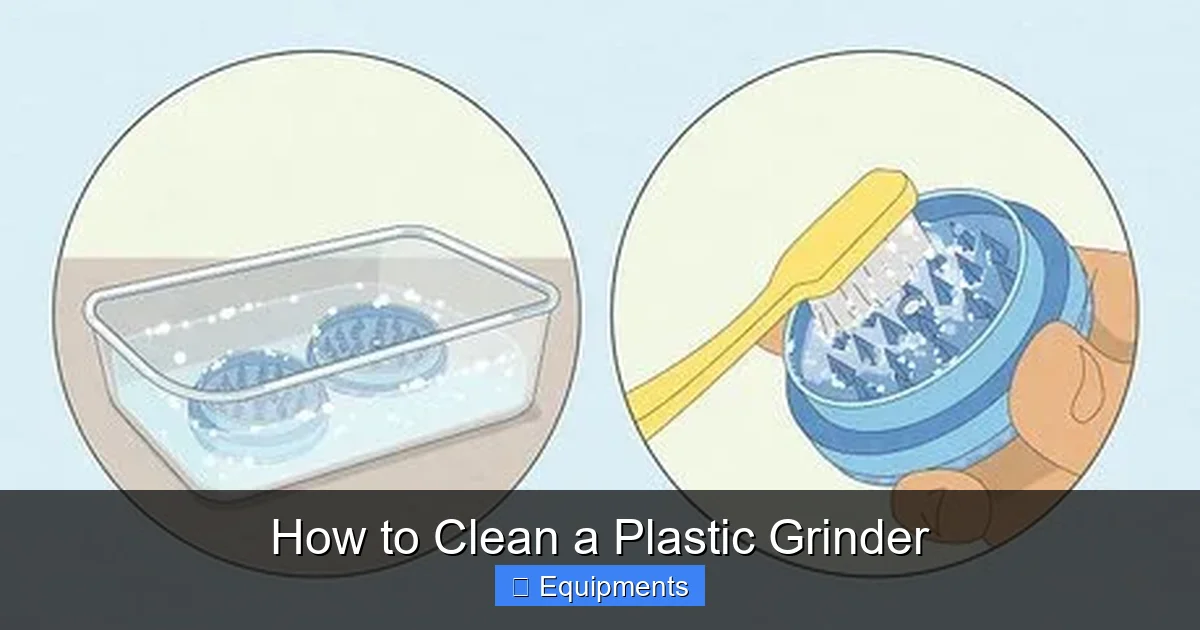
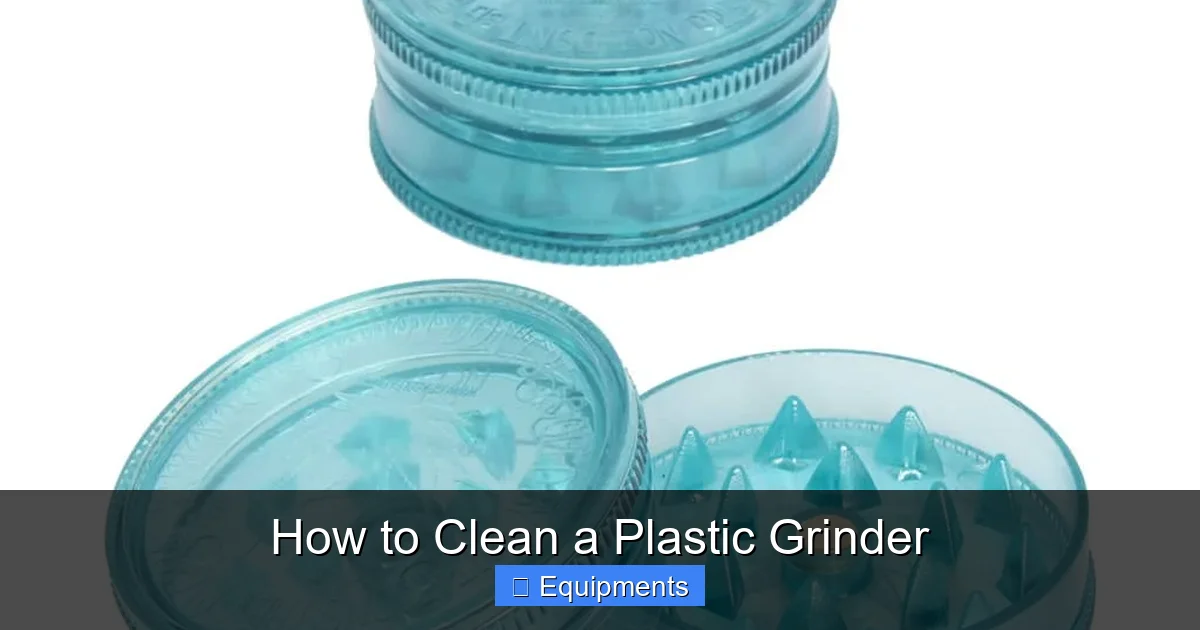
Most plastic grinders have three main parts: the lid (with teeth), the grinding chamber, and the collection compartment. Gently twist them apart. If your model includes a screen or a mesh filter, remove that too. This gives you full access to every surface.
Visual guide about How to Clean a Plastic Grinder
Image source: wikihow.com
Visual guide about How to Clean a Plastic Grinder
Image source: multitrance.com
2. Remove Loose Debris
Give the pieces a quick shake over a trash can. Use a small brush or your fingernail to scrape out any large chunks that are stuck to the teeth or walls. This step saves time later because the soak won’t have to dissolve big pieces.
3. Choose Your Cleaning Solution
Three easy options work well with plastic:
- Isopropyl Alcohol Soak: Fill a zip‑top bag with enough alcohol to cover the parts. Alcohol dissolves resin quickly and evaporates without leaving a residue.
- Baking Soda & Vinegar Paste: Mix one part baking soda with one part vinegar to form a fizzing paste. It’s mildly abrasive and safe for plastic.
- Warm Soapy Water: For a light clean, a few drops of mild dish soap in warm water will do.
4. Soak the Parts
Place the disassembled pieces in your chosen solution. Let them sit for 5‑10 minutes if you’re using alcohol, or 15‑20 minutes for the baking soda/vinegar mix. For soapy water, a 10‑minute soak is sufficient.
5. Shake and Scrub
After soaking, seal the bag (or keep the container covered) and give it a good shake. The motion loosens any remaining residue. Then, take the toothbrush and gently scrub the teeth, walls, and screen. Pay special attention to the corners where buildup loves to hide.
6. Rinse Thoroughly
Rinse each piece under warm running water. Make sure all cleaning solution and loosened debris are washed away. If you notice any lingering film, repeat the soak‑scrub cycle once more.
7. Dry Completely
Pat the parts dry with a lint‑free cloth or paper towels. Then, let them air‑dry on a clean surface for at least 15 minutes. Moisture left inside can cause mold or affect the next grind.
8. Reassemble and Test
Put the grinder back together, give it a few test twists, and make sure everything moves smoothly. If you hear grinding or feel resistance, check for any missed bits and repeat the rinse.
Maintaining Your Grinder Between Deep Cleans
Quick “wipe‑down” after each use
After grinding, tap the grinder gently over a trash can to release loose particles, then wipe the exterior and interior with a dry paper towel. This removes excess resin before it can harden.
Visual guide about How to Clean a Plastic Grinder
Image source: mygrinderguide.com
Use a grinder brush
Keep a small, dedicated brush (like a clean toothbrush) in your stash kit. A quick brush through the teeth after each session keeps buildup minimal.
Avoid moisture buildup
If you store herbs that are slightly damp, place a tiny silica‑gel packet in the grinder’s collection compartment. It absorbs excess humidity without touching the material.
Schedule regular deep cleans
Even with daily maintenance, plan a thorough clean every 1‑2 weeks if you grind daily, or once a month for occasional users. Consistency prevents the “sticky wall” problem that can ruin flavor.
Special Cases: Removing Tough Stains and Odors
Stubborn resin patches
For resin that has baked onto the plastic, increase the alcohol soak to 20‑30 minutes. You can also add a few ice cubes to the bag; the cold helps the resin contract and break away.
Persistent odors
After a standard clean, place a small piece of fresh citrus peel (lemon or orange) inside the grinder for a few hours. The natural oils neutralize lingering smells without leaving residue.
Using an ultrasonic cleaner
If you own an ultrasonic cleaner, fill it with isopropyl alcohol and run a 3‑minute cycle. The high‑frequency vibrations reach every nook, making it perfect for heavy users or multiple grinders at once.
Safety Tips and Common Mistakes to Avoid
Never use harsh chemicals
Acetone, bleach, and strong detergents can melt or discolor plastic. Stick to the recommended solutions above.
Don’t soak for too long
Extended exposure to alcohol can weaken plastic over time. Keep the soak under 30 minutes.
Avoid abrasive tools
Metal scrapers or steel wool will scratch the surface, creating grooves where resin can hide. Use only soft brushes or non‑abrasive sponges.
Check for cracks before reuse
Inspect the grinder after cleaning. If you see any cracks or warping, replace it. A compromised grinder can break during use and create a mess.
Conclusion: A Clean Grinder Equals a Better Experience
Cleaning a plastic grinder is straightforward when you have the right tools and follow a simple routine. By disassembling, soaking in a safe solution, scrubbing gently, and drying thoroughly, you’ll keep your grinder performing at its best. Regular maintenance prevents heavy buildup, preserves flavor, and extends the life of an affordable piece of equipment. Treat your grinder like a kitchen tool—clean it often, store it properly, and it will reward you with a smooth, consistent grind every time.
Frequently Asked Questions
How often should I deep‑clean my plastic grinder?
For daily users, a deep clean every 1‑2 weeks is ideal. Casual users can clean once a month. Frequent quick wipes help extend the time between deep cleans.
Can I use dish soap instead of alcohol?
Yes, mild dish soap in warm water works for light buildup. For heavy resin, alcohol or a baking‑soda paste is more effective.
Will vinegar damage my plastic grinder?
No. White vinegar is safe for plastic and helps break down resin. Rinse well afterward to remove any acidic residue.
Is it safe to put my grinder in the dishwasher?
Generally not recommended. High heat can warp plastic, and the dishwasher’s harsh detergents may leave residues. Hand cleaning is best.
How do I remove a persistent smell after cleaning?
Place a fresh citrus peel or a small piece of coffee bean inside the grinder for a few hours. The natural oils neutralize odors without leaving a taste.
Can I use an ultrasonic cleaner for a plastic grinder?
Yes, an ultrasonic cleaner with isopropyl alcohol works well for thorough cleaning, especially if you have multiple grinders or very stubborn buildup.