Changing the power level on your Toshiba microwave is a simple but essential skill for perfect cooking. Unlike just setting a timer, adjusting power controls the microwave’s intensity, preventing overcooked edges and frozen centers. This guide provides clear, model-specific instructions for every Toshiba microwave type, from basic to inverter models, ensuring you master this function for better meals.
Have you ever wondered why your microwave-reheated soup is scalding hot in the center but lukewarm at the edges? Or why that stick of butter, meant to be softened, ends up explosively melted and partially cooked? The secret weapon hiding in plain sight on your Toshiba microwave’s keypad is the power level setting. Mastering this function transforms your microwave from a simple reheating device into a versatile kitchen tool capable of delicate melting, gentle simmering, and even true cooking. This comprehensive guide will walk you through everything you need to know about changing the power level on any Toshiba microwave, decoding the buttons, understanding the technology, and applying it to real-world cooking tasks.
Key Takeaways
- Power Level ≠ Cooking Time: Lower power levels (like 50%) do not mean “cook for half the time.” They mean the microwave cycles on and off, providing gentler, more even heat for delicate tasks.
- Button Labels Vary: The power button may be labeled “Power,” “Power Level,” “Cook Power,” or represented by a wattage icon (e.g., “800W”). The “Start” button often confirms the setting.
- Inverter Technology is Different: Toshiba inverter microwaves provide true, steady low power without cycling, offering superior results for melting chocolate or simmering—the steps to set it are slightly different.
- Consult Your Manual: Your specific model’s manual is the ultimate authority. Model numbers (usually on the door frame or back) help you find the correct digital guide online if needed.
- Default is Usually 100%: If you don’t set a power level, the microwave operates at full (100%) power, which is why many foods end up tough or unevenly cooked.
- Common Uses for Lower Power: Use 30-40% for softening butter/cream cheese, 50% for gentle reheating or simmering, and 70% for cooking dense foods like potatoes without hardening the edges.
- Cycling Sound is Normal: On non-inverter models, you’ll hear the microwave turn on and off during cooking at reduced power. This is the magnetron cycling, not a malfunction.
📑 Table of Contents
- Why Power Level Matters: It’s Not Just About Time
- How to Change Power Level: The Universal Step-by-Step
- Model-Specific Variations and Button Locations
- Practical Applications: When and Why to Use Lower Power
- Troubleshooting: What to Do When It Doesn’t Work
- Advanced Tips and Safety Considerations
- Conclusion: Your Microwave, Upgraded
Why Power Level Matters: It’s Not Just About Time
Before we dive into button-pressing, let’s understand what “power level” actually means. A microwave oven cooks food by emitting microwave radiation that excites water molecules, generating heat. The “power level” setting controls the percentage of time the microwave’s magnetron (the component that generates microwaves) is actually on during your cooking cycle.
At 100% power, the magnetron is on continuously. At 50% power, it cycles on and off in intervals—typically 10 seconds on, 10 seconds off, though the cycle varies by model. This “off” time allows heat to conduct from the hotter outer layers of the food to the cooler inner parts, promoting more even cooking and preventing the surface from overheating while the center remains cold. It’s the difference between broiling a steak (high, direct heat) and braising it (low, moist heat).
The Inverter Difference: A Game-Changer
Toshiba has been a pioneer in bringing inverter technology to consumer microwaves. Traditional microwaves use a simple on/off cycling method to achieve lower power levels. Inverter microwaves, however, use sophisticated power supply technology to deliver continuous, steady power at any selected level, from 10% to 100%. This means no more loud cycling on and off, and more importantly, much more precise temperature control. This is revolutionary for tasks that require consistent, low heat, like melting chocolate without seizing, proofing yeast dough, or slow-cooking a stew without boiling it violently. The steps to set the power level on an inverter model are often similar, but the results are noticeably superior for delicate work.
How to Change Power Level: The Universal Step-by-Step
While button layouts differ, the core logic for setting power on a Toshiba microwave is remarkably consistent across decades of models. Follow these steps, and you’ll be able to adapt to any keypad.

Visual guide about How to Change Power Level on Toshiba Microwave
Image source: thekitchenix.com
Step 1: Enter Your Cook Time. Using the number pad, input the desired cooking time in minutes and seconds (e.g., 2:30 for two and a half minutes). Do not press “Start” yet.
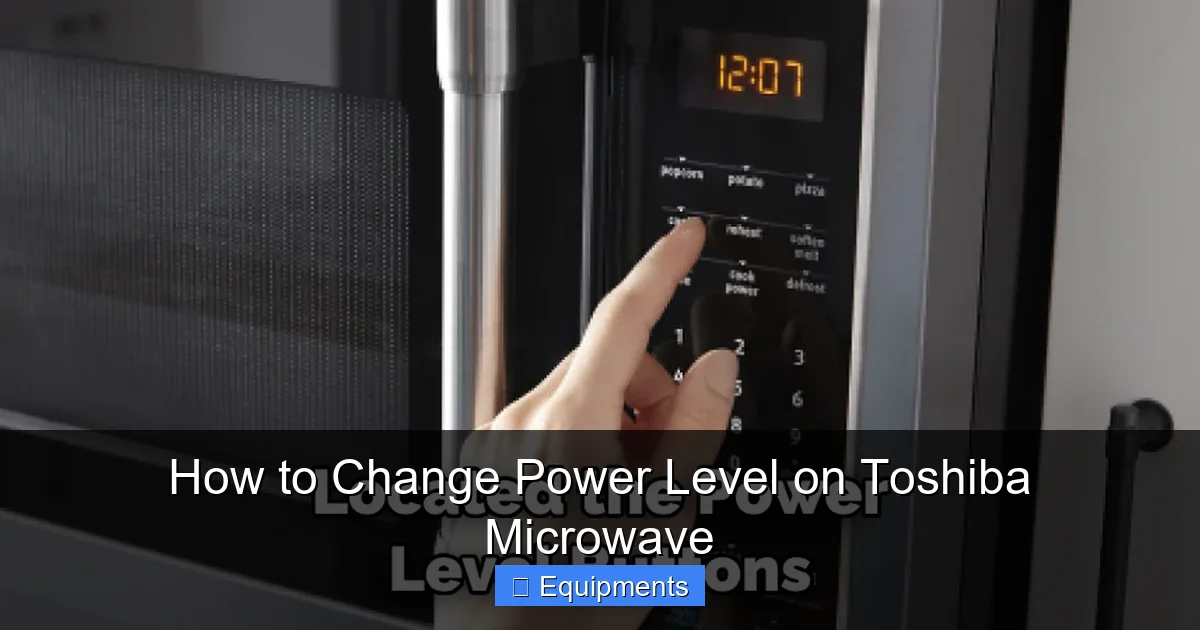
Step 2: Locate the Power Button. Look for a button clearly labeled “POWER”, “POWER LEVEL”, “COOK POWER”, or sometimes a button with a wattage symbol like “800W”. On some older or simpler models, this function might be accessed by pressing a button labeled “TIME DEFROST” or “WEIGHT DEFROST” first, but for standard cooking, the dedicated POWER button is standard.
Step 3: Press the Power Button. Press it once. The display will likely change. On a digital display, you might see “P-100” or “100%” flash, or the time may disappear and be replaced by a power level indicator. On models with an analog dial, turning the dial past the time setting often engages power level selection.
Step 4: Select Your Desired Power Level. You now enter the power level. This is almost always done using the number pad. For example:
- Press 5 and then 0 to select 50% power (often displayed as “P-50” or “50%”).
- Press 3 for 30% power.
- Press 7 for 70% power.
- Press 1 and then 0 for 100% (full power).
Some models require you to press the number corresponding to the tens place (e.g., press “5” for 50%, “3” for 30%). Others require you to press the full two-digit number (e.g., “5” then “0” for 50%). The display will confirm your selection.
Step 5: Confirm and Start. After setting the power level, press the START/ENTER button. The microwave will begin cooking at your selected power level. You should hear the characteristic cycling sound on non-inverter models.
Step 6: Adjusting Mid-Cycle (If Needed). If you need to change the power level while the microwave is running, you typically must stop it first by pressing STOP/CANCEL. Then, you can restart the cycle with the new power level setting using the same steps above.
Model-Specific Variations and Button Locations
While the universal method works for most, Toshiba microwaves come in various styles. Here’s how to adapt.

Visual guide about How to Change Power Level on Toshiba Microwave
Image source: thekitchenix.com
Models with a Dedicated “Power” Button
This is the most common and user-friendly design. The button is often located near the number pad, sometimes colored differently (like blue or orange). The sequence is always: Time -> Power -> Number -> Start.
Models with “Cook Power” on a Multi-Function Button
Some Toshiba models, particularly those with many auto-cook menus, have a single button that cycles through functions. You might need to press “COOK” or “MICRO” repeatedly until the display shows “P-100” or a power level, then use the Dial or +/- buttons to adjust the percentage up or down, and finally press START.
Models with a Rotary Dial (Older or Commercial-Style)
On these classic designs, you set the time by turning the central dial. To change power, you often press down on the dial or a small adjacent button labeled “Power” while turning the dial. The power level indicator (usually a ring of lights or a digital readout) will change as you turn. The setting is automatically engaged when you release the dial.
Inverter-Specific Models (e.g., Toshiba EM Series)
The process is identical to the universal method. The key difference is the result: you will not hear the magnetron cycling on and off at 50% power. It will run quietly and continuously at a reduced output. This is your clue that you have successfully set a lower power level on an inverter model.
Pro Tip: If your microwave has a “Quick Start” or “+30 Sec” button, this typically bypasses the power level setting and always uses 100% power. To use a custom power level, you must use the number pad and power button sequence.
Practical Applications: When and Why to Use Lower Power
Knowing how to change the power is useless without knowing when. Here is your cheat sheet for common cooking tasks.
Visual guide about How to Change Power Level on Toshiba Microwave
Image source: thekitchenix.com
For Melting and Softening (10%-30% Power)
This is the #1 reason to master power levels. Chocolate, butter, and cheese need gentle, indirect heat to melt without separating or cooking.
- Butter/Cream Cheese: 1 stick (1/2 cup) on a microwave-safe plate. Heat at 30% power for 45-60 seconds. Check and stir. It will soften perfectly without a puddle.
- Chocolate Chips: 1 cup in a dry bowl. Heat at 30% power for 1 minute, stir, then 30-second bursts until smooth. No seizing!
- Honey or Syrup: Crystallized honey in a jar. Heat at 20% power for 30-45 seconds. It will liquefy gently without overheating or boiling.
For Gentle Reheating and Defrosting (30%-50% Power)
Reheating leftovers, especially dense items like casseroles or meat, requires patience.
- Leftover Pasta/Meat: Place in a microwave-safe dish, add a teaspoon of water or broth, cover loosely. Heat at 50% power for 2-3 minutes, stirring halfway. This heats through without drying out or making the edges rubbery.
- Defrosting Ground Meat: Use the defrost weight setting if available, but for manual control, use 30% power. Break apart and rotate every minute. It thaws more evenly, starting to cook the edges less.
- Reheating Soup/Stew: Heat at 50% power, stirring every minute. Prevents superheated pockets and ensures the center warms up gradually.
For Cooking and Simmering (50%-70% Power)
You can actually “cook” in a microwave, not just reheat.
- Baking a Potato: Pierce the potato. Cook on 70% power for 5-7 minutes, turning once. It cooks more evenly from the inside out, resulting in a fluffier interior.
- Oatmeal or Grains: Cook rolled oats or rice in water. Bring to a boil on 100%, then reduce to 50% power and cook for the recommended time. Prevents boil-overs and creates a creamier texture.
- Poaching Fish: Place a fish fillet in a dish with a splash of broth or wine. Cover. Cook at 50% power for 3-5 minutes. It will poach gently, staying moist and flaky.
Remember: When reducing power, you almost always need to increase the total cooking time. A general rule is to add 25-50% more time. A 2-minute job on 100% might take 2.5 to 3 minutes on 50%. Always check for doneness and adjust in future attempts.
Troubleshooting: What to Do When It Doesn’t Work
Sometimes, the power level setting seems to be ignored. Here’s how to diagnose the issue.
Symptom: The Microwave Seems to Run at Full Power Anyway
Possible Cause 1: You forgot to press START after setting the power level. The time and power are stored, but the cycle won’t begin until you confirm. Always press START last.
Possible Cause 2: You are using a “One-Touch” or “Auto Cook” button. Buttons like “POPCORN,” “POTATO,” or “REHEAT” are pre-programmed with their own power levels and times. They ignore any manually set power level. To use a custom power, you must use the manual time/power entry method.
Possible Cause 3: Faulty Keypad or Control Board. If the power button does nothing or the display doesn’t change, there may be an electronic failure. Unplug the microwave for 2 minutes to reset. If the problem persists, it may require professional service.
Symptom: I Hear Constant Cycling, Even at 100% Power
This is normal for all microwaves! The magnetron cycles on and off very rapidly (often inaudibly) even at 100% power to regulate heat and protect the component. Don’t confuse this with the slower, audible on/off cycling that signifies a reduced power setting (e.g., 50%).
Symptom: Food Still Cooks Unevenly at Lower Power
Solution: Lower power helps, but it’s not magic. You must also:
- Arrange food properly: Place thicker parts toward the outside of the turntable ring.
- Use a cover: A microwave-safe lid or vented plastic wrap traps steam, promoting more even heating.
- Stir, rotate, flip: Pause and manually rearrange food halfway through the cycle, especially when using lower power for longer times.
- Let it rest: Heat is conductive. After the microwave stops, let food sit for 1-2 minutes. The heat will continue to distribute to the cooler spots.
Advanced Tips and Safety Considerations
Take your microwave mastery to the next level with these pro insights.
Using Power Level for “Browning” (A Limited Hack)
Microwaves don’t brown food like an oven. However, you can achieve a slightly better texture by cooking at 70-80% power for a slightly longer time. The reduced power allows more surface moisture to evaporate before the interior is fully cooked, leading to a less soggy, slightly firmer exterior on items like bacon or chicken breast. For true browning, use a microwave crisper pan or finish under a broiler.
The Importance of Container Choice
Your cookware affects how power level works. Glass and ceramic are excellent, heating evenly. Microwave-safe plastic can heat up itself, which can accelerate cooking on the outside. When using lower power for delicate tasks, stick to glass or ceramic for the most controlled heat transfer.
Safety First: Never Run an Empty Microwave
This is critical. Running a microwave, especially at lower power levels for extended periods, with nothing inside it can cause the microwave energy to reflect back and damage the magnetron. Always ensure there is food or a microwave-safe container with water inside when operating.
Cleaning and Maintenance
A dirty microwave can affect performance. Food splatters on the interior walls absorb microwave energy, creating hot spots and reducing overall efficiency. Wipe the interior clean with a damp cloth or a bowl of heated lemon water. Ensure the turntable ring and roller are clean and spin freely for even cooking, which is even more important when using variable power levels.
Conclusion: Your Microwave, Upgraded
Changing the power level on your Toshiba microwave is not a hidden, complex feature—it’s the key to unlocking its full potential. By moving beyond the default 100% setting, you gain control. You can soften butter without a mess, reheat leftovers without compromising texture, and even cook simple dishes with finesse. Remember the simple sequence: Time -> Power -> Number -> Start. Understand the difference between traditional cycling and inverter technology. Apply the practical power levels to specific tasks. And don’t be afraid to experiment and adjust times. Your Toshiba microwave is a powerful tool. With this knowledge, you’ve just upgraded it from a simple timer to a precision instrument in your kitchen. Now, go melt some chocolate perfectly.
Frequently Asked Questions
What does the “P” or “Power” indicator mean on my Toshiba microwave display?
When you see “P-100” or “P-50” on the display, it confirms the selected power level. “P-100” is full power, “P-50” is 50% power, and so on. This indicator appears after you press the Power button and enter the desired percentage but before you press Start.
Can I change the power level while the microwave is already running?
No, you cannot adjust the power level during an active cooking cycle on any Toshiba microwave. You must press STOP/CANCEL to halt the cycle, then re-enter the time and new power level setting before pressing START again.
Why is my Toshiba microwave so much quieter at 50% power than my old one?
Your Toshiba microwave likely uses inverter technology. Unlike traditional microwaves that cycle the magnetron loudly on and off at lower power settings, inverter models deliver a steady, continuous low power output. This results in quieter operation and more precise, even heating for delicate tasks.
Is there a default power level if I don’t set one?
Yes. If you enter a cook time and press START without first pressing the POWER button and selecting a level, the microwave will automatically operate at 100% (full) power. This is the default for all standard cooking functions.
My microwave doesn’t have a button labeled “Power.” How do I set it?
Look for buttons labeled “Cook Power,” “Wattage” (e.g., “800W”), or sometimes a multi-function “Cook” button. The process is the same: enter time, press this button, use the number pad to enter the percentage (like 5-0 for 50%), and press Start. Consult your specific model’s manual for exact labeling.
Does using a lower power level save electricity?
Not in a straightforward way. While the magnetron is on for a smaller percentage of the time at lower power levels, the total cooking time is usually longer. The total energy consumed for cooking a specific food item is often similar, but the results are far superior. The primary benefit of lower power is food quality and even cooking, not significant energy savings.