Adding rinse aid to your Whirlpool dishwasher is a simple yet crucial step for achieving perfectly dry, spot-free dishes. This guide walks you through exactly where to find the dispenser, how to fill it correctly, and which product to use. By following these easy instructions, you’ll unlock your dishwasher’s full drying potential and say goodbye to water marks and rewashing.
Key Takeaways
- Rinse aid is essential: It breaks water surface tension, allowing water to sheet off dishes instead of beading, which leads to faster, more complete drying and prevents spots.
- Location varies by model: The rinse aid dispenser is typically inside the dishwasher door, but some older or commercial models have it on the tub’s interior wall.
- Fill carefully: Use a funnel or the bottle’s spout, pour slowly to avoid overflow, and wipe away any spills immediately with a damp cloth.
- Use the right product: Always use a commercial rinse aid designed for dishwashers. Avoid substitutes like vinegar or dish soap, which can damage the appliance.
- Adjust the setting: Most Whirlpool dispensers have a dial or electronic setting to control how much rinse aid is released. Start with a medium setting and adjust based on your results.
- Check levels regularly: The dispenser has a clear window or indicator. Check it every few weeks or when you notice drying performance declining.
- Troubleshoot drying issues: If dishes aren’t drying, first verify rinse aid levels and settings before checking other factors like water temperature or loading practices.
📑 Table of Contents
- Why Rinse Aid is Your Dishwasher’s Secret Weapon
- Locating the Rinse Aid Dispenser in Your Whirlpool
- The Step-by-Step Process to Add Rinse Aid
- Choosing the Right Rinse Aid for Your Whirlpool
- Common Mistakes and How to Avoid Them
- Troubleshooting: When Rinse Aid Doesn’t Seem to Work
- Maintaining Your Dispenser for Long-Term Performance
- Conclusion: Your Path to Perfectly Dry Dishes
Why Rinse Aid is Your Dishwasher’s Secret Weapon
You’ve loaded your Whirlpool dishwasher, selected your cycle, and pressed start. The motor hums, water sprays, and detergent gets to work. But there’s one silent hero in this process that many homeowners overlook: rinse aid. This seemingly simple liquid is the key to transforming your dishwasher’s performance from “just clean” to “restaurant-quality dry and sparkling.” Understanding why and how to add rinse aid to your Whirlpool dishwasher is one of the easiest, most cost-effective ways to maximize your appliance’s potential and protect your dishware.
So, what exactly does rinse aid do? Think about the last time you hand-washed a glass. Even after drying it with a towel, you might see tiny water spots or a faint film. That’s because tap water contains minerals like calcium and magnesium. When water evaporates, these minerals are left behind as visible deposits. Rinse aid is a surfactant, a chemical that dramatically reduces the surface tension of water. Instead of forming stubborn, spherical beads that cling to surfaces and evaporate with mineral residue, the treated water sheets off in a thin, uniform film. This sheeting action carries away virtually all water and its dissolved minerals, resulting in dishes that are not just clean, but truly dry and free of spots, film, and streaks. For glassware, this means brilliant clarity. For plastics, it means no unsightly water marks. For stainless steel, it means a flawless shine.
For Whirlpool dishwasher owners, this is particularly important. Whirlpool designs its wash systems—from the powerful wash arms to the heated dry options—to work in concert with rinse aid. Without it, even the best wash cycle may leave dishes damp, especially on the upper rack or on items with concave surfaces like bowls and mugs. The heated dry option will work harder and take longer, consuming more energy. By learning how to add rinse aid to your Whirlpool dishwasher correctly, you ensure your machine operates at peak efficiency, saves you time on hand-drying, and extends the life of your dishes by preventing mineral etching over time. It’s a small step with a massive impact on your daily kitchen routine.
Locating the Rinse Aid Dispenser in Your Whirlpool
Before you can add rinse aid, you need to find where it goes. Whirlpool makes this process fairly intuitive, but the exact location can vary slightly depending on your dishwasher’s model series and age. Don’t worry; the dispenser is always easy to spot once you know what you’re looking for. In over 95% of modern Whirlpool residential dishwashers, the rinse aid compartment is integrated into the dishwasher door itself.
Visual guide about How to Add Rinse Aid to Whirlpool Dishwasher
Image source: kitchenseer.com
The Standard Door-Mounted Dispenser
Open your dishwasher door fully. Look at the interior of the door, typically on the left or right side, near the detergent cup. You should see a small, round or oval plastic cap, often colored gray, white, or blue. This cap is usually smaller than the main detergent cup and is often labeled with a symbol that looks like a water droplet or the words “Rinse Aid.” It may also have a series of numbers (like 1-5 or 1-10) or a dial around it—this is the adjustable setting that controls how much rinse aid is released per cycle.
To open it, you usually just need to twist the cap counterclockwise. Some models have a flip-top or pull-off design. If you’re struggling, a gentle twist with a bit of pressure is almost always the trick. Once open, you’ll see a small reservoir underneath. This is where you’ll pour the liquid. There is often a clear plastic window on the cap or the reservoir itself that serves as a gauge. When the rinse aid is full, the window will be completely filled with the blue or clear liquid. As it depletes, you’ll see an air bubble appear at the top.
Less Common Tub-Mounted Dispensers
A small number of older Whirlpool models, and some commercial-grade units, feature a rinse aid dispenser mounted on the interior wall of the tub, usually near the top rear corner. It looks like a small, capped cylinder or a rectangular box screwed into the tub’s plastic wall. The opening mechanism is similar—twist or pull the cap. The filling principle is identical. If you have an older model and cannot find the dispenser on the door, carefully inspect the tub’s interior walls, particularly the back corners near the top.
How to Identify Your Model’s Type
If you’re still unsure, the fastest way is to consult your owner’s manual. The “Use and Care” guide will have a diagram of your specific model’s interior, clearly labeling the detergent and rinse aid compartments. If you don’t have the manual, you can often find a digital copy online by searching for your model number, which is located on a sticker inside the door frame or on the side of the door. Searching “Whirlpool [Your Model Number] rinse aid location” will yield diagrams and even video tutorials.
Pro Tip: Before you start, ensure your dishwasher is completely empty and has finished its last cycle. It’s also a good practice to wipe down the door gasket and the area around the dispenser with a damp cloth to prevent any debris from falling into the reservoir when you open it.
The Step-by-Step Process to Add Rinse Aid
Now that you’ve found the dispenser, adding rinse aid is a quick, mess-free process. Following these steps carefully will prevent overflows and ensure proper function.
Visual guide about How to Add Rinse Aid to Whirlpool Dishwasher
Image source: kitchenseer.com
Step 1: Prepare Your Supplies
You’ll need a bottle of liquid rinse aid. Whirlpool recommends using their own brand or any high-quality commercial rinse aid designed for automatic dishwashers. Have a small funnel handy. While many rinse aid bottles have a built-in spout designed to fit the dispenser opening, a funnel provides more control and is virtually foolproof. Also, keep a damp cloth or paper towel nearby for immediate cleanup of any drips.
Step 2: Open the Dispenser Cap
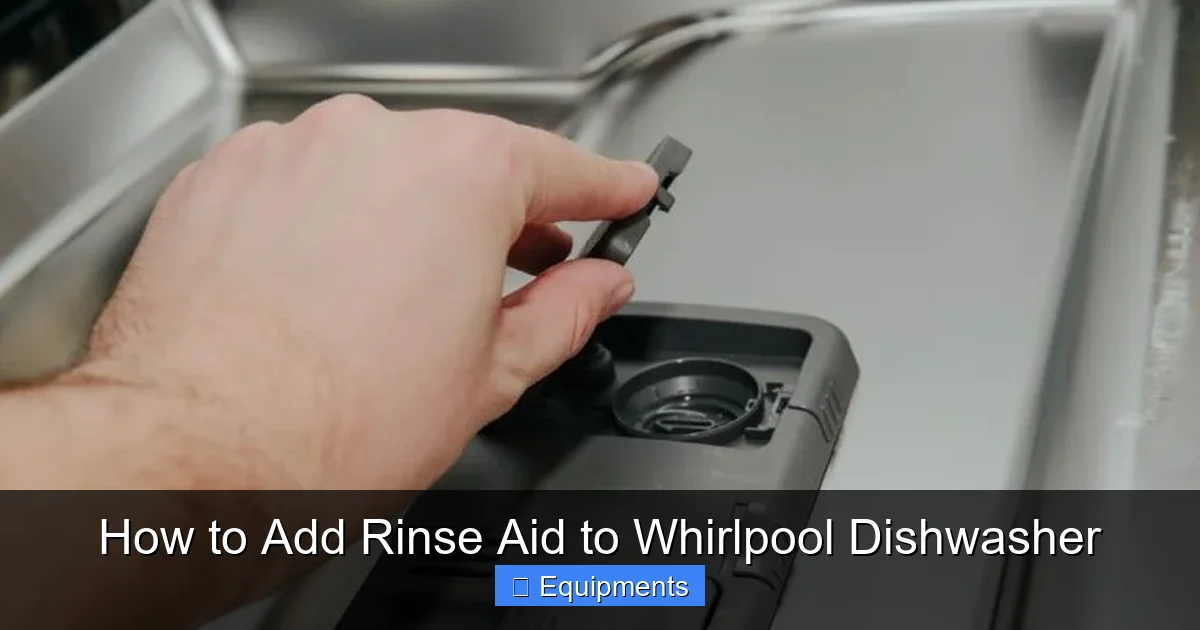
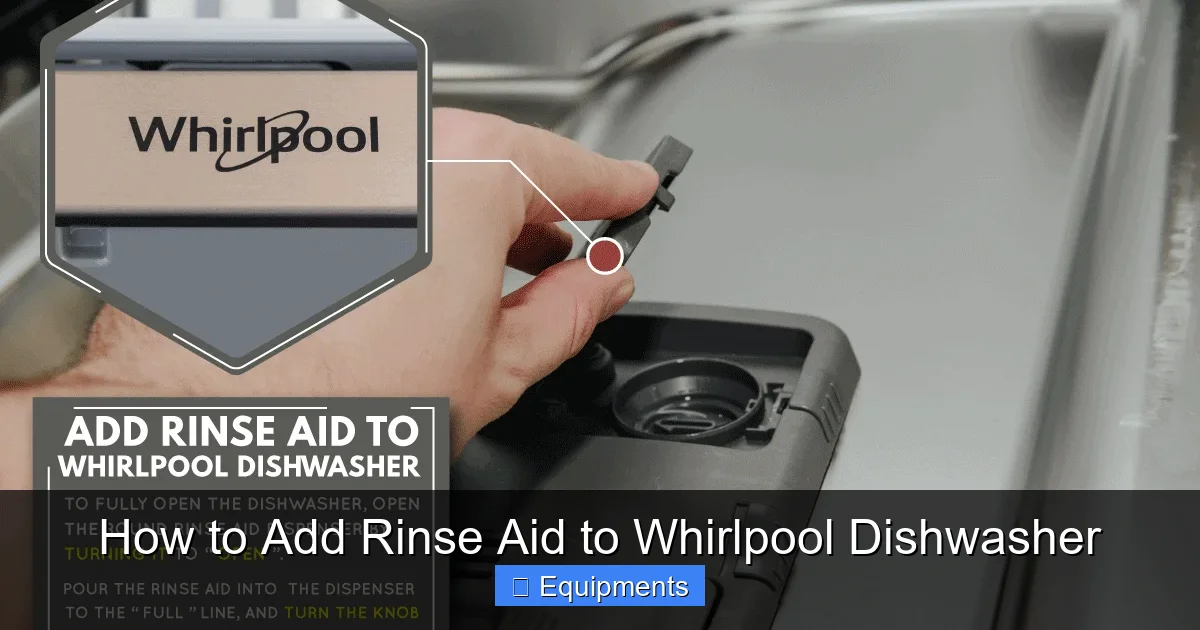
As identified in the previous section, locate the rinse aid cap on the interior of the door (or tub). Twist it firmly counterclockwise. On some models, you may need to press down slightly while turning. If it’s a pull-off style, gently pry it up with your fingernail. Set the cap aside in a safe, clean place where it won’t get knocked into the dishwasher tub.
Step 3: Fill the Reservoir Slowly
Holding the rinse aid bottle over the opening, begin to pour slowly. If using a funnel, place it securely in the opening first. Watch the clear window as you pour. The liquid will fill the reservoir from the bottom up. Stop pouring as soon as the liquid reaches the bottom of the clear plastic window or just covers the opening. Do not fill it to the very top. The dispenser is designed with a small air gap to allow for thermal expansion and to prevent constant dripping. Overfilling can cause the rinse aid to leak out during cycles, creating a slippery, sudsy mess on your kitchen floor.
If you do accidentally overfill, use a paper towel or cloth to carefully soak up the excess from the window until it’s at the correct level. Do not try to siphon it back out, as this can introduce air into the system.
Step 4: Wipe and Replace the Cap
Before replacing the cap, use your damp cloth to wipe away any rinse aid that may have splashed onto the door gasket, the dispenser housing, or the tub walls. Rinse aid is slippery and, if left, can cause leaks or interfere with the door seal. Once clean, place the cap back on the opening. Twist it clockwise until it’s snug and tight. You should feel it click or resist further turning. A loose cap can leak during the wash cycle and will also allow the rinse aid to evaporate, rendering it ineffective.
Step 5: Check the Setting
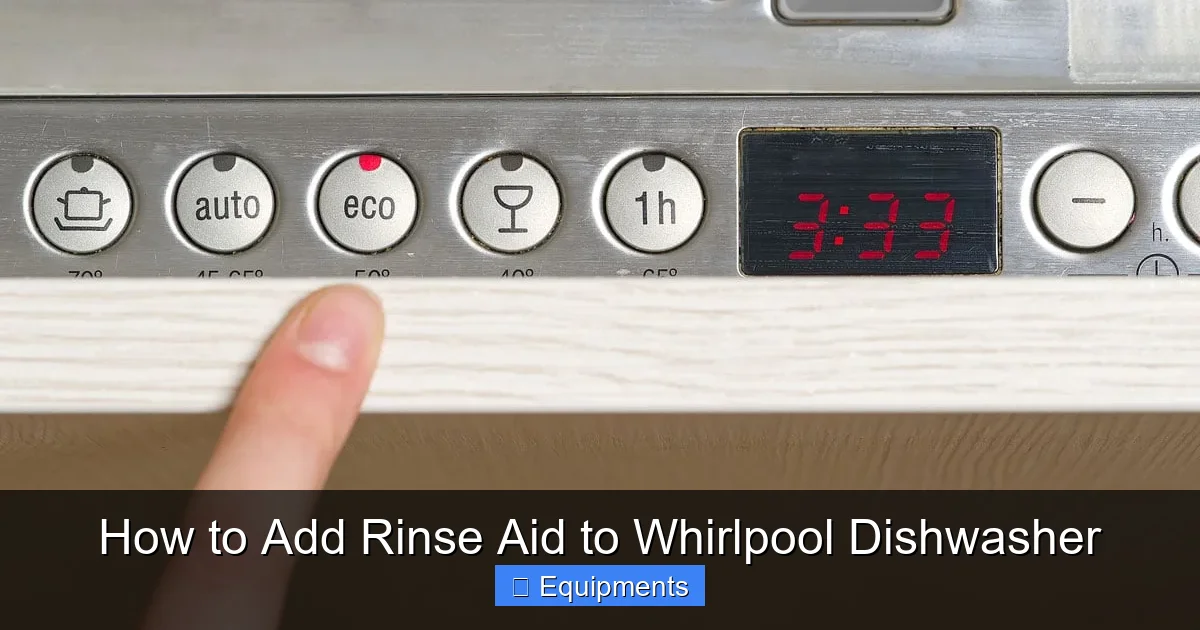
With the cap back on, locate the adjustment dial or electronic setting. On a manual dial, it’s usually around the base of the cap or on the cap itself. The numbers typically range from 1 (lowest amount) to 5 or 10 (highest amount). The correct setting depends on your water hardness. If you have very hard water, you’ll need a higher setting (like 4-6). For soft water, a lower setting (2-3) is sufficient to avoid wasting product. If you’re unsure, start with a medium setting (often 3 or 4) and adjust after a few cycles based on your results. On electronic models, this setting is usually found in the “Options” or “Settings” menu on the control panel—consult your manual for exact navigation.
Step 6: Test and Observe
Run your dishwasher through a normal cycle with a full load of dishes. Pay attention to the drying phase. When the cycle is complete, carefully open the door and check the dishes. Are they dry? Are there water spots on glasses? If drying is inadequate and spots are present, your rinse aid level might be low, or the setting may be too low for your water hardness. If you notice a chemical smell or film on dishes, the setting may be too high. Adjust accordingly for the next load.
Choosing the Right Rinse Aid for Your Whirlpool
Not all rinse aids are created equal, and using the wrong product can do more harm than good. Whirlpool, like all major appliance manufacturers, designs its systems to work optimally with specific chemical formulations.
Visual guide about How to Add Rinse Aid to Whirlpool Dishwasher
Image source: kitchenseer.com
Why Commercial Rinse Aid is Non-Negotiable
The first and most important rule: only use a liquid rinse aid specifically labeled for automatic dishwashers. These products are carefully formulated to be safe for your dishwasher’s internal components—seals, hoses, and sensors. They are also highly concentrated and designed to release at the precise moment in the cycle (during the final rinse) for maximum effect.
Never, under any circumstances, substitute with the following:
- Dish Soap or Liquid Detergent: This will create a torrent of suds inside your machine, potentially causing leaks, poor cleaning, and a massive mess that may require a service call.
- Vinegar: While vinegar is a popular DIY cleaning agent for removing mineral deposits from the dishwasher itself, it is not a functional substitute for rinse aid in daily use. Its acetic acid is much weaker than commercial surfactants, so it won’t promote proper sheeting. Moreover, regular use can gradually degrade rubber seals and gaskets.
- Hand-Drying Rinse Aids or Fabric Softener: These are formulated for different purposes and different pH environments. They will not work effectively and can leave a sticky, gummy residue inside your dishwasher.
Whirlpool Brand and Top-Tier Alternatives
Whirlpool sells its own brand of rinse aid, which is guaranteed to be compatible and is often affordably priced. However, many excellent third-party brands work just as well. Look for products from reputable names like Finish, Cascade, or Ecover. Read the label to ensure it’s for automatic dishwashers. Some brands offer “professional” or “hard water” formulas that are more concentrated and may be better if you have extremely hard water.
What to look for on the label: Terms like “rinse aid,” “drying agent,” or “spot-free rinse.” Avoid anything that says “pre-wash” or is combined with detergent in a single pod or tablet (those are for the detergent cup, not the rinse aid dispenser).
Understanding Concentrations and Fill Frequency
Rinse aid is highly concentrated. A single bottle can last for months, even with regular dishwashing. The frequency of refills depends entirely on your usage and the setting you use. A medium setting on a daily-cycle household will likely need a refill every 1-2 months. The clear window on your dispenser is your best friend—check it periodically. When the liquid level drops to about 1/4 of the window or you see a large air bubble, it’s time to add more. Don’t wait until it’s completely empty, as the dispenser mechanism needs liquid to prime properly.
Pro Tip: Buy rinse aid in bulk or during sales. Since it has a long shelf life, you can keep a spare bottle under your sink for convenient top-ups.
Common Mistakes and How to Avoid Them
Even with the best intentions, small errors can negate the benefits of rinse aid. Here are the most frequent pitfalls and how to sidestep them.
Overfilling the Dispenser
This is the #1 mistake. More is not better. As mentioned, overfilling creates pressure that can force rinse aid out during the wash cycle. This leaked liquid mixes with the wash water, creating excess suds and a slippery film on the floor. It also wastes product. The solution is simple: stop when the liquid just covers the bottom of the sight window. If you’re paranoid about it, under-filling slightly is safer than overfilling. The dispenser will still release enough for a full load.
Using the Wrong Product
We’ve stressed this, but it bears repeating. Substituting with vinegar, soap, or fabric softener is a recipe for disaster. It won’t improve drying and will likely damage your dishwasher over time. Keep a dedicated bottle of rinse aid next to your dishwasher detergent. Make it a habit to check the label before you fill.
Ignoring the Setting Adjustment
Many people fill the dispenser and never touch the dial. But the ideal setting is directly tied to your home’s water hardness. If you live in an area with very hard water (you may see scale on faucets or in kettles), the default medium setting might be insufficient, leading to spotted dishes. Conversely, if you have soft water, a high setting will waste product and can sometimes leave a slight film. Spend five minutes to test. Start with a medium setting (3 or 4). After a few cycles, evaluate your dishes. If spots persist, nudge the setting up one number. If you notice any filmy residue, nudge it down.
Not Wiping Spills Immediately
Rinse aid is oily and slick. A drip on the door seal or the bottom of the tub will not evaporate; it will sit there, attracting dust and eventually creating a sticky residue. Worse, it can compromise the door seal, leading to minor leaks. Always have your damp cloth ready and wipe the dispenser area thoroughly after filling, before running a cycle.
Assuming the Dispenser is Faulty
Before you call a repair technician for poor drying, always check the rinse aid. An empty dispenser is the most common cause of spotty, wet dishes. Make checking the rinse aid level a part of your regular dishwasher maintenance routine, just like scraping plates or cleaning the filter.
Troubleshooting: When Rinse Aid Doesn’t Seem to Work
You’ve added rinse aid, set it to a high number, but your glasses still come out wet and spotted. Don’t panic. The rinse aid dispenser is just one part of the drying equation. Here’s how to systematically diagnose the problem.
First, Verify the Basics
Is the dispenser actually full? Look through the window. Is the cap screwed on tightly? Is the setting dial turned to a visible number (not “0” or “Off”)? Sometimes, during cleaning, the dial can get accidentally turned down. Ensure the cap is fully seated. A partially open cap will leak and won’t allow the proper vacuum to release the product during the cycle.
Check for a Clogged Dispenser
Over time, especially if you use a gel-based detergent that can drip into the rinse aid compartment, the small opening from the reservoir to the wash tub can become clogged with dried detergent or mineral buildup. To check, remove the cap and look directly into the hole. Shine a flashlight. Can you see through it into the dishwasher tub? If it looks blocked, you need to clean it.
How to clean: Use a soft, damp cloth or a cotton swab. Gently wipe around the opening. For stubborn clogs, you can use a small amount of white vinegar on the swab to dissolve mineral deposits. Do not use a sharp object like a toothpick, as you could damage the seal or widen the opening, causing leaks. Be thorough but gentle. Once clean, refill and test.
Consider Your Water Temperature
Rinse aid works best with hot water. The final rinse in a Whirlpool dishwasher is typically heated to at least 140°F (60°C) to promote drying. If your home’s water heater is set too low (below 120°F), or if your dishwasher is not connected to the hot water line (a common mistake during installation), the final rinse water may not be hot enough to activate the rinse aid and evaporate quickly. Check your water heater setting. If the dishwasher is on a cold-water line, consult a plumber about re-routing it—this is a significant performance limiter.
Evaluate Loading and Cycle Selection
Improper loading can block wash and rinse spray arms, preventing water from reaching all surfaces. Overcrowding traps water in concave items. Ensure plates are angled down, bowls are not nested, and utensils are not sticking up. Also, are you using a short cycle? Some eco or quick cycles have lower final rinse temperatures and may not use the heated dry option. For best drying, use a “Normal” or “Heavy” cycle with the “Heated Dry” option selected (if your model has it).
Hard Water vs. Rinse Aid Strength
If you have extremely hard water (above 10 grains per gallon), even a high rinse aid setting might not be enough. The mineral load is simply too high. In this case, you have two options: first, consider installing a whole-house water softener, which is the ultimate solution. Second, use a rinse aid specifically marketed for “hard water” or “extreme spots.” These are more concentrated. You might also need to manually increase the dispenser setting beyond the standard “10” if your dial goes higher, or consult your manual for instructions on adjusting the electronic setting beyond the default maximum.
Maintaining Your Dispenser for Long-Term Performance
A little periodic maintenance goes a long way in ensuring your rinse aid dispenser works flawlessly for years. Incorporate this into your quarterly dishwasher deep-cleaning routine.
Regular Inspection and Cleaning
Every 1-2 months, when you add rinse aid, take an extra moment to inspect the dispenser. Remove the cap and look inside. Is there any dried, crusty residue? Is the opening clear? Use a soft, damp cloth to wipe the interior of the reservoir and the area around the opening. If you see buildup, dip the cloth in a solution of equal parts white vinegar and water. Vinegar is excellent at dissolving mineral deposits without harming plastic. Wipe thoroughly, then rinse the cloth with clean water and wipe again to remove any vinegar smell. Let it air dry completely before refilling and replacing the cap.
Seasonal Deep Clean
Twice a year, during your comprehensive dishwasher cleaning (when you also clean the filter, spray arms, and run an empty cycle with vinegar or a dishwasher cleaner), give the rinse aid dispenser special attention. After removing the cap, you can carefully pour a tablespoon of white vinegar directly into the empty reservoir. Let it sit for 15-20 minutes. This will help dissolve any internal mineral film. Then, use a turkey baster or a small syringe to draw the vinegar out from the bottom of the reservoir. Rinse the reservoir by pouring in a small amount of clean water and sucking it out the same way. This ensures no vinegar remains to potentially interact with the next batch of rinse aid. Dry with a cloth and refill.
What to Do If the Cap is Lost or Damaged
The cap is a critical seal. If it cracks, becomes warped, or is lost, you must replace it immediately. A missing cap will cause constant leaks and evaporation. Do not run the dishwasher without it. You can order a replacement cap directly from Whirlpool using your model number. They are usually inexpensive (often under $10) and easy to snap or screw back on. Using a temporary fix like tape is not recommended, as it can melt or leave residue.
Signs of a Failing Dispenser Mechanism
If you’ve confirmed the dispenser is full, the cap is tight, the setting is correct, and the opening is clean, but rinse aid is clearly not being used (your dishes are consistently wet and spotty, yet the liquid level in the window isn’t dropping over many cycles), the internal dispenser mechanism may be faulty. This is rare but possible. The small piston or diaphragm that releases the product can wear out or get stuck. At this point, it’s time to consult your owner’s manual for troubleshooting or contact Whirlpool customer service or a qualified appliance repair technician. Diagnosing and replacing the internal dispenser assembly is a more involved repair.
Conclusion: Your Path to Perfectly Dry Dishes
Mastering the simple task of how to add rinse aid to your Whirlpool dishwasher unlocks a new level of convenience and cleanliness in your kitchen. It’s not just about avoiding spots; it’s about maximizing the sophisticated engineering of your appliance. Rinse aid works synergistically with your detergent, wash system, and heated dry option to deliver a finish that hand-drying can rarely match. It saves you time, protects your glassware from mineral etching, and reduces energy consumption by making the heated dry cycle more effective and potentially shorter.
Remember the core principles: locate the dispenser (usually on the door), use only commercial dishwasher rinse aid, fill to the bottom of the sight window (never overfill), adjust the setting for your water, and wipe away any spills. Make checking the rinse aid level a monthly habit, alongside cleaning the filter. By integrating this small maintenance step into your routine, you ensure every cycle performs at its best. You invested in a Whirlpool dishwasher for its reliability and performance—give it the one additive it needs to truly shine. Your future self, reaching for a perfectly dry, spotless wine glass straight from the dishwasher, will thank you.
Frequently Asked Questions
Can I use vinegar instead of rinse aid in my Whirlpool dishwasher?
No. While vinegar is excellent for descaling and cleaning the dishwasher itself, it is not an effective substitute for rinse aid. Vinegar does not have the same surfactant properties to break water tension, so it won’t promote proper sheeting and drying. Regular use can also degrade rubber seals over time. Always use a commercial rinse aid product.
How often do I need to add rinse aid to my Whirlpool dishwasher?
This depends on your usage and the setting. For an average family running a load daily with a medium rinse aid setting, you’ll likely need to refill every 4-8 weeks. The best practice is to check the clear sight window on the dispenser regularly. Refill when the liquid level drops to about one-quarter full or when you notice drying performance declining.
What happens if I overfill the rinse aid dispenser?
Overfilling can cause the rinse aid to leak out during the wash cycle, creating a slippery, sudsy puddle on your kitchen floor. The excess liquid can also mix with the wash water, potentially affecting cleaning performance. Simply wipe away the excess with a cloth until the level is just at the bottom of the sight window.
My rinse aid dispenser cap is missing. Can I run the dishwasher without it?
Absolutely not. The cap is essential for creating a proper seal. Without it, rinse aid will evaporate quickly and not be dispensed, and liquid can leak out during cycles. You must replace the cap before using the dishwasher. You can order a replacement from Whirlpool using your model number.
Why are my glasses still wet and spotted even with rinse aid?
First, double-check that the dispenser is full, the cap is tight, and the setting is appropriate for your water hardness. Next, ensure you’re using a cycle with a heated dry option. Then, check for a clogged dispenser opening. Finally, consider your water temperature—the final rinse needs to be hot (140°F+) for rinse aid to work effectively. Very hard water may require a higher setting or a specialized rinse aid formula.
Can I adjust the amount of rinse aid my Whirlpool dishwasher uses?
Yes, most Whirlpool models have an adjustable setting. On older models, it’s a dial around the base of the rinse aid cap, numbered 1-5 or 1-10. On newer electronic models, you’ll find it in the “Options” or “Settings” menu. Increase the number for harder water or if dishes are wet; decrease it for soft water or if you notice any film on dishes. Start with a medium setting (3 or 4) and adjust based on your results.