A malfunctioning dishwasher soap dispenser door latch is a common issue that prevents detergent from releasing at the right time, leading to poorly cleaned dishes. This comprehensive guide walks you through diagnosing the exact problem—whether it’s a broken latch, a faulty spring, or a jammed mechanism—and provides detailed, safe repair instructions for most common dishwasher models. You’ll learn how to access the dispenser, identify the faulty part, replace it with the correct component, and test your work, often with simple tools and without needing a professional.
You load your dishwasher, add detergent to the little compartment, press start, and walk away. An hour later, you open the door to find sparkling glasses and perfectly clean plates. That satisfying cycle relies on a tiny, often-overlooked component: the soap dispenser door latch. This small mechanism holds the detergent compartment closed during the wash cycle, then releases it at precisely the right moment—usually during the main wash—to dump the soap into the tub. When this latch breaks, sticks, or fails, your detergent stays locked away. You’re left with dishes coated in grease and food residue, wondering what went wrong. The frustration is real, but the fix is often a straightforward DIY project you can handle in under an hour, saving you the cost of a service call. This guide will transform you from a frustrated homeowner into a confident dishwasher repair person, walking you through every step of diagnosing and fixing a faulty dishwasher soap dispenser door latch.
Key Takeaways
- Diagnosis First: Always confirm the problem is the latch mechanism itself, not just a clogged dispenser or a broken door seal, before disassembling.
- Safety is Paramount: Always disconnect the dishwasher from its power source (circuit breaker) and turn off the water supply before beginning any repair.
- Part Identification is Key: The exact latch assembly part number is crucial. Use your dishwasher’s model number (found on the door edge or side panel) to search for the correct replacement.
- Tools Are Simple: Most repairs only require basic screwdrivers (Phillips and flathead), pliers, and possibly a socket set. No specialized appliance tools are usually needed.
- Gentle Handling: Plastic components and small springs can break easily. Work patiently, take photos during disassembly, and keep track of every screw and clip.
- Test Before Full Reassembly: Manually operate the new latch mechanism and test the dispenser door’s movement with the inner door panel removed to ensure correct function first.
- Consider the Whole Assembly: Often, it’s more efficient and reliable to replace the entire dispenser door latch assembly rather than trying to repair a single broken plastic tab or spring.
📑 Table of Contents
- Understanding the Soap Dispenser and Its Latch Mechanism
- Essential Tools and Preparation for the Repair
- Step-by-Step Disassembly: Gaining Access to the Latch
- Installing the New Latch Assembly
- Reassembly and Functional Testing
- Preventative Maintenance and Troubleshooting Tips
- When to Call a Professional
Understanding the Soap Dispenser and Its Latch Mechanism
Before we grab a screwdriver, let’s understand what we’re fixing. The soap dispenser is typically located on the inner door panel of your dishwasher. It consists of a plastic compartment with a hinged door. That door is kept securely closed by a small plastic or metal latch assembly. This assembly is a marvel of simple engineering. It usually involves a spring-loaded lever or a rotating cam. When the dishwasher’s control board sends power to a small wax motor or solenoid (often located behind the dispenser), it activates this mechanism. The mechanism pulls or pushes a release lever, which in turn pops open the dispenser door, allowing the detergent to wash out.
Common Failure Points
Several things can go wrong with this system:
- Broken Latch Tab: The most common failure. A small plastic nub on the dispenser door or the latch assembly itself snaps off. The door can no longer catch and will hang open or not open at all.
- Weakened or Broken Spring: The tiny spring that provides the tension to hold the door closed or pop it open can lose its elasticity or break entirely.
- Jammed Mechanism: Detergent residue, hard water deposits, or a small piece of a broken dish can jam the latch, preventing it from moving freely.
- Faulty Wax Motor/Solenoid: Less common for just a latch issue, but if the actuator that pulls the latch is broken, the dispenser won’t open. This often feels like a latch problem but requires a different part.
- Cracked Dispenser Housing: The plastic body of the dispenser itself can crack around the latch mounting points, making the whole assembly unstable.
Essential Tools and Preparation for the Repair
Being prepared makes the job smooth and prevents damage. Gather these items before you start:
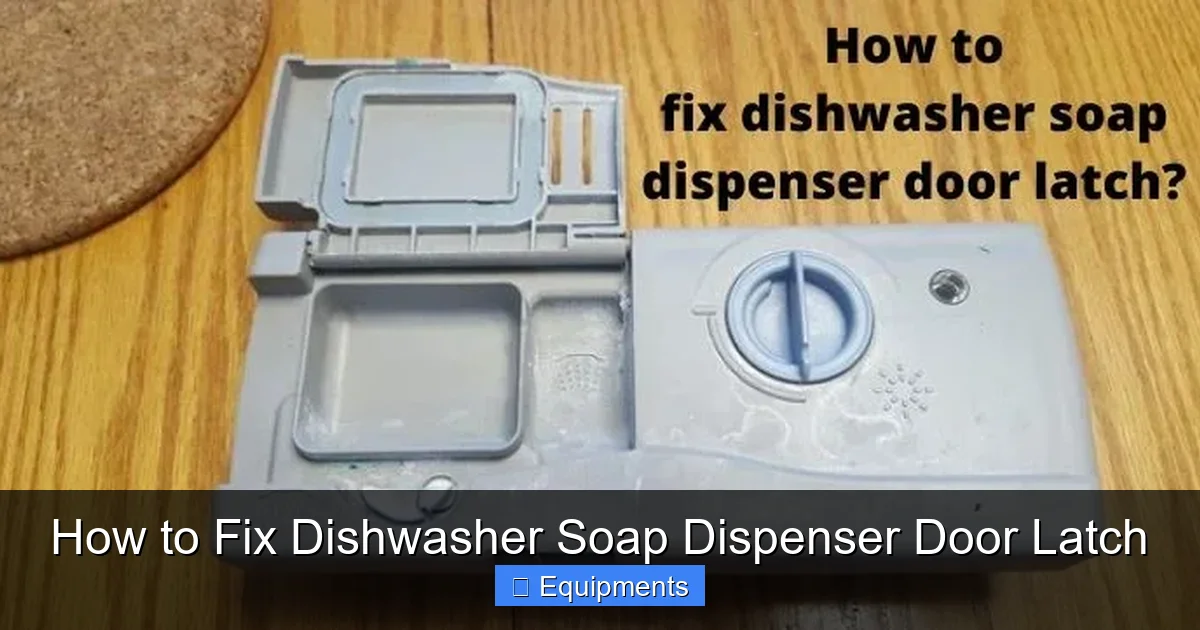
Visual guide about How to Fix Dishwasher Soap Dispenser Door Latch
Image source: kitchenrank.com
- Screwdrivers: A set of Phillips-head (#1 and #2 are most common) and a small flathead screwdriver for prying clips.
- Needle-Nose Pliers: Invaluable for gripping small springs, clips, and wires.
- Putty Knife or Plastic Pry Tool: To gently pry open the inner door panel without scratching your dishwasher’s finish.
- Flashlight: The area inside the door is often dark.
- Container for Screws: A small bowl or cup to keep track of the various screws you’ll remove.
- Your Smartphone: For taking photos at each disassembly step. These will be your best reference when putting it back together.
- The Replacement Part: Order the correct latch assembly for your model. See the next section for how to find it.
Finding Your Dishwasher Model Number and the Correct Part
This is the most critical step. An incorrect part will not fit and will waste your time and money. The model number is usually on a sticker or metal plate:
- On the **door edge**, often where the door meets the tub when closed.
- On the **side of the inner door panel**.
- On the **back of the door** (you may need to remove the lower rack).
- Sometimes on the **tub’s side wall** behind the door.
The sticker will say “Model No.” or “Mod.” Write it down exactly. Go to the manufacturer’s website (Whirlpool, GE, Bosch, Samsung, etc.) and search for “soap dispenser latch” or “detergent dispenser assembly” using your model number. Alternatively, use an appliance parts website like PartSelect, AppliancePartsPros, or RepairClinic. Enter your model number, and their diagrams will show you the exact part. Look for terms like “detergent dispenser door latch,” “dispenser cover latch,” or “dispenser assembly.” If your dispenser door itself is cracked, you may need the entire dispenser housing assembly.
Step-by-Step Disassembly: Gaining Access to the Latch
With your tools and part ready, it’s time to open up the dishwasher door. Remember: SAFETY FIRST. Go to your home’s circuit breaker panel and turn OFF the breaker that supplies power to the dishwasher. Also, turn the dishwasher’s water supply valve under the sink to the OFF position. This prevents any accidental start or water leak.
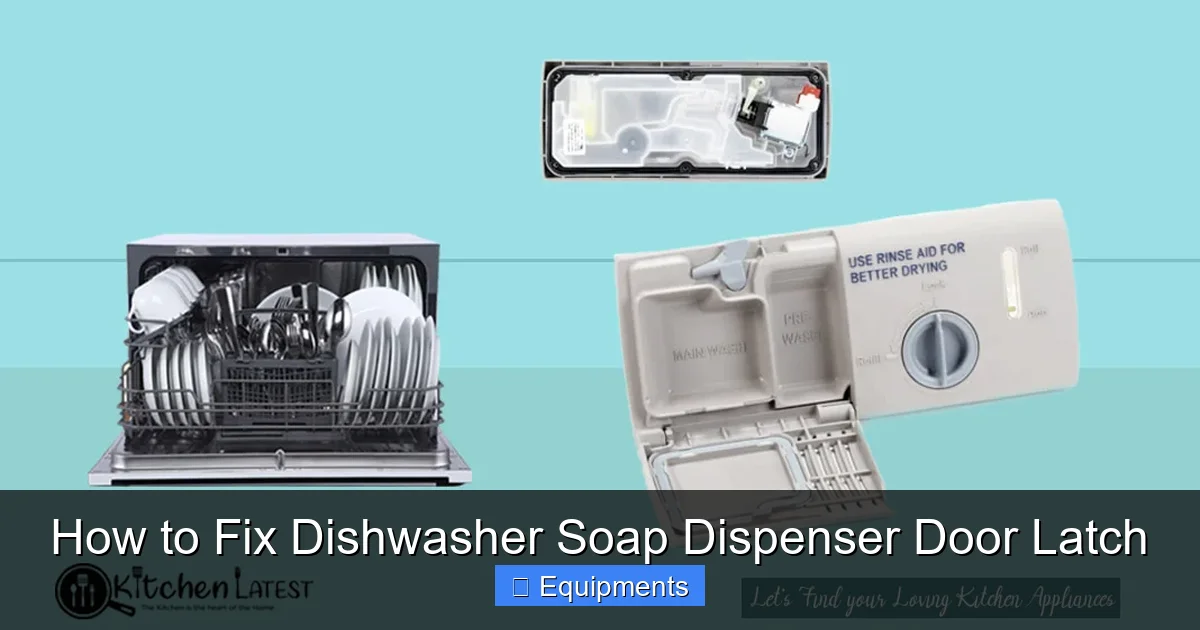
Visual guide about How to Fix Dishwasher Soap Dispenser Door Latch
Image source: kitchenlatest.com
1. Removing the Inner Door Panel
The latch mechanism is mounted on the back of the inner door panel, which is the white or colored plastic part you see and load. To access it, you must remove this panel.
- Open the dishwasher door fully.
- Locate and remove all screws around the edge of the inner door panel. They are often hidden under plastic caps or at the very top edge. Some models have screws at the bottom behind the kickplate or inside the detergent dispenser itself.
- There are also usually plastic retaining clips along the sides and bottom. Use your flathead screwdriver or plastic pry tool to gently release these clips. Start at one corner and work your way around. The panel will pop free.
- Carefully lift the inner door panel away from the outer metal door. Be mindful of any wires or the wax motor solenoid that may be attached to the back of the dispenser. Do not let the panel hang by these wires. Support it and lay it face-up on a soft towel or blanket on your kitchen floor or a table.
2. Accessing and Removing the Old Latch Assembly
Now you see the backside of the dispenser and the latch mechanism.
- First, take photos from multiple angles. Capture how the spring is hooked, how any connecting rods or wires are positioned, and the orientation of the entire assembly.
- The latch is typically held on by 2-4 small screws. Remove these screws and set them aside.
- Gently pull the latch assembly away from the dispenser housing. This is the tricky part: You will likely find a small, delicate spring under tension. Use your needle-nose pliers to carefully unhook it from its posts on both the old latch and the dispenser housing. Note exactly where each end was hooked. These springs can shoot off dangerously if released improperly. Point the assembly away from your face and eyes.
- If your model uses a connecting rod instead of a spring, note how it attaches. It may have a small plastic clip or a cotter pin.
- Once the spring/rod is free and all screws are out, the old latch should come free. Compare it to your new part to ensure it’s an identical match.
Installing the New Latch Assembly
Installation is essentially the reverse of disassembly, but patience is key.
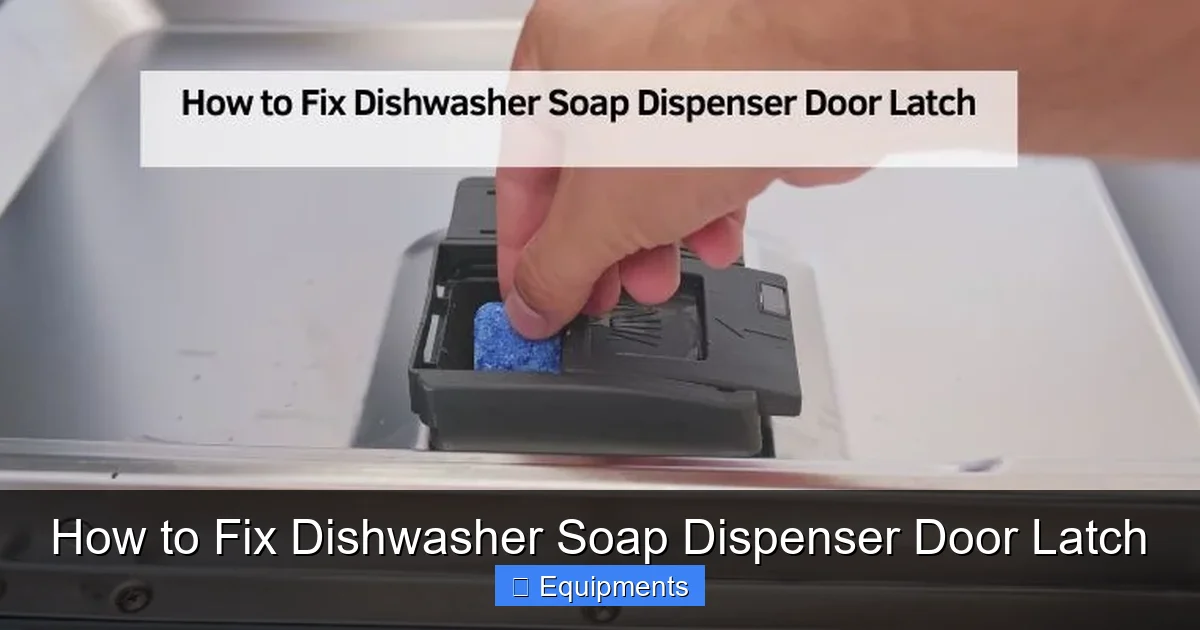
Visual guide about How to Fix Dishwasher Soap Dispenser Door Latch
Image source: homeimprovementway.com
- Position the new latch assembly in place, aligning the screw holes with those on the dispenser housing.
- Reattach the spring FIRST. This is easier to do with the assembly not fully screwed in. Hook one end of the spring to its post on the new latch. Then, using your pliers, carefully stretch and hook the other end to its post on the dispenser housing. It requires a bit of finesse. Ensure the spring is seated correctly in any grooves.
- Once the spring is secure, loosely insert all the mounting screws. Hand-tighten them to hold the assembly in place.
- Check the mechanism’s movement: Use your finger to press the part of the latch that the dispenser door would normally catch on. It should move smoothly and spring back. If it binds, double-check the spring’s position and that the assembly isn’t crooked.
- Fully tighten all screws. Do not overtighten and crack the plastic.
Reconnecting Any Actuator Rod or Wax Motor
If your dishwasher uses a small plastic rod that connects the latch to a wax motor (a white, cylindrical component often mounted nearby), reattach it now. It usually clips into a hole on the latch assembly. Ensure it’s secure but not forced. If a wire was disconnected from a solenoid, reconnect the spade connector firmly.
Reassembly and Functional Testing
Do not rush to put the inner door panel back on. Test first.
1. Manual Operation Test
- With the inner door panel still off, locate the part of the new latch that the dispenser door would normally press against (the “catch”).
- Simulate the action: Press on this catch with your finger. You should feel the spring tension, and the mechanism should move inward and then spring back out. This mimics the door opening.
- Now, locate the dispenser door on the inner panel (which is laying face-up). Gently open and close it by hand. The small plastic tab on the door should catch on the new latch’s “hook” and hold it securely closed. Release it by pressing the tab inward (simulating the wax motor action). It should pop open freely.
2. Reattaching the Inner Door Panel
- Carefully lift the inner door panel and align it with the outer door frame.
- First, engage all the plastic retaining clips around the perimeter. You should hear/feel them snap into place. Do not force it.
- Reinsert all the screws you removed. Tighten them securely, but again, don’t overtighten plastic.
- Reconnect any wire harnesses you may have had to disconnect.
3. Final Power-On and Cycle Test
- DO NOT reinstall the lower rack yet. You want to watch the dispenser work.
- Go back to the circuit breaker and turn the power to the dishwasher BACK ON. Also, turn the water supply valve back on.
- Close the dishwasher door fully.
- Start a normal wash cycle. You don’t need to fill it with dishes for this test.
- Listen for the cycle to begin. During the main wash phase (after the initial rinse), you should hear a distinct click or pop from inside the door. That’s your new latch releasing the dispenser door.
- Open the door during the main wash (the machine will pause and unlock). Look inside. The dispenser door should be wide open, and the detergent should be gone. If the door is still closed, the wax motor/solenoid isn’t activating, or there’s still a jam. If the door is open but detergent remains, the dispenser housing might be cracked or the door seal is compromised.
- If it works perfectly, run a full cycle with a load of dishes to confirm everything is clean.
Preventative Maintenance and Troubleshooting Tips
To avoid future latch problems and handle minor issues:
- Use the Right Detergent: Always use detergent specifically designed for dishwashers. Pre-measured pods or tablets are excellent as they reduce the chance of over-packing or using the wrong type (like regular dish soap) that creates excessive suds and pressure.
- Keep It Clean: Once a month, remove the lower rack and inspect the dispenser. Wipe out any old, caked-on detergent or hard water scale from the housing and door seal with a soft cloth and a little white vinegar. A clean dispenser operates smoothly.
- Don’t Overfill: If using powder or gel, fill the main compartment only to the line or fill line. Forcing too much in can jam the door or put stress on the latch.
- Check for Obstructions: Before every cycle, ensure nothing (a utensil, a tall glass) is leaning against the inside door that could physically block the dispenser door from opening.
- If the Dispenser Door Stays Open: A door that won’t stay closed is almost always a broken latch or spring on the dispenser door itself. Follow this same guide to replace the assembly.
- If the Dispenser Door Won’t Open: This could be a broken latch or a faulty wax motor/solenoid. If you’ve replaced the latch and it still won’t open, the actuator part is likely the culprit and may need replacement.
When to Call a Professional
While this is a very DIY-friendly repair, there are times to call an appliance technician:
- If you are uncomfortable working with electrical components, even with the power off.
- If the dispenser assembly is severely damaged or cracked, and you’re not confident in replacing it without causing further damage to the inner door panel.
- If you’ve replaced the latch and it still doesn’t work, and you suspect the electronic control board or wiring is at fault. Diagnosing these issues requires specialized tools and knowledge.
- If your dishwasher is very old and parts are obsolete or extremely difficult to find.
- If you encounter a major leak after reassembly, indicating a damaged tub seal or improper installation of the dispenser housing.
For the vast majority of simple latch breaks, however, you have the skills and this guide to get the job done yourself.
Conclusion: A broken dishwasher soap dispenser latch doesn’t have to mean hand-washing your dishes until a repairman arrives. By methodically diagnosing the problem, sourcing the exact replacement part using your model number, and following a careful, photo-documented disassembly and reassembly process, you can fix this common issue yourself. The key is preparation, patience, and a focus on safety by disconnecting power and water. A little time with a screwdriver will restore your dishwasher’s cleaning power and save you a significant service fee. Next time you hear that satisfying click and see your sparkling dishes, you’ll have the pride of knowing you fixed it with your own two hands.
Frequently Asked Questions
How much does it cost to fix a dishwasher soap dispenser latch?
The cost is primarily for the replacement part, which typically ranges from $15 to $40 for most common models. If you do the labor yourself, the total cost is just the part. A professional service call for this repair could add $100-$200 in labor.
How long does it take to replace a dishwasher dispenser latch?
For a confident DIYer with the right tools and part, the job takes between 30 minutes and 1 hour. The longest part is usually carefully removing the inner door panel and managing the small spring. First-timers should budget 1.5 hours.
Can I use my dishwasher if the soap dispenser door is broken?
You can run the cycle, but it will be ineffective. If the dispenser door is stuck open, all the detergent will release immediately in the pre-wash and be gone by the main wash. If it’s stuck closed, no detergent ever gets released. Either way, your dishes will not be clean.
What’s the difference between a latch and a wax motor failure?
A broken latch is a physical plastic/metal part that the dispenser door clips onto. A wax motor failure is the electrical actuator (a small wax-filled cylinder) that pulls a rod to release the latch. If the latch is broken, the door won’t stay closed. If the wax motor is faulty, the door may stay closed but won’t pop open when it should.
My dispenser door is cracked—can I just replace the latch?
If the door itself is cracked, replacing just the latch won’t fix the seal or structural issue. You will likely need to replace the entire detergent dispenser housing assembly, which includes the door, the latch mechanism, and the housing it mounts into.
Is it safe to work on my dishwasher myself?
Yes, if you follow the two most important safety rules: 1) Turn off the power at the circuit breaker, not just the dishwasher button. 2) Turn off the water supply valve under the sink. With power and water off, the risk is very low. Just be cautious with sharp edges and small, spring-loaded parts.