Unlock effortless can opening with your Hamilton Beach can opener. This guide walks you through every step, from understanding your specific model to achieving a smooth, safe cut every time. We cover essential safety features, simple maintenance to extend its life, and clear solutions to common issues. Transform a frustrating kitchen task into a quick, reliable process.
Key Takeaways
- Always start with a clean, stable can and opener. Wipe the can’s top rim and ensure the opener is on a flat, dry surface for optimal grip and cutting precision.
- Position the can correctly under the cutting blade. The can’s rim must sit flush in the opener’s designated cradle or against the guide, with the lid centered under the blade for a clean, circular cut.
- Engage the lever or press the button firmly and let the machine work. Apply steady, even pressure; do not force it. The motor and blade are designed to do the work—your job is to guide and stabilize.
- Never touch the cutting blade or lid edge immediately after opening. The metal is extremely sharp. Use the built-in lid lifter or a tool to separate the lid, and always dispose of lids safely in a dedicated container.
- Regular, simple cleaning prevents jams and ensures longevity. Wipe the blade and magnetic lid holder after each use to remove food residue and moisture, which can cause rust or sticky operation.
- Your model’s specific features matter. Identify if you have an electric smooth-edge opener, a manual punch-down model, or a multi-use model, as the exact steps for lever engagement and lid removal vary slightly.
- Address problems immediately. If the opener strains, slips, or leaves jagged edges, stop, unplug (if electric), and check for misalignment, dull blades, or debris—don’t force it.
[FEATURED_IMAGE_PLACEHOLDER]
📑 Table of Contents
- Unlock Effortless Kitchen Mastery: Your Complete Guide to the Hamilton Beach Can Opener
- Know Your Weapon: Identifying Your Hamilton Beach Can Opener Model
- The Golden Sequence: A Step-by-Step Guide to Perfect Opening
- Safety First: Non-Negotiable Practices for Injury-Free Opening
- Keeping Your Partner Happy: Simple Maintenance for a Long Lifespan
- Troubleshooting 101: When Things Go Wrong (And How to Fix Them)
- Beyond the Basics: Advanced Tips and Creative Uses
- Conclusion: From Frustration to Fulfillment
Unlock Effortless Kitchen Mastery: Your Complete Guide to the Hamilton Beach Can Opener
That moment of frustration is all too familiar. You’re ready to cook dinner, but the can of tomatoes or beans is putting up a fight. The manual opener slips, the lid bends awkwardly, and you’re left with a sharp, jagged edge and a half-opened can. It’s a small thing, but it can derail your entire evening. Enter the Hamilton Beach can opener—a trusted kitchen workhorse designed to transform this tedious task into a one-motion wonder. But even the best tools work best when you know exactly how to use them. This isn’t just about turning a lever; it’s about understanding your tool, respecting its mechanics, and employing a few simple techniques to guarantee a clean, safe, and effortless open every single time. Whether you have a classic electric smooth-edge model, a sturdy manual version, or a versatile multi-use opener, this guide will walk you through everything, building your confidence and skill from the very first step.
Think of your Hamilton Beach can opener as a silent partner in your kitchen. It’s there to save you time, prevent nicked fingers, and provide that satisfying *pop* and *whirr* of a job done right. But to earn that trust, it needs a knowledgeable user. We’ll move beyond the basic instruction booklet to explore the nuances of positioning, the importance of maintenance, and the clever tricks that make your opener an indispensable tool. You’ll learn not just the “how,” but the “why” behind each step, turning you from a casual user into a true expert. By the end, opening a can will be a mindless, secure, and completely frustration-free part of your cooking routine.
Know Your Weapon: Identifying Your Hamilton Beach Can Opener Model
Before you can master the technique, you must know what you’re working with. Hamilton Beach has produced several iconic can opener designs over the decades, each with subtle differences in operation. Using the wrong technique on the wrong model is the #1 cause of slipped lids and user frustration. Let’s identify your soldier.
Visual guide about How to Use a Hamilton Beach Can Opener
Image source: hamiltonbeach.com
The Classic Electric Smooth-Edge Opener (The Most Common)
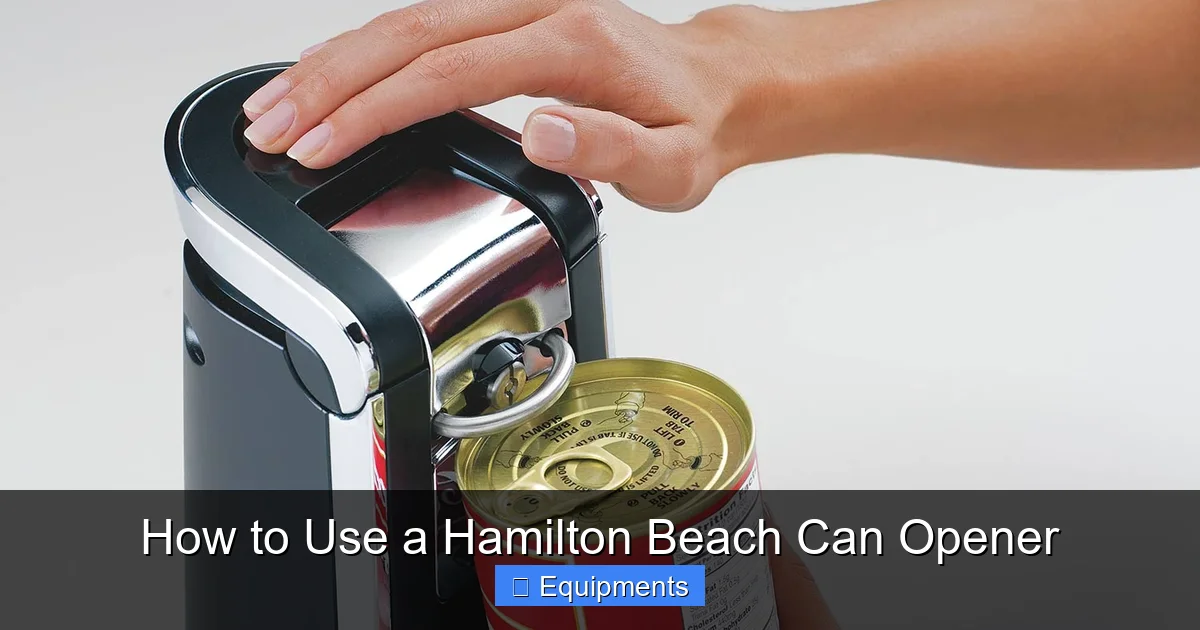
This is the iconic, often red or black, countertop model with a single lever on the side. Its defining feature is the ability to cut the lid off *smoothly* along the rim, leaving no sharp edges on the can or the lid. The lid is removed magnetically or with a small lifter tab. It’s an electric model that plugs into a wall outlet. Models like the classic 766 series or many modern equivalents fall into this category. The operation is simple: position, lever down, and the motor does the rest.
The Manual “Punch-Down” or Side-Cut Opener
These are the sturdy, no-electricity-required workhorses. They often have a large, knob-like handle that you press down to drive a triangular cutting wheel through the lid. They typically cut a small opening in the center or side of the lid, which you then have to manually pry or expand. They are incredibly durable and great for camping or power outages. The key here is applying straight, downward force on the handle.
The Multi-Use or “All-in-One” Openers
Many modern Hamilton Beach models combine functions. You might have an opener that also handles bottle caps, jar lids, and even has a built-in knife sharpener. These often have a rotating base or multiple heads. The can-opening function is usually one specific setting. It’s crucial to ensure you’ve rotated the device to the correct “can” symbol before positioning the can.
How to Identify Yours: Look for the model number on the bottom or back. A quick online search for “Hamilton Beach [Your Model Number] manual” will give you the definitive guide. But even without the manual, these visual cues will tell you everything you need to know for operation. Take 30 seconds now to examine your opener. Is there a plug? Is there a big lever or a punch-down handle? This knowledge is the foundation of flawless use.
The Golden Sequence: A Step-by-Step Guide to Perfect Opening
With your model identified, we can proceed with the universal principles and specific steps. Follow this sequence like a ritual for guaranteed success.

Visual guide about How to Use a Hamilton Beach Can Opener
Image source: hamiltonbeach.com
Step 1: The Prep – Clean and Position
Before you even touch the opener, prepare your can. Use a damp cloth to wipe the top rim of the can thoroughly. Any dust, dried food, or manufacturing oil can cause the opener’s cutting blade to slip, leading to a skinned lid or a failed cut. This is a non-negotiable step for a clean cut. Next, place your opener on a stable, flat, dry countertop. Ensure there is enough clearance behind it for the lid to be removed and magnetically released (on electric models) without hitting a wall or backsplash.
Step 2: The Positioning – The Most Critical Moment
This is where 90% of mistakes happen. For electric smooth-edge models: Lift the lever on the side. This raises the cutting head and magnetic lid holder. Place the can directly underneath. The key is alignment. The outer rim of the can must sit perfectly flush in the circular metal cradle or against the fixed guide lip of the opener. The lid should be centered directly under the circular cutting blade. You should not have to tilt the can. If it wobbles, reposition until it sits perfectly level and secure.
For manual punch-down models: Place the can on a stable surface. Position the opener’s cutting wheel at the edge of the can’s lid, usually just inside the rim. Many have a small lip or notch to help you seat it. Ensure the opener’s base is flat on the counter and the can is held steady with your other hand.
Step 3: The Engagement – Engage with Confidence
For Electric Models: With the can properly seated, press the lever down firmly and steadily until you hear it click into place and the motor engages. You will feel a slight resistance as the blade pierces the lid, then the motor will take over, rotating the blade around the circumference of the can. Do not press down further once the motor starts; your job is now to hold the opener steady. The motor may slow slightly as it completes the circle—this is normal.
For Manual Models: Apply firm, straight downward pressure on the handle. Use your body weight if needed. You should feel the cutting wheel puncture the lid. Continue pressing down and slightly inward (following the can’s curve) to complete the cut. You will hear a change in sound as the cut finishes.
Step 4: The Release and Lid Removal – Safe Handling is Key
For Electric Smooth-Edge Models: Once the motor stops (it usually does automatically after one full rotation), lift the lever. The magnetic lid holder will lift the cut lid and hold it. Carefully tilt the opener over your sink or a trash can and press the small release tab (often on the side of the magnetic holder) to drop the lid. The can’s rim will now be perfectly smooth. Do not reach into the can. The lid is sharp on the underside.
For Punch-Down Models: The lid will now have a small hole. Use a fork, spoon, or the built-in lid lifter (if your model has one) to carefully pry the lid upward from the hole. Work your way around the lid, gently prying to detach it from the rim. Be extremely cautious of the sharp metal edges on both the lid and the can.
Step 5: The Final Check and Clean
Run your finger lightly along the can’s rim (away from the opening) to confirm it’s smooth on electric models. For all models, immediately wipe the cutting blade and the area where the lid sat with a dry or slightly damp cloth. This removes acidic food residue that can corrode the blade and sticky sugars that can gum up the mechanism. This quick 10-second clean is the single most important thing you can do for your opener’s lifespan.
Safety First: Non-Negotiable Practices for Injury-Free Opening
Can openers are simple tools, but they involve sharp blades and, in electric models, moving parts. Respecting safety protocols is paramount. These practices should become second nature.
Visual guide about How to Use a Hamilton Beach Can Opener
Image source: hamiltonbeach.com
Blade Awareness: The Invisible Danger
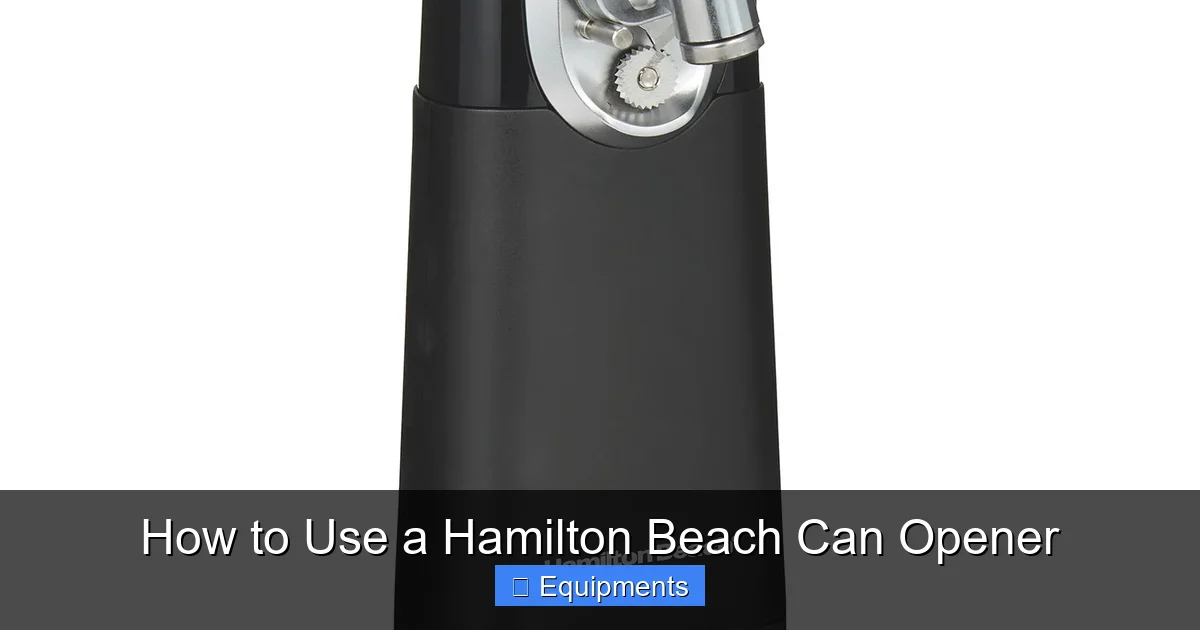
The cutting blade is exposed during operation and is razor-sharp. Never, under any circumstance, touch the blade with your finger, even if the motor is off. When cleaning, use a soft brush or cloth, moving away from the cutting edge. Always assume the blade is as sharp as a surgeon’s scalpel. After opening, the underside of the removed lid is a circle of razor-sharp metal. Handle it by the edges only, or better yet, let the magnetic holder do the work. Immediately place used lids into a dedicated, lidded trash can. Never toss them loosely into a recycling bin where they can slice through a bag and injure someone later.
Electrical Safety for Plug-In Models
Keep the cord and plug dry. Never operate the opener with wet hands or on a wet counter. Do not immerse the opener in water. When not in use, wrap the cord neatly (don’t yank it) and store it where it won’t be pinched or damaged. If you notice a frayed cord, a burning smell, or unusual motor strain, stop using it immediately and discontinue use until inspected or replaced.
Child and Pet Safety
Store the can opener in a cabinet or on a high shelf when not in use if you have curious children or pets. The exposed blade and the intriguing magnetic lid holder are magnets for little fingers. During use, keep children and pets away from your workspace. Make a habit of putting the opener away immediately after cleaning.
Keeping Your Partner Happy: Simple Maintenance for a Long Lifespan
Your Hamilton Beach can opener is a mechanical device. Like any tool, it performs best and lasts longest with regular care. This isn’t complicated—it’s a matter of habit.
The Daily Wipe-Down: Your New 10-Second Ritual
As mentioned in the sequence, this is crucial. After every use, unplug the electric model. Use a soft, dry microfiber cloth to wipe down the entire exterior. Then, focus on the critical areas: the circular cutting blade and the metal housing around it. Use the corner of the cloth or a cotton swab to gently remove any tiny bits of food or liquid that splashed during cutting. For the magnetic lid holder, wipe both the magnet surface and the plastic/metal parts. This prevents food buildup, which can cause the lid to slip or the magnet to weaken.
The Monthly Deep Clean
Once a month, or if you notice sticky residue, do a more thorough job. With the opener unplugged, use a toothbrush dipped in a mild soapy water solution to gently scrub the blade housing and the gear mechanism (often visible under the lever pivot point). Be extremely careful around the blade. Rinse the brush frequently. Then, wipe the entire area with a cloth dampened with clean water, followed immediately by a dry cloth. Never submerge the opener or run it under water.
Storage and Long-Term Care
Store your opener with the lever in the “up” or “open” position. This relieves tension on the internal spring and gears. Keep it in a dry drawer or on your counter, away from the steam and splashes of the sink or stove. If you won’t be using it for an extended period (e.g., storing seasonal equipment), give it a final coat of very light food-safe mineral oil on a cloth and wipe the metal parts to prevent humidity-based corrosion.
Troubleshooting 101: When Things Go Wrong (And How to Fix Them)
Even the best tools can hiccup. Don’t panic or reach for a hammer. Here’s how to diagnose and solve the most common issues.
Symptom: The Opener Slips and Skins the Lid Instead of Cutting
Cause: Almost always, improper can positioning or a dirty can rim. The blade is not engaging the lid perpendicularly.
Solution: Stop immediately. Wipe the can’s top rim again. Realign the can so its rim sits perfectly flat and flush in the cradle. On manual models, ensure the cutting wheel is seated right at the very edge of the lid. Apply more downward force on the lever/handle to ensure initial puncture.
Symptom: The Motor Struggles, Stalls, or Sounds Labored
Cause: 1) Dull blade from years of use. 2) Debris jammed in the gear mechanism. 3) Trying to cut a can that is too large for the opener’s capacity (check your model’s max diameter). 4) Low voltage (for plug-in models on a long, thin extension cord).
Solution: Unplug the opener. Clean it thoroughly, especially around the blade and gears. Check for and remove any visible food particles or metal shavings. If cleaning doesn’t help, the blade may be dull. Hamilton Beach typically sells replacement parts. For electric models, ensure you’re plugged directly into a wall outlet, not a power strip.
Symptom: Jagged, Rough Edges on the Can Rim (On a “Smooth-Edge” Model)
Cause: A dull or damaged cutting blade. The smooth-edge function relies on a precise, sharp blade to shear the metal cleanly.
Solution: This is a sign the blade needs replacement. Continuing to use it will be frustrating and unsafe. Contact Hamilton Beach customer service or check their website for official replacement blade kits for your model. Do not attempt to sharpen the blade yourself.
Symptom: The Lid is Cut but Won’t Release from the Can
Cause: The cut was incomplete or the lid is stuck due to pressure differences or sticky contents.
Solution: Sometimes, a second, very light pass with the opener can finish the cut. If the lid is suctioned on, gently insert a butter knife between the lid and can rim at the cut point to break the seal. Never use excessive force to pry.
Beyond the Basics: Advanced Tips and Creative Uses
Once you’ve mastered the standard 12-ounce soup can, it’s time to expand your skills.
Opening Non-Standard Cans with Confidence
Large #10 cans (restaurant size) or oddly shaped cans (like some olive oil tins) can be tricky. Ensure your opener’s capacity isn’t exceeded (most handle up to ~3.5-inch diameter). For very large cans, you may need to open them in segments: make the initial cut, then rotate the can and make a second cut to create a larger opening. For cans with unusually thick rims (some imported goods), you may need to apply extra initial pressure to get the blade started.
Your Opener as a Multi-Tool
Many Hamilton Beach models have hidden talents. The sturdy metal base can be used as a mallet for gentle tasks like cracking nuts in a bag. The magnetic lid holder is perfect for retrieving small metal items from the bottom of a sink. The lever pivot point can sometimes be used as a makeshift bottle cap lifter in a pinch. Explore your specific model’s design—you might be surprised.
The “No-Touch” Lid Disposal System
Create a safe workflow. Place your trash can directly behind the opener’s operating zone. After the lid is magnetically released, let it fall straight into the trash. Never try to catch it or move it with your hand. For punch-down models, once the lid is pried off, use the back of a butter knife to flick it into the trash can from the side, keeping your fingers clear.
Conclusion: From Frustration to Fulfillment
Your Hamilton Beach can opener is more than a gadget; it’s a testament to smart design solving a universal problem. By taking the time to understand its specific model, mastering the precise art of positioning, committing to the simple ritual of post-use cleaning, and arming yourself with troubleshooting knowledge, you elevate this tool from a mere utility to a seamless extension of your kitchen workflow. The satisfying whir of the motor and the clean, smooth edge of an opened can are small victories that make cooking more enjoyable and safer. Remember, the goal isn’t just to open a can—it’s to do it with zero frustration, zero risk, and maximum efficiency. Treat your opener with the respect and care outlined here, and it will faithfully serve you for years, turning countless meal prep moments from a chore into a silent, successful partnership. Now, go open something easy, and feel the difference.
Frequently Asked Questions
Can I use my Hamilton Beach can opener on dented or damaged cans?
No, avoid opening dented cans, especially along the seams. The structural integrity is compromised, and the lid may not seal properly after opening, risking spoilage. The can could also slip unpredictably during cutting, which is unsafe.
My electric opener leaves a few tiny, sharp burrs on the can rim. Is this normal?
No, a properly functioning smooth-edge model should leave a perfectly smooth, safe rim. Tiny burrs indicate a dull or damaged blade. Stop using it immediately and order a replacement blade kit from Hamilton Beach to ensure safety and proper function.
Is it safe to wash the opener in the dishwasher?
Absolutely not. The high heat, harsh detergents, and prolonged water exposure will damage the motor, gears, and electrical components (in electric models), and cause rapid rusting of the blade. Always clean by hand with a damp cloth and dry thoroughly.
What’s the maximum can size my opener can handle?
Most standard Hamilton Beach countertop models are designed for cans up to approximately 3.5 inches (9 cm) in diameter. Check your specific model’s manual for the exact capacity. Attempting to open a larger can can jam the mechanism or cause the can to slip.
Why does my electric opener make a loud grinding noise sometimes?
A loud, grinding noise usually signals a problem. First, unplug it. Check for debris jammed in the blade area or around the gears. Clean it thoroughly. If the noise persists, the internal gears may be stripped or the blade bearing is damaged. This requires professional repair or replacement of the unit.
How often do I need to replace the cutting blade?
With regular use and proper cleaning, a blade can last 3-5 years or more. Replace it when you notice it’s no longer cutting cleanly (skins the lid, leaves jagged edges, or requires excessive force). Blades are considered wear items and are available for purchase from Hamilton Beach for most models.
Pingback: Can Caffeine Gum Cause Heartburn - kitchenandhouseware.com