Don’t let a dripping faucet drive you crazy or waste thousands of gallons of water yearly. The fix is usually simpler than you think, often requiring just a few basic tools and a replacement part. The key is correctly identifying your faucet’s mechanism—compression, ball, cartridge, or ceramic disk—as each has a different repair method. With the right approach, you can confidently stop a faucet from dripping, eliminate the noise, and lower your water bill in under an hour.
Key Takeaways
- Identify First: Before you start, determine if you have a compression, ball, cartridge, or ceramic disk faucet, as each requires a different repair method and parts.
- Always Shut Off Water: Locate and turn off the shut-off valves under your sink before beginning any repair to prevent a flood.
- Simple Parts Fix Most Drips: For compression faucets, a worn washer is the usual culprit. For modern faucets, a faulty O-ring or cartridge is typically to blame.
- Corrosion is a Red Flag: If you find corroded valve seats or damaged internal parts, a full faucet replacement may be more cost-effective than a repair.
- Know When to Call a Pro: If you cannot stop the water, find extensive corrosion, or are uncomfortable with the steps, a licensed plumber can solve the problem quickly and safely.
📑 Table of Contents
- That Persistent Drip: Why It Matters and You Can Fix It
- Understanding Your Enemy: The 4 Main Types of Faucets
- Gathering Your Armory: Essential Tools and Parts
- The Step-by-Step Surgery: How to Fix Each Faucet Type
- When the Repair Isn’t Enough: Knowing to Call a Professional
- Prevention is Key: How to Keep Your Faucets Drip-Free
- Conclusion: Your Quiet, Efficient Home Awaits
That Persistent Drip: Why It Matters and You Can Fix It
That rhythmic plink… plink… plink isn’t just an annoying sound echoing in your quiet kitchen or keeping you up at night. A faucet that drips once per second can waste over 3,000 gallons of water in a single year. That’s enough to fill a small swimming pool! Beyond the environmental impact and the irritating noise, that leak is literally money flowing down the drain, increasing your water bill month after month. The good news? You don’t need to be a master plumber to stop a faucet from dripping. In most cases, it’s a straightforward DIY fix that takes less than an hour and costs less than $20 in parts. This guide will walk you through every step, from diagnosing the problem to executing the repair with confidence. Let’s get that drip silenced for good.
Understanding Your Enemy: The 4 Main Types of Faucets
Before you buy a single part, you must understand what kind of faucet you’re dealing with. The repair method is entirely dependent on the internal mechanism. Using the wrong washer or cartridge will mean the drip continues. Here’s how to tell them apart.
Visual guide about How Do You Stop a Faucet from Dripping
Image source: allprodad.com
1. Compression Faucets (The “Traditional” Style)
These are the oldest and most recognizable type. They have separate hot and cold handles that you turn multiple times (more than a quarter-turn) to open. When you tighten the handle, you feel a distinct resistance as a stem with a rubber washer at the bottom presses down against a valve seat to stop the flow. The drip almost always comes from a degraded rubber washer.
Visual Cues: Separate handles, multiple turns to shut off, often seen in older homes. The handles may have a decorative “acorn” or “wheel” shape.
2. Ball Faucets (The Single-Handle Delta-Style)
Identified by a single lever handle that moves over a rounded, ball-shaped cap. This faucet uses a plastic or metal ball with holes in it that rotates to control water flow and temperature. Leaks are usually caused by worn seals or O-rings around the ball, or a corroded valve seat.
Visual Cues: Single handle, pivots on a rounded base. Common in many homes built from the 1970s to the 1990s.
3. Cartridge Faucets (The Common Single-Handle)
Another very common single-handle design. Instead of a ball, it uses a cylindrical cartridge (often plastic or brass) that slides up and down to control flow and side-to-side to control temperature. A dripping cartridge faucet usually means the cartridge seals are worn out or the cartridge itself is cracked.
Visual Cues: Single handle, often with a more rectangular or cylindrical base under the handle. Very common in modern homes.
4. Ceramic Disk Faucets (The Premium Single-Handle)
These are high-end, durable faucets. They use two super-hard ceramic disks (one stationary, one moving) that slide against each other. The precision-ground disks create a watertight seal. Leaks are rare but can occur if sediment gets between the disks or if an O-ring fails.
Visual Cues: Single handle, typically very smooth operation with a precise “click” at the off position. Often found in newer or remodeled kitchens and bathrooms.
Gathering Your Armory: Essential Tools and Parts
You don’t need a workshop, but having the right tools on hand will make the job smooth and prevent mid-repair trips to the hardware store. The good news? Most of these items are inexpensive and you likely have some already.
Visual guide about How Do You Stop a Faucet from Dripping
Image source: i.ytimg.com
- Adjustable Wrench or Basin Wrench: The basin wrench is a special tool designed to reach up behind a sink to loosen tight nuts holding the faucet in place. An adjustable wrench works too, but can be trickier in tight spaces.
- Screwdrivers: Both flathead and Phillips head. You’ll need these to remove handle screws and decorative caps.
- Plumber’s Grease: A silicone-based lubricant. You will use this to grease new O-rings and stems to ensure smooth operation and a better seal. Do not use petroleum jelly, as it can degrade rubber parts.
- Needle-Nose Pliers: Helpful for gripping small parts like retaining clips or O-rings.
- Replacement Parts Kit: This is the most critical item. Take your old parts (washer, O-ring, cartridge) to a hardware store or plumbing supply shop. Match them exactly. Universal repair kits exist but matching the original part is the surest way to stop a faucet from dripping. For cartridge and ball faucets, it’s often best to buy the manufacturer-specific replacement cartridge.
- Bucket and Towels: To catch any residual water in the pipes when you disconnect supply lines.
- Distilled White Vinegar and an Old Toothbrush: For cleaning mineral deposits off valve seats and internal parts. This simple step can often solve the problem without part replacement.
The Step-by-Step Surgery: How to Fix Each Faucet Type
Now for the main event. Follow these specific instructions based on your faucet type. Remember the golden rule: Always shut off the water supply first! Look for two small valves (one for hot, one for cold) on the water lines under your sink. Turn them clockwise until tight. If your home doesn’t have individual shut-offs, you’ll need to turn off the main water supply to the house. After shutting off, turn the faucet handle on to release any pressure and drain the remaining water from the lines.

Visual guide about How Do You Stop a Faucet from Dripping
Image source: c8.alamy.com
Repairing a Compression Faucet Drip
This is the classic DIY repair. The culprit is almost always a worn rubber washer.
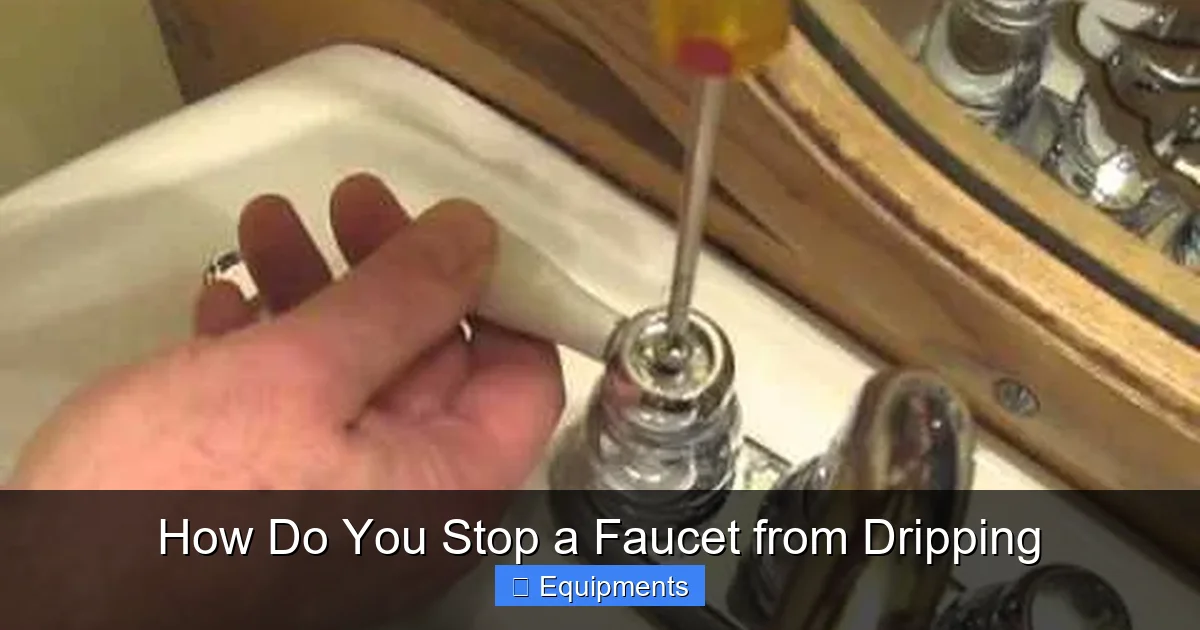
- Remove the Handle: Pry off the decorative cap on top of the handle (if present) with a flathead screwdriver. Remove the screw underneath. Lift the handle off. If it’s stuck, gently wiggle it or use a handle puller.
- Access the Stem: Once the handle is off, you’ll see a large packing nut. Use your adjustable wrench to turn it counterclockwise and remove it.
- Extract the Stem: Pull the stem straight up and out. It may be stuck; gently work it back and forth. Take note of its orientation.
- Replace the Washer: At the bottom of the stem is a rubber washer. It will be either held by a screw or pressed on. Remove the old, hardened, or cracked washer. Take it to the store to find an exact match in size and thickness.
- Inspect and Clean: While you have it apart, inspect the valve seat (the metal part the washer presses against). If it’s rough or pitted, you need a seat wrench to smooth it or replace the entire faucet. Clean any debris with vinegar and your toothbrush.
- Reassemble: Apply a dab of plumber’s grease to the new washer and the stem’s threads. Reinstall the stem, tighten the packing nut (don’t over-tighten), and reattach the handle. Turn the water back on slowly and check for drips.
Fixing a Ball Faucet Leak
Ball faucet repairs involve replacing the seals and O-rings. Kits are available with all necessary parts.
- Remove the Handle: Remove the index cap (the decorative cover on the handle) and the handle screw. Lift the handle off.
- Remove the Cap and Ball: Under the handle, you’ll see a plastic cap. Unscrew it with pliers. Lift out the plastic ball and the cam (the piece that presses down on the ball).
- Replace Seals and O-Rings: You’ll see rubber seals and O-rings in the faucet body. Remove them all with needle-nose pliers. In your repair kit, you’ll find new seals and O-rings. Lubricate them with plumber’s grease and press them into their respective grooves in the faucet body.
- Inspect the Valve Seats: The metal rings the seals press against are the valve seats. If they are corroded or damaged, the entire faucet body may need replacement.
- Reassemble: Place the cam and ball back in, ensuring they align correctly. Screw the cap back on (hand-tight is usually fine). Reattach the handle. Turn water on and test.
Cartridge Faucet Repair: The Most Common Modern Fix
Cartridge faucets are popular because they’re reliable, but the cartridge itself is a wear item. Replacing it is often the solution.
- Remove the Handle: This varies. Some have a set screw under a decorative cap. Others have a screw at the base. Consult your faucet’s brand website (Moen, Delta, Kohler, etc.) for a specific exploded diagram—this is invaluable.
- Access the Cartridge: After the handle is off, you may see a retaining clip or nut holding the cartridge in place. Use pliers to remove the clip or a wrench to remove the nut.
- Extract the Cartridge: Pull the cartridge straight out. It might be stuck. Grip it firmly with pliers (protect the finish with a cloth) and wiggle gently.
- Get the Exact Replacement: This is non-negotiable. Cartridges are not universal. Take the old one to the store or use the model number from the faucet to order the correct part online.
- Install the New Cartridge: Before inserting, lubricate the new cartridge’s O-rings with plumber’s grease. Slide it into the faucet body exactly as the old one came out, matching any tabs or notches.
- Reassemble: Reinstall the retaining clip/nut, then the handle. Turn the water on and check. The drip should be gone.
Tackling a Ceramic Disk Faucet
These are durable, so a leak usually means an O-ring has failed or sediment has compromised the seal.
- Remove the Handle: As with cartridges, the method varies. Look for a set screw under a cap or at the base. Refer to the manufacturer’s guide.
- Remove the Escutcheon and Disk Cylinder: Once the handle is off, you’ll see a decorative escutcheon (plate). Unscrew it. Underneath, you’ll find the ceramic disk cylinder, held by a nut. Unscrew the nut and lift out the cylinder.
- Clean the Disks: Inspect the two ceramic disks. If they have any grit or mineral buildup, clean them meticulously with vinegar and a soft cloth. Do not scratch them. If a disk is cracked, the entire cylinder assembly must be replaced.
- Check and Replace O-Rings: Around the base of the cylinder are small O-rings. If they are cracked or flattened, replace them. Lubricate new ones with plumber’s grease.
- Reassemble: Place the cylinder back, ensuring it sits flat. Screw on the retaining nut (don’t over-tighten). Reattach the escutcheon and handle. Test for leaks.
When the Repair Isn’t Enough: Knowing to Call a Professional
While most drips are DIY-friendly, certain situations demand a licensed plumber’s expertise. Attempting a fix in these cases can lead to water damage, costly mistakes, and voided warranties.
- You Can’t Stop the Water: If the shut-off valves under your sink are corroded, stuck, or broken, you cannot safely isolate the faucet. A plumber can replace these valves or shut off water at the main.
- Extensive Corrosion or Damage: If you open the faucet and find the internal body is rusted, the valve seat is pitted beyond cleaning, or parts are disintegrated, a full faucet replacement is likely the best long-term solution. This involves more extensive plumbing work.
- Persistent Leaks After Repair: If you’ve meticulously followed the steps for your faucet type with new, correct parts and it still drips, the issue may be with the water pressure, a hidden leak in the supply line, or a defective faucet body.
- No Experience or Comfort: There’s no shame in calling a pro. A professional can diagnose and fix the issue in 30 minutes, often for a reasonable service fee, giving you peace of mind and saving you from potential flooding.
Prevention is Key: How to Keep Your Faucets Drip-Free
Once you’ve conquered the current drip, a little maintenance goes a long way to prevent future leaks.
- Gentle Use: Don’t overtighten handles. For compression faucets, turn them until they stop, not until you can’t turn anymore. For other types, a gentle quarter-turn is sufficient.
- Regular Cleaning: Clean aerators (the screen at the tip of the faucet) periodically by unscrewing them and soaking in vinegar to remove mineral buildup. This also maintains good water pressure.
- Lubricate Periodically: Once a year, turn off the water, remove the handle (if you’re comfortable), and apply a tiny bit of plumber’s grease to the stem or cartridge O-rings. This keeps them supple and sealing properly.
- Address Hard Water: If you have very hard water, consider a whole-house water softener. Mineral deposits accelerate wear on internal seals and washers.
- Listen and Act Early: That first faint drip or the feeling that a handle is “wobbly” is your cue to inspect it. Catching a problem early means a simple washer or O-ring replacement, not a full cartridge or faucet swap.
Conclusion: Your Quiet, Efficient Home Awaits
A dripping faucet is one of the most common—and most fixable—household annoyances. By taking a moment to identify your faucet type, gathering the correct tools, and following a methodical repair process, you possess the power to stop that wasteful drip for good. The sense of accomplishment from a successful DIY repair, coupled with the savings on your water bill and the return of peaceful silence, makes this project incredibly rewarding. Remember the core steps: shut off the water, identify the mechanism, replace the worn seal (washer, O-ring, or cartridge), and reassemble carefully. Should you ever encounter a situation that feels beyond your comfort zone, a qualified plumber is always a smart call. Now, go forth, silence that drip, and enjoy the quiet confidence of a well-maintained home.
Frequently Asked Questions
Can I fix a dripping faucet without turning off the water?
No, you should never attempt internal faucet repairs with the water on. Shutting off the supply valves under your sink is the critical first step to prevent flooding. If those valves are stuck or missing, you must turn off the main water supply to your home.
Why does my faucet drip even after I turn it off tightly?
This is almost always due to a worn internal seal. In compression faucets, the rubber washer hardens or wears out. In cartridge, ball, or ceramic disk faucets, the O-rings or the cartridge/disk seals degrade and can no longer create a watertight closure against the valve seat.
Is it cheaper to fix a faucet or replace it?
For a simple washer or O-ring replacement (under $10 in parts), repair is vastly cheaper. If the faucet body is corroded, the valve seat is damaged, or multiple internal parts are failing, replacement may be more cost-effective long-term, especially with a high-end faucet where parts are expensive.
What’s the difference between a washer and an O-ring?
A washer is typically a flat, round, rubber disc used in compression faucets. It sits on the stem and presses against a metal valve seat. An O-ring is a small, round, rubber tube with a hollow center. It’s used as a seal in cartridge, ball, and ceramic disk faucets, often around the moving cartridge or inside the faucet body.
My faucet still drips after I replaced the washer/cartridge. What now?
First, double-check that you installed the correct, exact replacement part. Next, inspect the valve seat (the metal part the washer or seal presses against). If it’s pitted, corroded, or rough, water will leak past even a new seal. You may need to replace the faucet or use a valve seat dresser tool to smooth it.
When should I call a plumber instead of DIYing?
Call a professional if you cannot locate or turn off the shut-off valves, find extensive corrosion inside the faucet, are uncomfortable with any step, or have tried a correct repair with new parts and the drip persists. Also, if your home has old, galvanized steel pipes that may break when disturbed, a plumber is essential.